3D Rigging - Shoes
STEP 1 : Preparing for rigging
Load the BaseBody and the modeled shoes object to fit the shoes well on the mask.
- Make sure the mask foot volume does not extrude outside the shoes.
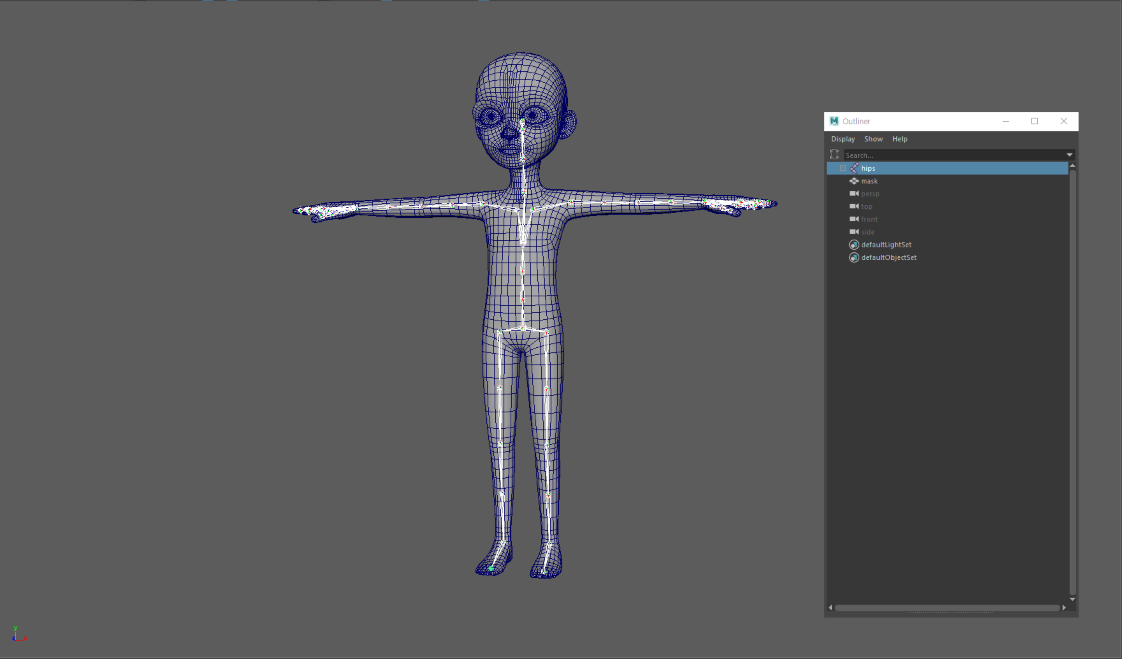
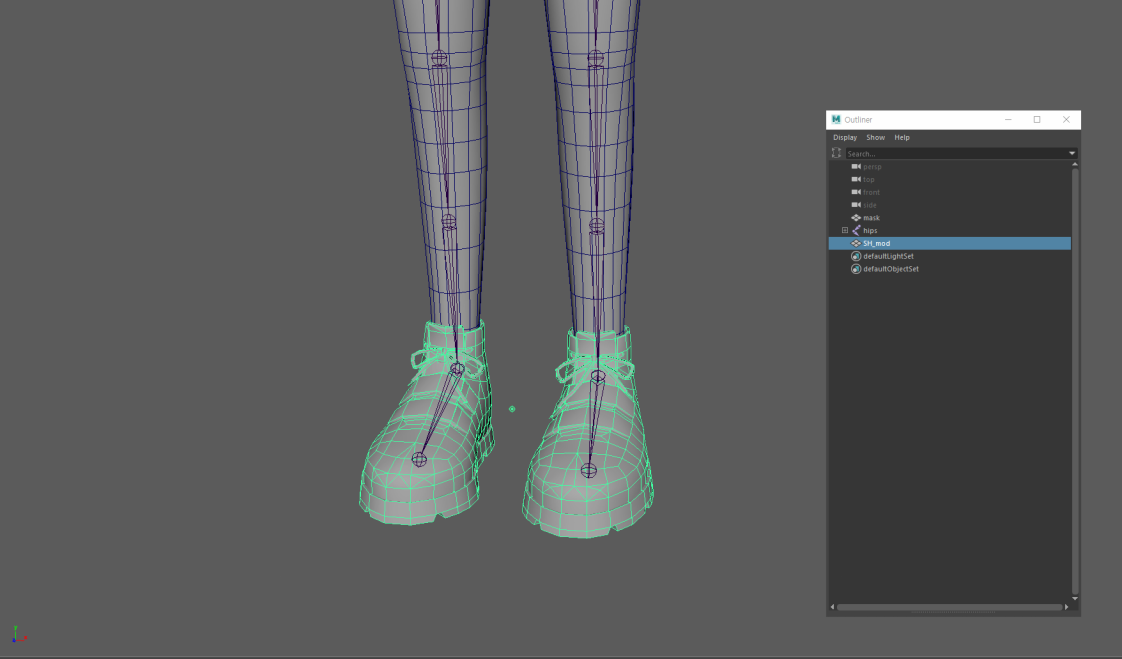
- Set the surface plane to be one tile above the grid.
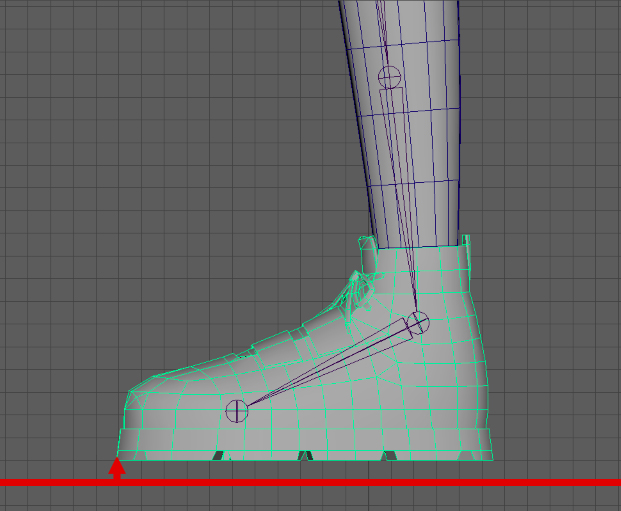
Do the 3D mask task to fit the shape of the shoes.
- Select the mask and use the Paint Vertex Tool to color the part that will be hidden by the shoes black (0) and the parts that will be visible white (1).
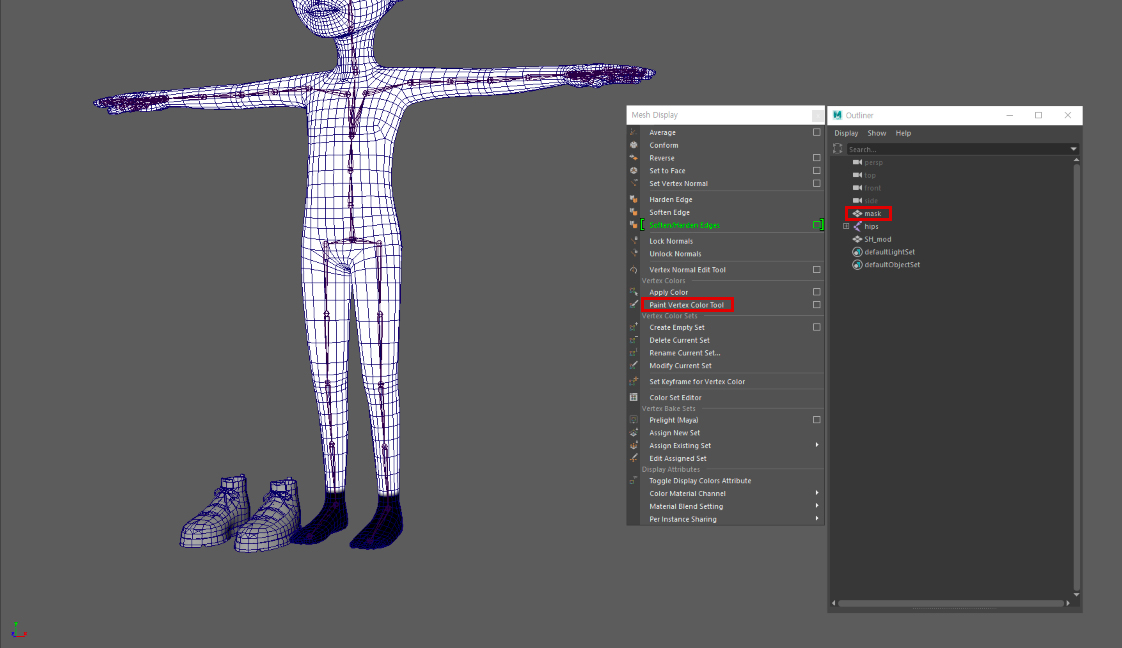
In order to do bindSkin, you must open the joint (hips) group and select the necessary joints. Here, you must include the hips.
It is important to improve work efficiency by only selecting the joints you need. (head, jBone, hand, foot, lowerArm(Leg)Twist, thumbPro, and hips)
Add the item object on the joint selected in step 3 and click Skin > Bind Skin to open the options window. In the options, set Bind to to Selected Joints.
- During the bindSkin process, make sure to include the lowerLegTwist and lowerLegTwist_scale to make sure the shins deform smoothly.
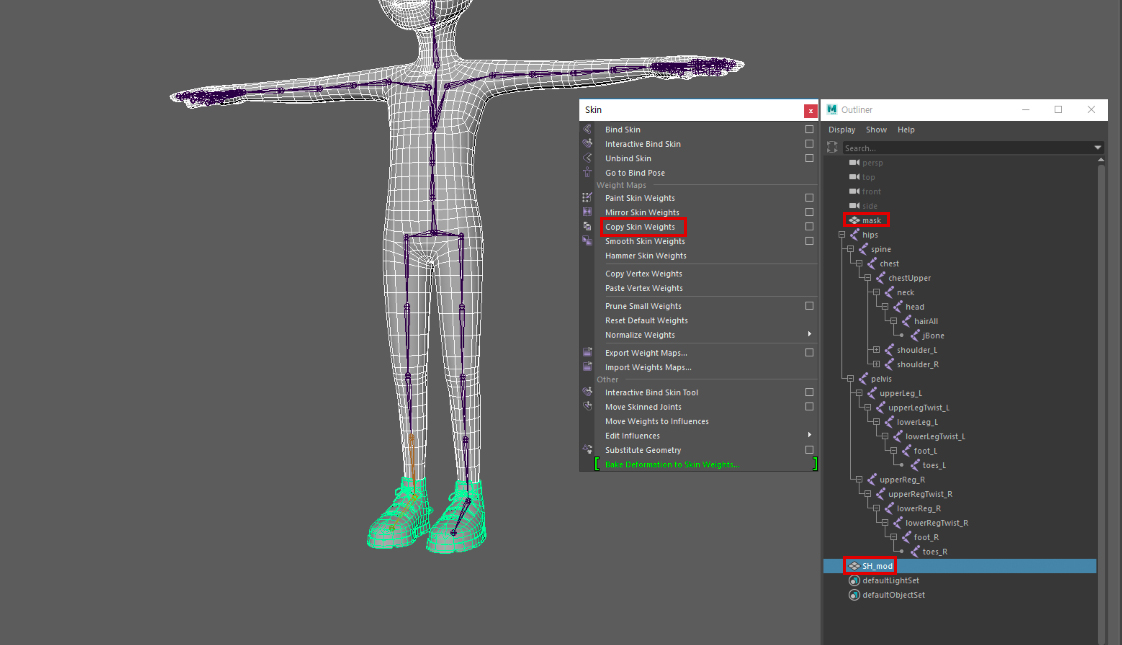
STEP 2 : Figuring weights
Move each joint one by one and edit the parts that collapse or have incorrect weights applied.
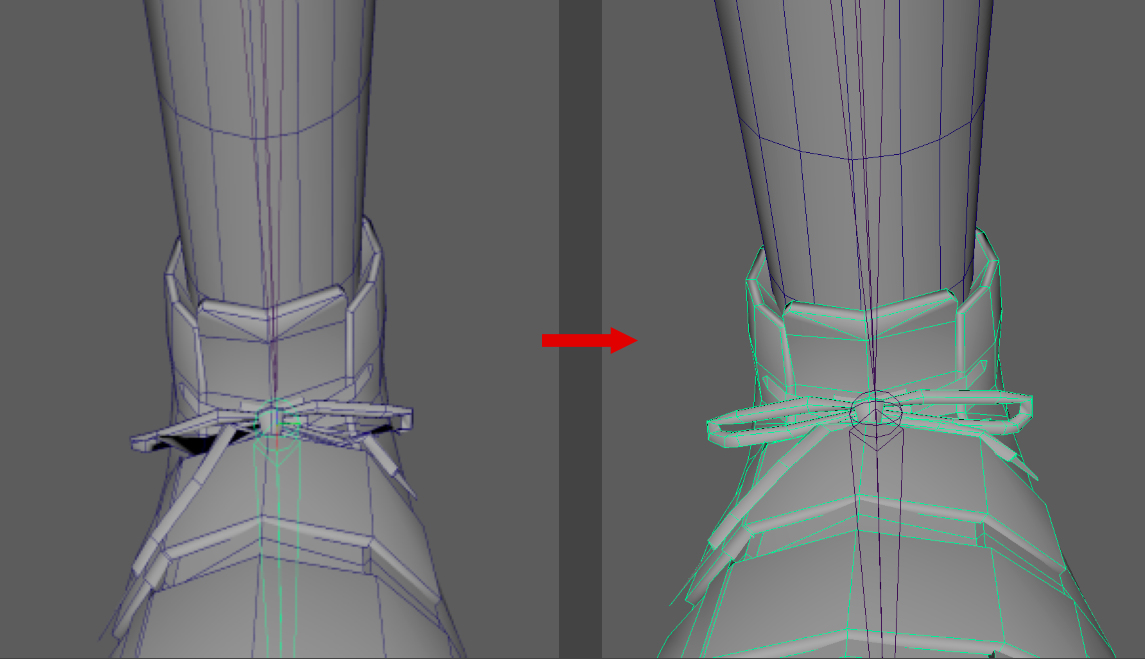
STEP 3 : Finishing
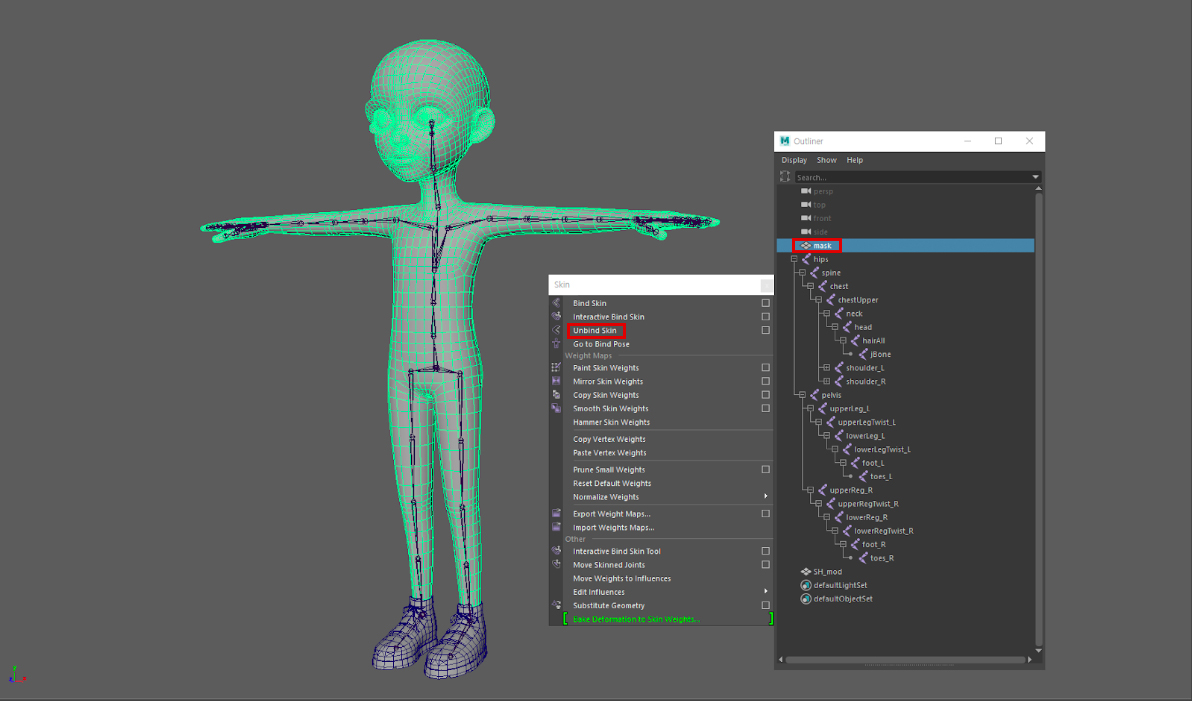
Do the unBindSkin process for the mask (mask).
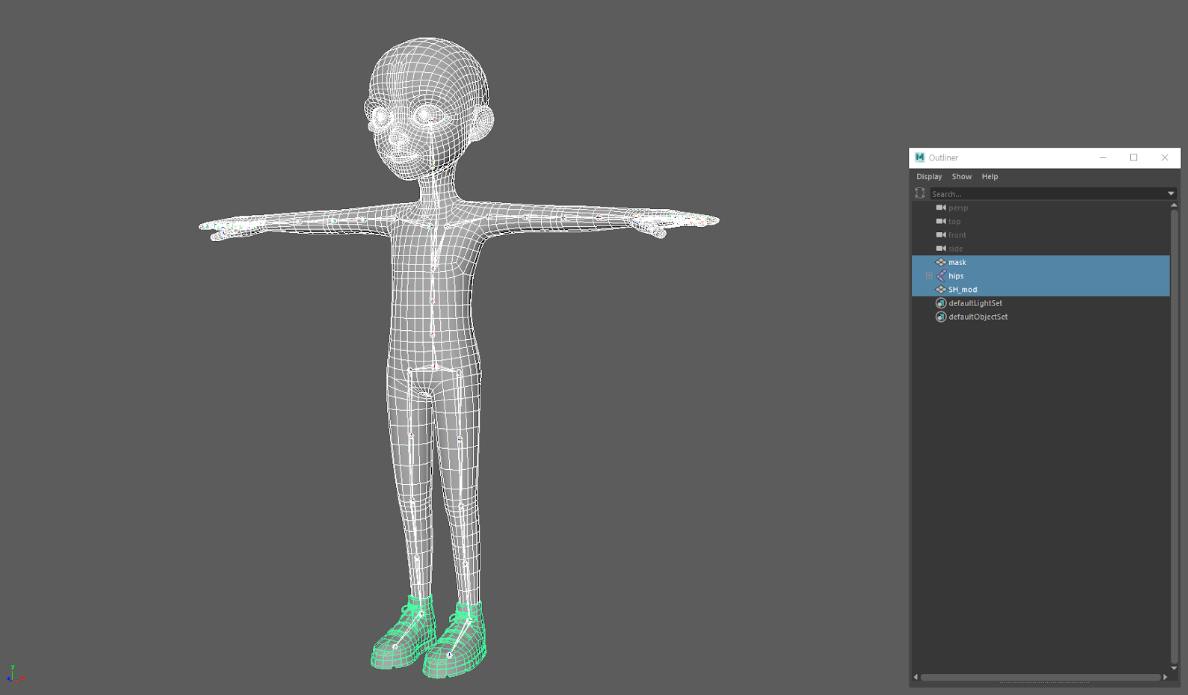
Select the shoes object, joint (hips), and mask (mask). Click Export Selection to save them as a .fbx file.
caution
Before the next step, insert the animation key in Unity and make sure there are no issues.
caution
In the case of shoes (SH), it is in a format where the toes and ankle joints are added onto the bottom costumes. Thus, the lowerLegTwist and the lowerLegTwist_scale exist in the same area, meaning there are cases where weight copying results in abnormal deformation. Before copying the weights, move the scale joint slightly to prevent this.
Updated 5 months ago
