Rigging - Shoes/Expressions
Prep for Rigging
For shoe rigging, it is assumed that the creatorBaseSet has been imported in the scene for rigging and that the shoe modeling is complete. It’s a good time to double check if the shoe has any modeling errors, like if the shoe intersects with the mask unintentionally.
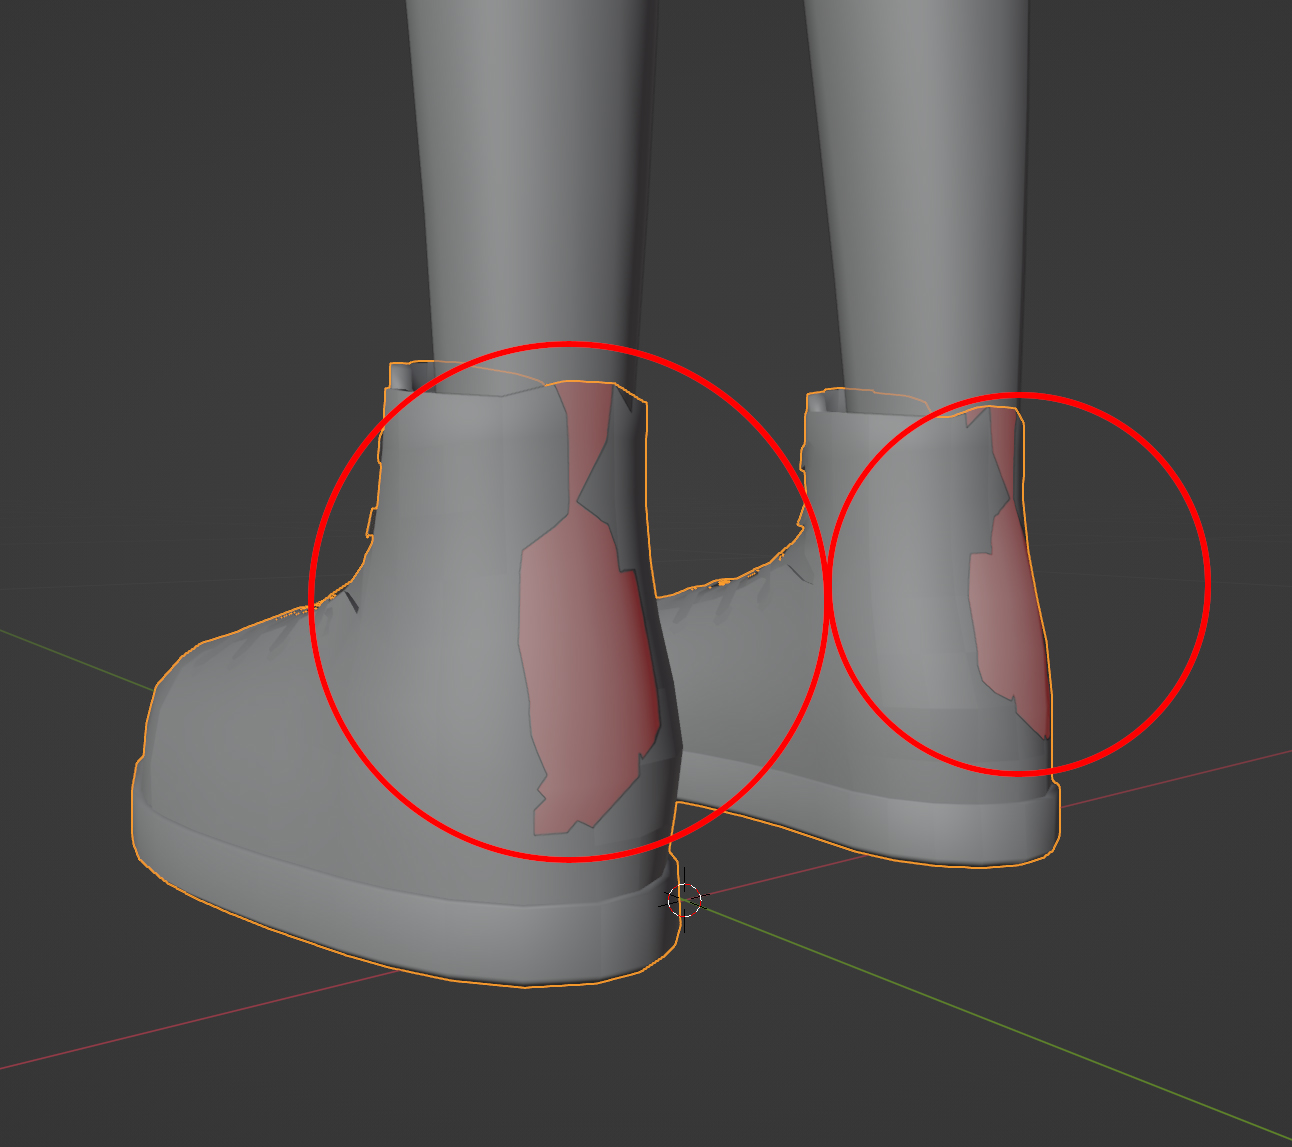
It is also assumed that you understand the basic concepts of rigging in Blender for ZEPETO as covered in the Rigging section of the guide. Unlike rigging work for a torso, an A-Pose alteration to the rig is unnecessary. However, if a shoe has a different default foot position like a heeled shoe or platform shoe, rigging the shoe to a properly posed armature will provide a smoother experience. The shoes will need to be exported with a T-pose set model.
Alternate Pose Preparations
For heeled shoes or shoes that otherwise change the position of the avatar, it can be good to use a duplicated armature/mask to apply the alternate pose to. This duplicated rig allows for applying weights on a properly posed skeleton while the model is in its normal position. Like applying an A-pose or alternate pose in Rigging, the process will follow a few steps.
- Pose the skeleton to fit the shoes
a. Move the hip bone to place the general position of where the ankles should be, then change rotations of the rest of the foot elements based on that.
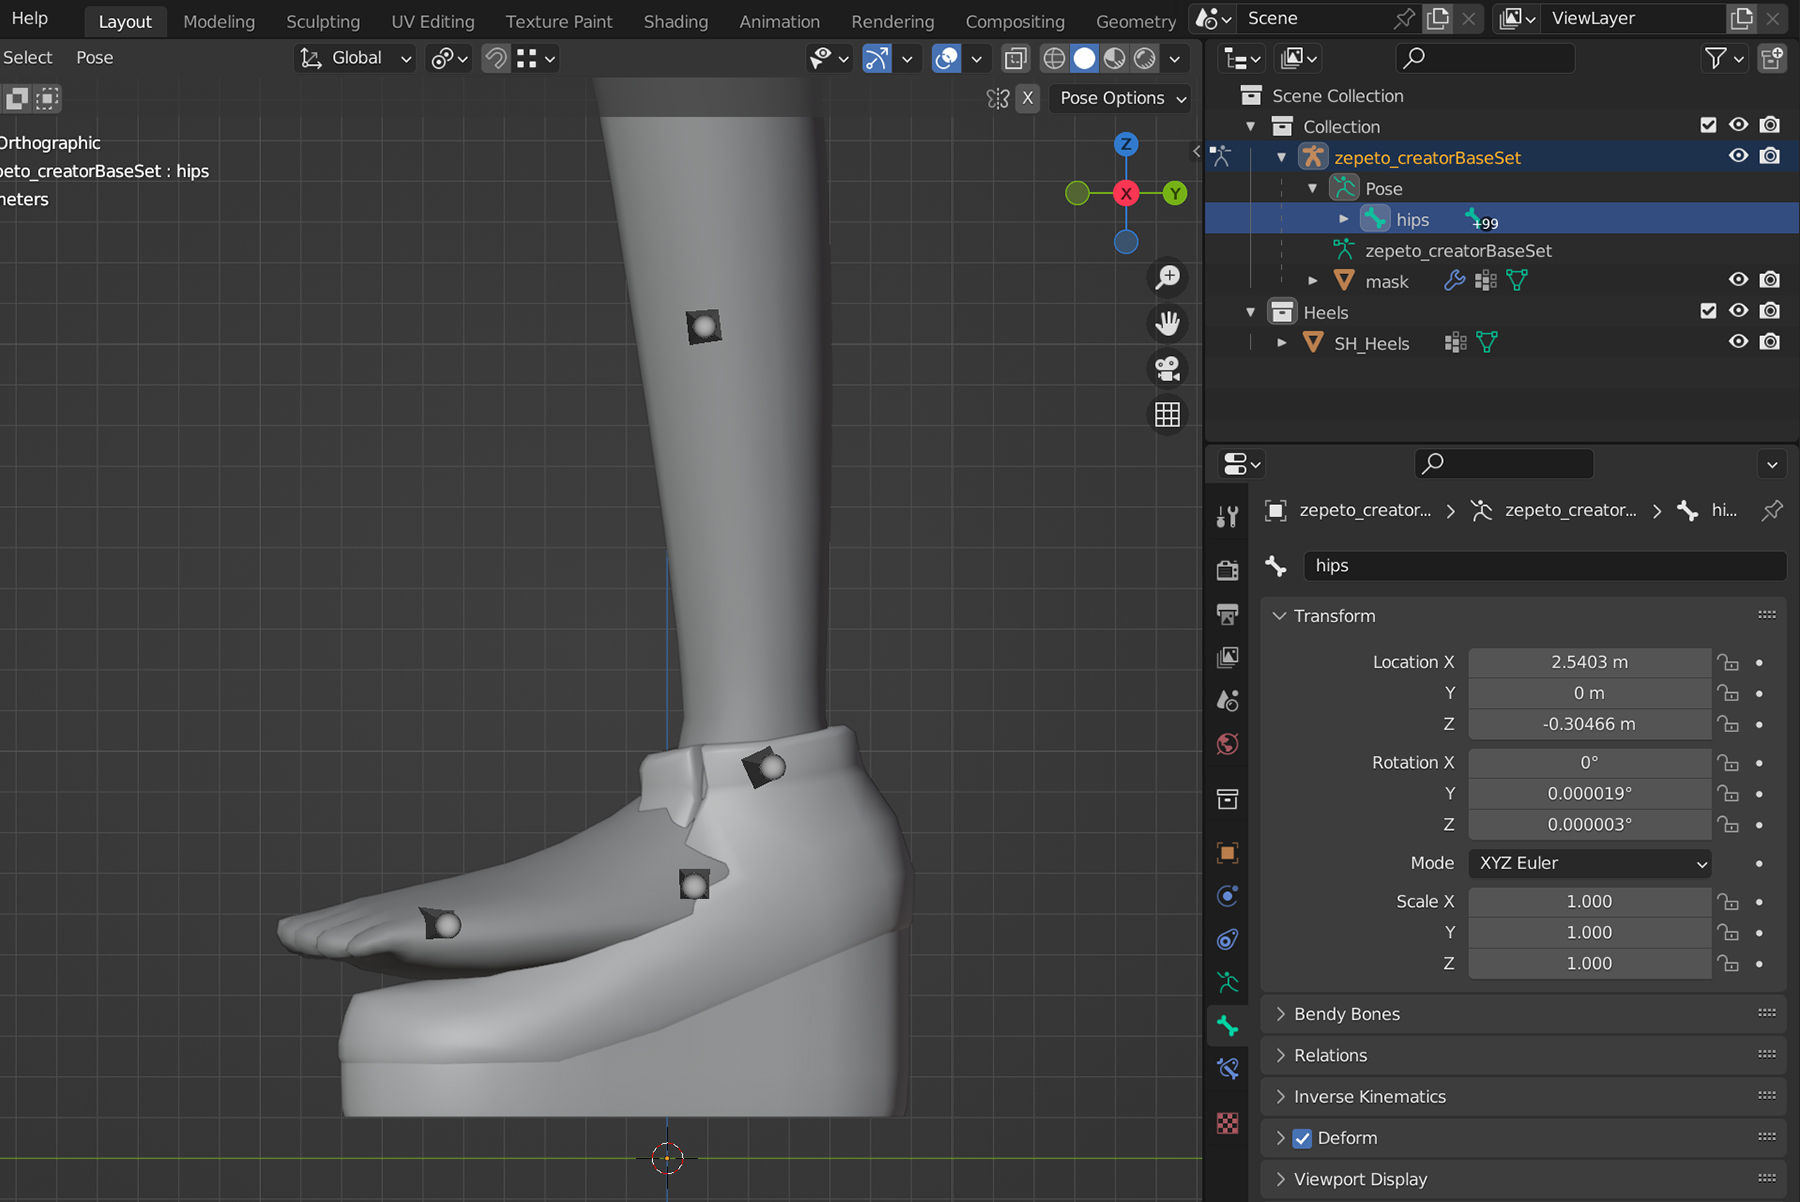
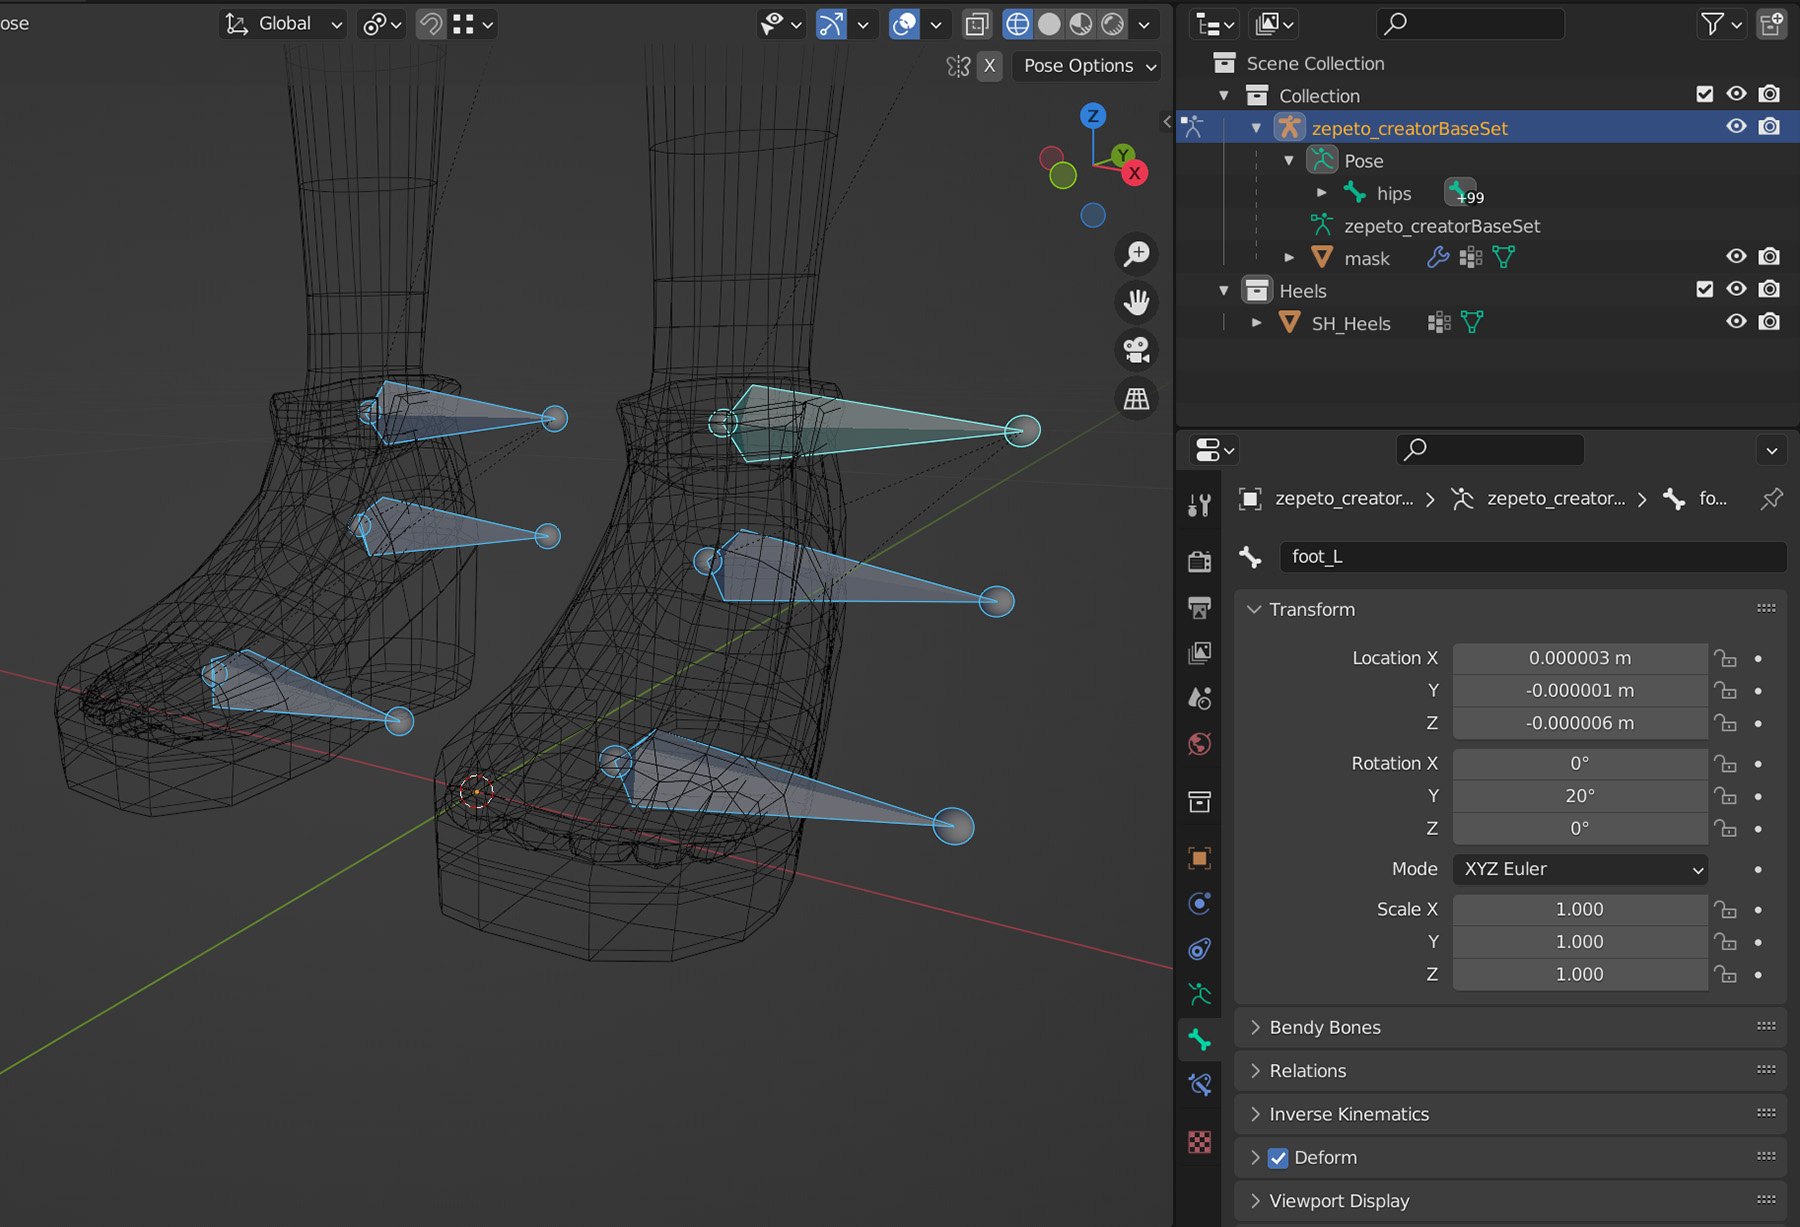
- Duplicate the Armature and Mask elements
a. Rename the duplicate elements for organizational clarity - Apply the Armature modifier on the duplicated mask element
- Apply the altered pose as rest pose on the duplicated armature
- Re-add the Armature modifier to the duplicated mask and point to the duplicated armature
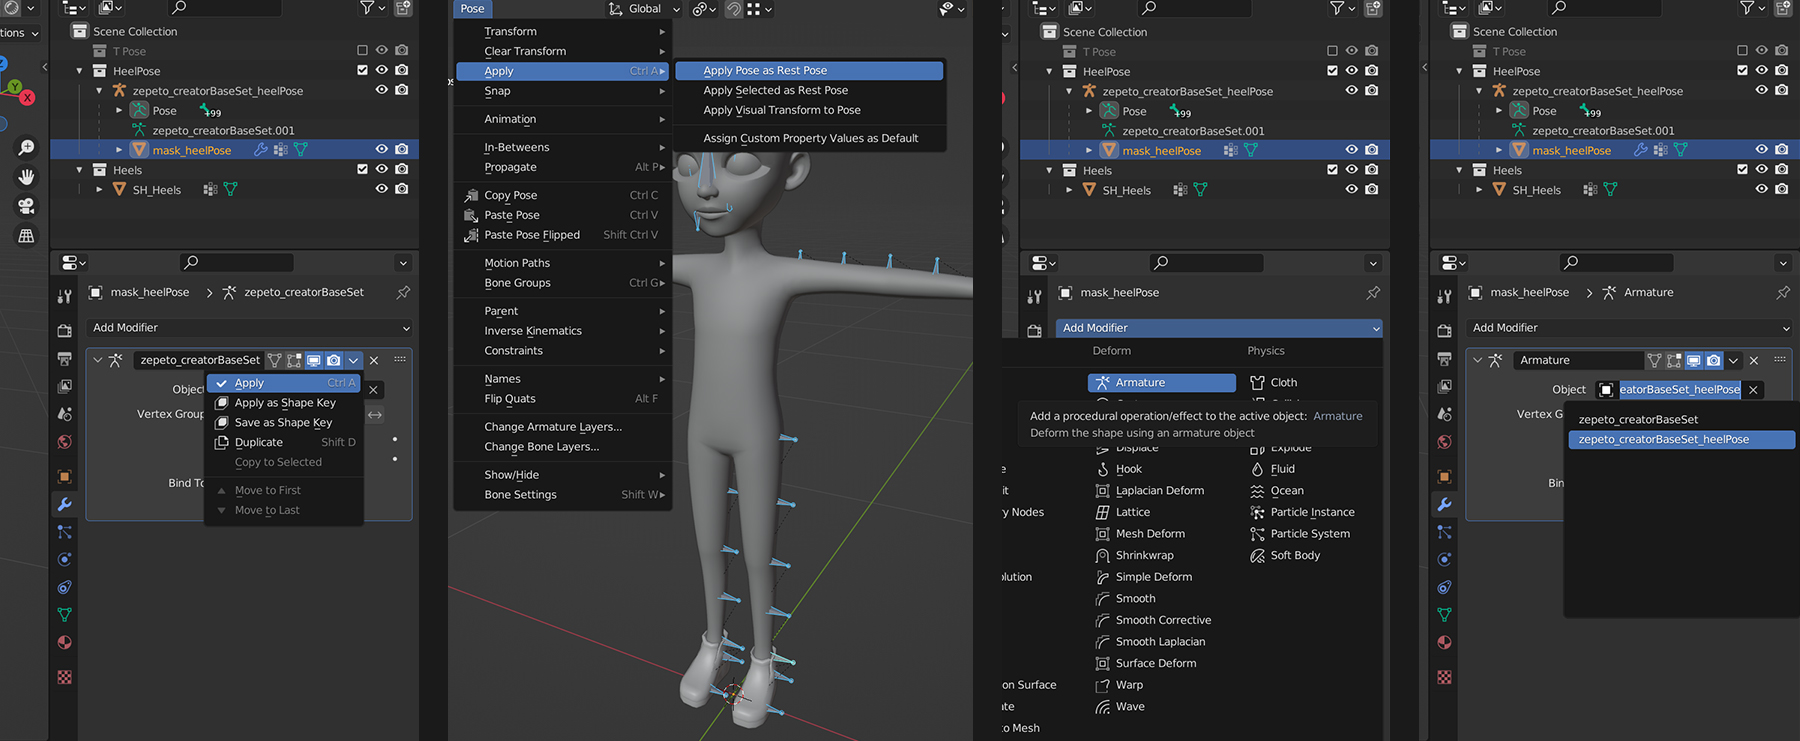
At this point, the alternate pose setup is complete, and you can move on to rigging the shoes.
Weight Painting
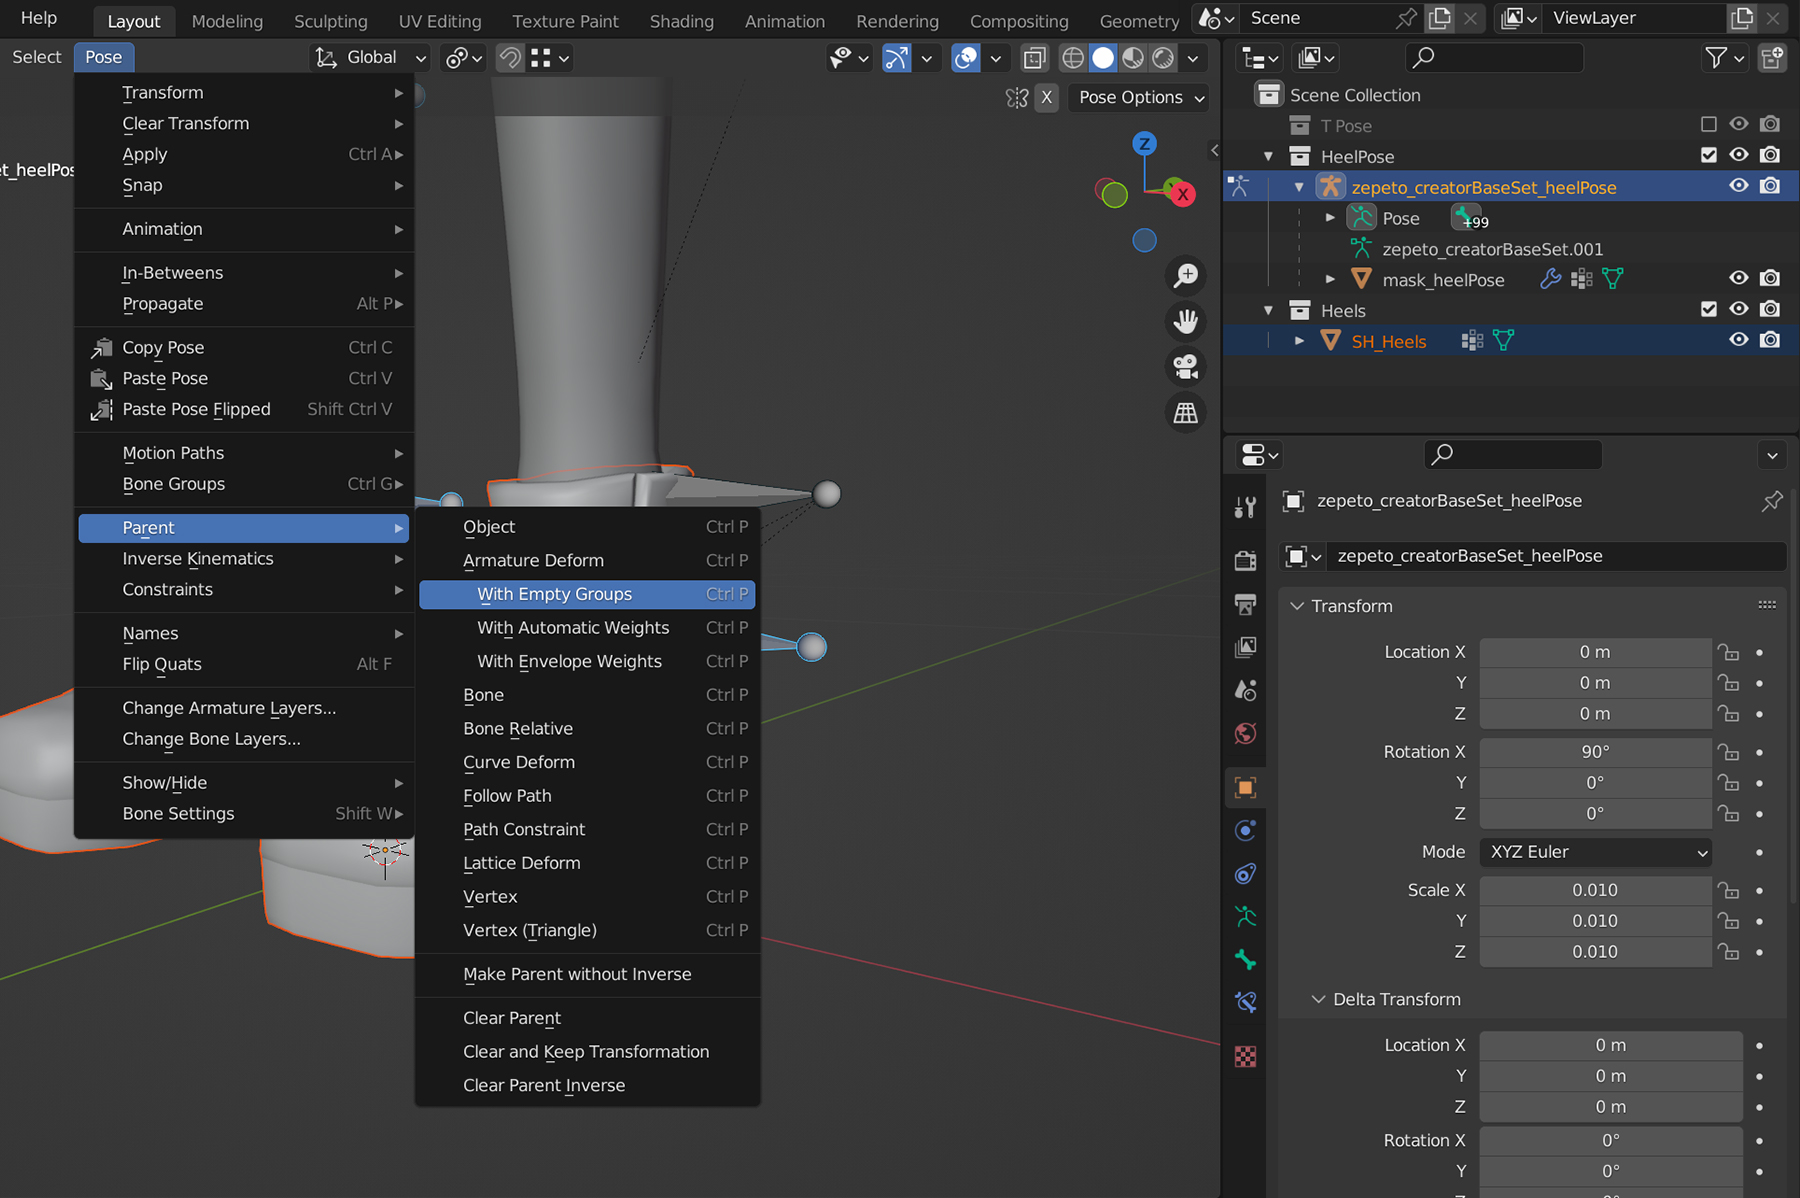
The rigging process for shoes is very similar to the general rigging process. After the setup is complete, the item will be parent-bound to the right armature.
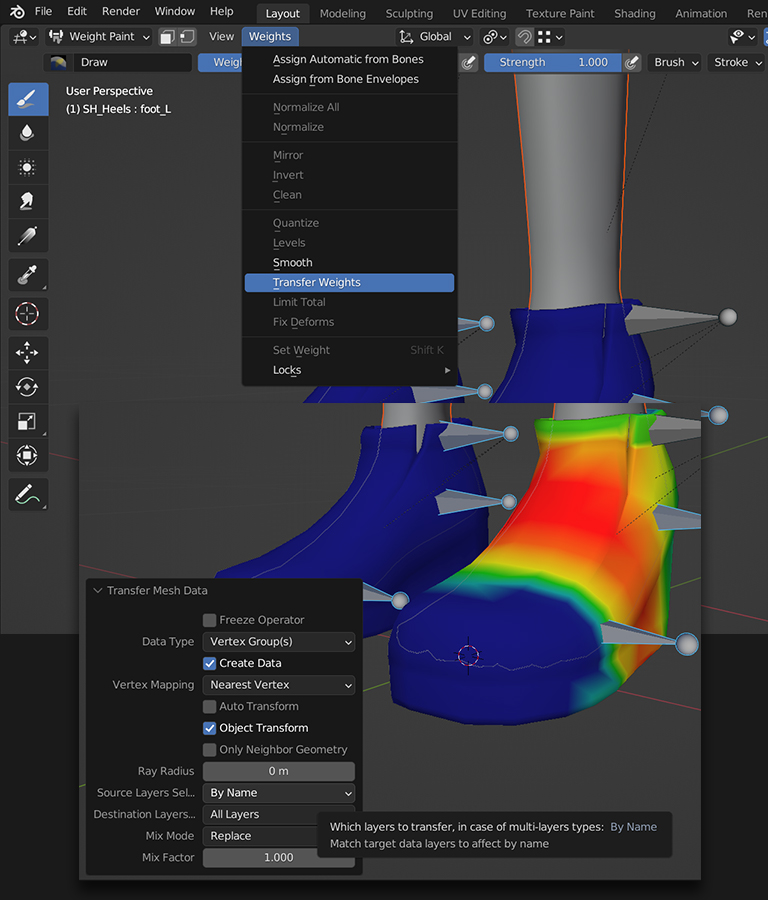
Make use of the mask’s weight data to simplify the initial binding data using the weight transfer operation. Then, begin correcting weights in weight paint mode.
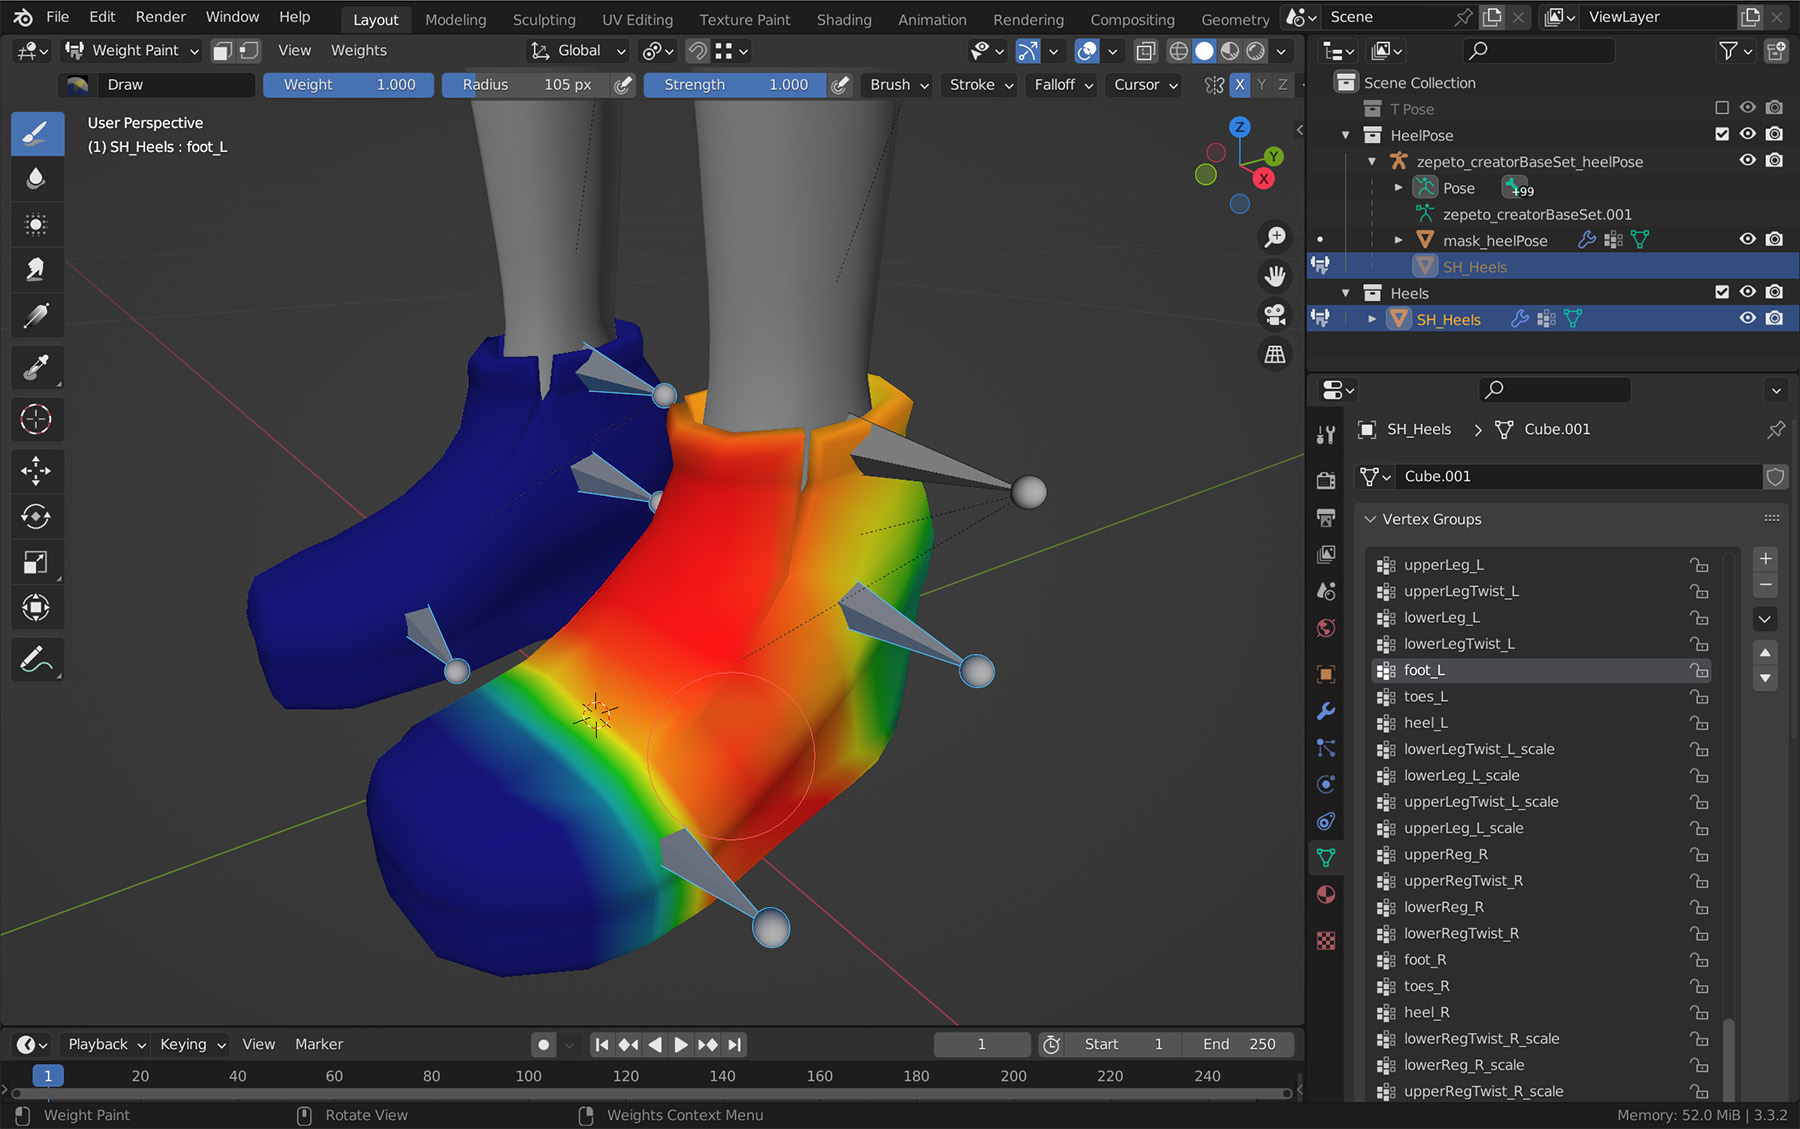
Make sure to enable “Auto-Normalize” in the weight paint tools option for weight painting. Otherwise, the weights may not be distributed evenly across the mesh.
Weight painting correction relies on testing bone weights by changing the position on bones in Pose Mode and making corrections if the mesh bends in a weird way. Repeat this process until errors are minimized.
- Check that the skin weight influences are properly set at 4, though it should be Blender’s default setting
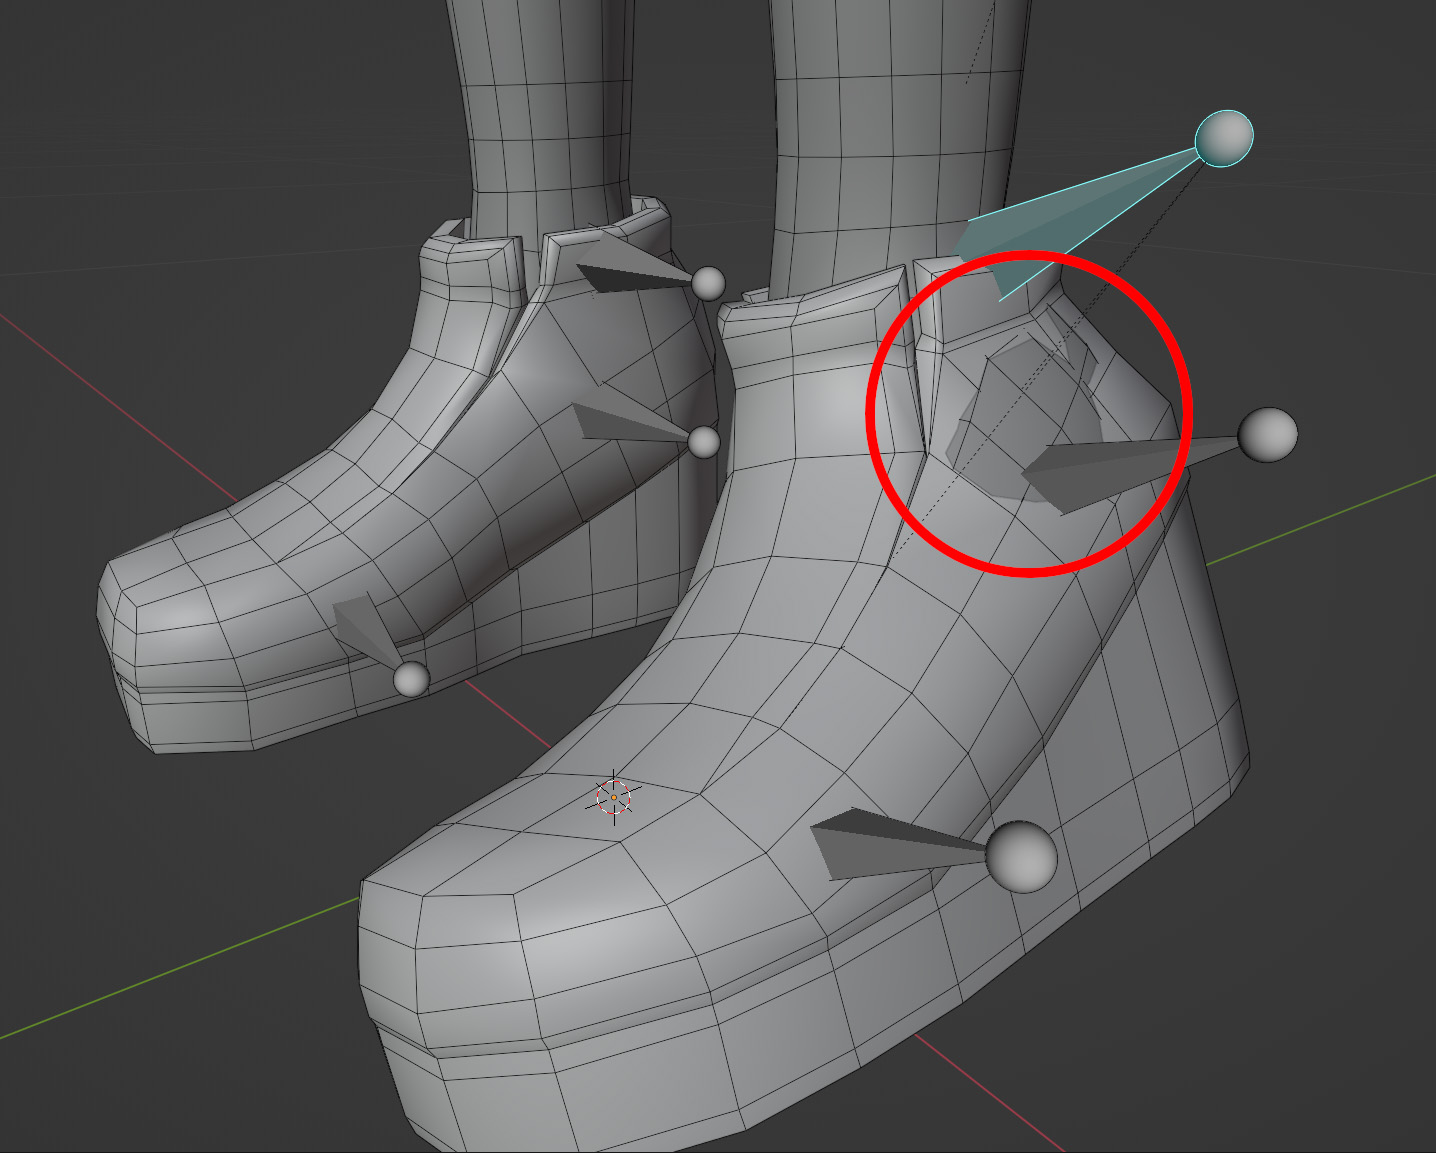
- Try and prevent the mask from poking through the shoe item while it’s being deformed
Return to T-Pose
When weight painting is complete, make sure to transfer the item back to the T-posed armature. The item will produce errors if not exported with a T-posed armature. In Pose Mode on the non-T-posed armature, rotate the bones back into position for the T-pose and bring the hip location back into place with the T-pose Armature. Apply the Armature Modifier on the shoes. Then, re-add the Armature Modifier on the shoes and point it to the T-pose Armature.
Now, correct the mesh and weights for any errors that may have occurred from the armature transfer. It can help to re-pose the T-pose armature into the heeled form to catch these errors.
Rigging Tips
Checking shoe volume integrity with the guide object provided in the SH_Guide will require a quick bit of rigging on the guide mesh. A good result can usually be achieved with a simple weight transfer from the mask to the SH_Guide object without additional corrections.
Keyframes
It can be useful to save the alternate pose of the armature to the T-pose armature. This can be done with some of the animation tools in Blender.
- In the timeline underneath the 3d viewport, advance the time to frame 2.
- With the T-pose armature set in the posed position in Pose Mode, select all bones and set a keyframe with ‘i.’
- Set the type of keyframe as “Location, Rotation, and Scale.”
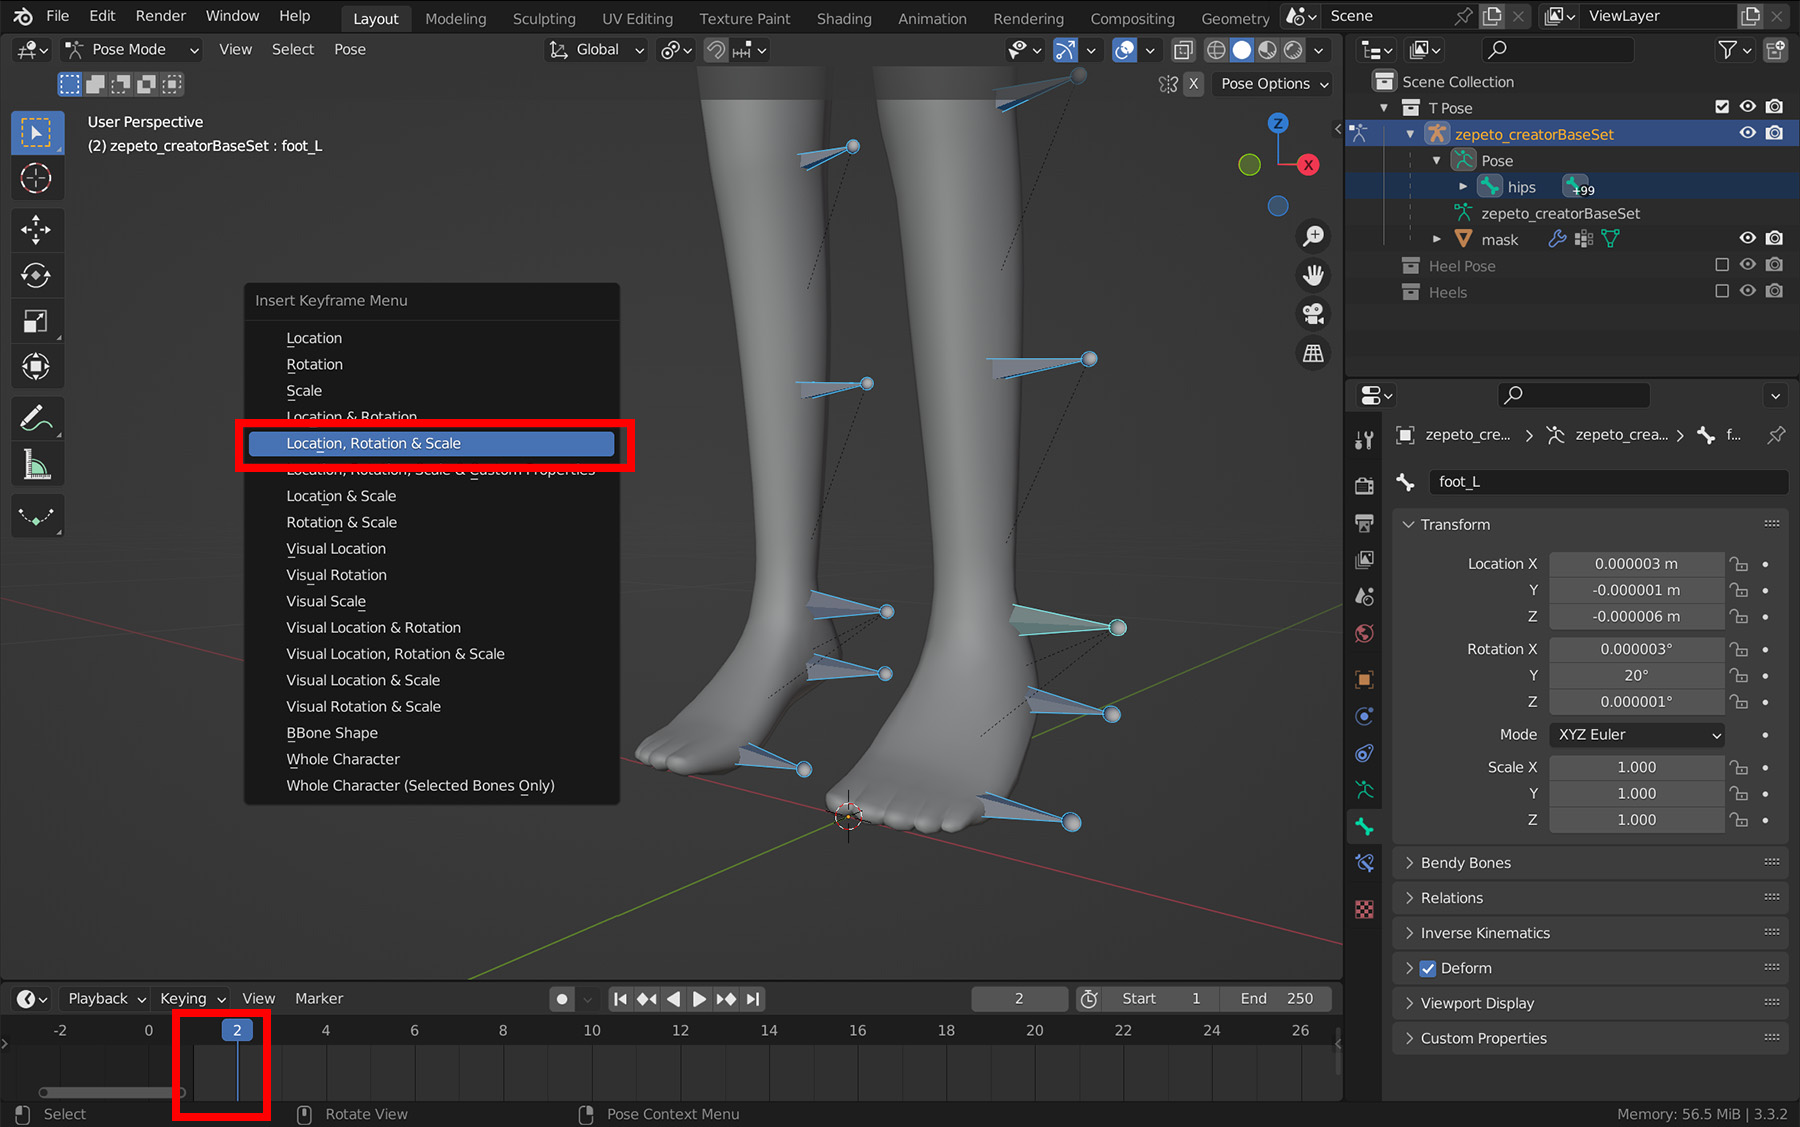
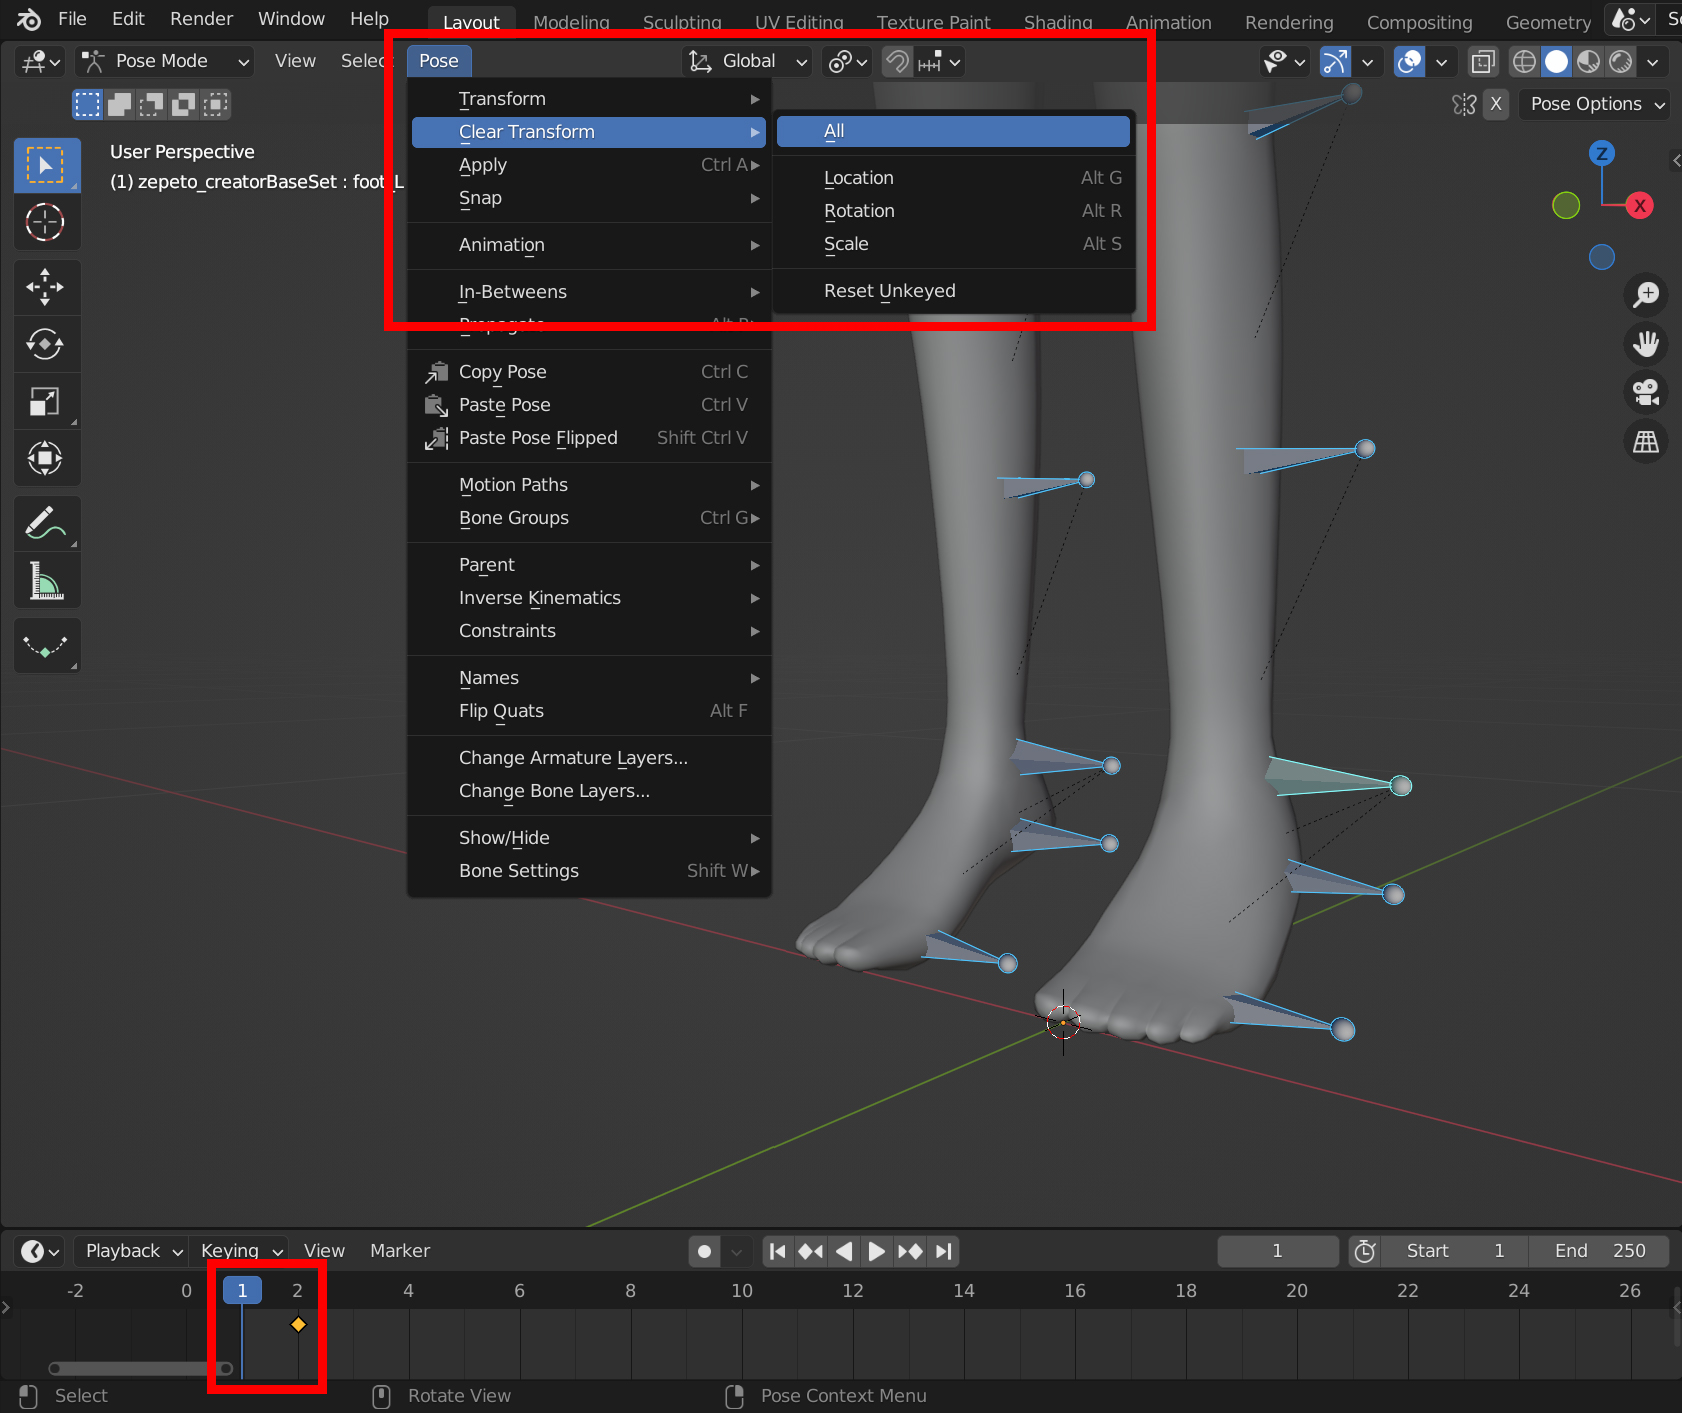
- Return to frame 1 in the timeline
- Select all bones and reset their transforms
- With all bones selected, set another keyframe on frame 1
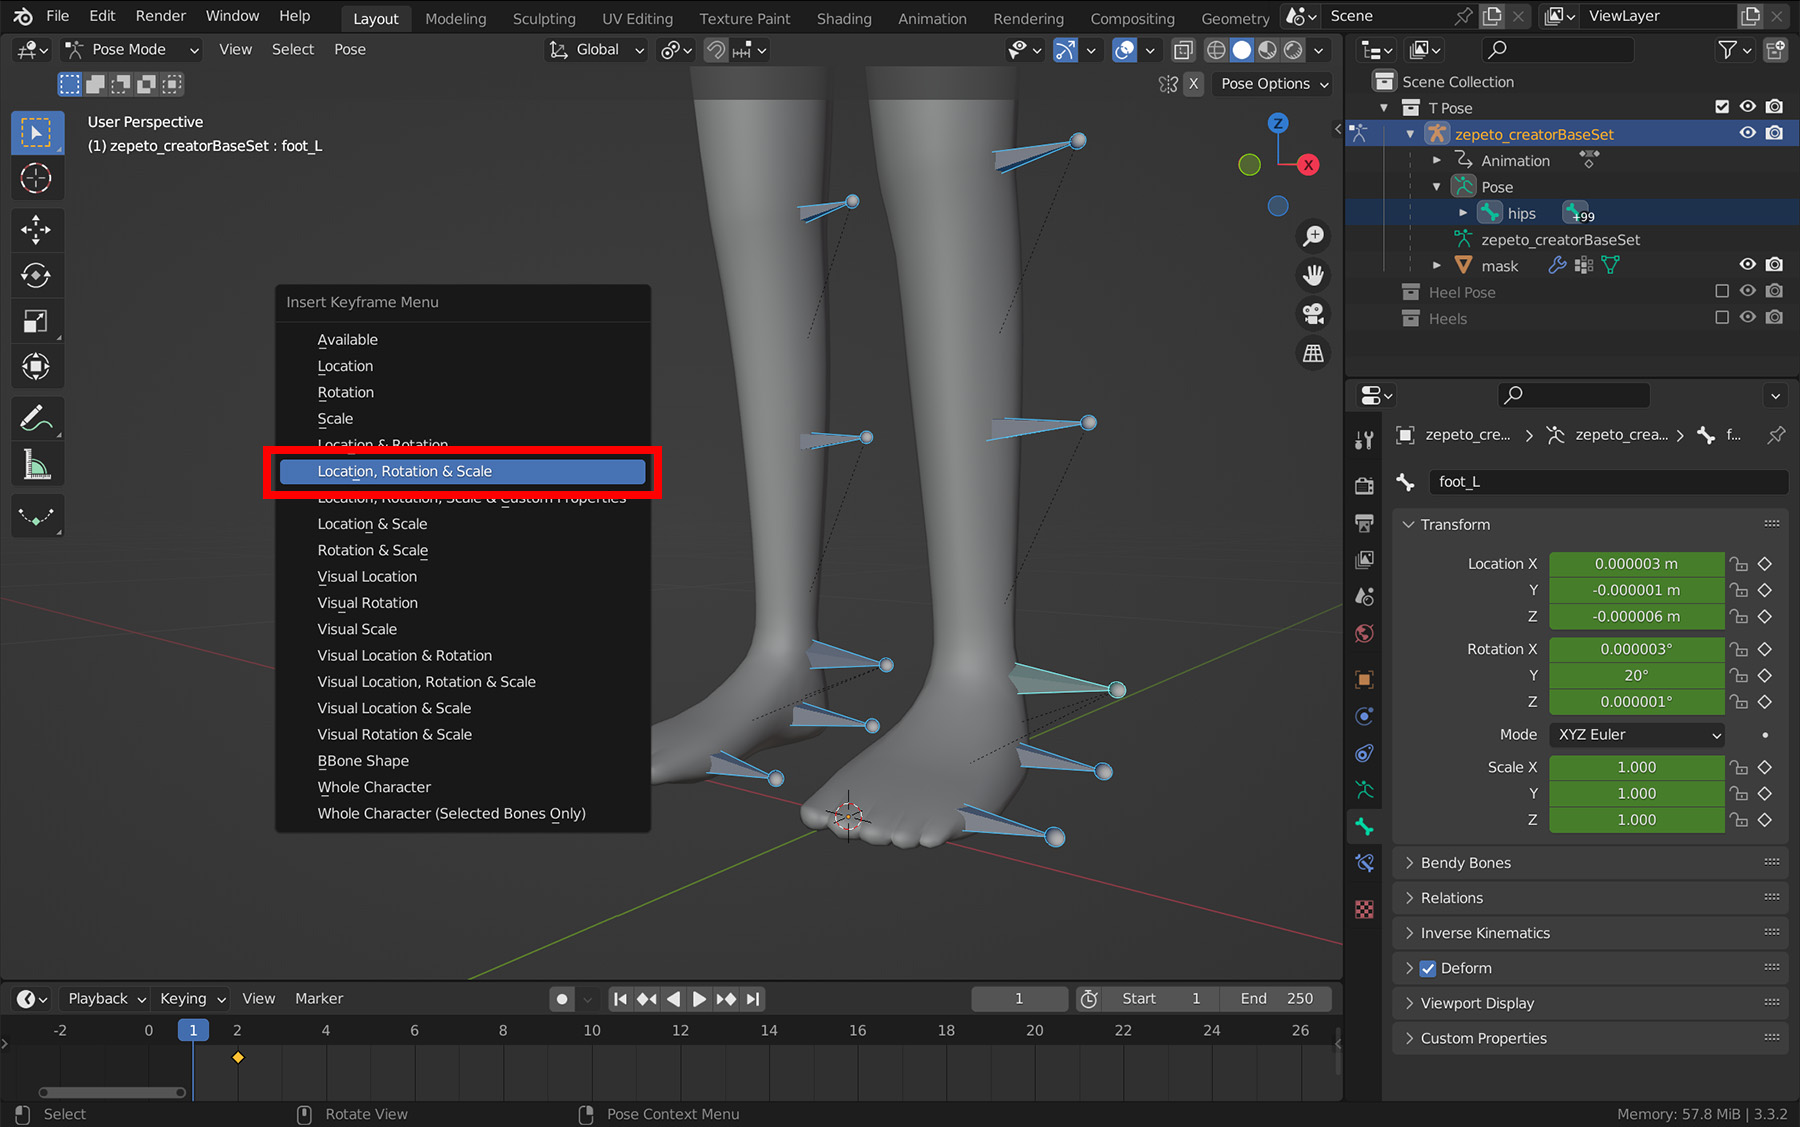
With these keyframes in place, you can switch between the original and alternate poses for reference or error correcting without having to change the transform inputs manually.
Expressions
To make sure that the rig changes apply in the app, a tool called “expressions” will be used to record the changes in rotation. Expressions are empty objects that record the change in rotations or translations of bones in the avatar’s skeleton. These values are then applied to the base body when the item is added in Unity and in the app.
- Expressions are grouped under an empty object labeled “expressions.” Create an empty with this name.
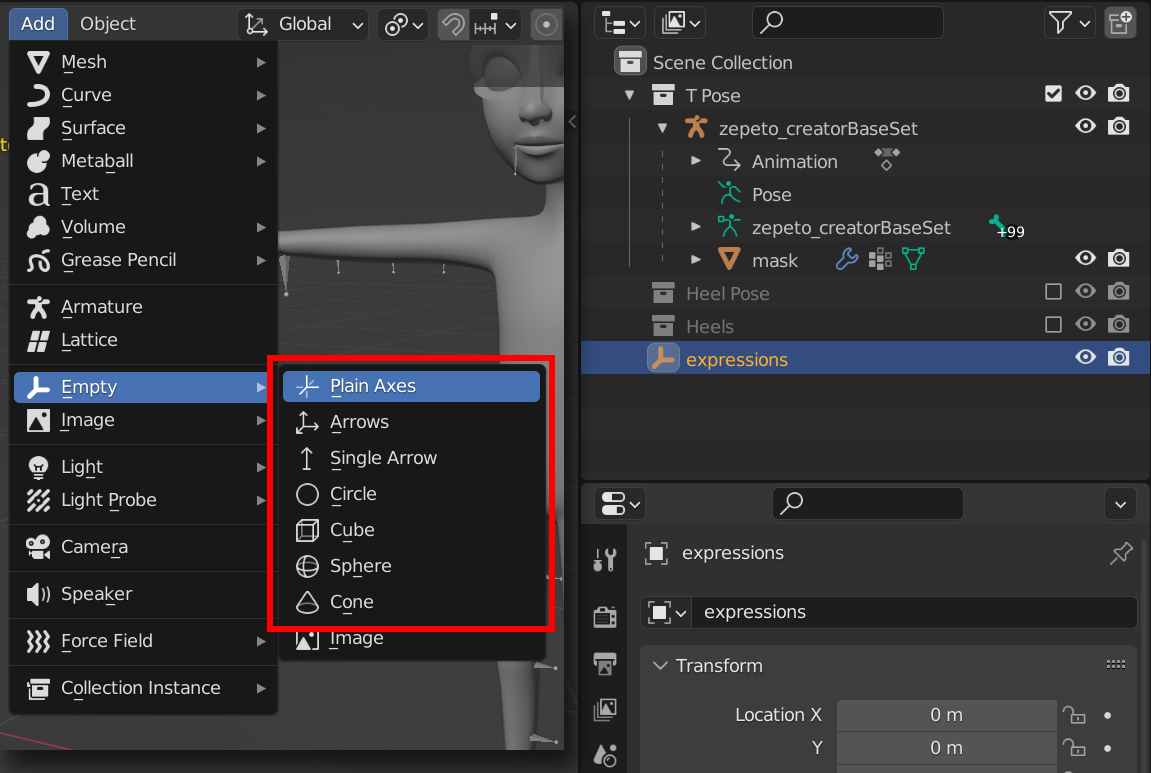
- Starting with the root, create an empty object and name it “_hips”
a. The “_hips” expression changes the hips root of the ZEPETO skeleton, moving it by a certain amount in global space.
b. In the “_hips” empty transform, input the change in the hip bone’s location in Blender’s global space.
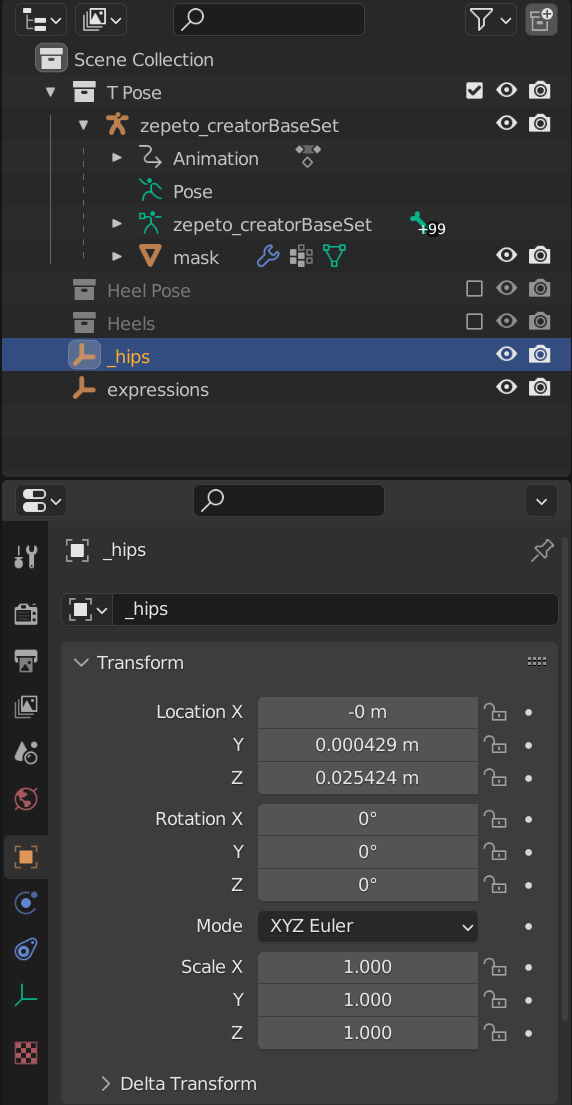
This will be different than the transform of the hips bone to get into location, as the bone operates in local space. If the translation was a simple vertical translation it is most likely that the only transform value that needs to be changed is the Z Location. The global space change of the hips can be checked using a helper empty object and snapping tools
- Next, create empty objects and rename those objects to correspond to the bones that need their rotations changed, but with an “_” underscore mark in front of the bone name.
a. E.G. “_foot_L, _foot_R, _toes_L, _toes_R”
b. For each empty, input the rotations of its corresponding bone
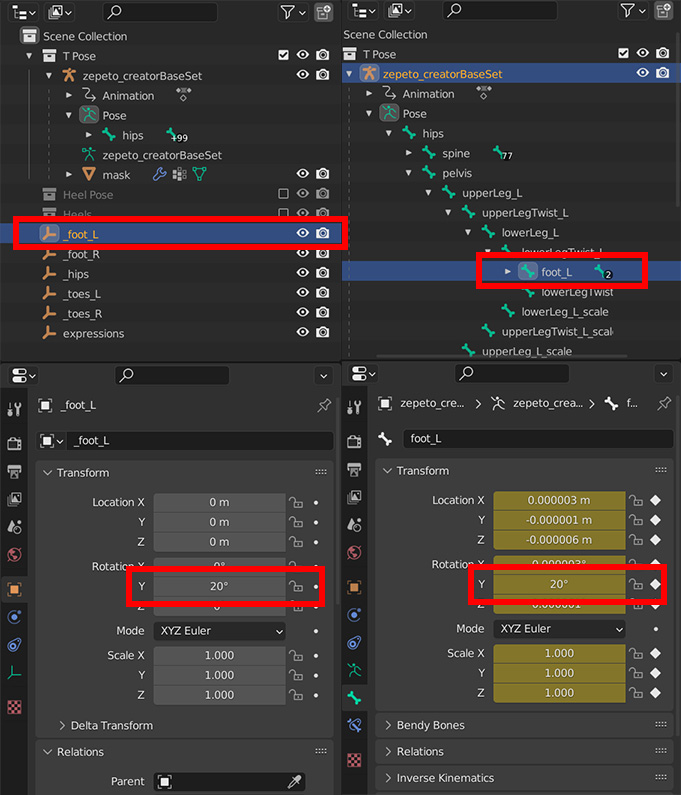
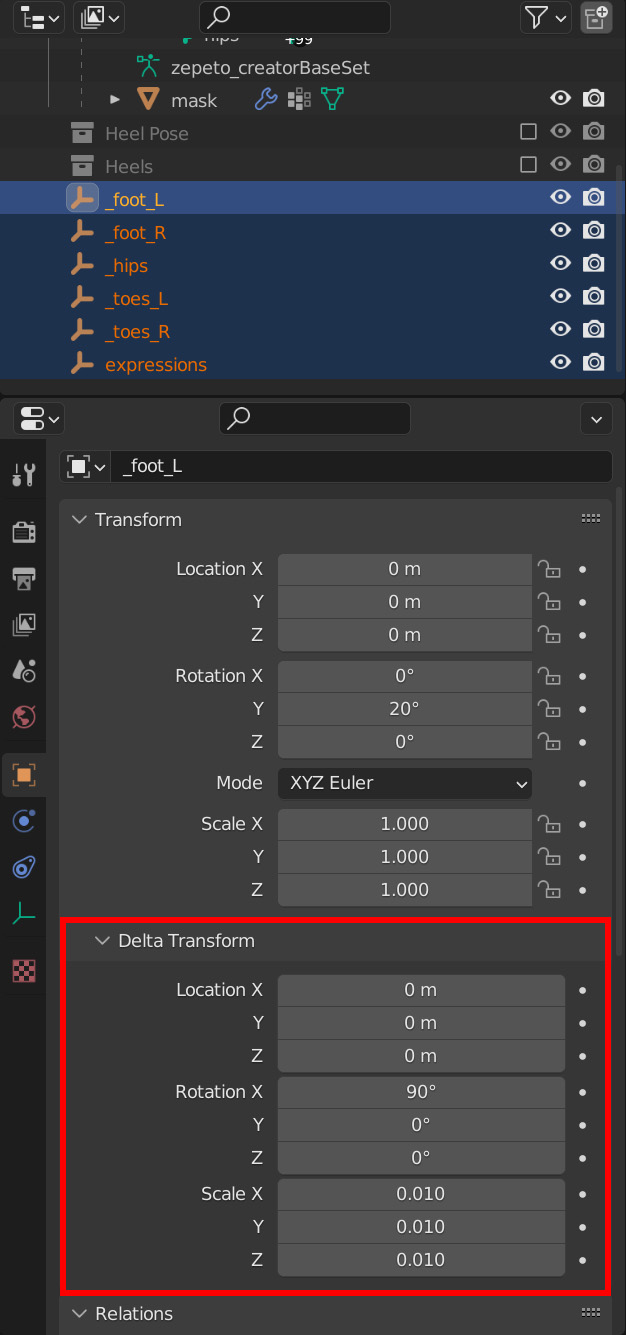
- To correct for the Blender to Unity space orientation issue, we’ll make some changes in the Delta Transforms of the empties
a. Delta Transform values allow for the general corrective transforms to be applied while keeping the normal transform values human-readable in Blender.
b. Select all the expression empties and go to the object tab
c. Under transforms, expand the tab labeled “Delta Transform”
d. Set the Rotation X of the delta transforms of the expressions to 90
e. Set the scale values of the delta transforms of the expressions 0.01
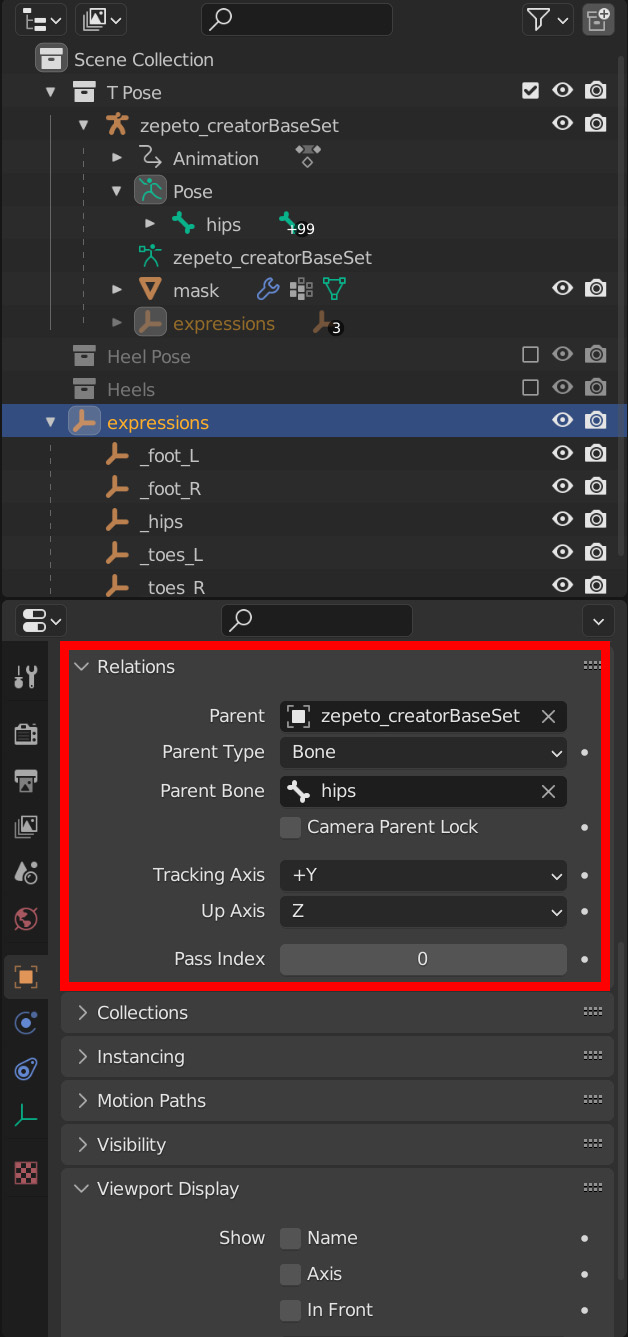
- Now, parent the bone expressions to the expressions empty
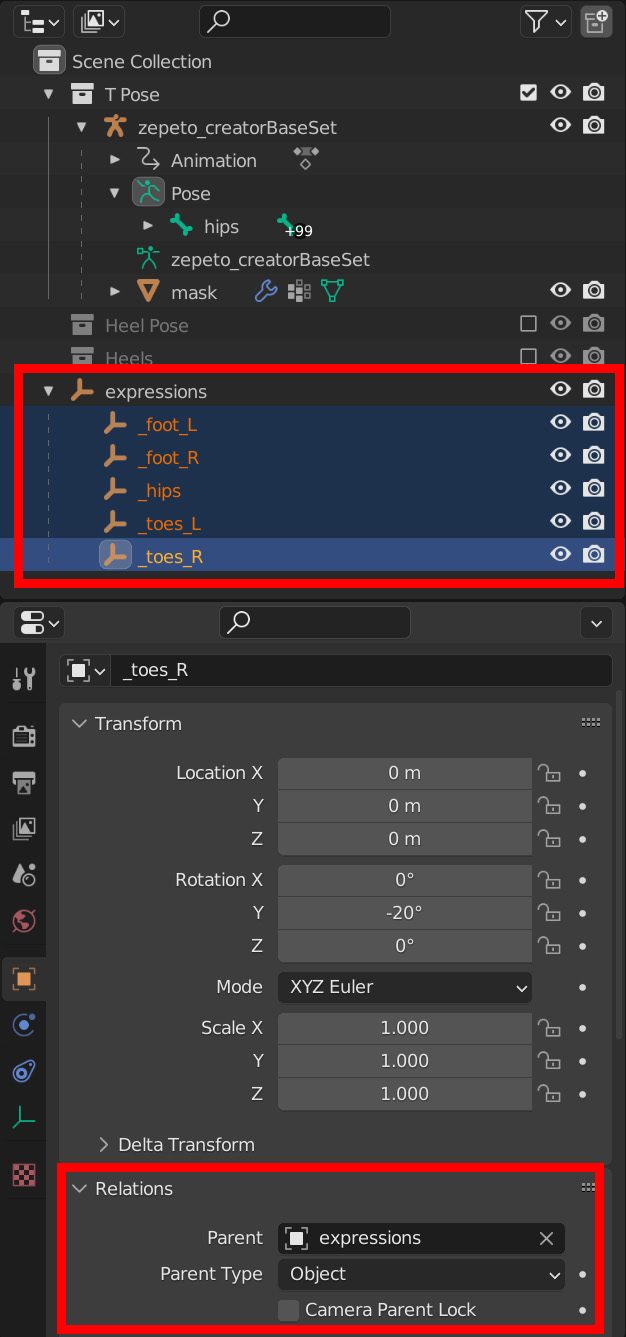
- Parent the expressions empty to the Hips bone.
a. If the expressions object isn’t parented to the hips bone, then the expressions will not be created in the prefab during the convert to ZEPETO Style process
Updated 4 months ago
