Making Existing Clothing Into Customizable Clothing
STEP 1 : Preparing for rigging
Load the baseBody and the modeled clothing object, then align the costume well to the mask.
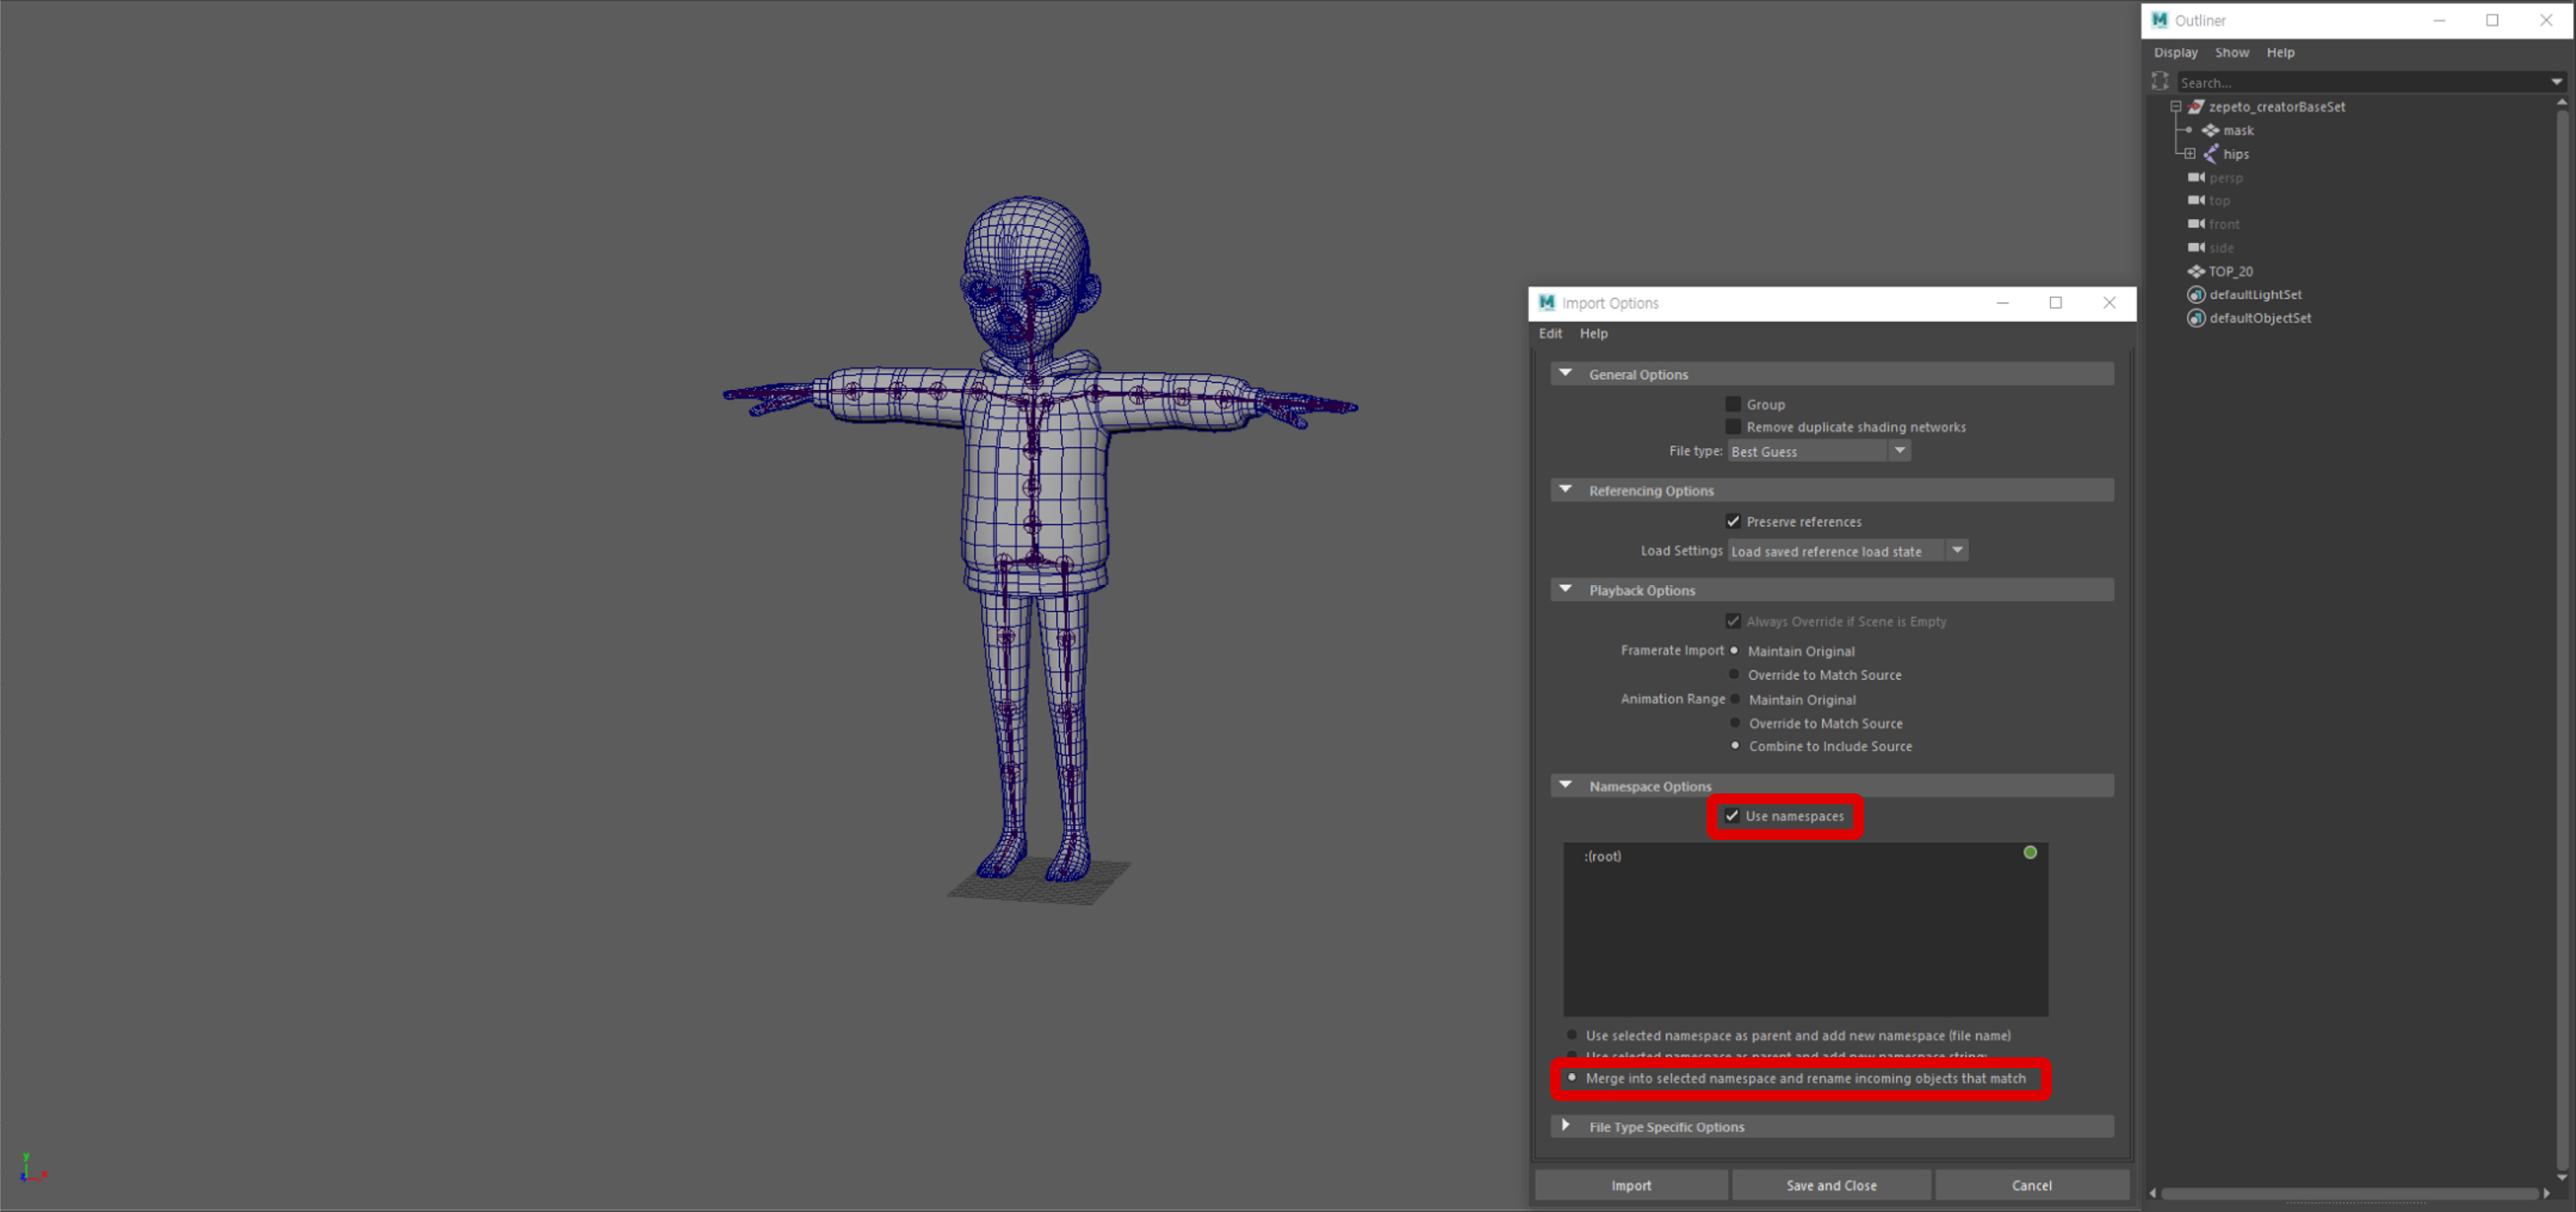
- Load in the Import Options window after selecting use namespaces and merge into the selected namespace.
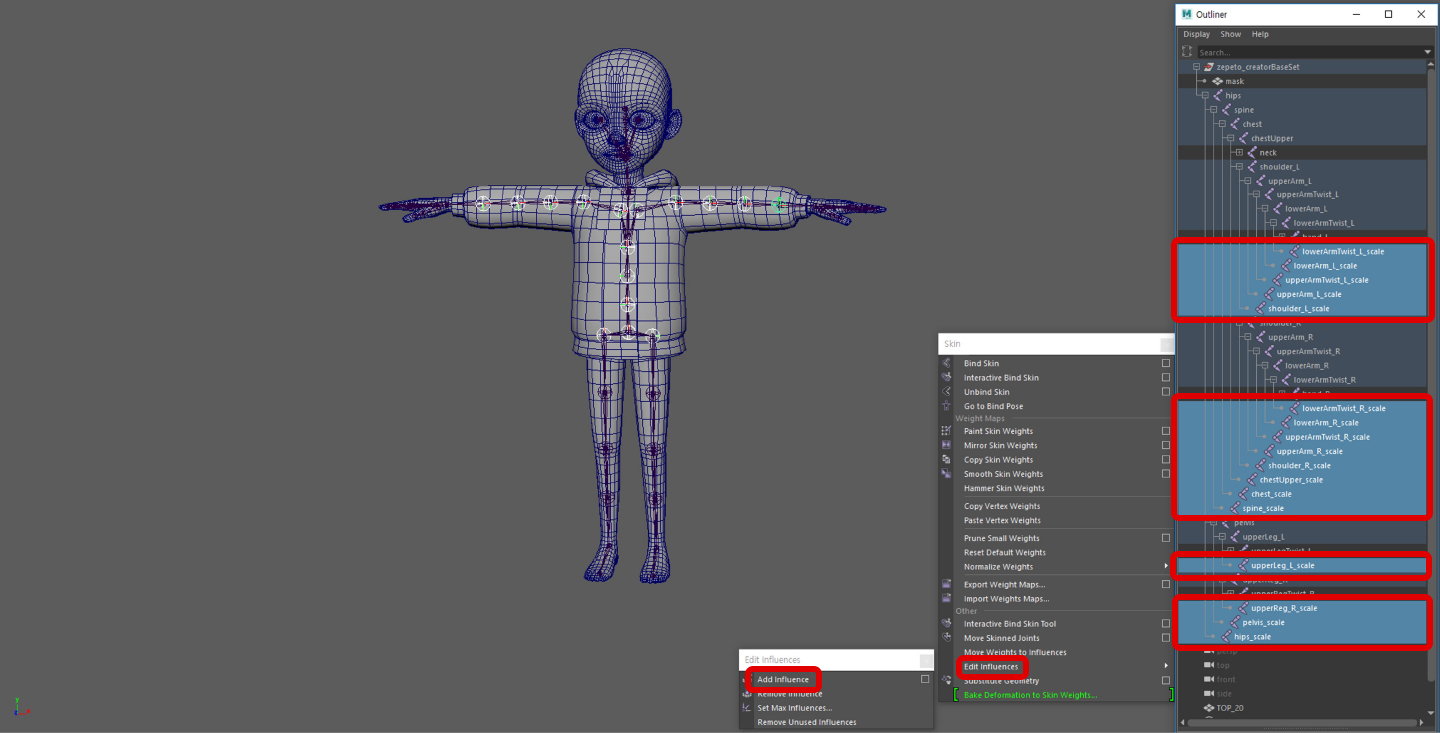
Select the necessary scale joints and add using the Skin > Edit Influences > Add Influences menu.
caution
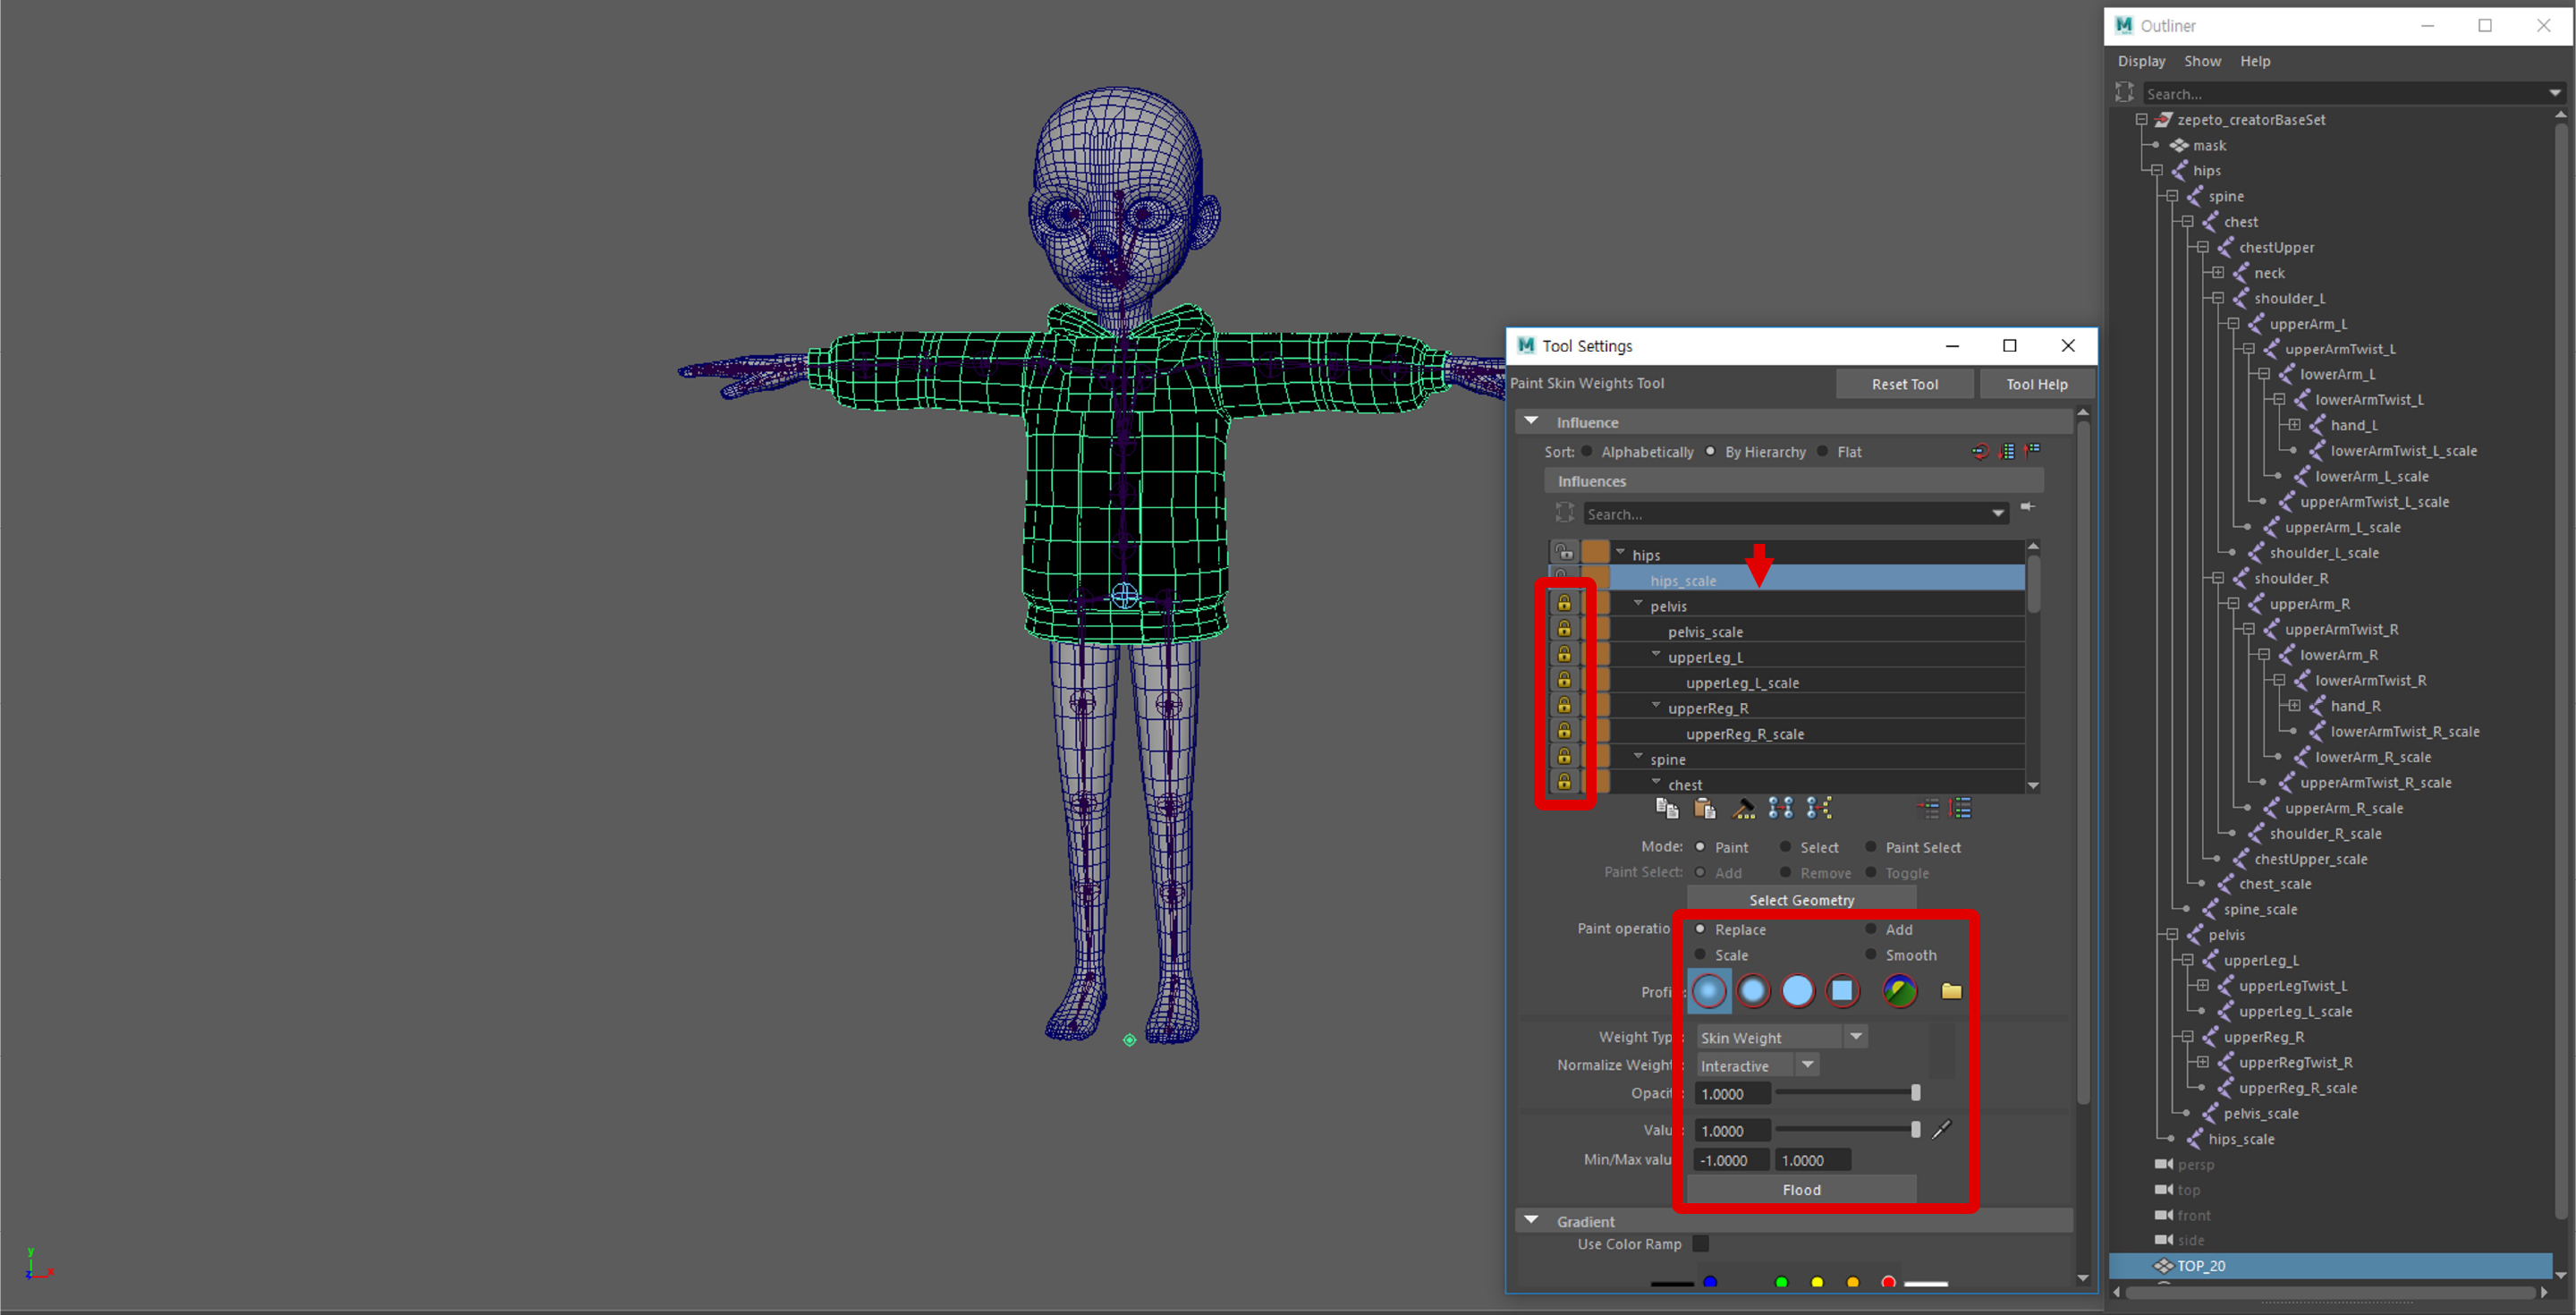
Make sure to check Weight locking in the options. If this option is not checked, the weight values will not be set correctly.
Use the Paint Skin Weights tool to move all weight values to [jointName] > [jointName]_scale.
- This is not applicable to the head, foot, and hand joints.
- During this process, hold all joints aside from those that will be moved to prevent unintended repositioning.
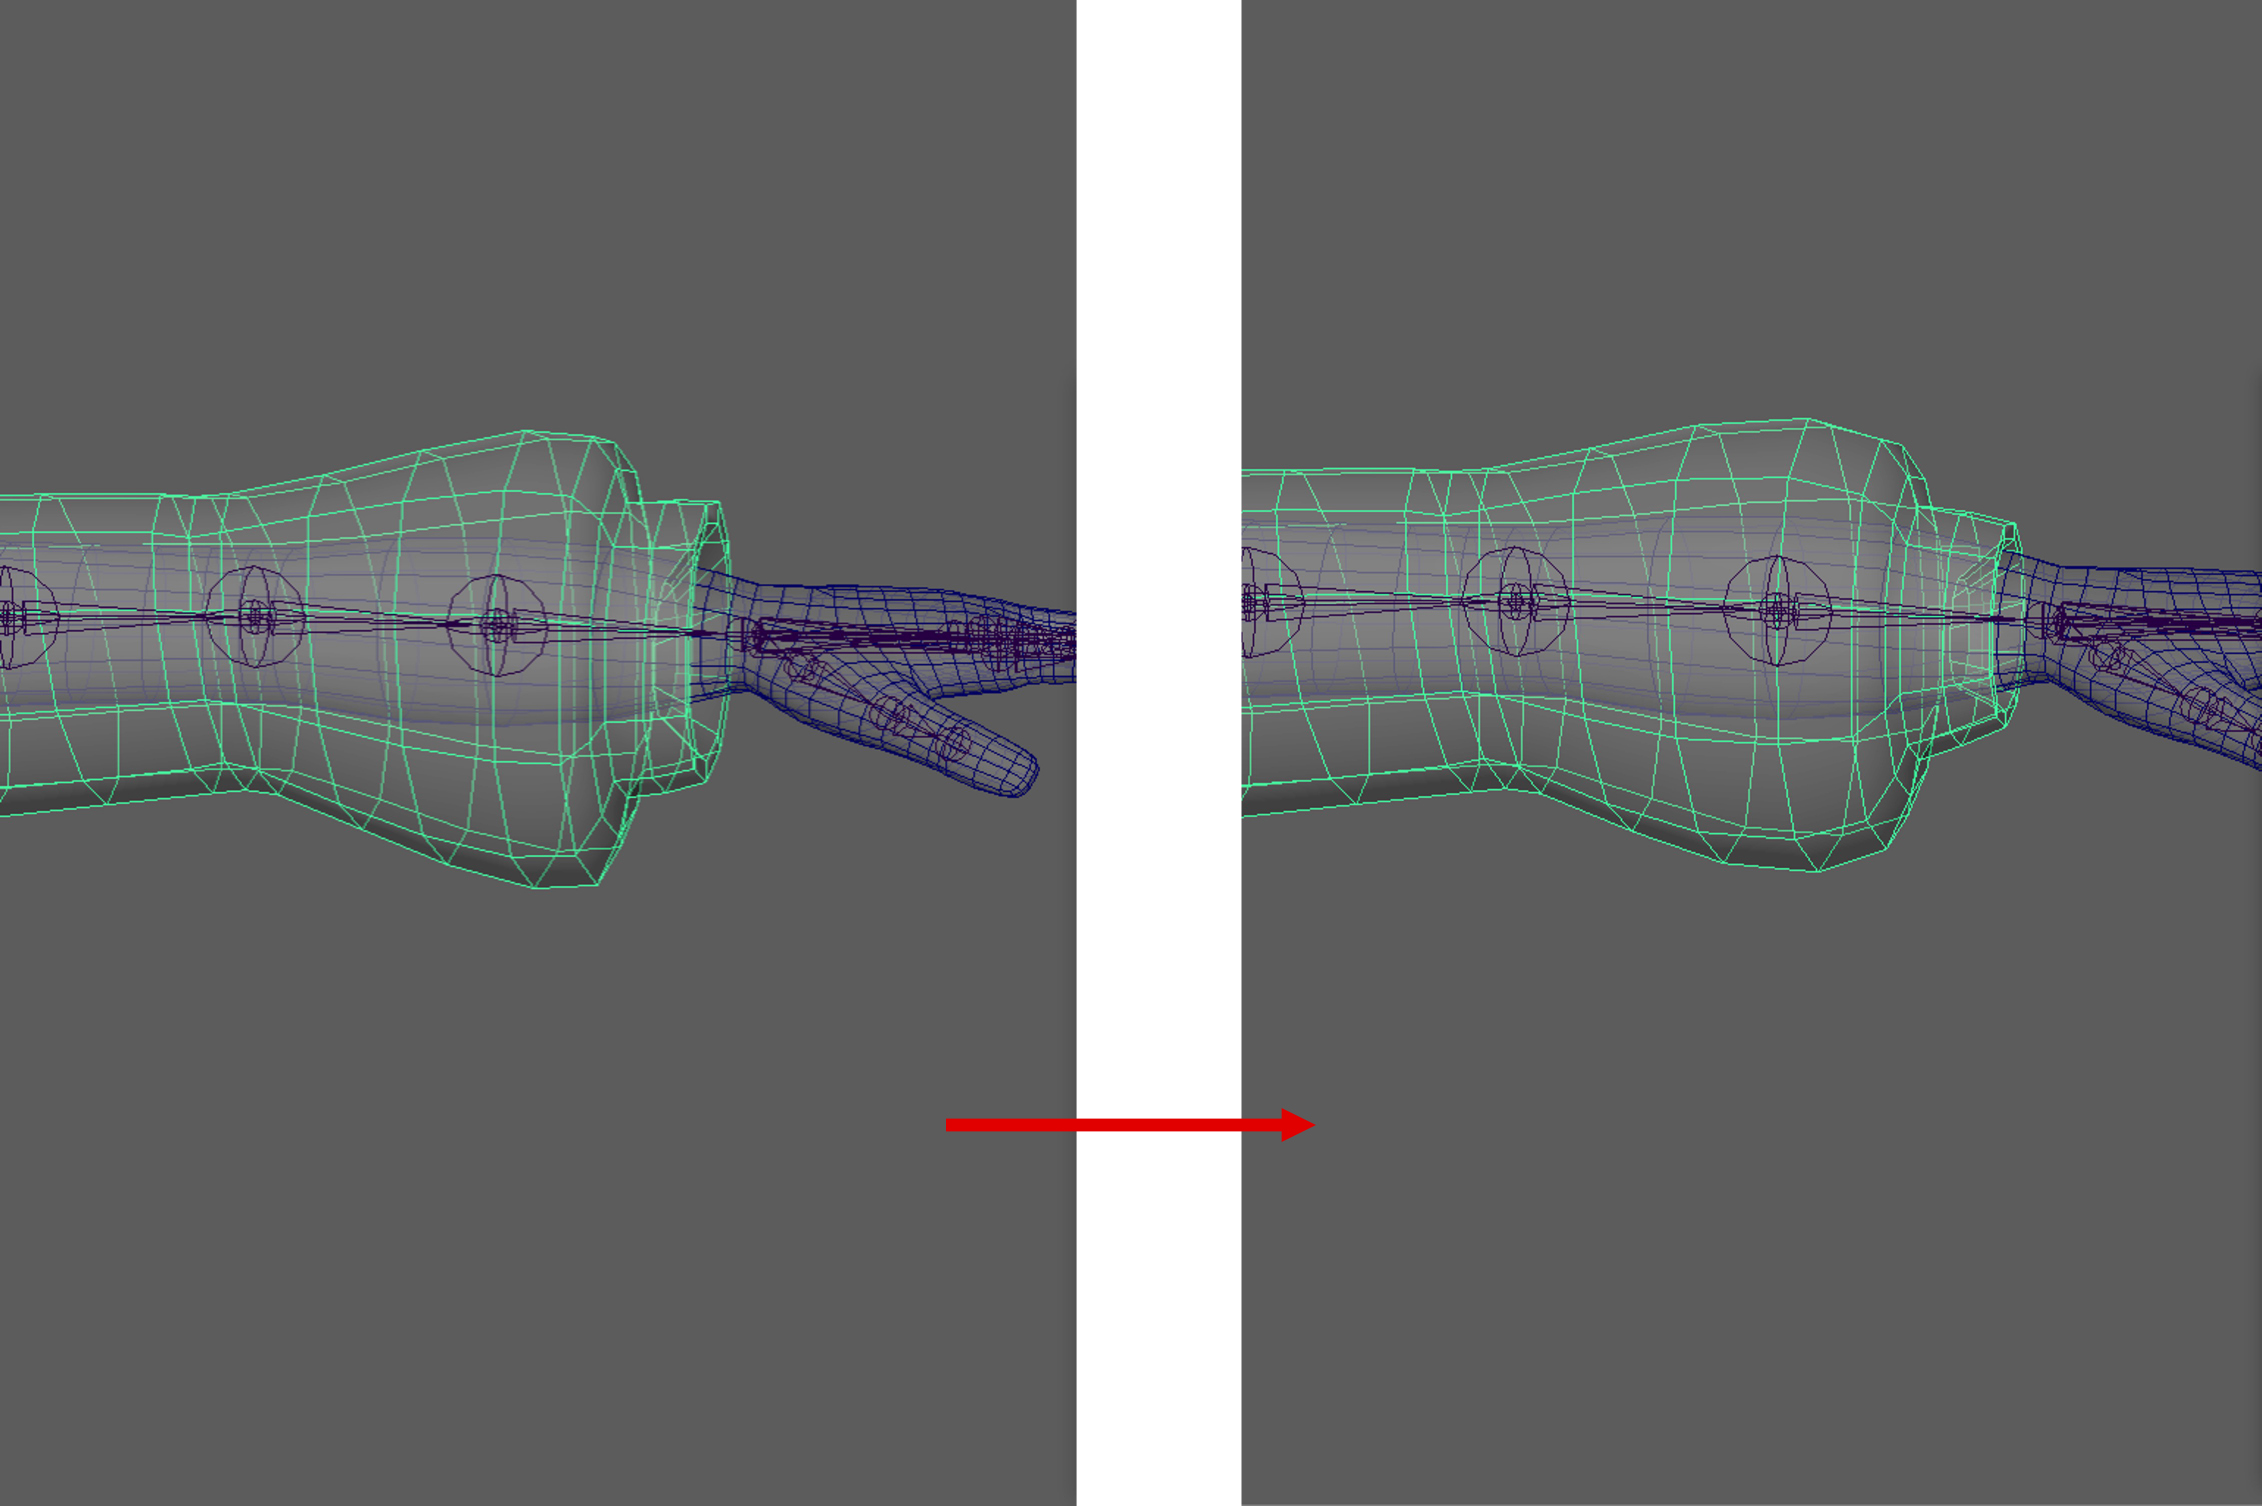
It may be hard to paint weights for the shin and upper arms. It will be easier to copy the mask weight after slightly moving the lowerArm(Leg)Twist_scale joint. (Select the vertices of the applicable area)
- In order for the shins and wrists to deform smoothly, the values of the lowerArm(Leg)Twist and lowerArm(Leg)Twist_scale must be similar to that of the mask weight.
- The weight value of the hips joint must be 0.
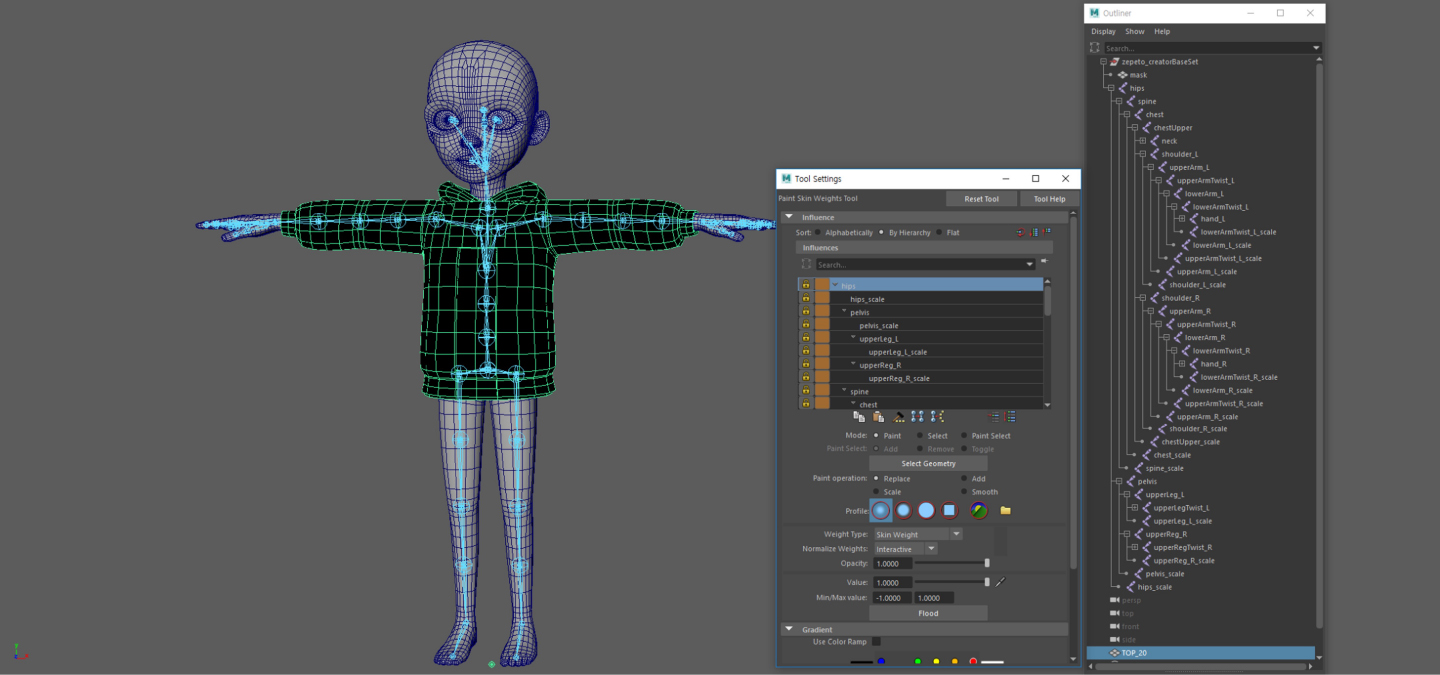
STEP 2 : Figuring weights
Move each joint one by one and edit the parts that collapse or have incorrect weights applied.
- Modify the scale value of the scale joints and check for problems upon deformation.
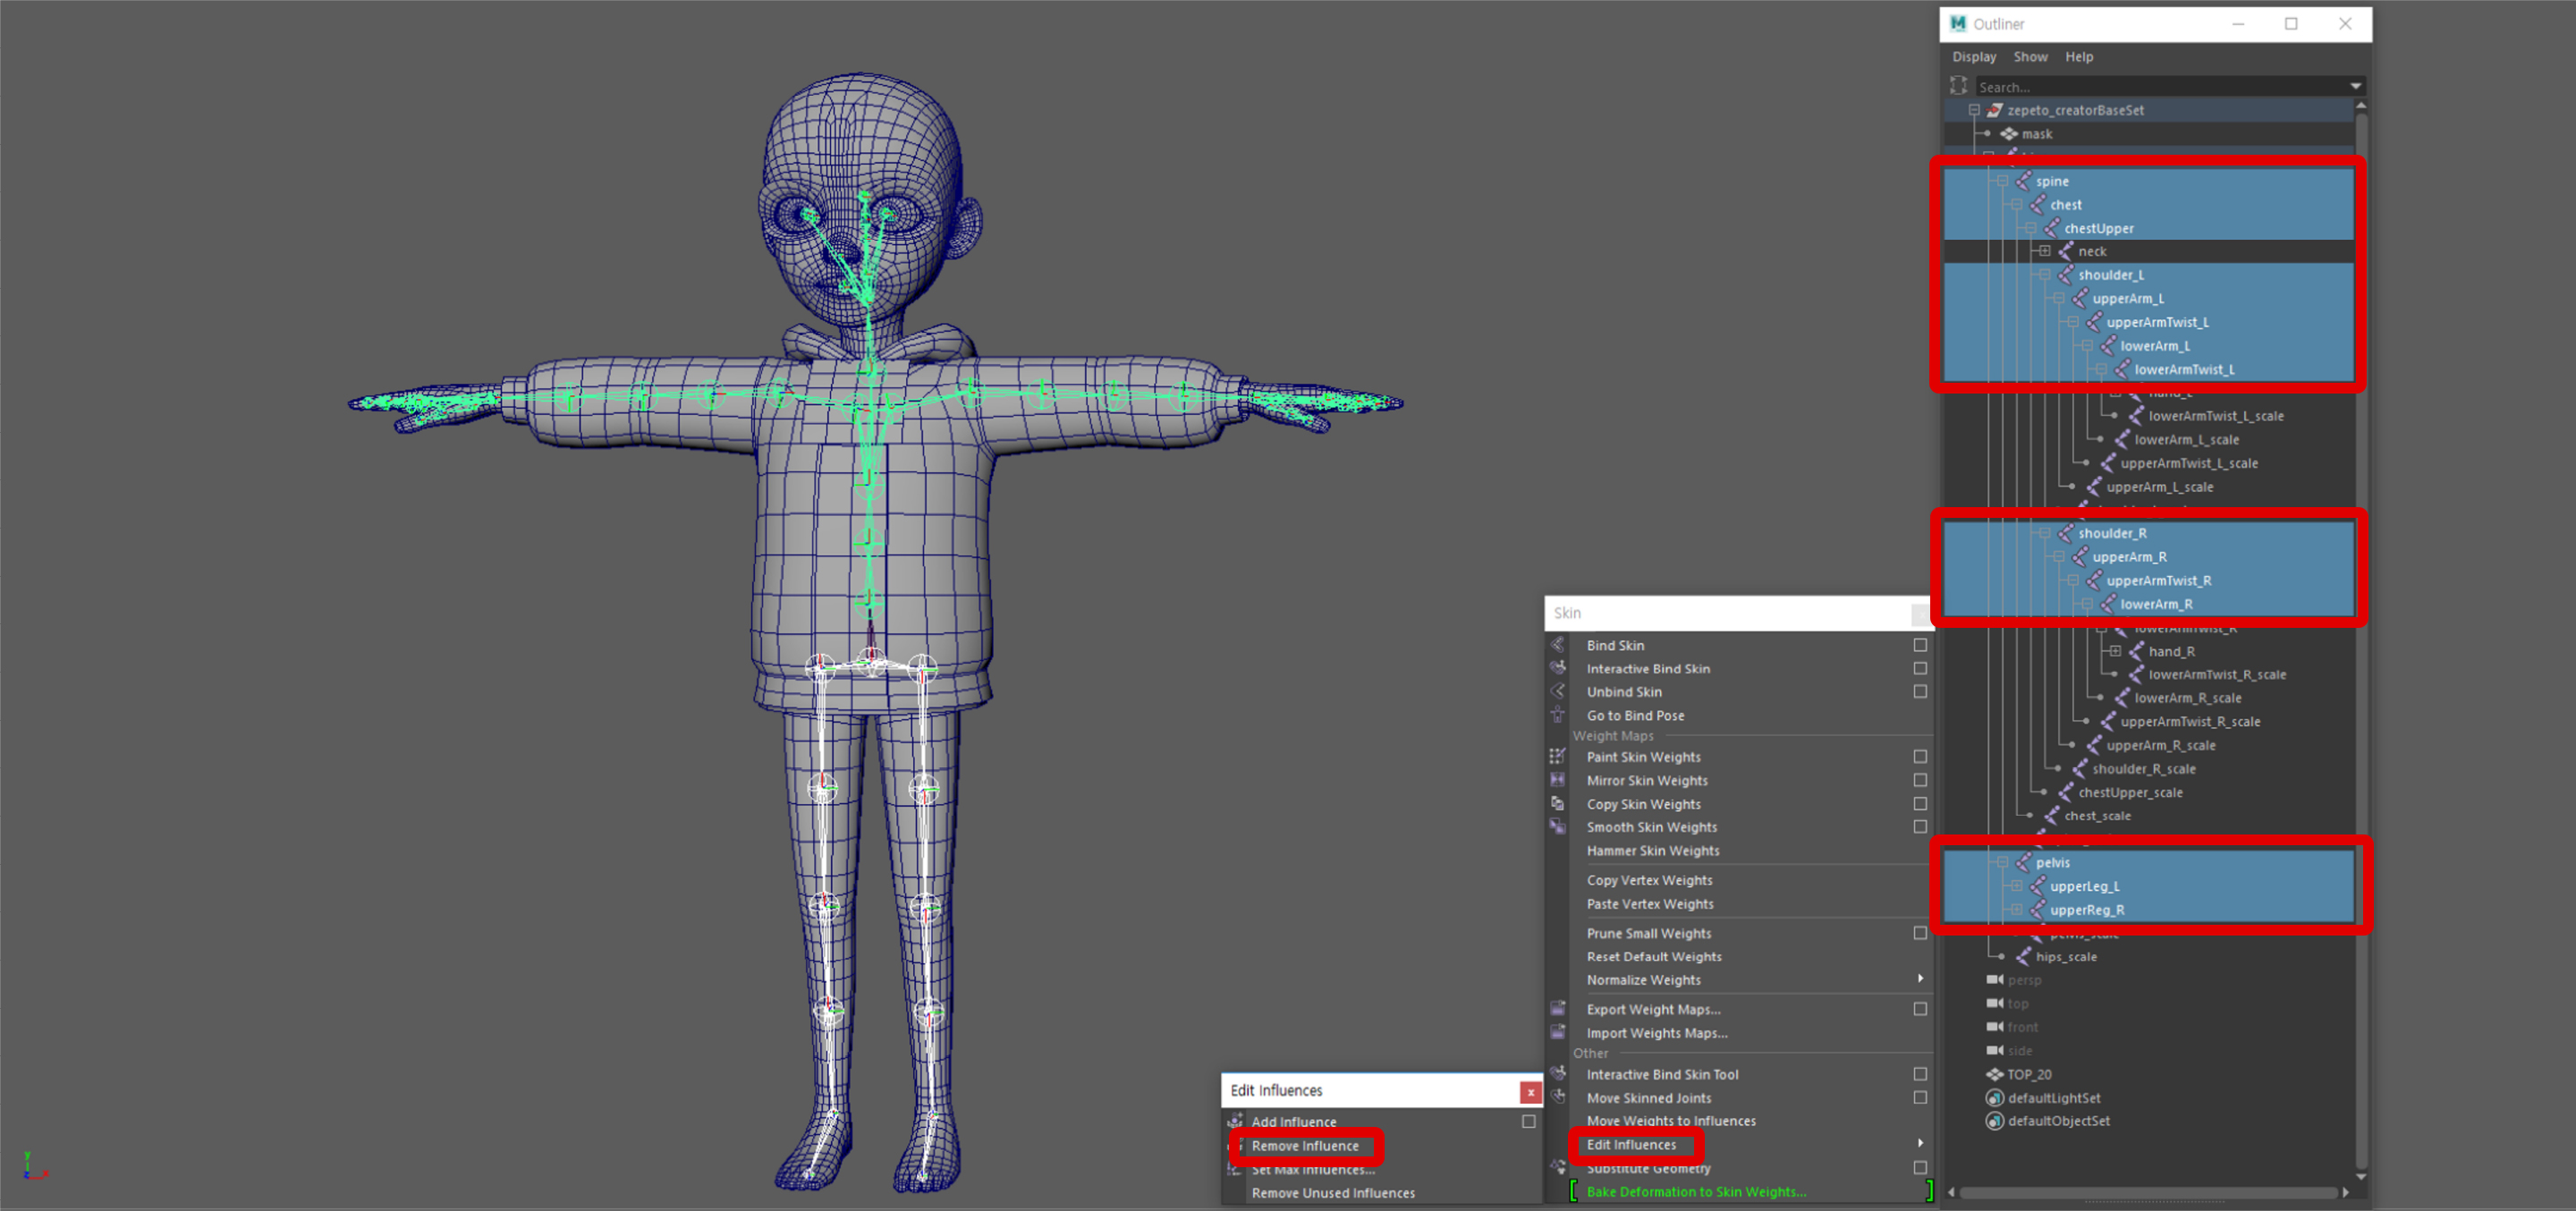
Unnecessary joints, aside from the hips joint, should be removed by Skin > Edit Influences > Remove Influences.
STEP 3 : Finishing
Do the unBindSkin process for the mask (mask).
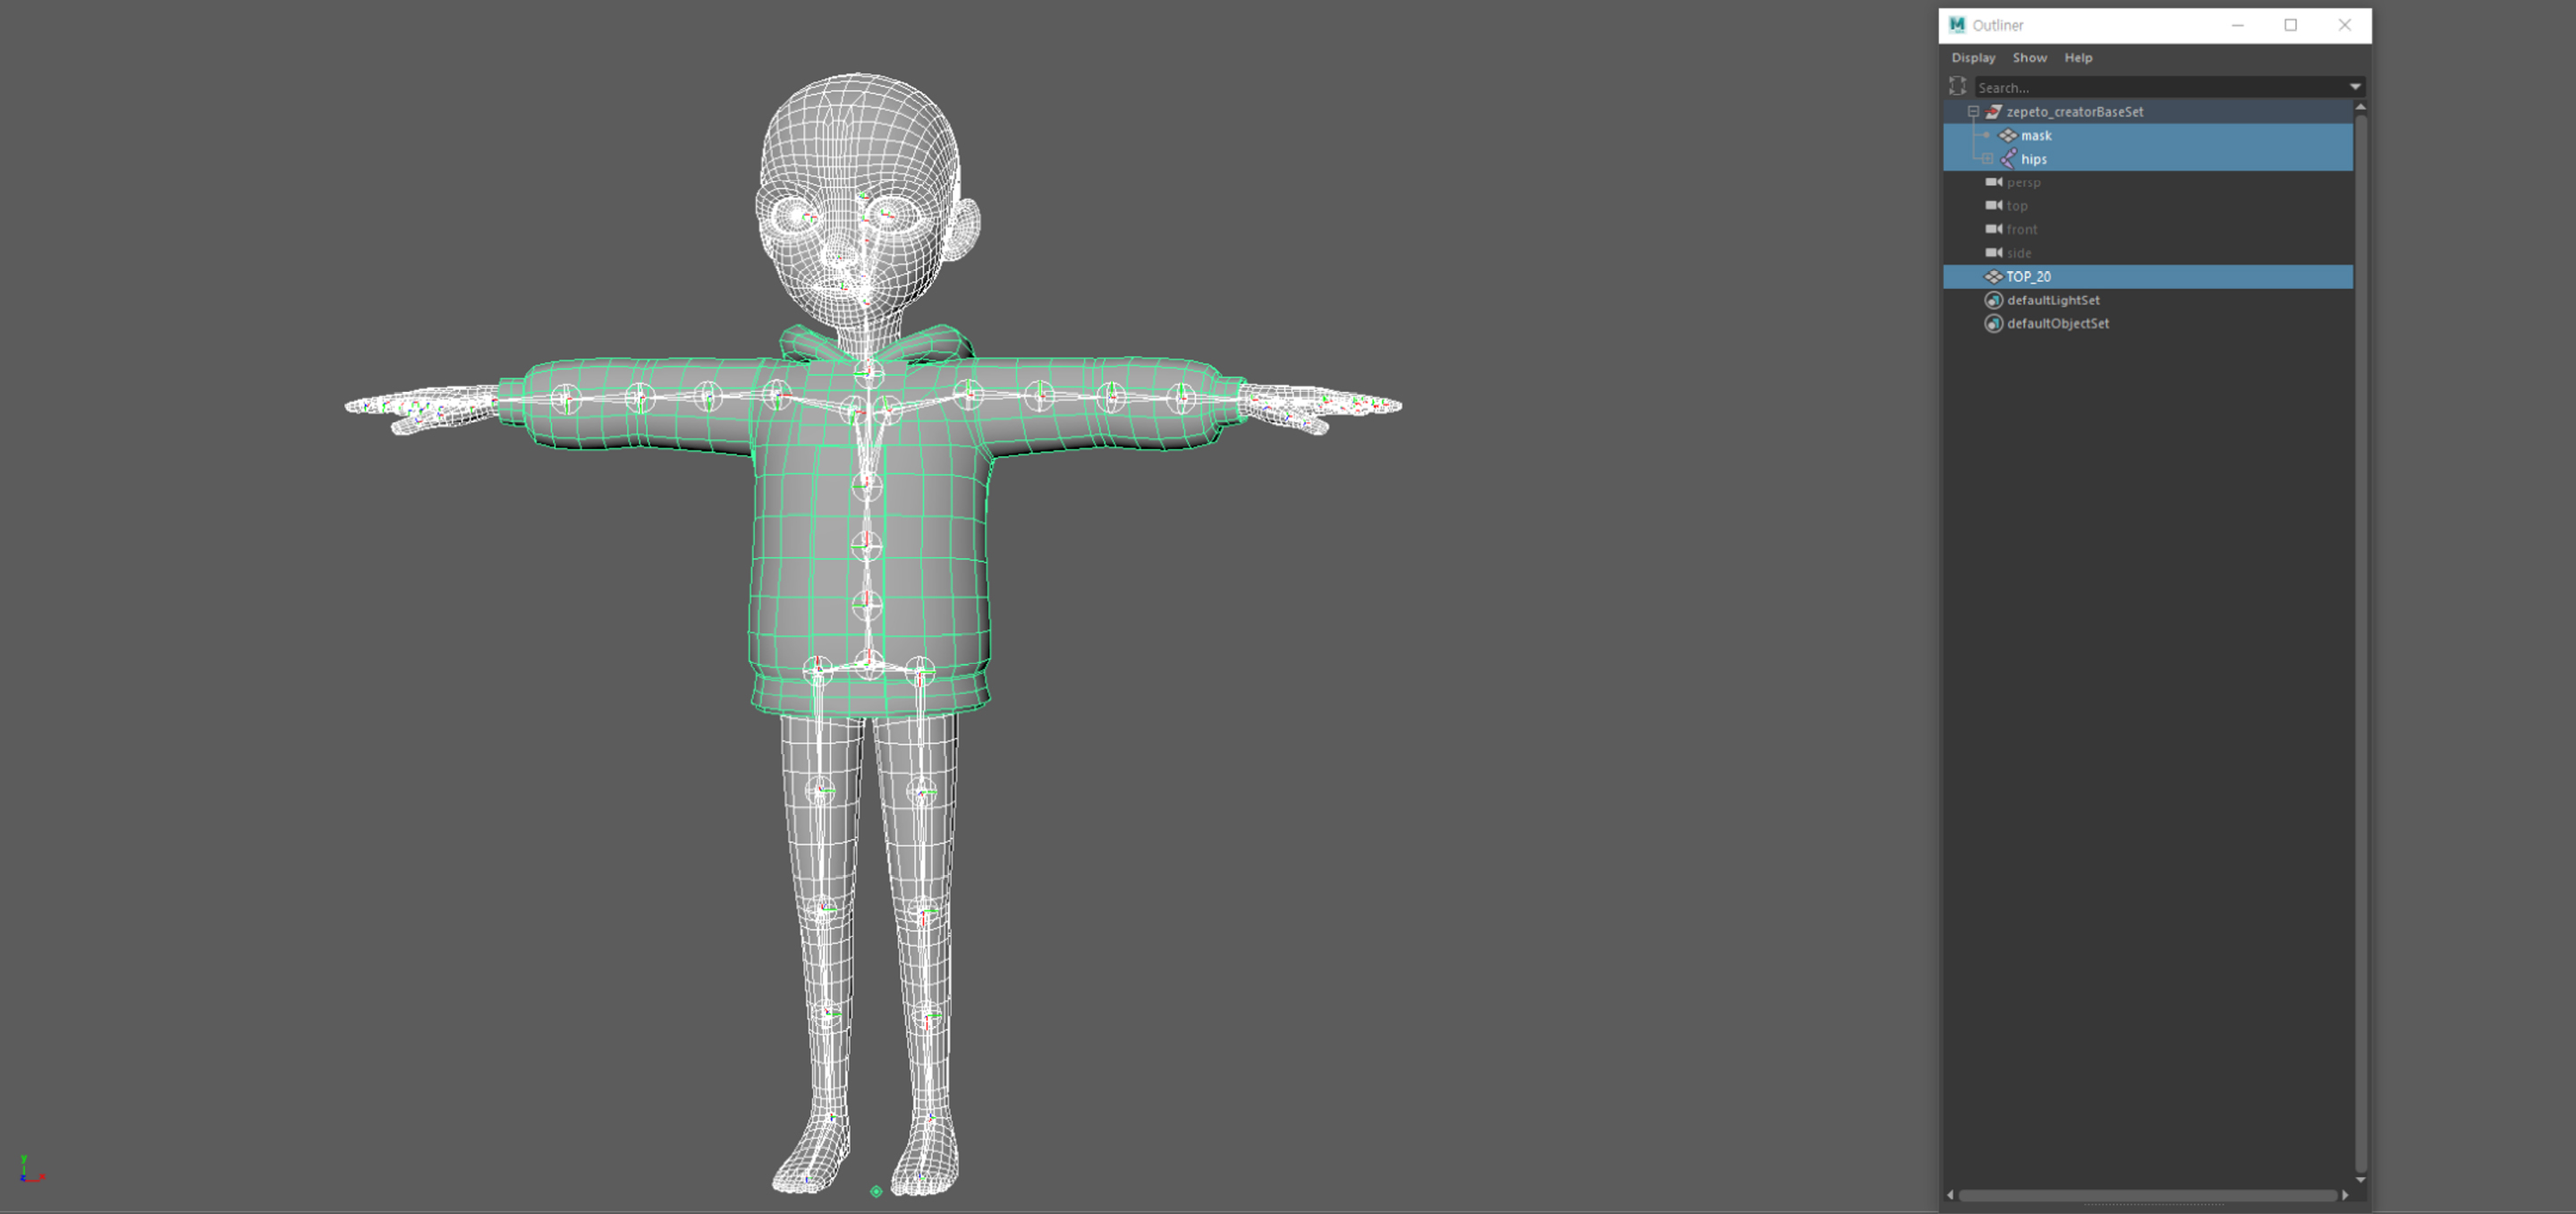
Select the clothing object, joint (hips), and mask (mask). Then click Export Selection to save them as a .fbx file.
caution
Before the next step, insert the animation key in Unity and make sure there are no issues.
Updated 4 months ago
