ZEPETO Multiplay is a module that allows multiple users to connect and play the World at the same time.
It provides the server/client development and local test environment.
Official Multiplay World Sample
- GitHub: https://github.com/naverz/zepeto-multiplay-example
- Tutorial : Multiplay Tutorial
STEP 1 : Install
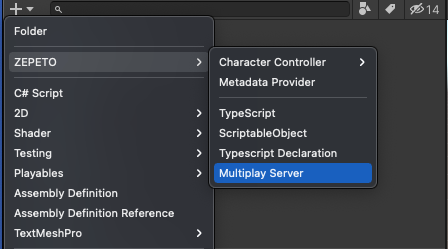
Select ZEPETO → Multiplay Server on the [+] menu at the top left of the [Project] panel, or go to Assets → Create → ZEPETO → Multiplay Server.
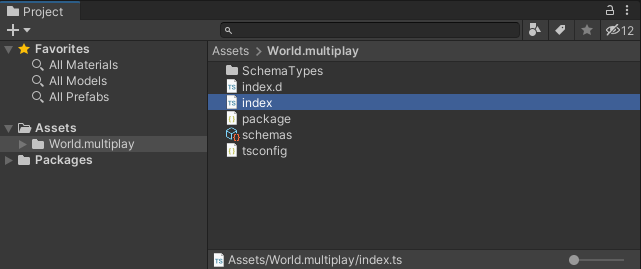
The World.multiplay package consists of the following items, and are automatically updated when the World is published.
- index.ts: Server main logic code
- schemas: Data Structure for server/client communication
Caution
Only one World.multiplay package can be created per game.
STEP 2 : Settings
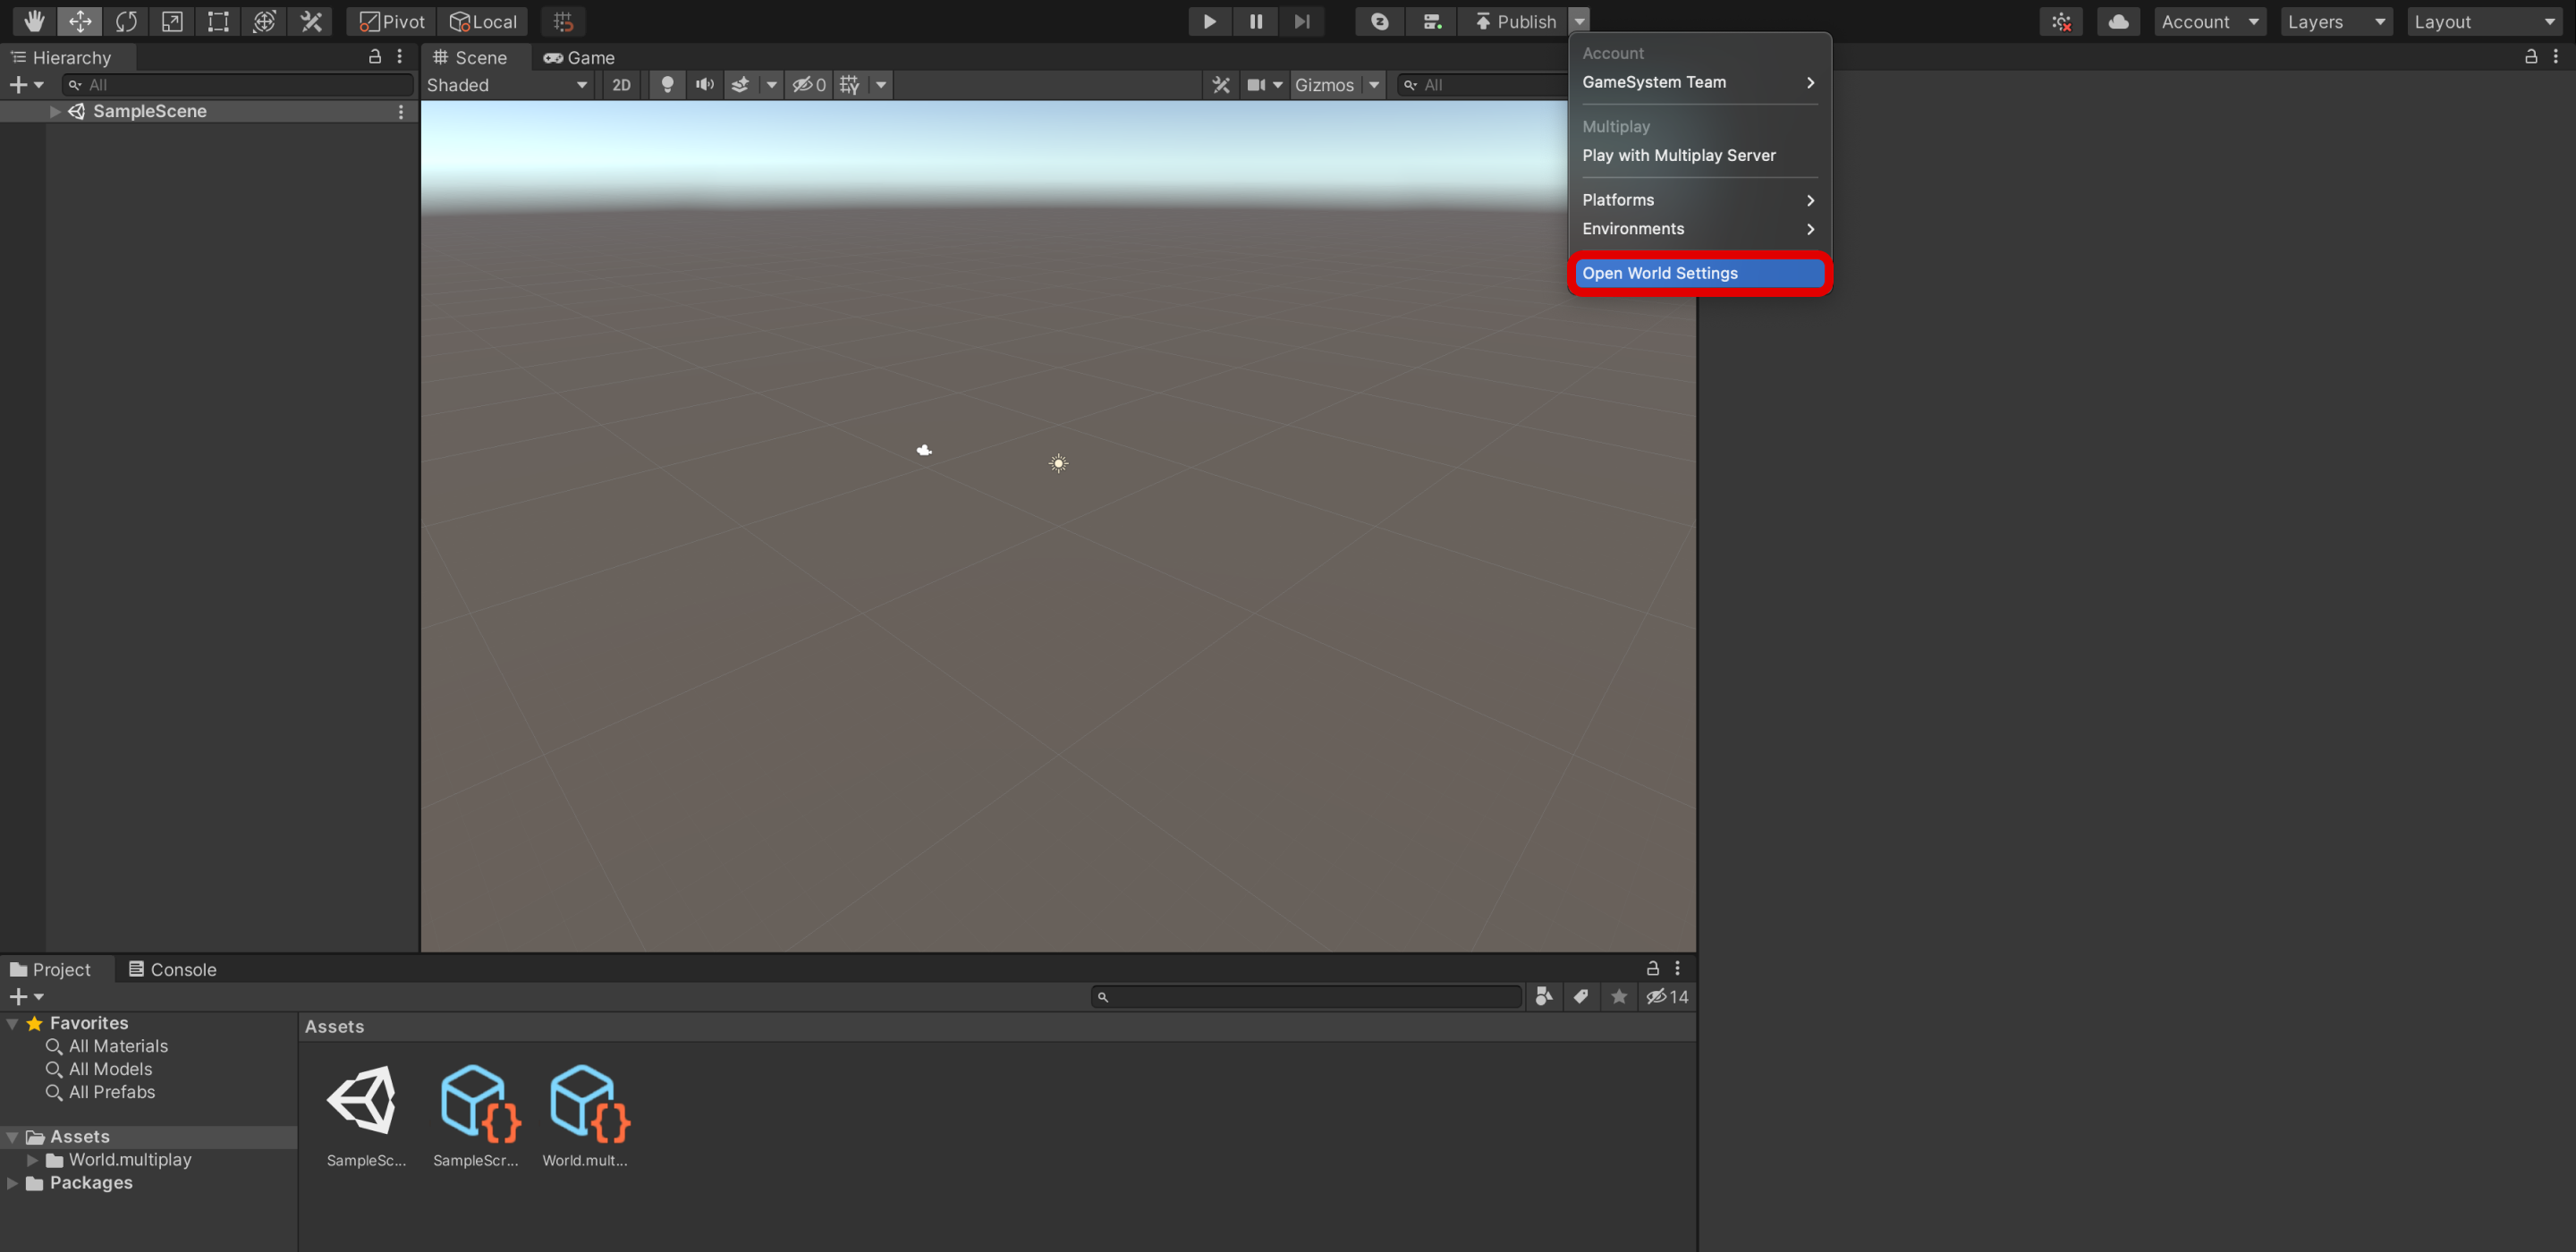
Click the [Open World Settings] as shown in the image below to set the World Setting.
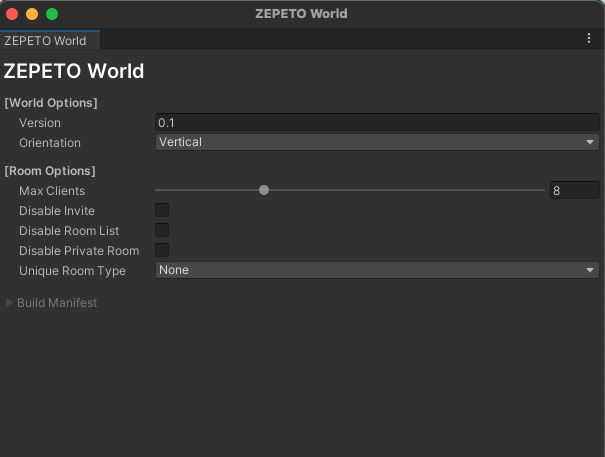
| Property | Description |
|---|---|
| Version | Enter the version of your file to be registered. |
| MaxClients | Set the maximum number of people who can access the room. |
| Orientation | Choose the orientation of the screen. |
| Disable Invite | Disables room invitation function. |
| Disable Room List | Disables the ability to check the room list. |
| Disable Private Room | Disables the ability to create a private room. |
Disable Invite
Even if the room invitation function is off, you can send invites through the test link.
STEP 3 : Running a Test Server
ZEPETO Multiplay provides a local server environment where the creator can test servers/clients during development.
To check the local server actions, select Unity top menu → Window → ZEPETO → Multiplay Server to open the server status window.
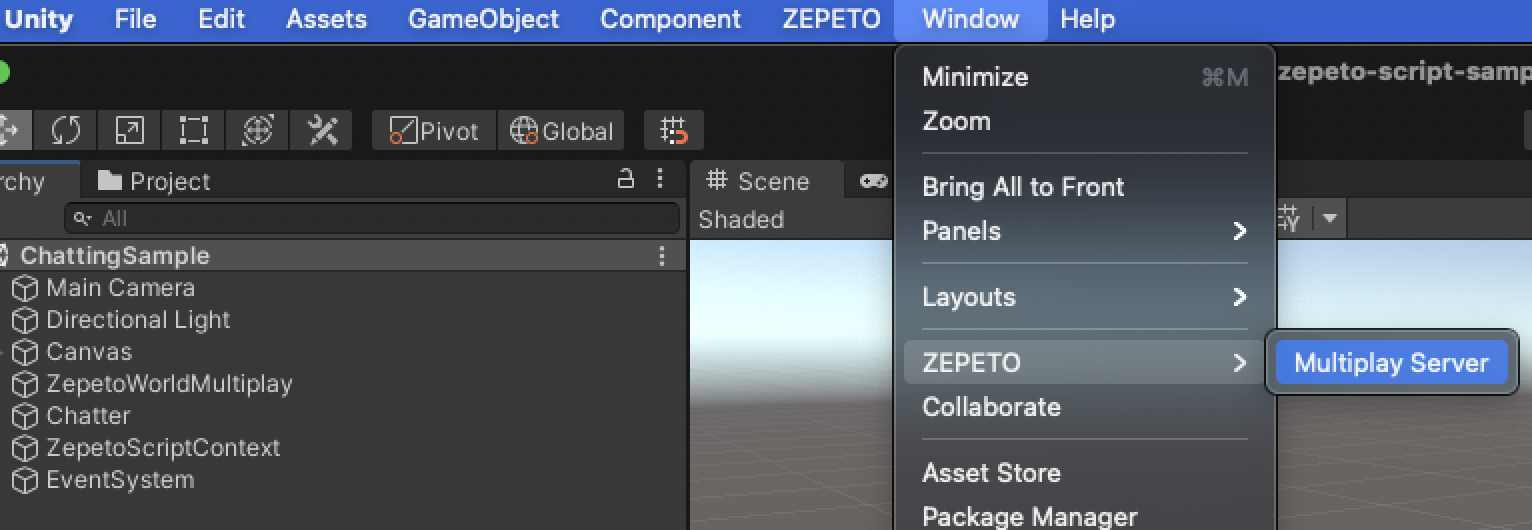
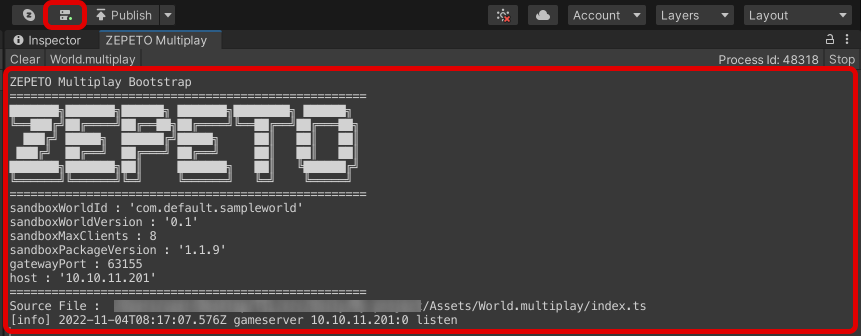
Click the server button next to the [▶︎(Play)] button at the center of the editor's screen.
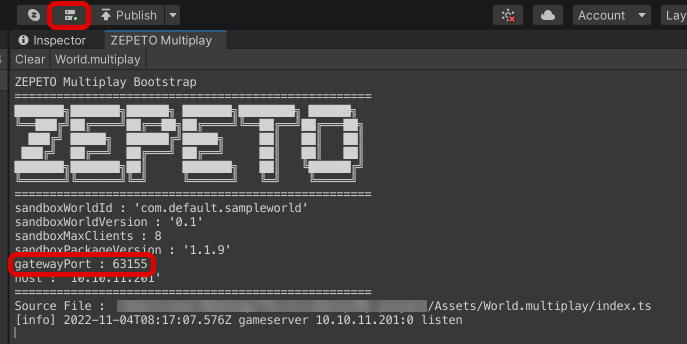
You will see the following server log at the Server Status pane.
STEP 4 : Connecting to a Client(Connecting to a Local Server)
The ZepetoWorldMultiplay component is a Multiplay Manager Class used on the Client Side.
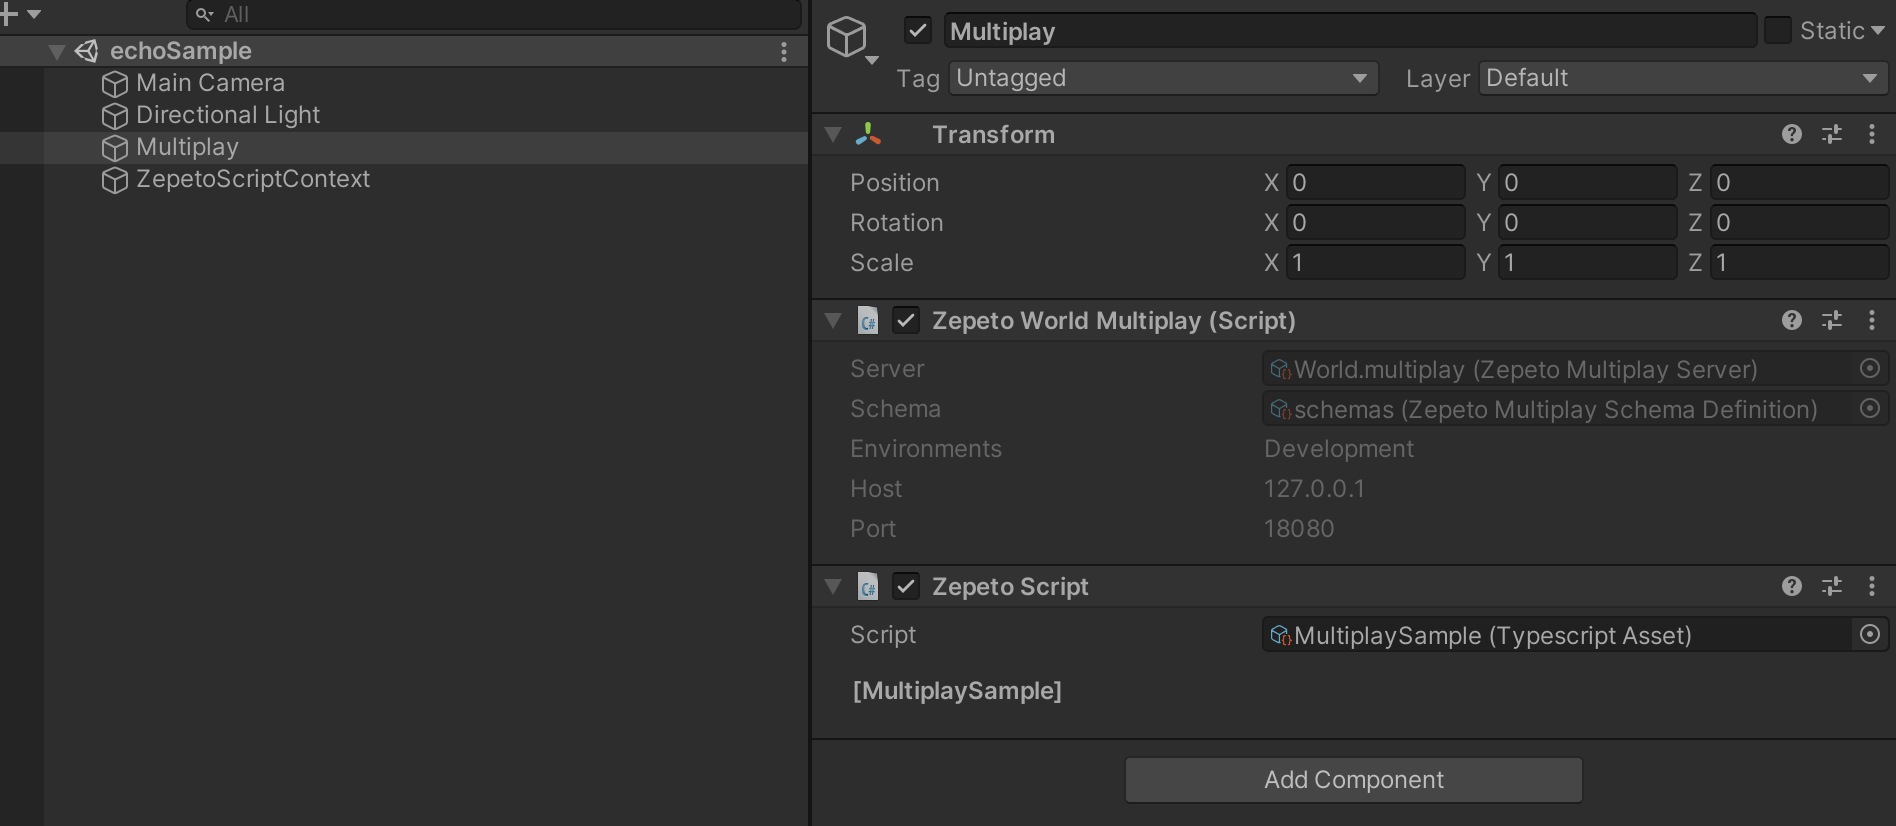
Create a GameObject in the Hierachy window, and add a ZepetoWorldMultiplay component.
The ZepetoWorldMultiplay component will automatically conect to the Multiplay Package.
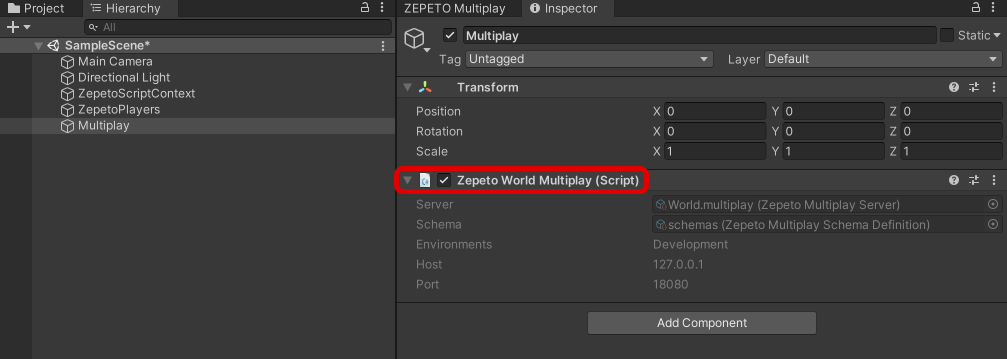
Click on the [▶︎(Play)] button at the center of the Editor screen to view the client connection log in the Server Log window.
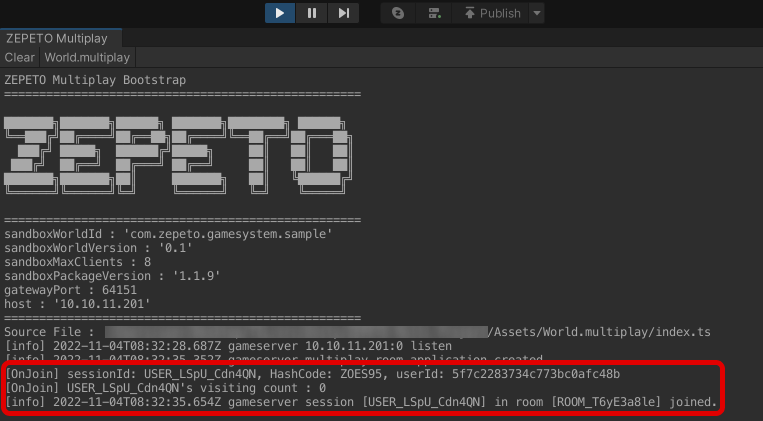
The development server runs on localhost(127.0.0.1), and the port is set when the project is first loaded.
When connecting through multi-project, set the connection environment to the following
Please refer to the following guide. [Accessing to Multiplay IP Addresses]
After the World is distributed, it will run on the ZEPETO server.
STEP 5 : Server / Client Communication Default Example
Implementing Server Logic
The index.ts file in the World.multiplay package is the code responsible for the server's main logic.
Open the index.ts file, and add the logic that is delivered to the client after receiving the message type, echo, in the onCreate() event.
Please refer to the following guide. [ZEPETO.Multiplay(Server) API]
import { Sandbox, SandboxOptions, SandboxPlayer } from 'ZEPETO.Multiplay';
import { Player } from 'ZEPETO.Multiplay.Schema';

export default class extends Sandbox {

    onCreate(options: SandboxOptions) {
        this.onMessage("echo", (client, message) => {
            console.log(`Echo onMessage from ${client.sessionId}, -> ${message}`);

            // Send current client
            client.send("echo", "echo to sender : " + message);

            // Broadcast all connected client
            this.broadcast("echo", "echo to all : " + message);
        });
    }

    onJoin(client: SandboxPlayer) {
        const player = new Player();
        player.sessionId = client.sessionId;
        player.userId = client.userId;
        const players = this.state.players;

        players.set(client.sessionId, player);

        console.log('onJoin!!!!');
    }

    onLeave(client: SandboxPlayer, consented?: boolean) {

    }
}
Implementing Client Logic
Create an add the ZEPETO script in the ZepetoWorldMultiplay GameObject used to send/receive server events as follows:
import { ZepetoScriptBehaviour } from 'ZEPETO.Script';
import { ZepetoWorldMultiplay } from 'ZEPETO.World';
import { Room } from 'ZEPETO.Multiplay';

export default class MultiplaySample extends ZepetoScriptBehaviour {

    private _multiplay: ZepetoWorldMultiplay;

    Start() {
        this._multiplay = this.gameObject.GetComponent<ZepetoWorldMultiplay>();

        this._multiplay.RoomJoined += (room: Room) => {
            console.log(`RoomCreated, my session id is ${room.SessionId}`);

            // Send message to server
            room.Send("echo", "hello ZEPETO Multiplay");

            // Add server message listener
            room.AddMessageHandler("echo", (message) => {
                // Print server message
                console.log(message);
            });
        };
    }
}
Please refer to the following guide. [Multiplay Room Message]
STEP 6 : Test Output Results
Click the [▶︎(Play)] on the center of the Editor screen to run the server/client. You should see an example of an 'echo' type message as shown below:
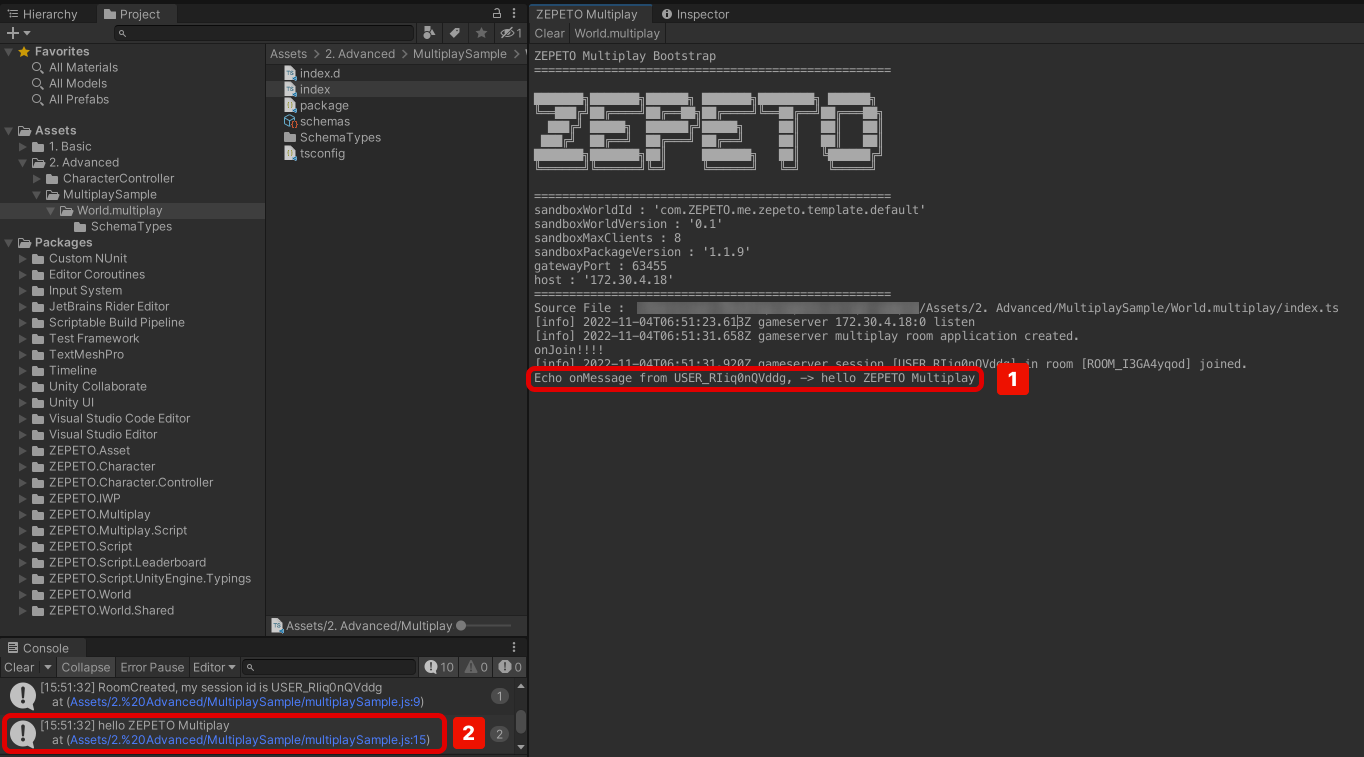
① Log of the output when client messages are received in the server.
② Log of the message received from the server from the client.
Precautions when using server code
Caution
[Use of variables within server code]
- Variables can also be declared in server code.
- However, the cache memory available in the server is currently limited to 512KB. (This may change later.)
- If it exceeds 512KB, the room may be hidden, so please develop it with this in mind.
[Use of loops within server code]
- The Loop Time Limit is set to 2 seconds (2000ms) in the server code.
- Please consider this when developing, as using blocking code or long-running loops may cause the program to fail to execute correctly due to the Loop Time Limit.
