Effect Item
❗️ caution The particle system can make items interesting, but excessive use may hurt the aesthetics and affect the app system negatively.
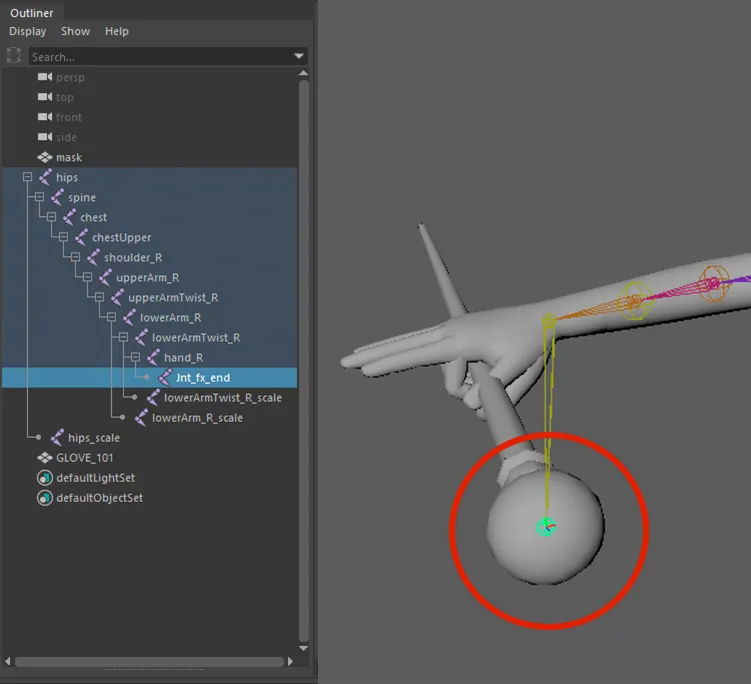
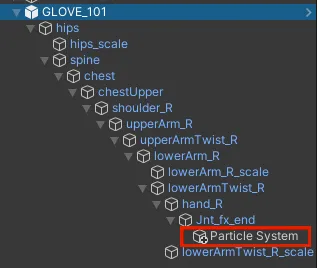
After modeling, mapping, and rigging processes are complete, choose the area to have particle effects applied. In order to have the effects follow the movement of specific areas, add an fx joint (where the effects will spawn from) on top of the existing joints.
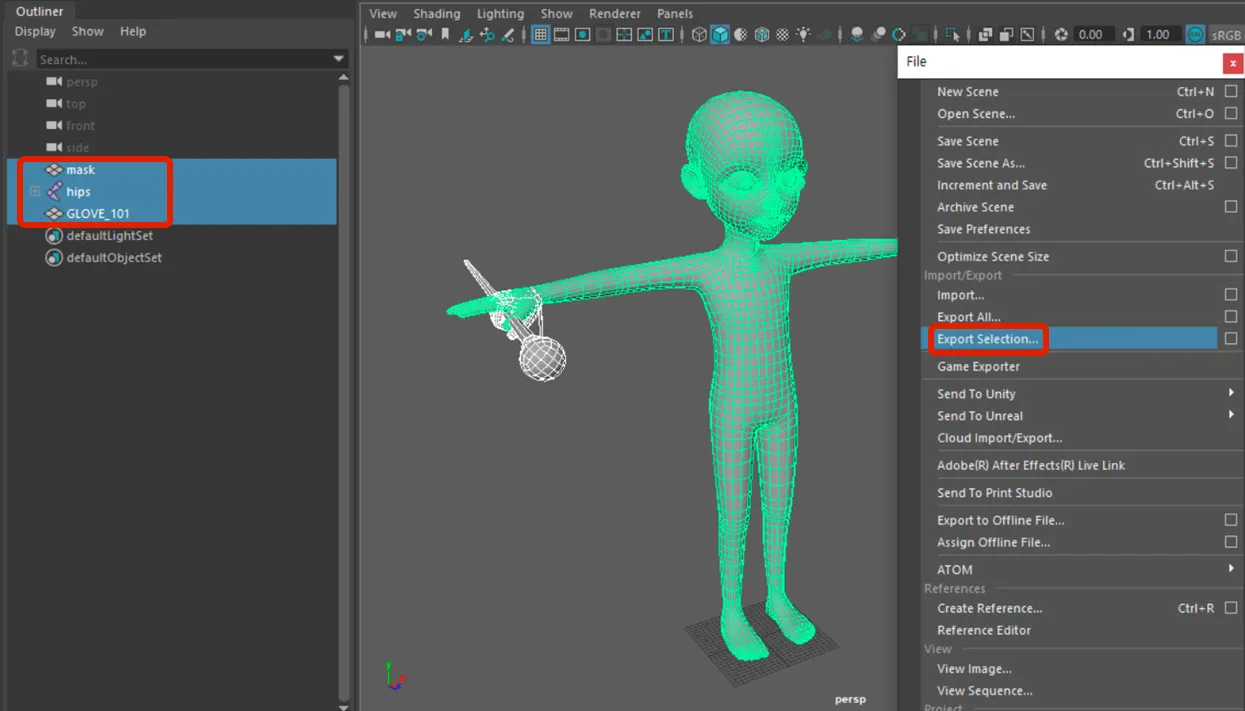
Select all masks, joints, and created objects, then select Export Selection.
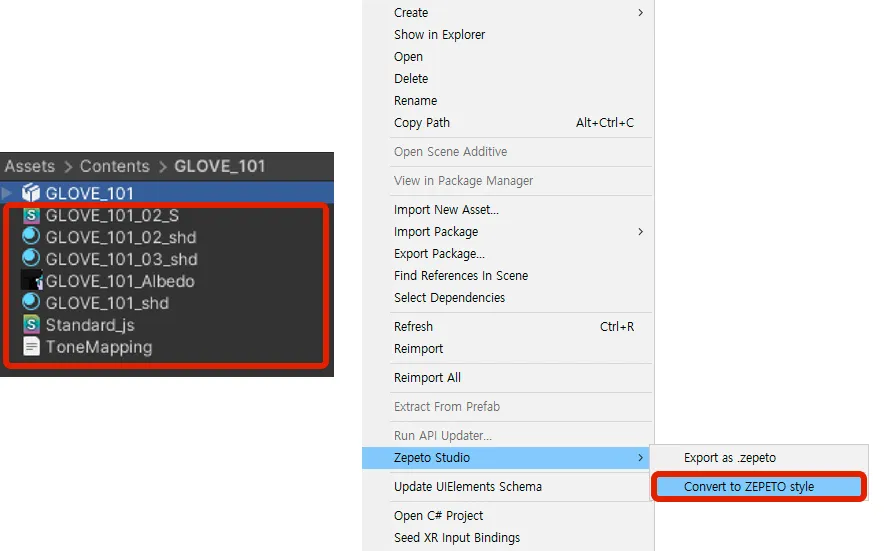
Convert the fbx file into a prefab using the Convert to ZEPETO Style menu.
In the prefab settings screen, select the fx joint and right-click > Effects > Particle System.
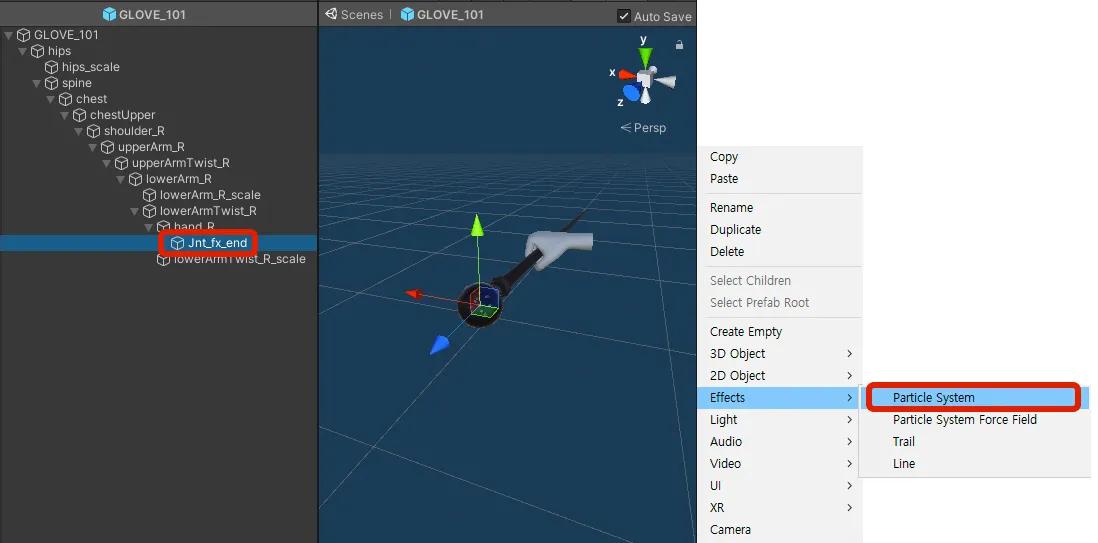
❗️ caution If you add a particle system to an existing joint instead of the newly added joint, the effect may not follow character movements.
❗️ Before making the effect, please follow the Particle System option guidelines!
- A guide to one individual Particle system Component.
- Restricted if there are more than 5 Particle system Components in one prepfab.
Particle system option
- Any option is only available within the minimum and maximum values.
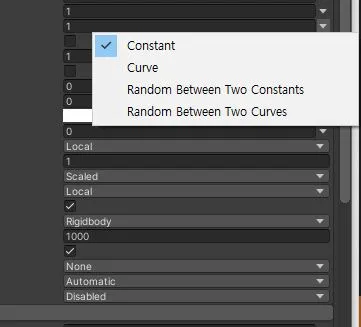
- Start Delay: Max Limit of 1 (including all meta options/ 0~1)
- Start Lifetime: Max Limit of 3 (including all meta-options/ 0~3)
- Start Speed: Max Limit of 1 (including all meta options/ -1~1)
- Start Size: Max Limit of 1 (including all meta-options/ 0~1)
- 3d Start Size: Max Limit of XYZ 1 (including all meta options/ 0~1)
- Gravity Modifier: Max Limit of 1 (including all meta options/ -1~1)
- Max particles: Max Limit of 1000
Emission
- Rate over Time / Bursts: Max Limit of 10 (including all meta options/ 0~10)
- Rate over Distance: Max Limit of 10 (all meta options included/ 0~10)
Shape
- Radius: Max Limit of 1 (including all Shape options / 0~1)
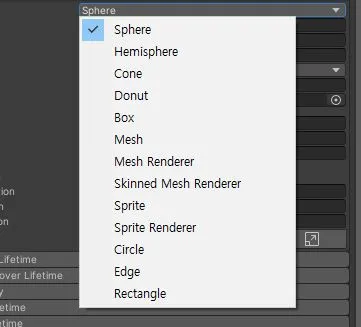

- Scale: Max Limit of 1(-1~1)
Velocity over Lifetime / Force over Lifetime
- Linear / Orbital / Offset: Value Max Limit of 1(All meta options included / -1~1)

Size over Lifetime : Max Limit of 1 (including Separate Axes (XYZ), all meta options included / 0~1)

Collision Tab Not Available
Renderer - Renderer mode
- If Mesh is used : Emission's Rate over Time/Bursts Max Limit of 5
- Stretched Billboard
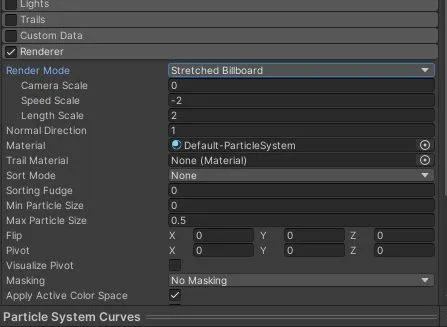
- Camera Scale / Speed Scale / Length Scale: -2~2
If there are unused Particle Systems, make sure to deactivate them or uncheck them from Renderer. They can appear unintentionally in other tasks.
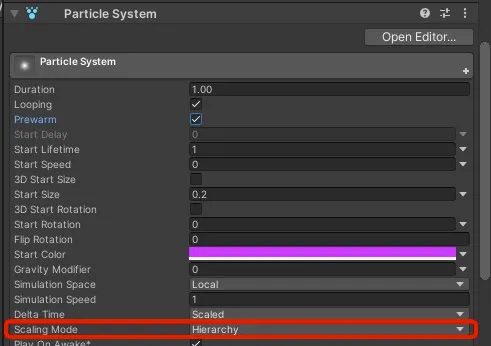
- Change the Scaling Mode to Hierarchy. This allows the effects to follow the corresponding pivot well.
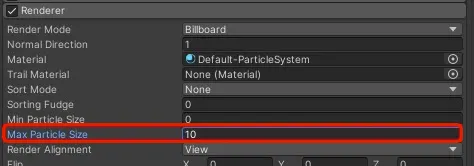
- Raise the Max Particle Size in the Renderer tab of the Particle System to 10. This can prevent the particle size value from being set excessively high.
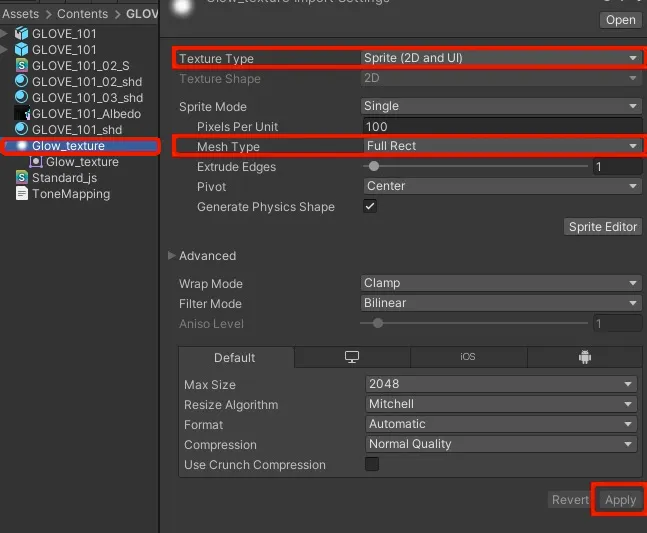
Put the texture you wish to use as particles inside the same folder as your item and change the texture type options as below.
- Texture Type : Sprite (2D and UI)
- Mesh Type : Full Rect
Select Texture Sheet Animation from the Particle System options. Change the mode to Sprites and put the corresponding texture in the empty slot that appears below.

Once you are done creating the effect, you must apply it to the prefab.
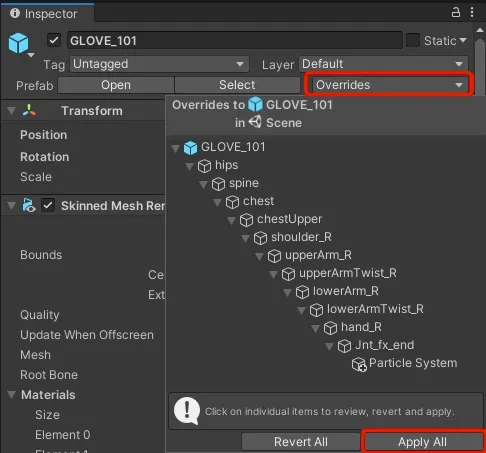
- Effects that are not applied to the prefab are displayed on the list as white.
In the Inspector window of the prefab you wish to apply the effects to, go to the Overrides tab and click Apply All on the bottom.
- If the effect in the list changes to the same color as the prefab, the particle has been correctly applied.
Play the Unity scene, and make sure the Prefab is displaying properly.
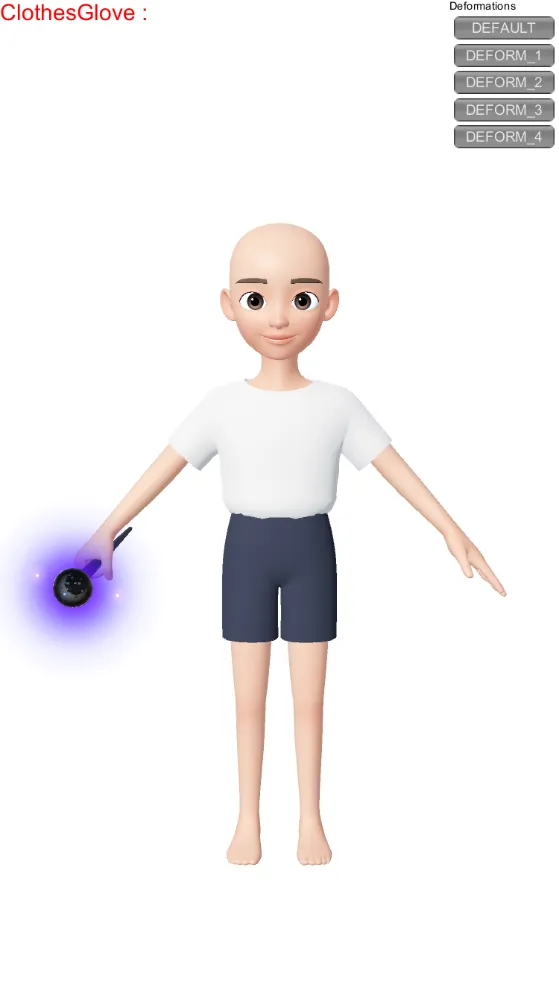
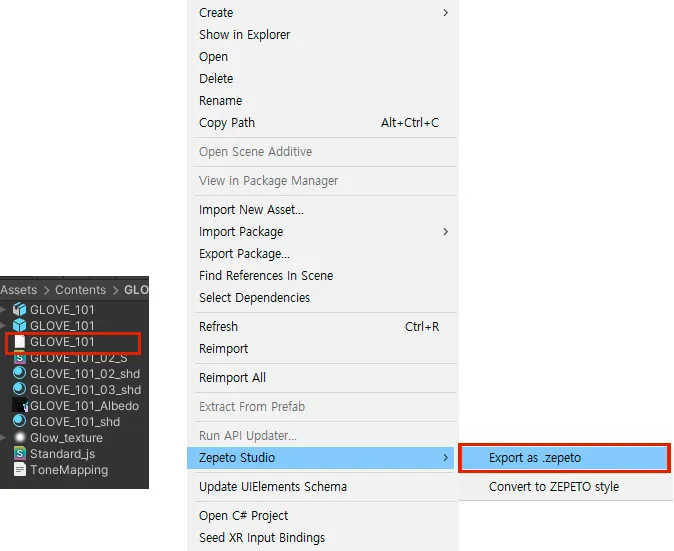
After completing the character preview, right-click the prefab file and click ZEPETO Studio > Export as .ZEPETO. The file with ZEPETO extension will be created, which would be the final step before it is uploaded to ZEPETO Studio.
