사용자가 보유한 아이템 정보 가져오기
9 분
현재 연결된 사용자의 카테고리별 아이템 정보를 가져오기 위해 ZEPETO.Module.Shop API를 사용할 수 있습니다.
설치
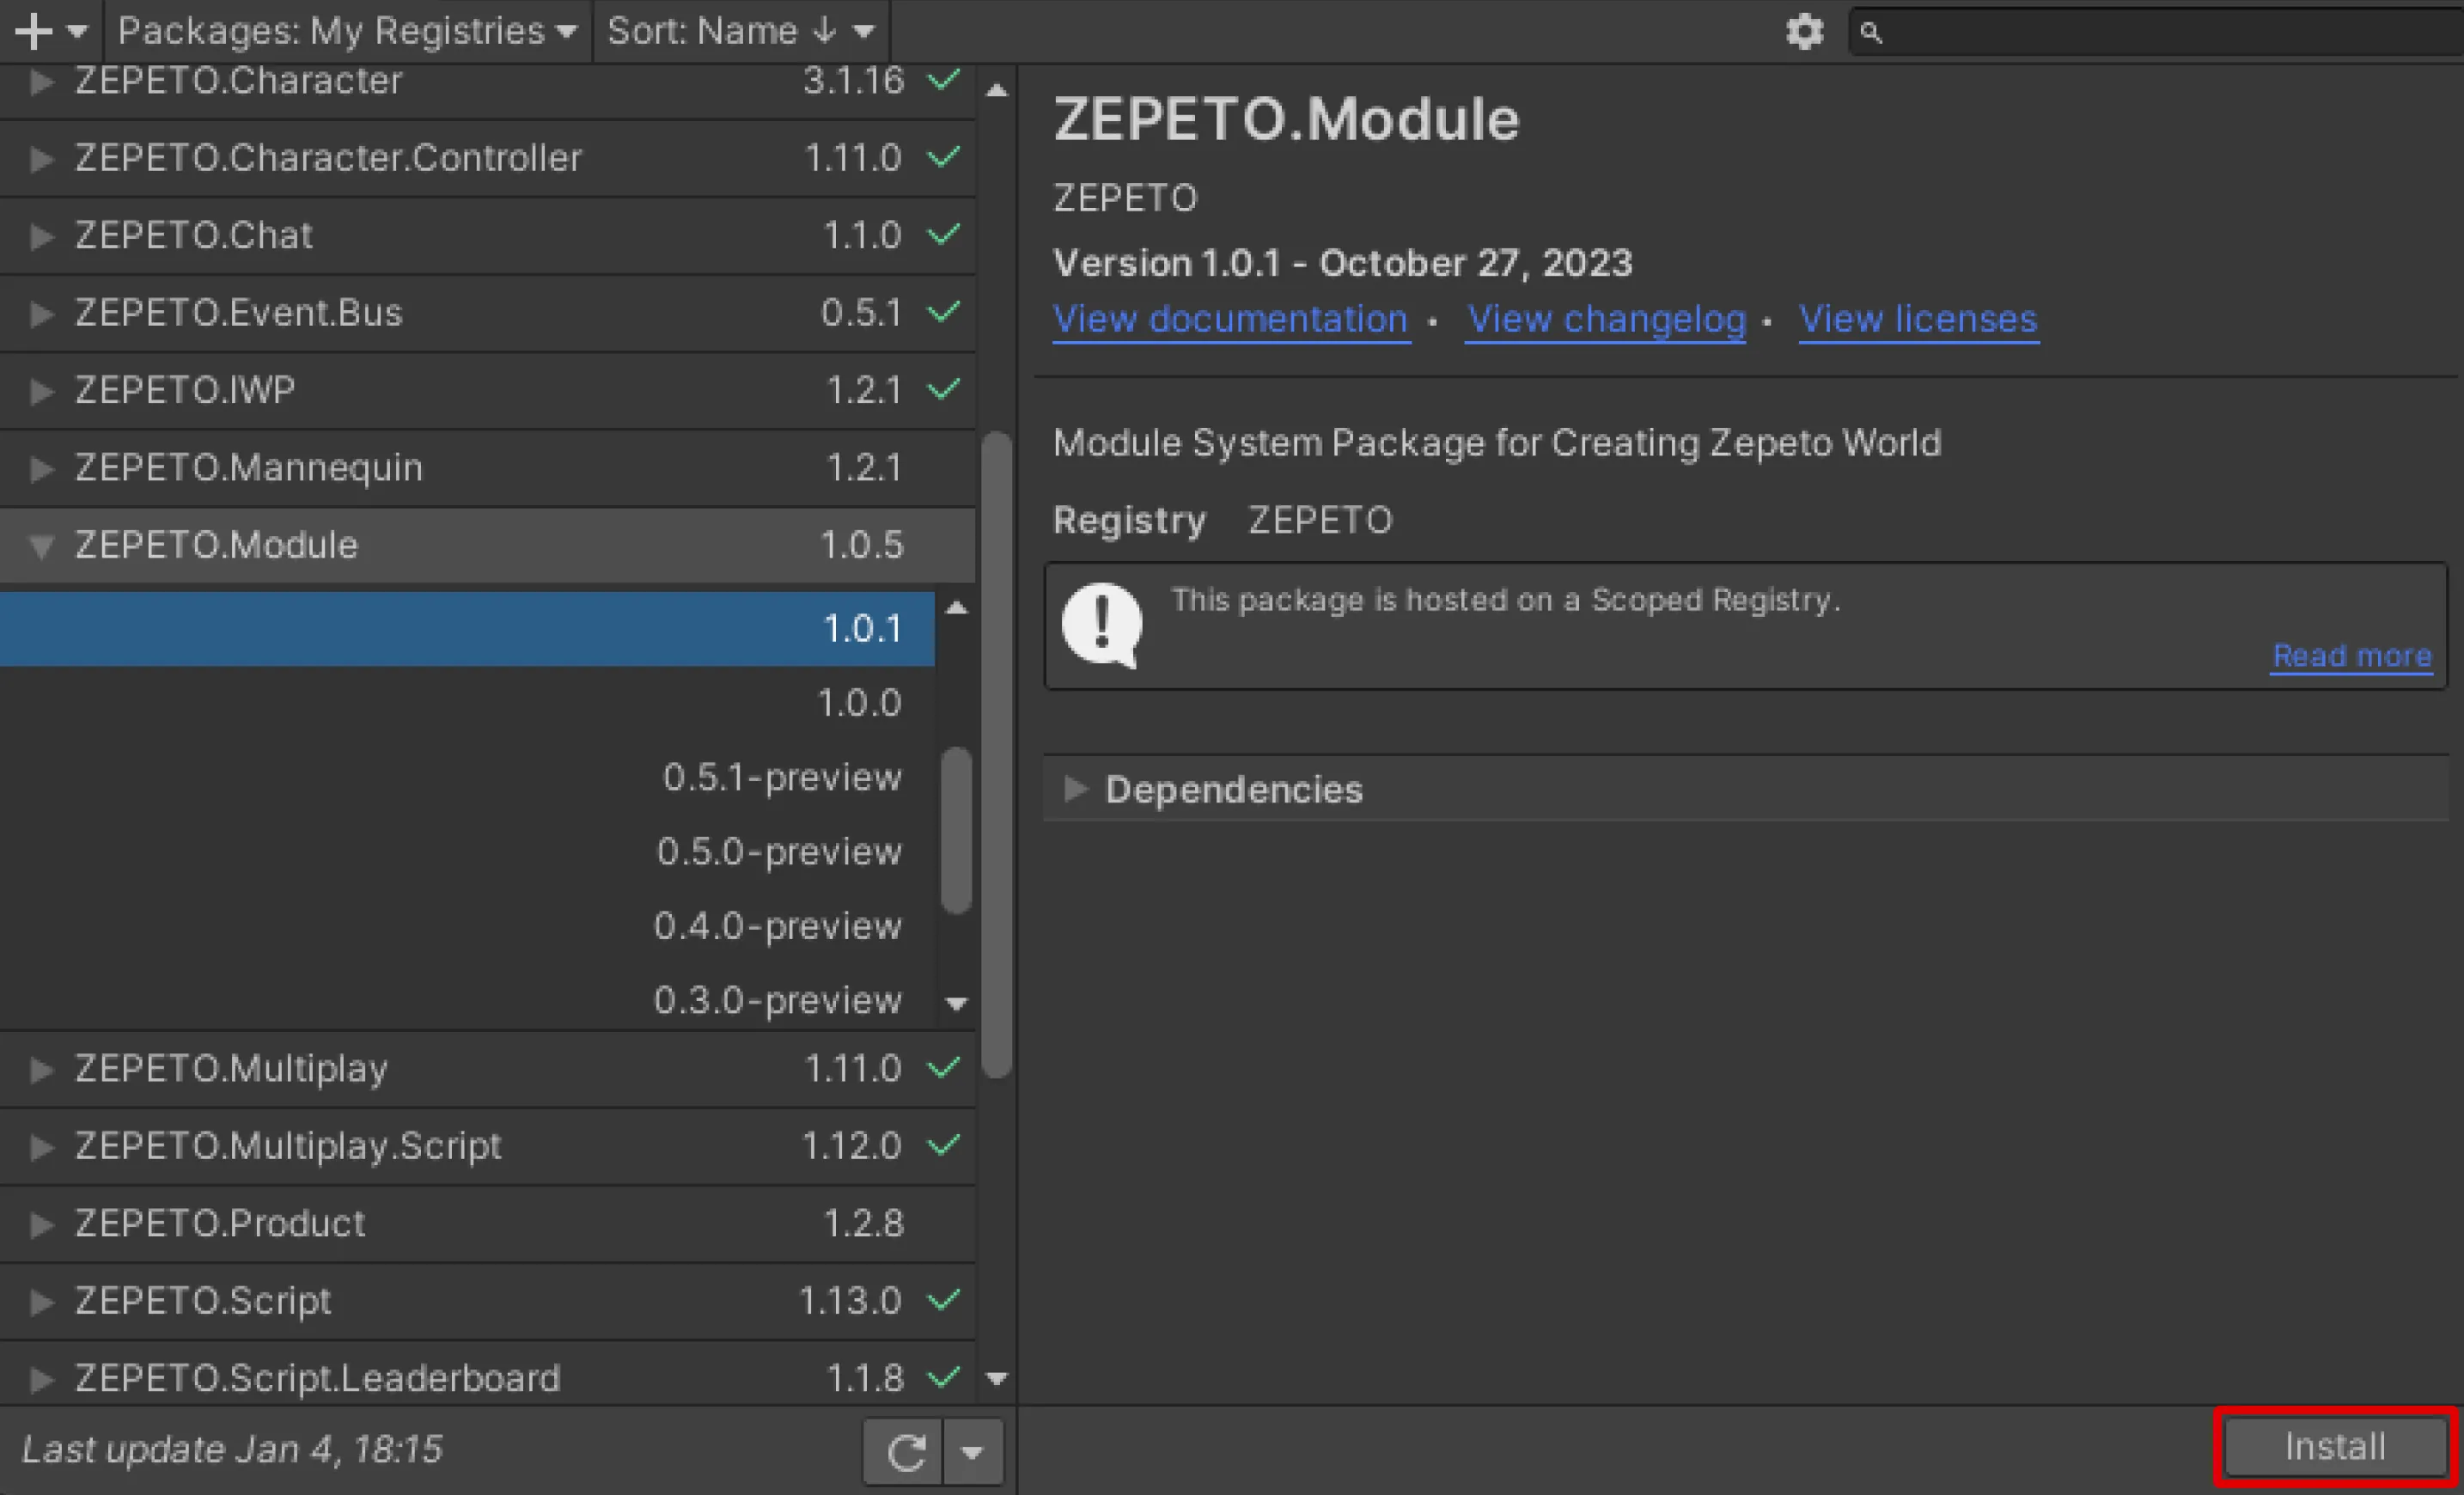
창 → 패키지 관리자 → 먼저 ZEPETO.World 패키지 1.21.14 버전 이상을 설치하십시오.
그 다음 ZEPETO.Module 패키지 1.0.7 버전 이상을 설치하십시오.
ZEPETO.Module.Shop API
ZEPETO.Module.Shop API에 관심이 있다면, 문서를 참조하십시오:
📘 다음 가이드를 참조하십시오. [ZEPETO.Module.Shop API]
아이템 정보 출력 예시
- 프로젝트 > 생성 > ZEPETO > TypeScript가 생성되었고 이름이 MyItemList로 변경되었습니다.
- 아래와 같이 샘플 스크립트를 작성하세요.
import { ZepetoScriptBehaviour } from 'ZEPETO.Script'
import { ShopService, Category, ItemKeyword } from 'ZEPETO.Module.Shop'
import { ZepetoPropertyFlag } from 'Zepeto'
import { Texture2D, WaitUntil } from 'UnityEngine'
import { RawImage } from 'UnityEngine.UI'
import { Item } from 'ZEPETO.Module.Content'

export default class MyItemList extends ZepetoScriptBehaviour {

    public thumbnailImage: RawImage;

    Start() {
        this.StartCoroutine(this.CoGetMyCategory());
    }

    *CoGetMyCategory() {
        var requestCategory = ShopService.GetMyCategoryAsync();
        yield new WaitUntil(() => requestCategory.keepWaiting == false);

        if (requestCategory.responseData.isSuccess) {
            let categoryInfo = requestCategory.responseData.category;
            console.log(`[카테고리 정보] ${categoryInfo.displayName} - 길이 : ${categoryInfo.categories.Length}`);

            let categories: Category[] = categoryInfo.categories;

            for (const category of categories) {
                console.log(`[카테고리 표시 이름] ${category.displayName} `);
                //카테고리 키워드는 ShopService.GetMyContentItemListAsync 함수의 인수로 사용됩니다.
                console.log(`[카테고리 키워드] ${category.keyword} `);
            }
        }
        this.StartCoroutine(this.CoGetMyItem());
    }

    *CoGetMyItem() {
        var requestItemList = ShopService.GetMyContentItemListAsync(ItemKeyword.all, null);

        yield new WaitUntil(() => requestItemList.keepWaiting == false);

        if (requestItemList.responseData.isSuccess) {
            let items: Item[] = requestItemList.responseData.items;

            // GetMyContentItemListAsync()의 결과로 받은 아이템 수.
            console.log(items.length);

            for (let i = 0; i < items.length; ++i) {
                const property: ZepetoPropertyFlag = items[i].property;
                // 아이템 ID와 아이템 속성
                console.log(`[콘텐츠 아이템] (id): ${items[i].id} | (property): ${property}`);

                // 아이템 썸네일을 rawImage의 텍스처로 설정
                var textureReq = items[i].GetThumbnailAsync();
                yield new WaitUntil(() => textureReq.keepWaiting == false);
                let thumbnailTexture: Texture2D = textureReq.responseData.texture;
                this.thumbnailImage.texture = thumbnailTexture;

            }
        }
    }
}
- 스크립트 설명
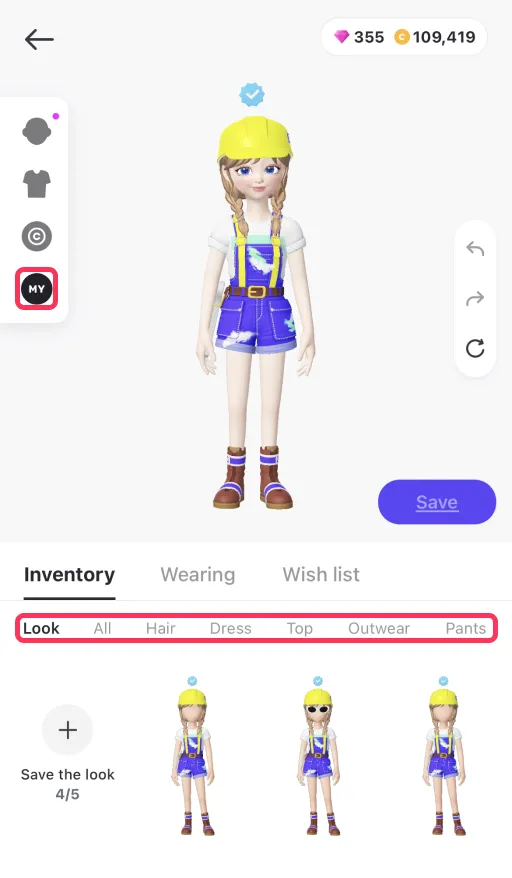
- 내 아이템 탭 정보 가져오기
- ShopService.GetMyCategoryAsync()를 호출하여 내 아이템 탭의 아이템 카테고리를 확인합니다.
- 응답을 성공적으로 받으면 responseData 속성을 통해 CategoryResponse 객체에 접근할 수 있습니다.
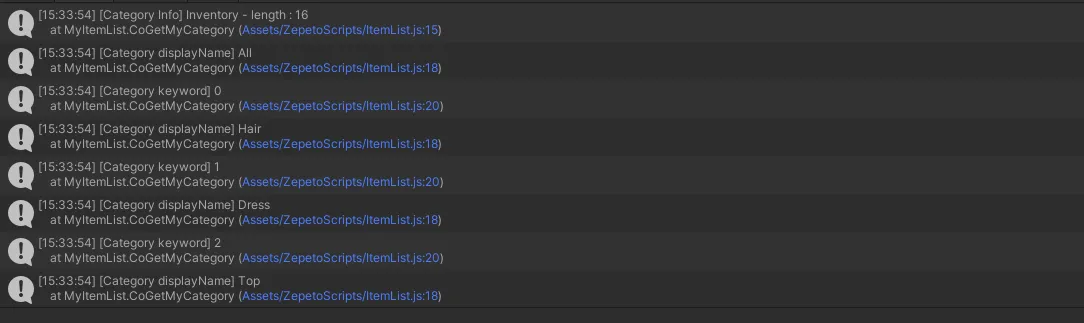
- CategoryResponse.category.categories를 탐색하여 내 아이템 탭의 아이템 카테고리 목록을 출력합니다.
- 아이템 목록 가져오기
- ShopService.GetMyContentItemListAsync(ItemKeyword.all, null)을 호출하여 모든 카테고리의 아이템 목록을 가져옵니다.
- 특정 카테고리에서만 아이템을 가져오도록 선택할 수 있습니다. 예를 들어, ItemKeyword.all 대신 ItemKeyword.hair를 사용하여 머리 아이템만 가져올 수 있습니다.
- 두 번째 매개변수는 요청할 다음 페이지 토큰을 알고 있는 경우에만 사용됩니다. API를 처음 호출할 때는 null로 설정합니다.
- nextPageToken과 관련된 예제는 아래 정보를 확인하세요.
- 성공적인 응답을 받으면 responseData 속성을 통해 ContentItemListResponse 객체에 접근할 수 있습니다.
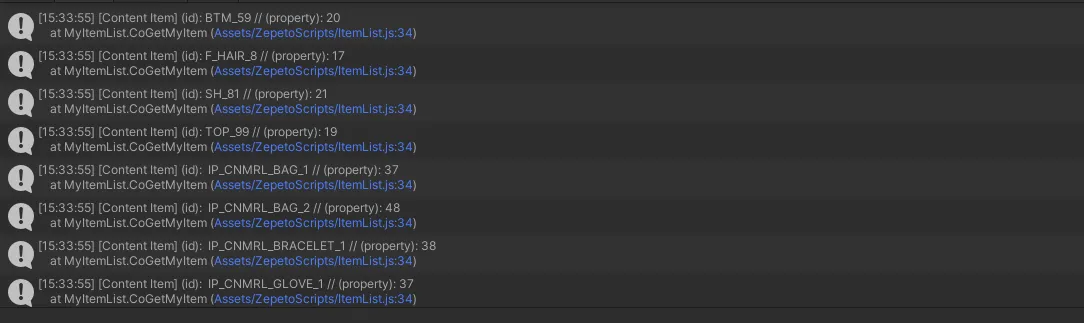
- ItemResponse.items를 탐색하여 각 아이템의 ID와 부분 Enum 코드를 출력합니다.
- 또한, 아이템 썸네일은 지정된 rawImage로 설정됩니다.
- 스크립트 작성을 마친 후, 씬의 객체에 스크립트를 추가합니다.
- 재생 버튼을 누르면 내 아이템 탭의 카테고리 목록과 모든 카테고리의 아이템 정보가 표시됩니다.
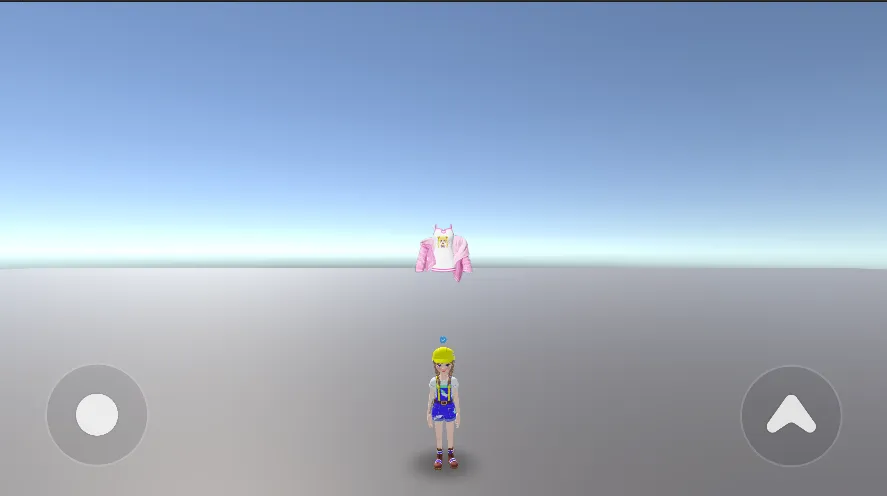
- 아이템 썸네일 프리팹을 생성하고 아이템 목록에 따라 썸네일을 동적으로 생성하면 UI에 아이템 목록 썸네일을 표시할 수 있습니다.
사용자의 특정 아이템 소유 상태 확인 예제
GetMyContentItemListAsync()를 활용하여 월드에서 누군가가 특정 의상을 착용하고 있는지 확인할 수 있습니다.
다음은 특정 아이템을 소유한 사용자의 UI에 메시지를 표시하는 간단한 예제입니다.
- 프로젝트 > 생성 > ZEPETO > TypeScript가 생성되고 이름이 CheckItem으로 변경됩니다.
- 아래와 같이 샘플 스크립트를 작성합니다.
import { ZepetoScriptBehaviour } from 'ZEPETO.Script'
import { ShopService, ItemKeyword } from 'ZEPETO.Module.Shop'
import { ZepetoPropertyFlag } from 'Zepeto'
import { WaitUntil } from 'UnityEngine'
import { Text } from 'UnityEngine.UI'
import { Item } from 'ZEPETO.Module.Content'

export default class CheckItem extends ZepetoScriptBehaviour {

    public resultText: Text;
    public checkItemID: string;

    Start() {
        this.resultText.gameObject.SetActive(false);
        this.StartCoroutine(this.CoCheckItem());
    }

    *CoCheckItem() {
        let nextPageToken: string | null = null;
        do {
            // Request the list of the user's content items.
            const requestItemList = ShopService.GetMyContentItemListAsync(ItemKeyword.all, nextPageToken);
            yield new WaitUntil(() => requestItemList.keepWaiting == false);

            if (requestItemList.responseData.isSuccess) {
                // Get the content items from the response.
                const contentItems: Item[] = requestItemList.responseData.items;
                nextPageToken = requestItemList.responseData.nextPageToken;

                // Iterate through the content items.
                for (let i = 0; i < contentItems.length; ++i) {
                    const property: ZepetoPropertyFlag = contentItems[i].property;
                    // Check if the item ID matches the specified ID.
                    if (contentItems[i].id == this.checkItemID) {
                        // Activate the matched item message.
                        this.ActivateMatchedItem();
                        break;
                    }
                }
            }
            else {
                break;
            }
        } while (nextPageToken != null);
    }

    ActivateMatchedItem() {
        // Show the matched item message.
        this.resultText.gameObject.SetActive(true);
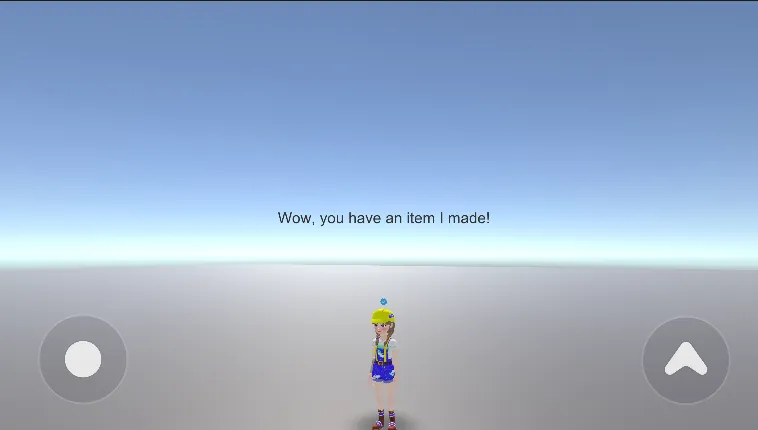
        this.resultText.text = "와우, 내가 만든 아이템이 있네요!";
    }
}
- 스크립트 설명
- 이 스크립트는 로그인한 사용자의 '내 항목' 목록(모든 카테고리)을 탐색하고 검사기에서 입력한 일치하는 항목 ID를 찾습니다.
- 항목이 많으면 nextPageToken 값이 null이 아닙니다. 따라서 값이 null이 될 때까지 do-while 문으로 프로세스가 반복됩니다.
- nextPageToken이 ShopService.GetMyContentItemListAsync(ItemKeyword.all, nextPageToken)의 두 번째 매개변수로 제공된 것을 주목하세요.
- 성공적인 응답을 받으면 responseData 속성을 통해 ContentItemListResponse 객체에 접근할 수 있습니다.
- ItemResponse.items를 탐색하여 입력한 항목 ID와 일치하는 항목을 찾습니다.
- 일치하는 항목이 발견되면 ActivateMatchedItem()이 호출되어 사용자의 화면에 텍스트를 표시하고 루프를 종료합니다.
- 스크립트 작성을 마친 후, 씬의 객체에 스크립트를 추가하세요.
- World의 사용자가 가지고 있는지 확인하고 싶은 항목의 ID를 검사기에 입력하세요.
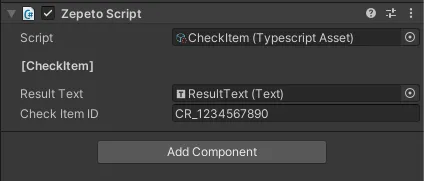
- 프로세스를 실행하려면 재생 버튼을 누르세요. 사용자가 로그인한 월드에 입력한 아이템 ID와 일치하는 아이템이 있으면 화면에 텍스트가 나타납니다.
이 예제를 적용하여 다양한 흥미로운 콘텐츠를 만들 수 있습니다.