GameObject와 Component
세상에서는 객체를 생성하거나 특정 구성 요소를 수정하거나 추가하는 것이 매우 일반적입니다.
ZEPETOScript는 Unity 스크립트에서 사용되는 것과 동일한 인터페이스를 지원합니다.
GameObject 및 Component의 기본 예제
게임 객체를 생성하고 제거하기:
// GameObject 생성
const tempObj = new GameObject();
const obj = Object.Instantiate(tempObj);

// GameObject 파괴
Object.Destroy(obj);
GameObjects의 구성 요소를 가져오거나 새로 추가하려면 GetComponent 또는 AddComponent를 사용하세요.
// 제네릭을 사용한 GetComponent
const myTransform = this.GetComponent<Transform>();

// 제네릭을 사용한 AddComponent
const animator = this.gameObject.AddComponent<Animator>();
GameObject Component에 대한 전체 코드 예제를 확인하세요.
다음은 GameObject의 생성 및 속성 수정, 구성 요소 추가 및 파괴를 다루는 예제입니다.
import { GameObject, Object, Transform, Animator, Vector3, WaitForSeconds } from 'UnityEngine';
import { ZepetoScriptBehaviour } from 'ZEPETO.Script';

export default class GameObjectSample extends ZepetoScriptBehaviour {

    private _testObject : GameObject;

    Start() {

        // 빈 GameObject 생성
        const tempObj = new GameObject();
        this._testObject = Object.Instantiate(tempObj) as GameObject;

        // 객체의 이름 변경
        this._testObject.name = "TestObject";

        // 객체의 변환 정보 변경
        this._testObject.transform.position = new Vector3(3,3,3);

        // 객체에 구성 요소 추가
        this._testObject.gameObject.AddComponent<Animator>();

        // GetComponent 사용 예
        const animator = this._testObject.GetComponent<Animator>();
        if(animator != null) {
            console.log("GetComponent 성공");
        }

        // 코루틴을 사용하여 5초 후 객체 파괴
        this.StartCoroutine(this.DestroyObject());

    }

    *DestroyObject() {
        yield new WaitForSeconds(5);

        // GameObject 파괴
        Object.Destroy(this._testObject);
    }
}
Find 활용하기
Find 관련 메서드는 Unity 스크립트와 동일한 인터페이스 스타일을 ZEPETOScript에서도 지원합니다.
메서드 | 설명 |
|---|---|
GameObject.Find() | - 현재 씬에서 이름을 기반으로 활성 GameObject 객체를 찾고 반환합니다. - 찾지 못하면 null을 반환합니다. |
GameObject.FindGameObjectWithTag() | - 현재 씬에서 태그를 기반으로 활성 GameObject 객체를 찾고 반환합니다. - 활성 객체 중에서 지정된 태그와 일치하는 첫 번째 객체를 찾고 반환하며, 찾지 못하면 null을 반환합니다. |
GameObject.FindGameObjectsWithTag() | - 현재 씬에서 특정 태그를 가진 모든 활성 GameObject 객체를 찾아 배열로 반환합니다. - 찾지 못하면 빈 배열을 반환합니다. |
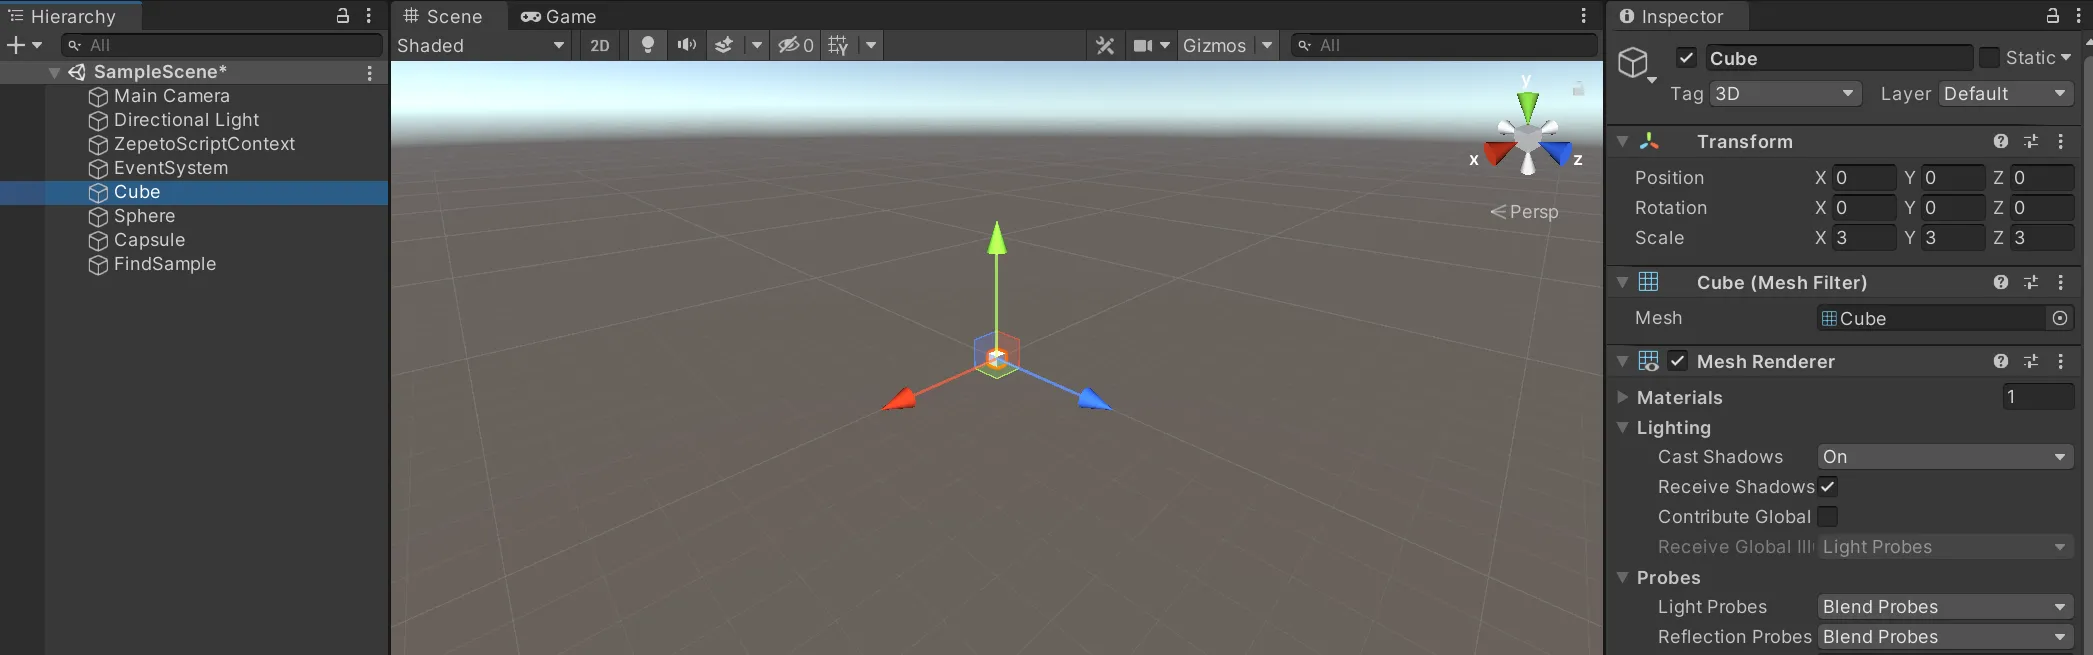
예를 들어, 씬을 다음과 같이 설정합니다:
- 여러 개의 3D 객체를 추가하고 모든 태그를 3D로 지정합니다.
- 스크립트를 붙일 빈 객체를 생성하고, 이름을 FindSample로 변경합니다.
import { ZepetoScriptBehaviour } from 'ZEPETO.Script';
import { GameObject, Transform } from 'UnityEngine';

export default class FindSample extends ZepetoScriptBehaviour {

    public tempObj1: GameObject;
    public tempObj2: GameObject;
    public tempObj3: GameObject[];

    Start() {
        // 지정된 이름을 가진 대상 GameObject를 찾습니다.
        // 동일한 이름을 가진 여러 GameObject가 있는 경우, 처음 발견된 것이 반환됩니다.
        this.tempObj1 = GameObject.Find("Cube");
        if(this.tempObj1 != null) {
            console.log("GameObject 찾기 성공");
        }

        // 지정된 태그를 가진 대상 GameObject를 찾습니다.
        // 동일한 태그를 가진 여러 GameObject가 있는 경우, 처음 발견된 것이 반환됩니다.
        this.tempObj2 = GameObject.FindGameObjectWithTag("3D");
        if(this.tempObj2 != null) {
            console.log("FindGameObjectWithTag 성공");
        }

        // 지정된 태그를 가진 GameObject의 배열을 반환합니다.
        this.tempObj3 = GameObject.FindGameObjectsWithTag("3D");
        if(this.tempObj3 != null) {
            console.log("FindGameObjectsWithTag 성공");
        }
    }
}
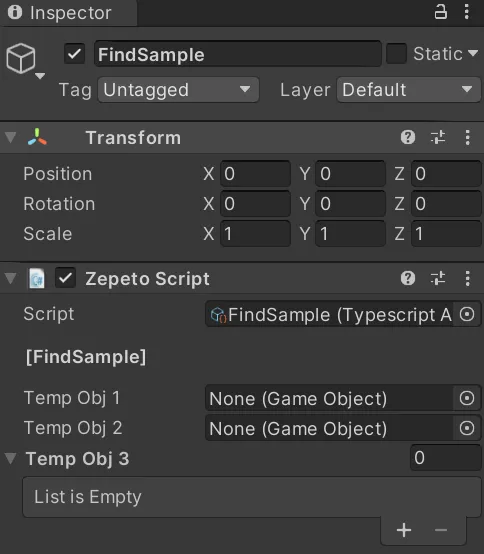
- FindSample 객체에 스크립트를 추가하면 검사기가 비어 있습니다.
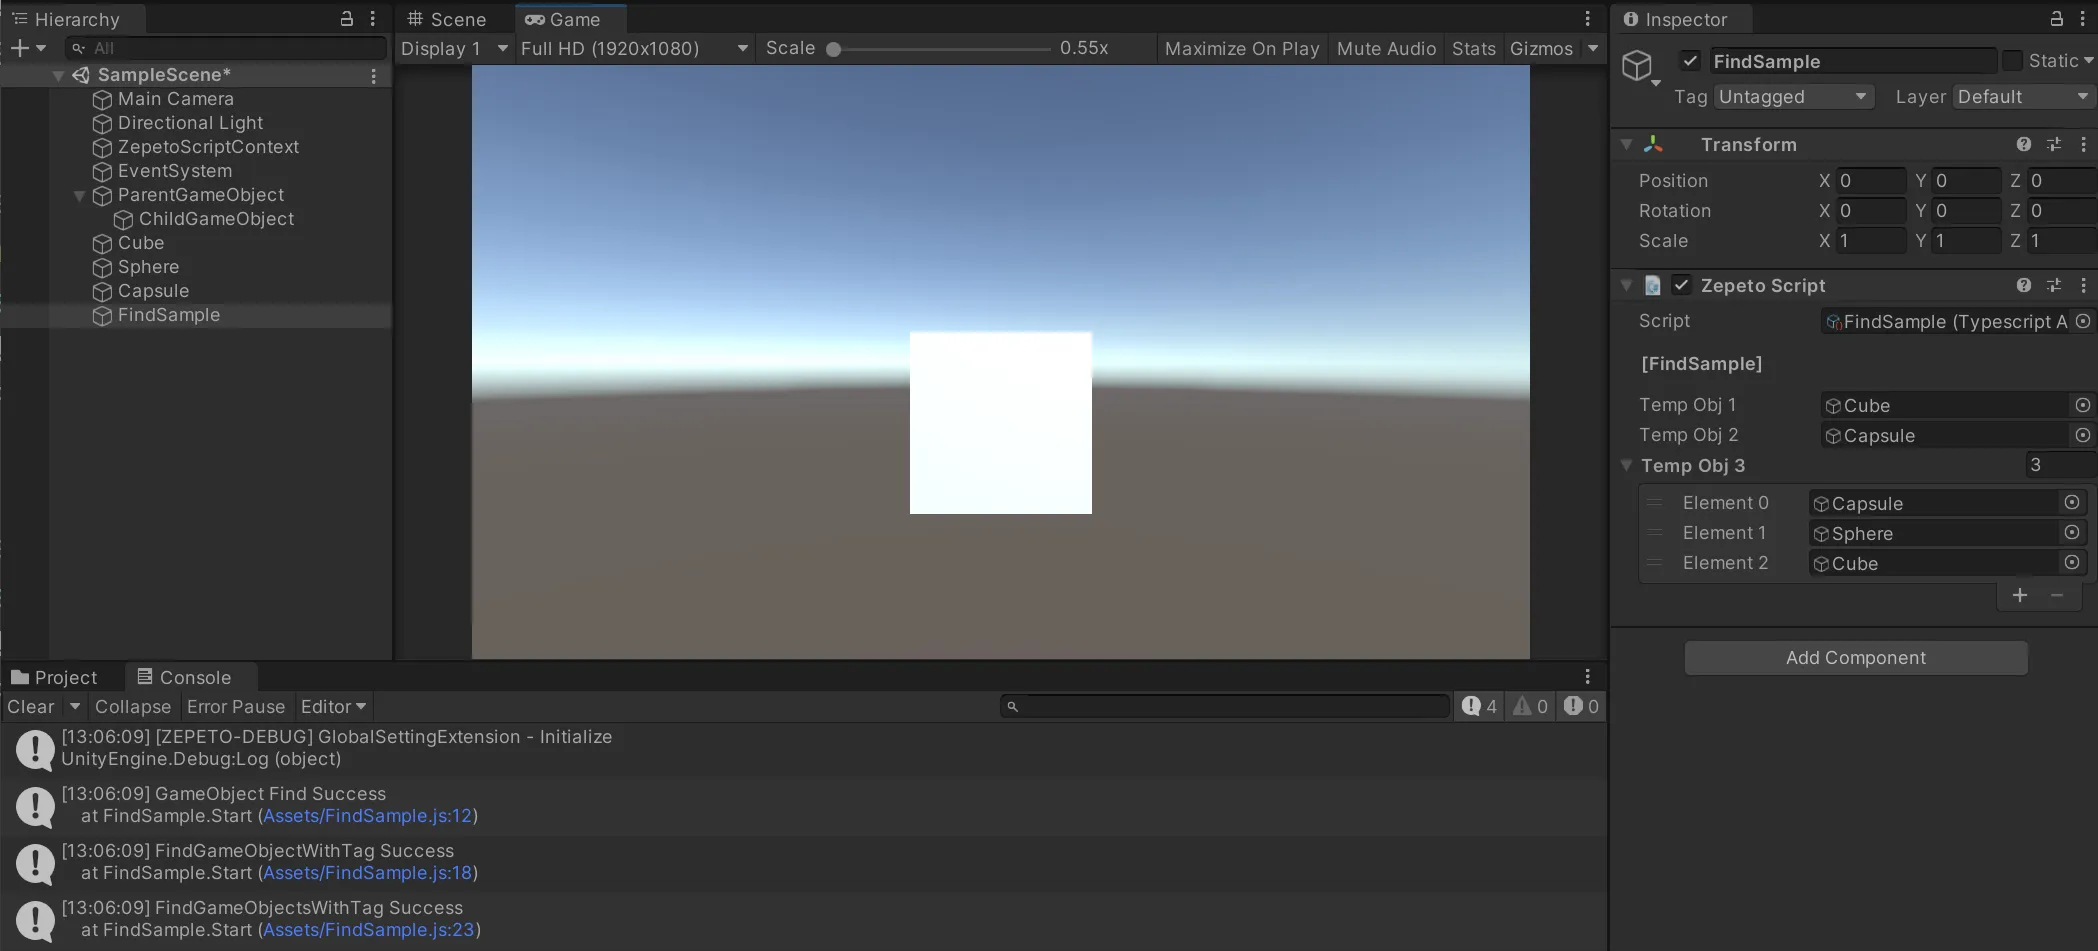
- 재생 버튼을 눌러 실행하면 검사기 창에서 각 객체가 할당되었는지 확인할 수 있으며, 콘솔 창을 통해 객체 찾기의 성공 여부를 확인할 수 있습니다.
프리팹 만들기
런타임 동안 프리팹을 만드는 방법을 탐색해 보겠습니다.
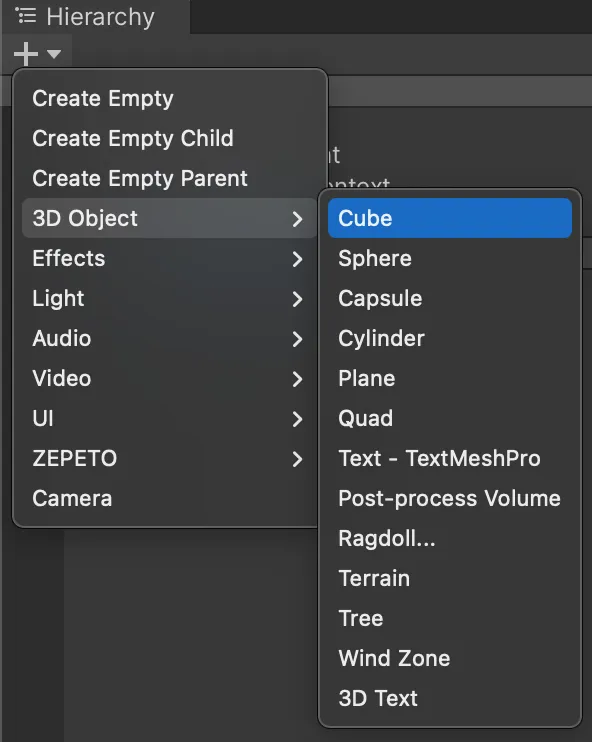
- 먼저, 3D 오브젝트 > 큐브를 씬에 추가합니다.
- 큐브의 인스펙터에서 구성 요소 추가를 누르고 Rigidbody를 추가합니다.
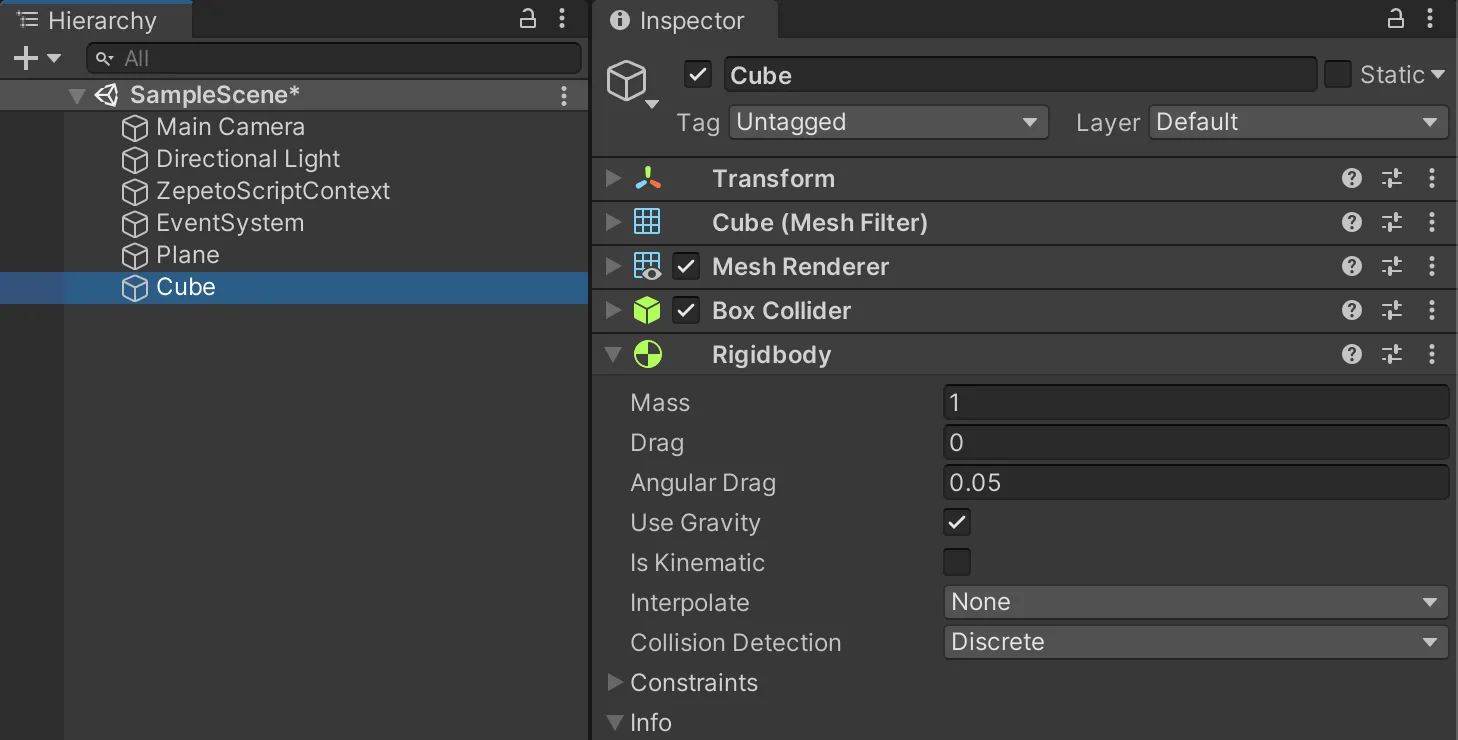
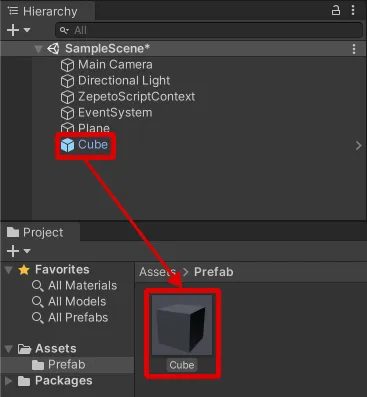
- 그런 다음 큐브를 프로젝트 영역으로 드래그하여 프리팹으로 만듭니다.
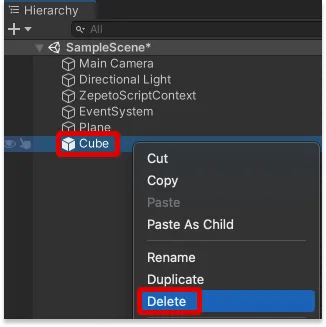
프리팹을 사용할 것이므로 씬에서 큐브를 삭제합니다.
- 아래 스크립트를 작성해 주세요.
import { GameObject, Object, Vector3, WaitForSeconds } from 'UnityEngine';
import { ZepetoScriptBehaviour } from 'ZEPETO.Script';

export default class CloneSample extends ZepetoScriptBehaviour {

    public clonePrefab : GameObject;

    Start() {

        this.StartCoroutine(this.DoRoutine());

    }

    *DoRoutine() {
        while(true) {
            yield null;
            // Create a clone
            const clone = Object.Instantiate(this.clonePrefab) as GameObject;

            // Set the height of the clone object
            clone.transform.position = new Vector3(0, 10, 0);

            // Destroy it after 5 seconds of creation
            GameObject.Destroy(clone, 5);
            yield new WaitForSeconds(1);
        }
    }
}
- 그런 다음 Unity 편집기로 돌아가서 프리팹을 스크립트 검사기로 드래그하여 추가합니다.
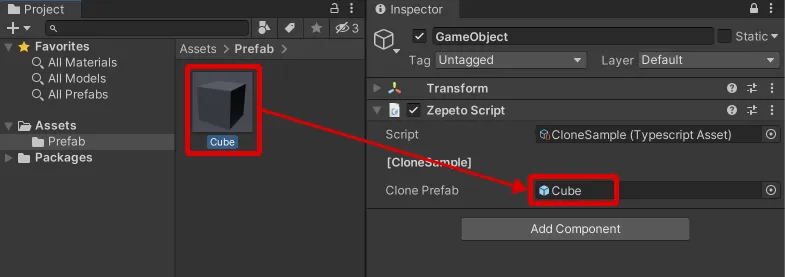
- 재생 버튼을 눌러 3D 객체가 생성되고 매초 위에서 떨어지는지 확인합니다.
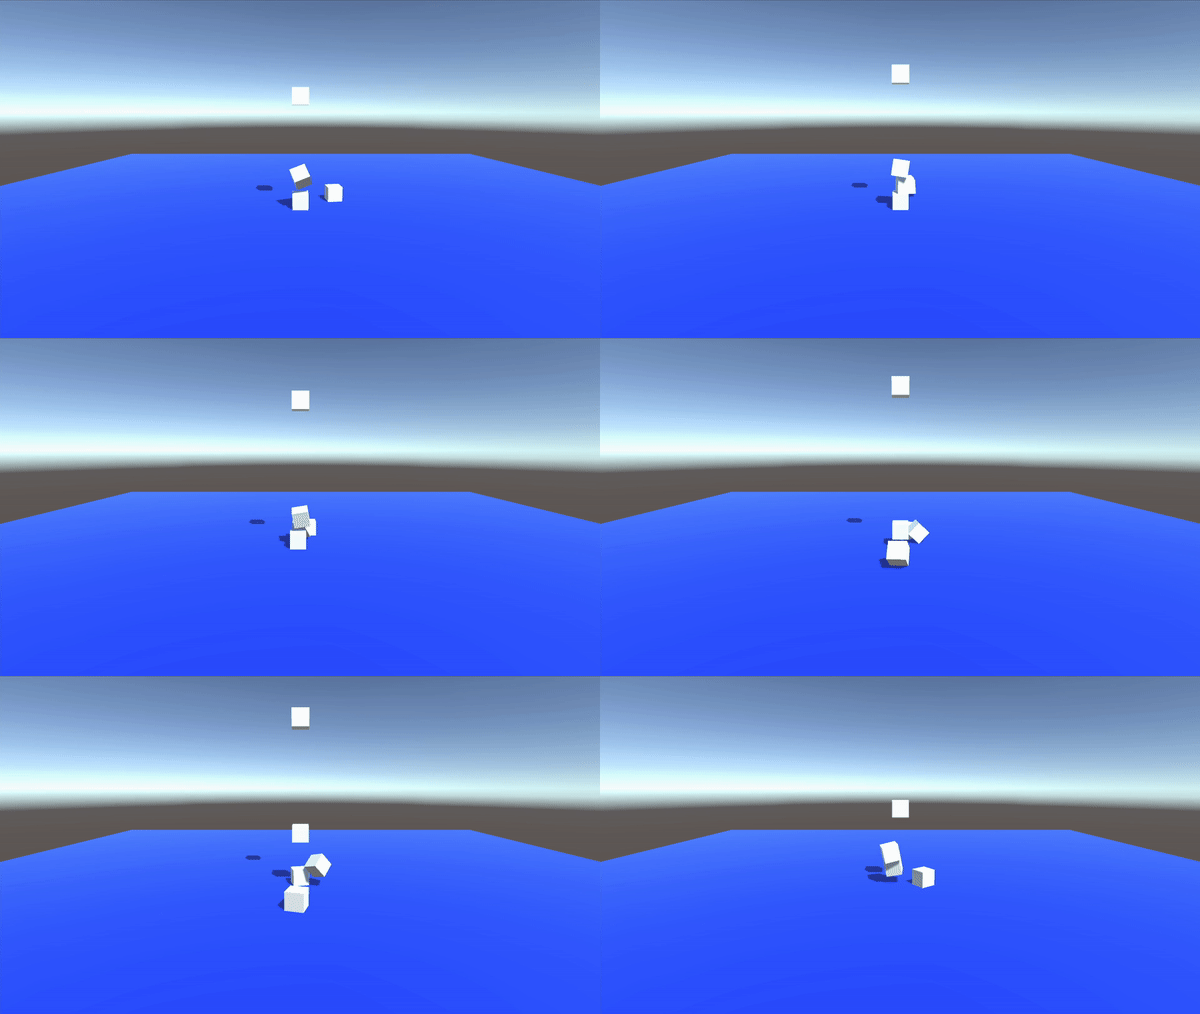
아래 링크를 클릭하여 ZEPETOScript에서 제공하는 Unity GameObjects 및 Components에 대해 자세히 알아보세요.