GameObjects and Components
ในโลกนี้ การสร้างวัตถุหรือการปรับเปลี่ยนหรือเพิ่มส่วนประกอบเฉพาะให้กับวัตถุเป็นเรื่องที่พบได้ทั่วไป
ZEPETOScript รองรับอินเทอร์เฟซเดียวกับที่ใช้ในสคริปต์ Unity
ตัวอย่างพื้นฐานของ GameObject และ Component
การสร้างและลบวัตถุเกม:
// GameObject สร้าง
const tempObj = new GameObject();
const obj = Object.Instantiate(tempObj);

// GameObject ลบ
Object.Destroy(obj);
เพื่อให้ได้ส่วนประกอบของ GameObjects หรือเพิ่มใหม่ ให้ใช้ GetComponent หรือ AddComponent
// GetComponent ด้วย Generic
const myTransform = this.GetComponent<Transform>();

// AddComponent ด้วย Generic
const animator = this.gameObject.AddComponent<Animator>();
ตรวจสอบตัวอย่างโค้ดทั้งหมดสำหรับ GameObject Component
นี่คือตัวอย่างที่ครอบคลุมการสร้างและการปรับเปลี่ยนคุณสมบัติของ GameObject การเพิ่มส่วนประกอบ และการทำลาย
import { GameObject, Object, Transform, Animator, Vector3, WaitForSeconds } from 'UnityEngine';
import { ZepetoScriptBehaviour } from 'ZEPETO.Script';

export default class GameObjectSample extends ZepetoScriptBehaviour {

    private _testObject : GameObject;

    Start() {

        // สร้าง GameObject ว่าง
        const tempObj = new GameObject();
        this._testObject = Object.Instantiate(tempObj) as GameObject;

        // เปลี่ยนชื่อวัตถุ
        this._testObject.name = "TestObject";

        // เปลี่ยนข้อมูลการแปลงของวัตถุ
        this._testObject.transform.position = new Vector3(3,3,3);

        // แนบส่วนประกอบไปยังวัตถุ
        this._testObject.gameObject.AddComponent<Animator>();

        // ตัวอย่างการใช้ GetComponent
        const animator = this._testObject.GetComponent<Animator>();
        if(animator != null) {
            console.log("GetComponent สำเร็จ");
        }

        // ทำลายวัตถุหลังจาก 5 วินาทีโดยใช้ coroutine
        this.StartCoroutine(this.DestroyObject());

    }

    *DestroyObject() {
        yield new WaitForSeconds(5);

        // ทำลาย GameObject
        Object.Destroy(this._testObject);
    }
}
การใช้ Find
วิธีการค้นหาที่เกี่ยวข้องยังรองรับสไตล์อินเทอร์เฟซเดียวกันใน ZEPETOScript เช่นเดียวกับในสคริปต์ Unity.
วิธีการ | คำอธิบาย |
|---|---|
GameObject.Find() | - ค้นหาและส่งคืนวัตถุ GameObject ที่ใช้งานอยู่ตามชื่อในฉากปัจจุบัน。 - ส่งคืน null หากไม่พบ. |
GameObject.FindGameObjectWithTag() | - ค้นหาและส่งคืนวัตถุ GameObject ที่ใช้งานอยู่ตามแท็กในฉากปัจจุบัน。 - ค้นหาและส่งคืนวัตถุแรกที่ตรงกับแท็กที่กำหนดในวัตถุที่ใช้งานอยู่ ส่งคืน null หากไม่พบ. |
GameObject.FindGameObjectsWithTag() | - ค้นหาวัตถุ GameObject ที่ใช้งานอยู่ทั้งหมดที่มีแท็กเฉพาะในฉากปัจจุบันและส่งคืนเป็นอาร์เรย์。 - ส่งคืนอาร์เรย์ว่างหากไม่พบ. |
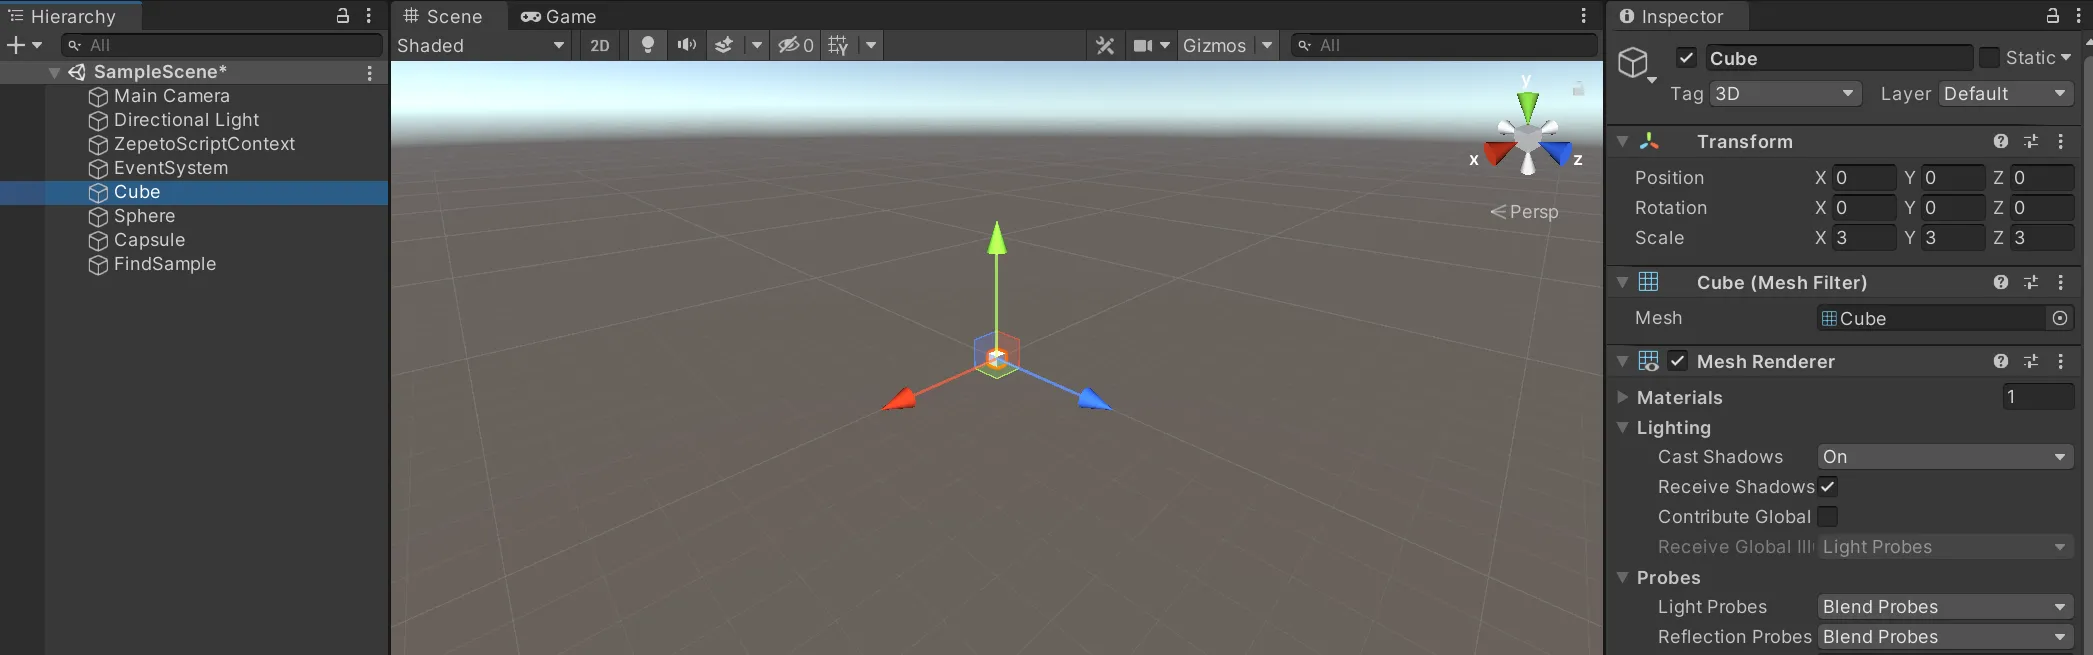
สำหรับตัวอย่าง ให้ตั้งค่าฉากดังนี้:
- เพิ่มวัตถุ 3D หลายตัวและกำหนดแท็กทั้งหมดเป็น 3D.
- สร้างวัตถุว่างเพื่อแนบสคริปต์และเปลี่ยนชื่อเป็น FindSample.
import { ZepetoScriptBehaviour } from 'ZEPETO.Script';
import { GameObject, Transform } from 'UnityEngine';

export default class FindSample extends ZepetoScriptBehaviour {

    public tempObj1: GameObject;
    public tempObj2: GameObject;
    public tempObj3: GameObject[];

    Start() {
        // Finds the target GameObject with the specified name.
        // If multiple GameObjects have the same name, the first one found will be returned.
        this.tempObj1 = GameObject.Find("Cube");
        if(this.tempObj1 != null) {
            console.log("GameObject Find Success");
        }

        // Finds the target GameObject with the specified tag.
        // If multiple GameObjects have the same tag, the first one found will be returned.
        this.tempObj2 = GameObject.FindGameObjectWithTag("3D");
        if(this.tempObj2 != null) {
            console.log("FindGameObjectWithTag Success");
        }

        // Returns an array of GameObjects that have the specified tag.
        this.tempObj3 = GameObject.FindGameObjectsWithTag("3D");
        if(this.tempObj3 != null) {
            console.log("FindGameObjectsWithTag Success");
        }
    }
}
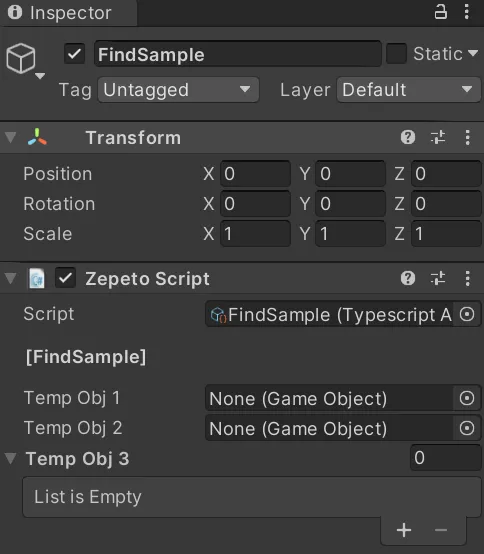
- ผู้ตรวจสอบว่างเปล่าเมื่อคุณเพิ่มสคริปต์ในวัตถุ FindSample.
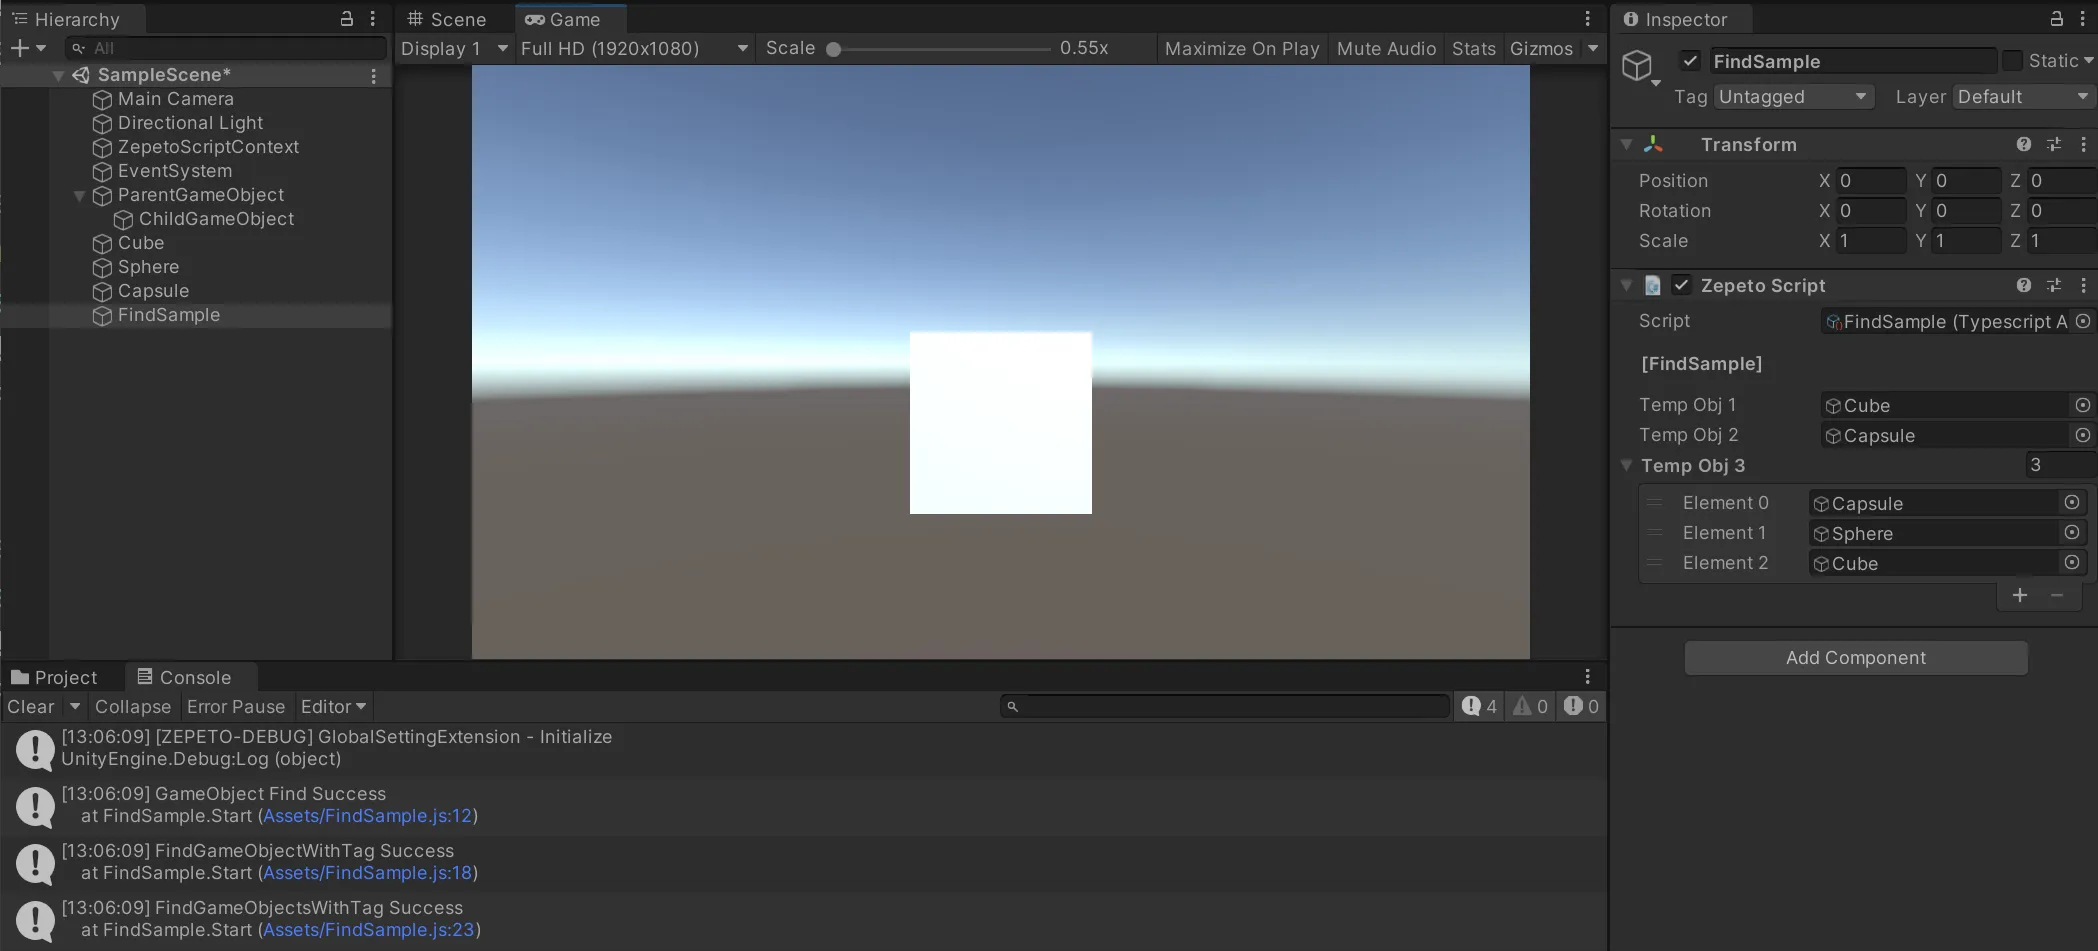
- กดปุ่มเล่นเพื่อรันมัน และคุณสามารถยืนยันในหน้าต่างผู้ตรวจสอบว่าทุกวัตถุได้รับการกำหนดค่าแล้วและตรวจสอบความสำเร็จในการค้นหาวัตถุผ่านหน้าต่างคอนโซล.
การสร้าง Prefabs
มาสำรวจวิธีการสร้าง prefabs ในระหว่างการทำงานกันเถอะ
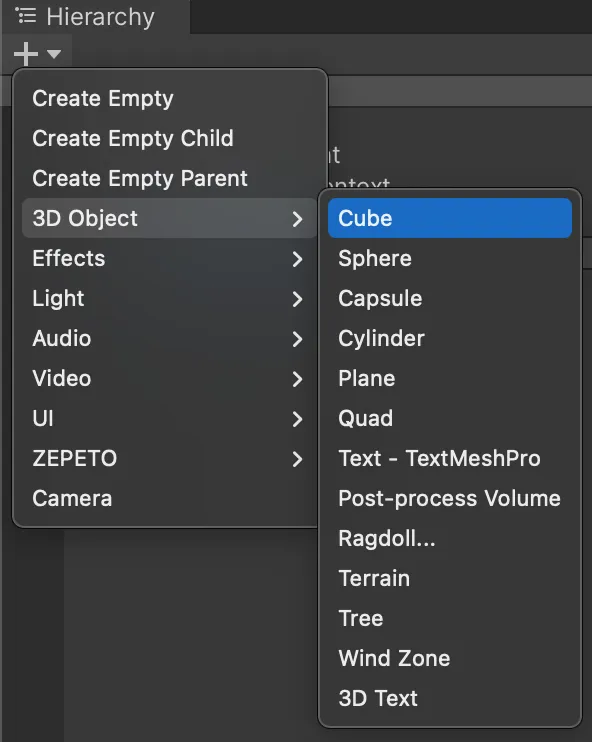
- ขั้นแรก เพิ่มวัตถุ 3D > Cube ลงในฉาก
- กดปุ่ม Add Component ใน inspector ของ Cube และเพิ่ม Rigidbody
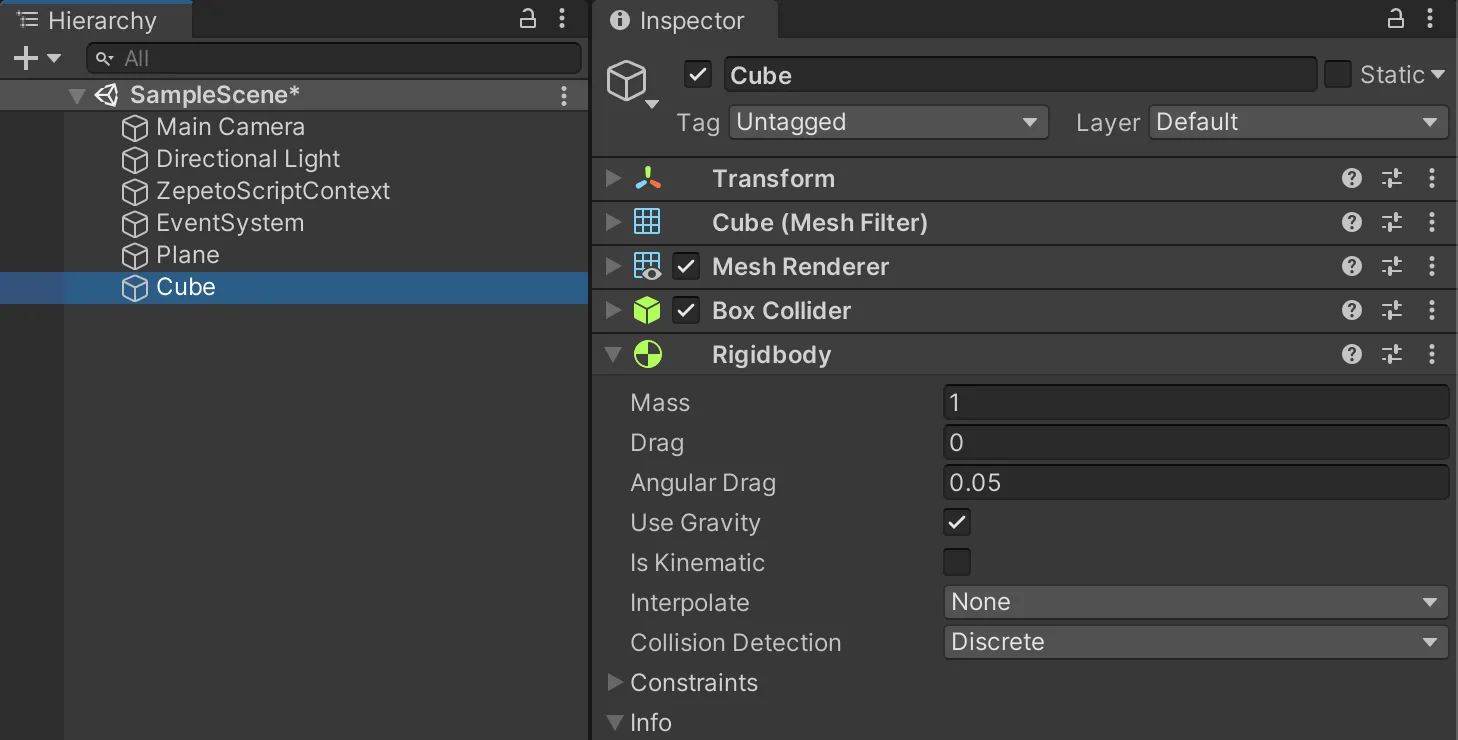
- จากนั้นลาก Cube ไปยังพื้นที่โปรเจกต์เพื่อทำให้มันเป็น prefab
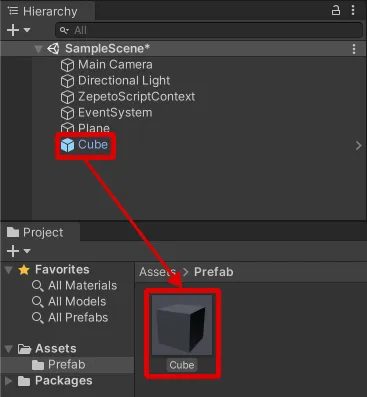
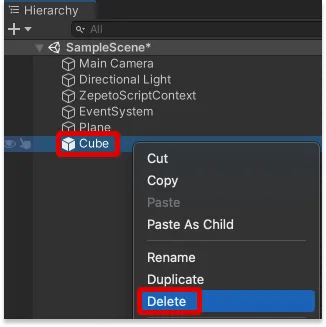
เนื่องจากเราจะใช้ Prefab ให้ลบ Cube ในฉากออก
- กรุณาเขียนสคริปต์ด้านล่างนี้
import { GameObject, Object, Vector3, WaitForSeconds } from 'UnityEngine';
import { ZepetoScriptBehaviour } from 'ZEPETO.Script';

export default class CloneSample extends ZepetoScriptBehaviour {

    public clonePrefab : GameObject;

    Start() {

        this.StartCoroutine(this.DoRoutine());

    }

    *DoRoutine() {
        while(true) {
            yield null;
            // Create a clone
            const clone = Object.Instantiate(this.clonePrefab) as GameObject;

            // Set the height of the clone object
            clone.transform.position = new Vector3(0, 10, 0);

            // Destroy it after 5 seconds of creation
            GameObject.Destroy(clone, 5);
            yield new WaitForSeconds(1);
        }
    }
}
- จากนั้นกลับไปที่ Unity editor ลาก prefab ไปที่ script inspector เพื่อเพิ่มมัน.
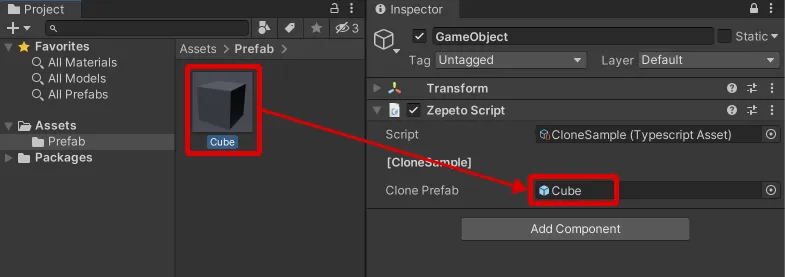
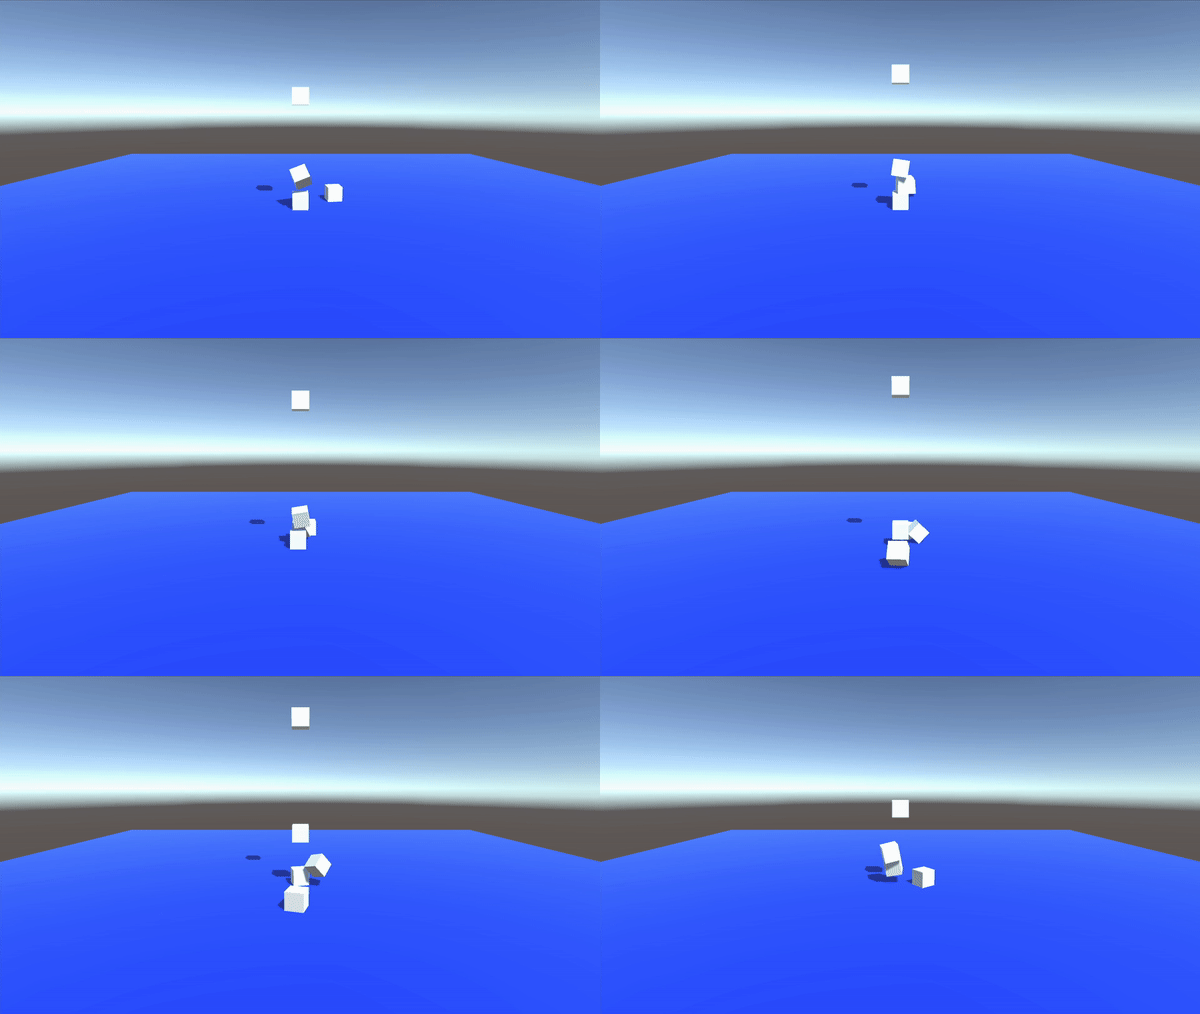
- กดปุ่มเล่นเพื่อตรวจสอบว่า 3D Object ถูกสร้างขึ้นและตกจากด้านบนทุกๆ วินาที.
คลิกที่ลิงก์ด้านล่างเพื่อเรียนรู้เพิ่มเติมเกี่ยวกับ Unity GameObjects และ Components ที่เสนอโดย ZEPETOScript.
📘 การสร้าง GameObjects https://docs.unity3d.com/2020.3/Documentation/ScriptReference/Object.Instantiate.html
📘 การทำลาย GameObjects https://docs.unity3d.com/2020.3/Documentation/ScriptReference/Object.Destroy.html
📘 การใช้ components https://docs.unity3d.com/kr/current/Manual/UsingComponents.html