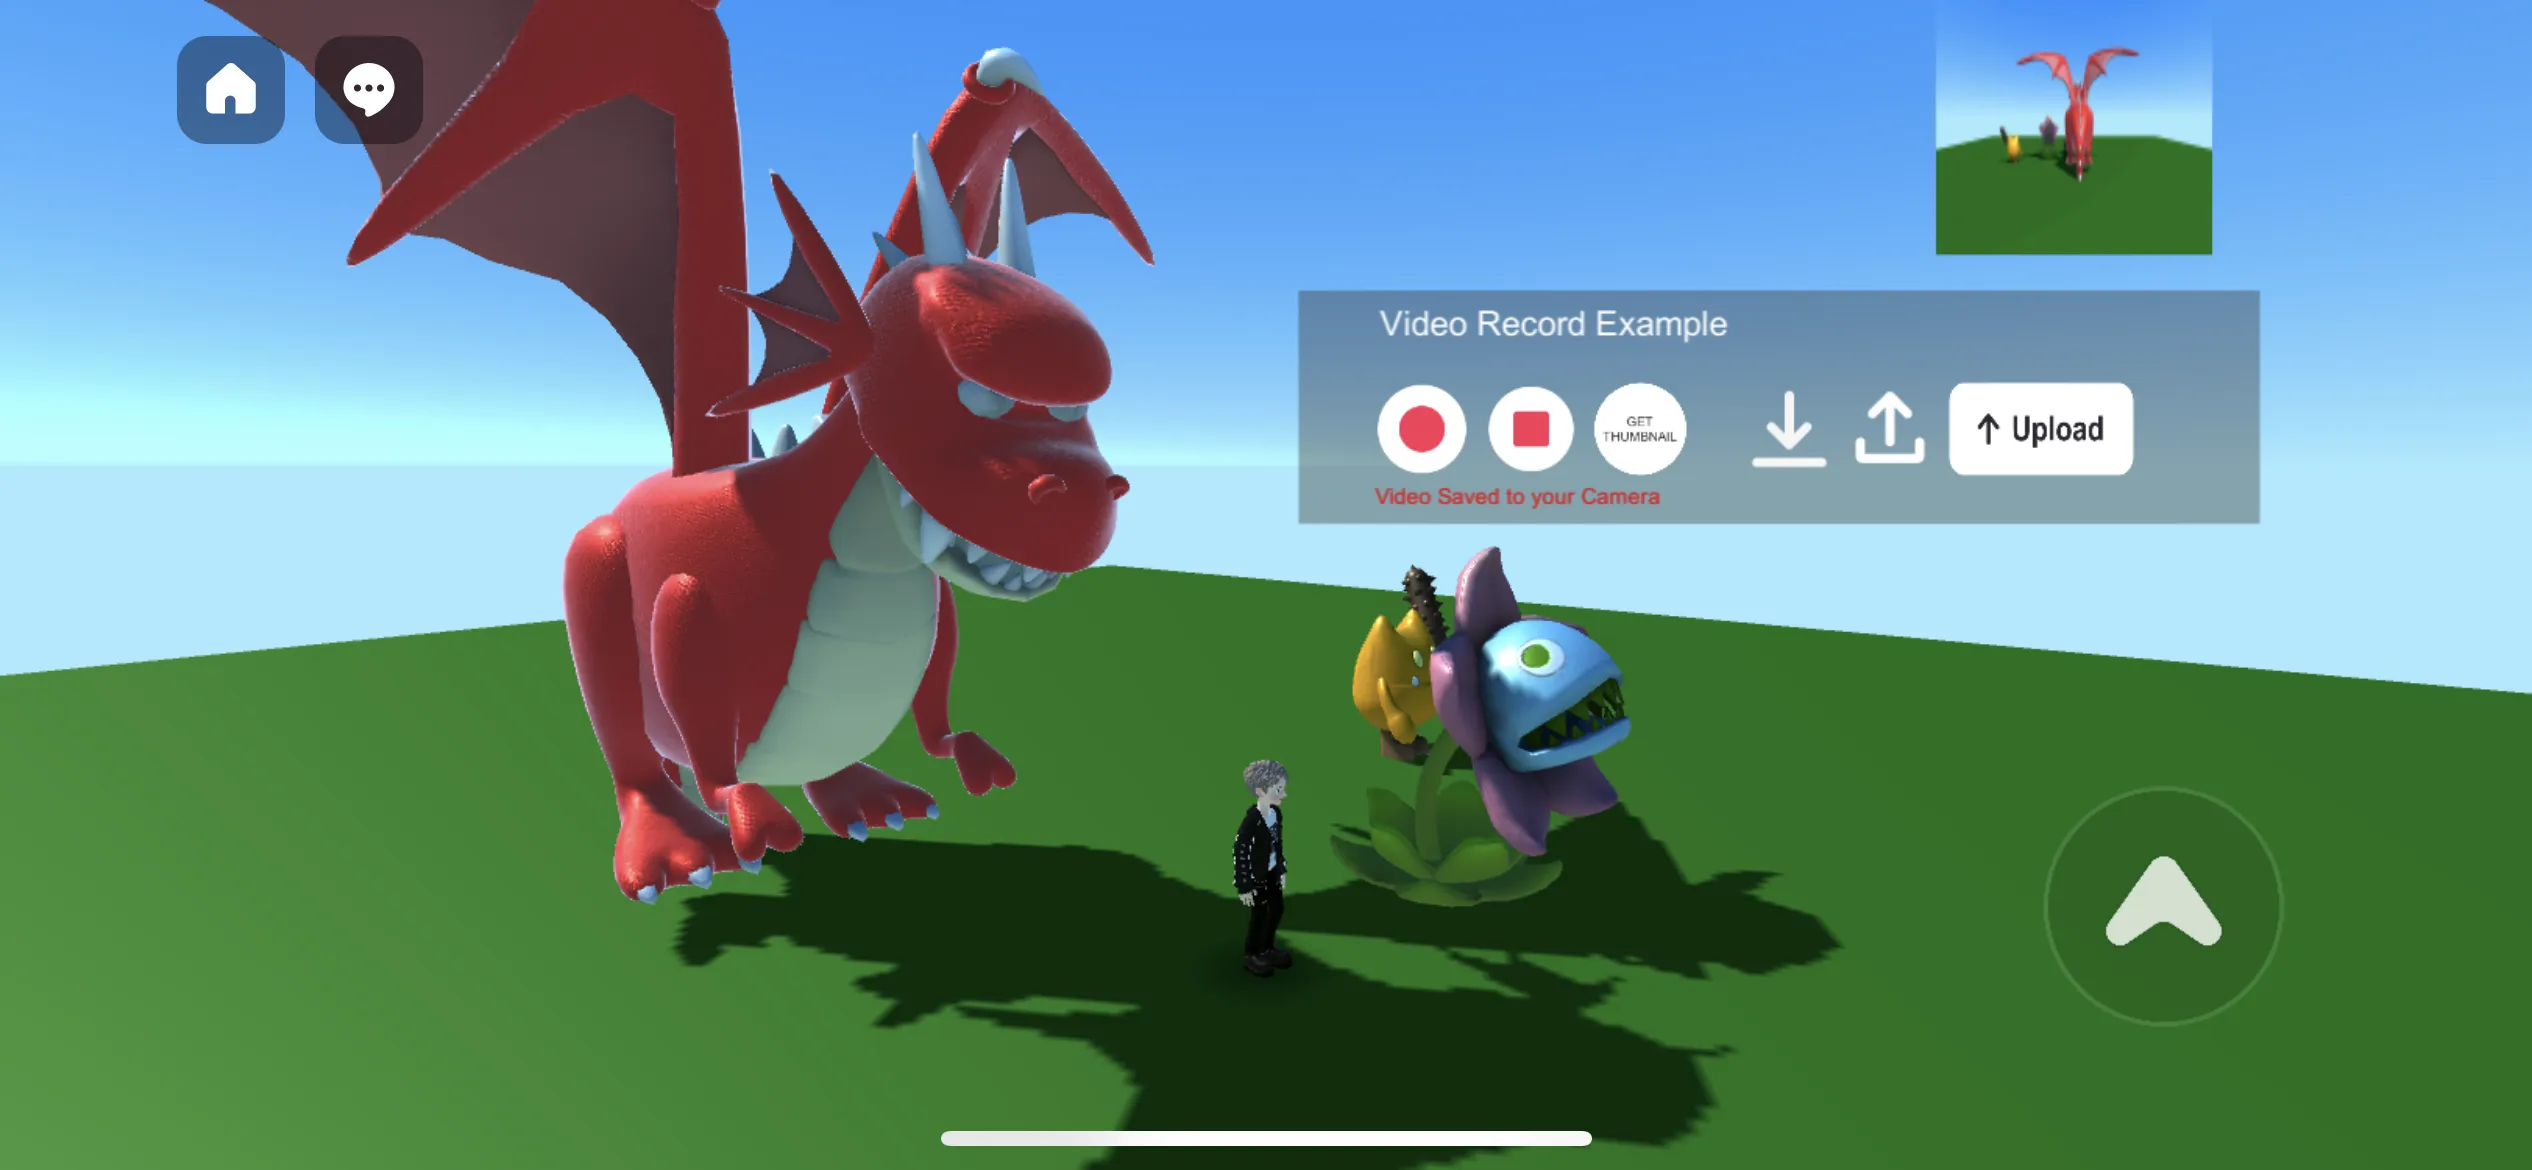
VideoRecording
คุณสามารถบันทึกหรือแชร์วิดีโอภายในโลกโดยใช้ฟังก์ชันวิดีโอใน WorldVideoRecorder API และสร้างฟีดโดยใช้วิดีโอ
เพื่อใช้ฟังก์ชันการบันทึกวิดีโอและการบันทึก/แชร์/โพสต์ฟีด คุณต้องสร้างคำสั่งนำเข้าดังนี้
import { WorldVideoRecorder } from 'ZEPETO.World';WorldVideoRecorder API มีฟังก์ชันที่เกี่ยวข้องกับวิดีโอดังต่อไปนี้.
API | คำอธิบาย |
|---|---|
WorldVideoRecorder.StartRecording(camera: UnityEngine.Camera, resolutions: VideoResolutions, durationSecond: number):boolean | เริ่มบันทึกวิดีโอ คุณสามารถตั้งค่ากล้องบันทึก ความละเอียดวิดีโอ และเวลาบันทึกเป็นพารามิเตอร์ ผลลัพธ์ที่ส่งกลับจะแสดงว่าการเริ่มบันทึกสำเร็จหรือไม่ - enum VideoResolutions { W1280xH720 = 0, W720xH1280 = 1, W1920xH1080 = 2, W1080xH1920 = 3 } - durationSecond : ค่าสูงสุดคือ 60 ดังนั้นกรุณาใส่ค่าน้อยกว่า 60 หากเป็นไปได้. |
WorldVideoRecorder.StopRecording() | หยุดการบันทึกวิดีโอที่กำลังดำเนินอยู่ |
WorldVideoRecorder.IsRecording():boolean | ส่งคืนว่าควรดำเนินการบันทึกวิดีโอต่อไปหรือไม่ |
WorldVideoRecorder.SaveToCameraRoll(callback: System.Action$1) | บันทึกวิดีโอลงในห้องสมุดภาพถ่าย |
WorldVideoRecorder.Share(callback: System.Action$1) | แชร์วิดีโอกับแอปพลิเคชันภายนอก |
WorldVideoRecorder.CreateFeed(contents: string, $callback: System.Action$1) | อัปโหลดวิดีโอไปยังฟีด ปัจจัยแรกคือ contents ซึ่งช่วยให้คุณกำหนดเนื้อหาของโพสต์ได้ |
WorldVideoRecorder.AddVideoPlayerComponent(playerObject: UnityEngine.GameObject, renderTexture: UnityEngine.RenderTexture):UnityEngine_Video.VideoPlayer | เพิ่มส่วนประกอบผู้เล่นวิดีโอลงใน GameObject ที่คุณต้องการเล่นวิดีโอ และเชื่อมต่อไฟล์วิดีโอที่บันทึกไว้ สิ่งนี้จะส่งคืนผู้เล่นวิดีโอที่เพิ่มเข้าไปและให้คุณกำหนดความกว้าง ความสูง หรือ RenderTexture เพื่อเล่นวิดีโอ ขึ้นอยู่กับพารามิเตอร์ |
WorldVideoRecorder.GetThumbnail():UnityEngine.Texture2D; | ส่งคืนภาพขนาดย่อของวิดีโอที่บันทึกไว้ |
ต่อไปนี้คือตัวอย่างการเรียกใช้ฟังก์ชันของการบันทึก/แชร์/โพสต์วิดีโอของฉันภายใน World Video Recorder.
- ไม่สามารถตรวจสอบได้ในสภาพแวดล้อมของ Unity editor แต่สามารถตรวจสอบได้เมื่อเล่นผ่านแอปพลิเคชัน.
- ความละเอียดจะถูกบันทึกตามค่าที่กำหนดเมื่อบันทึกเป็นไฟล์ แต่ความละเอียดอาจเปลี่ยนแปลงเมื่ออัปโหลดไปยัง ZEPETO Feed.
- หากคุณป้อนค่ามากกว่า 60 สำหรับ durationSecond การบันทึกจะไม่ทำงานอย่างถูกต้อง.
WorldVideoRecorder.SaveToCameraRoll(result => {console.log(`${result}`)});

WorldVideoRecorder.Share(result => {console.log(`${result}`)});

WorldVideoRecorder.CreateFeed("[contents]", result => {console.log(`${result}`)});
ต่อไปนี้คือตัวอย่างโค้ดทั้งหมดที่ใช้ฟังก์ชันการบันทึกวิดีโอของฉันภายใน WorldVideoRecorder โดยใช้ RenderTexture.
import { Camera, GameObject, RenderTexture } from 'UnityEngine';
import { Button, RawImage } from 'UnityEngine.UI';
import { ZepetoScriptBehaviour } from 'ZEPETO.Script';
import { VideoResolutions, WorldVideoRecorder } from 'ZEPETO.World';

export default class WorldVideoRecorderExample extends ZepetoScriptBehaviour {

    // WorldVideoRecorder Video UI
    public startRecordingButton: Button;
    public stopRecordingButton: Button;
    public saveVideoButton: Button;
    public shareVideoButton: Button;
    public createFeedButton: Button;
    public getThumbnailButton: Button;
    public thumbnailImage: RawImage;

    // Recorder Camera
    public recorderCamera: Camera;

    // Target Texture
    public targetTexture: RenderTexture;

    // VideoPlayer Object
    private videoPlayerObject: GameObject;

    Awake() {
        this.videoPlayerObject = new GameObject();
    }

    Start() {
        this.startRecordingButton.onClick.AddListener(() => {
            if (false == WorldVideoRecorder.StartRecording(this.recorderCamera, VideoResolutions.W1280xH720, 15)) {
                return;
            }

            this.StartCoroutine(this.CheckRecording());
        });

        this.stopRecordingButton.onClick.AddListener(() => {
            if (false == WorldVideoRecorder.IsRecording()) {
                return;
            }

            WorldVideoRecorder.StopRecording();
        });

        this.saveVideoButton.onClick.AddListener(() => {
            if (false == WorldVideoRecorder.IsRecording()) {
                WorldVideoRecorder.SaveToCameraRoll(result => { console.log(`${result}`) });
            }
        });

        this.shareVideoButton.onClick.AddListener(() => {
            if (false == WorldVideoRecorder.IsRecording()) {
                WorldVideoRecorder.Share(result => { console.log(`${result}`) });
            }
        });

        this.createFeedButton.onClick.AddListener(() => {
            if (false == WorldVideoRecorder.IsRecording()) {
                WorldVideoRecorder.CreateFeed("[contents]", result => { console.log(`${result}`) });
            }
        });

        this.getThumbnailButton.onClick.AddListener(() => {
            if (false == WorldVideoRecorder.IsRecording()) {
                this.thumbnailImage.texture = WorldVideoRecorder.GetThumbnail();
            }
        });
    }

    *CheckRecording() {
        while (WorldVideoRecorder.IsRecording()) {
            yield null;
        }

        let videoPlayer = WorldVideoRecorder.AddVideoPlayerComponent(this.videoPlayerObject, this.targetTexture);

        if (videoPlayer == null) {
            return;
        }

        videoPlayer.Play();
    }
}
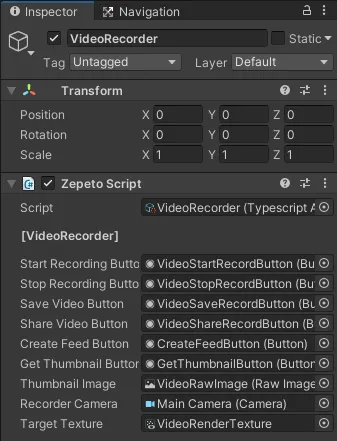
หลังจากเขียนสคริปต์แล้ว ให้สร้างปุ่มและภาพดิบที่จำเป็นบนแคนวาส
หลังจากนั้น ให้กำหนดแต่ละส่วนประกอบใน Inspector
- สำหรับกล้อง คุณสามารถใช้ส่วนประกอบกล้องปกติได้
- สำหรับพื้นผิวเป้าหมาย สร้าง > กรุณาสร้างเป็น Render Texture
👍 เคล็ดลับ
- หากคุณใช้พื้นผิวการเรนเดอร์เดียวกันกับภาพหน้าจอ มันอาจจะไม่เรนเดอร์อย่างถูกต้อง ดังนั้นโปรดสร้างพื้นผิวการเรนเดอร์ใหม่เฉพาะสำหรับการบันทึกและใช้มัน
คุณสามารถทดสอบฟังก์ชันการบันทึกวิดีโอโดยการรันผ่านการสร้าง QR บนมือถือ