2. Learn Basic Controls
Let's follow along with the video and learn the basic controls.
Subtitles are available in multiple languages, so make sure to turn them on!
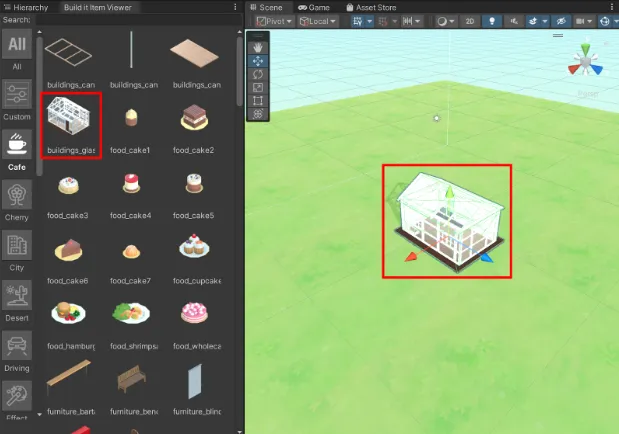
From the Build it Asset Browser on the left, select an object and click on the Scene to place it.
Right-clicking or pressing the ESC key will cancel the object selection.
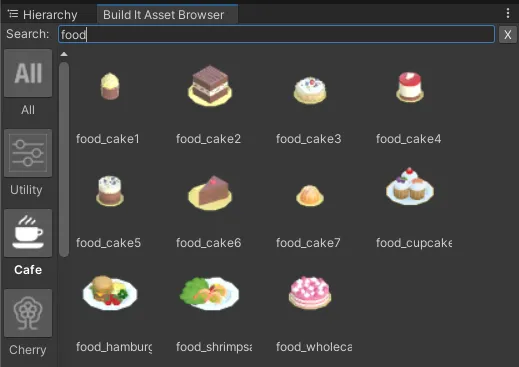
You can search for objects by typing keywords in English into the search box. Clicking the X button next to the search box clears your search.
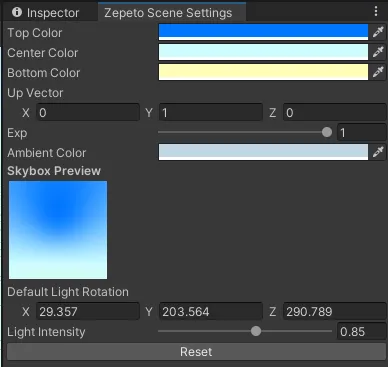
Adjust settings in Zepeto Scene Settings, such as background color, map brightness, and lighting color. The Reset button restores default settings.
- Top Color: Skybox gradient's top color
- Center Color: Skybox gradient's center color
- Bottom Color: Skybox gradient's bottom color
- Up Vector: Skybox gradient's position
- Exp: Skybox gradient blur amount
- Ambient Color: Scene's default brightness
- Default Light Rotation: Default lighting angle in the scene
- Light Intensity: Default lighting brightness
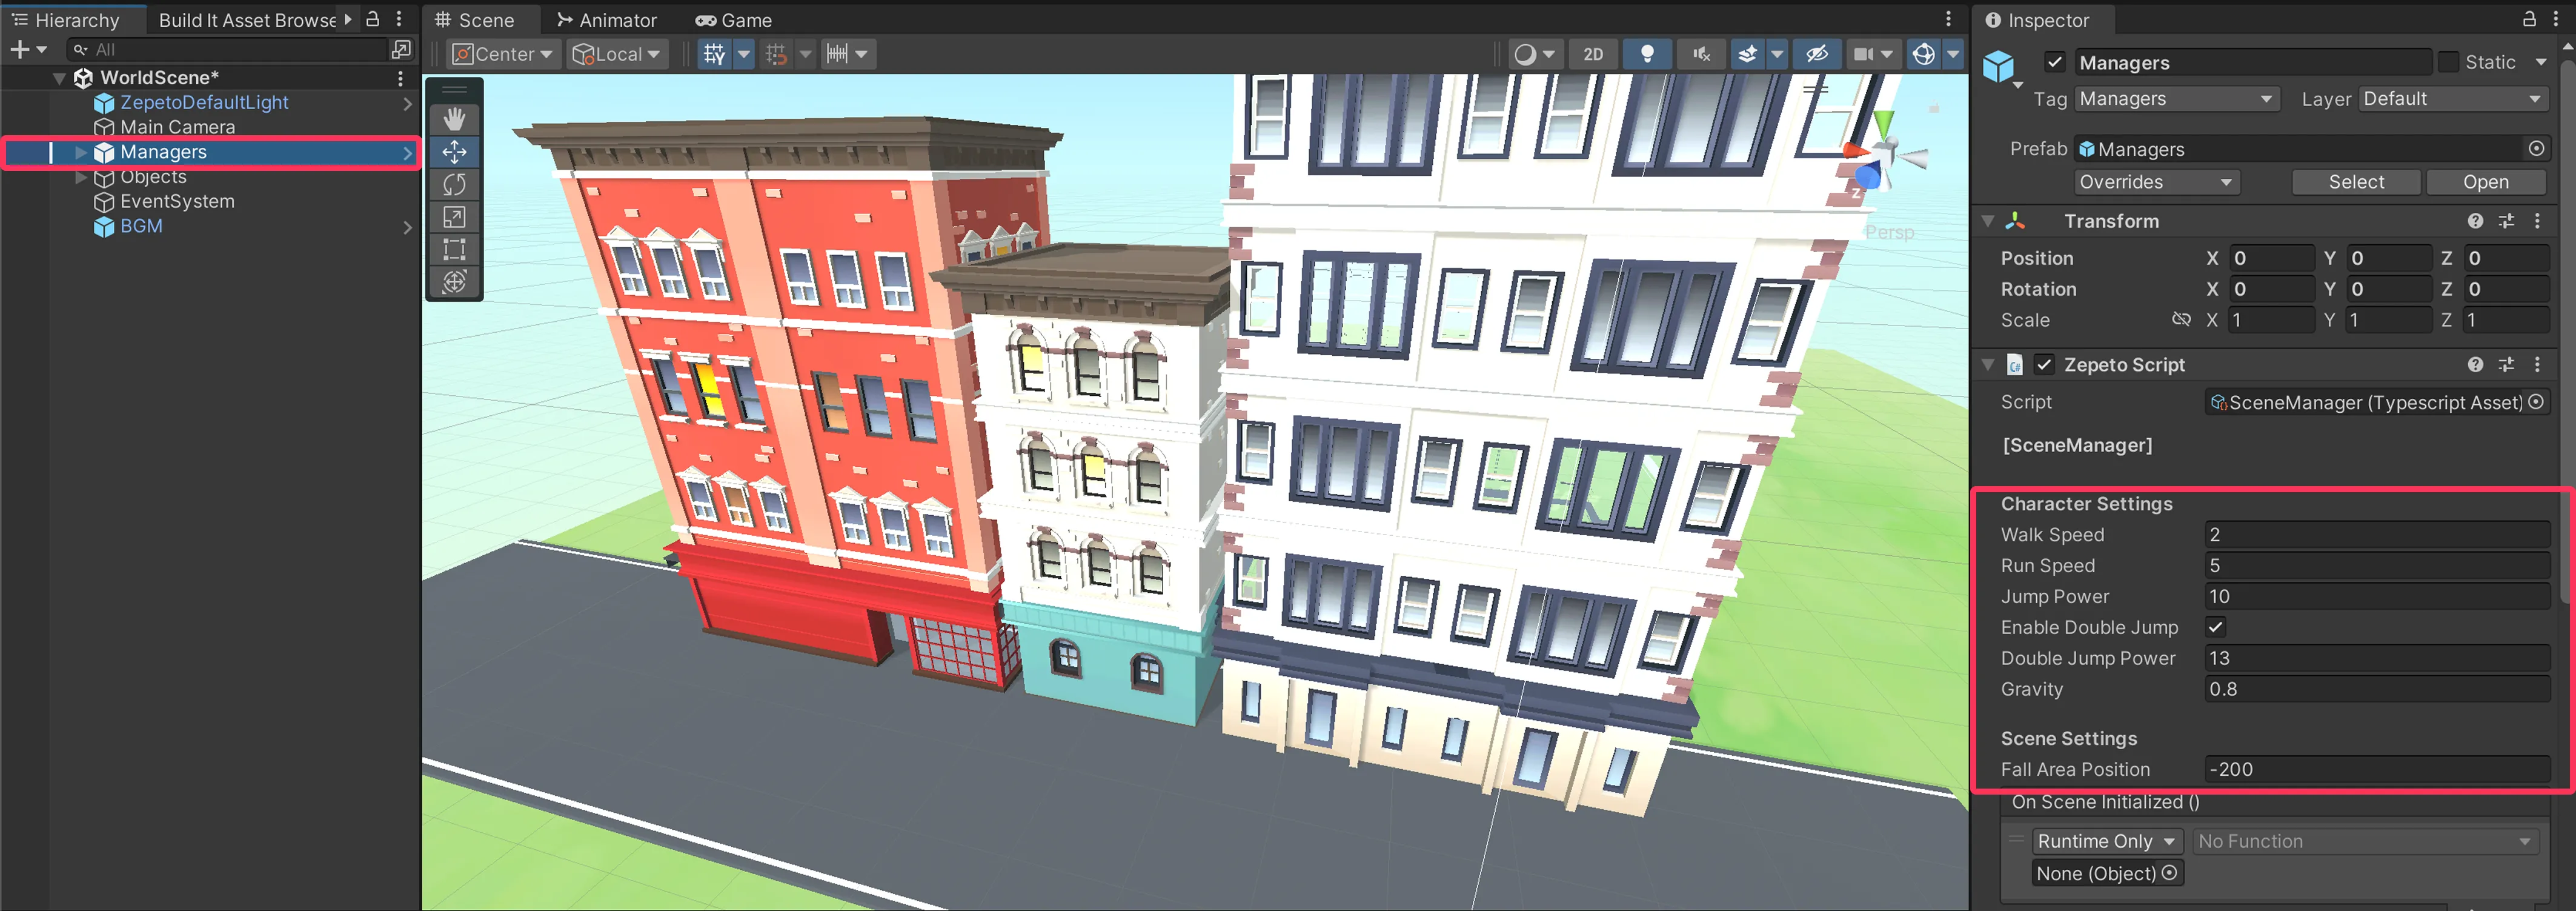
To adjust character control settings, select Manager in the Hierarchy tab on the left and adjust values in the Inspector on the right.
- Walk Speed: Walking speed of the Zepeto character (default: 2)
- Run Speed: Running speed of the Zepeto character (default: 5)
- Jump Power: Jumping power of the Zepeto character (default: 13)
- Enable Double Jump: Toggle double jump feature.
- Double Jump Power: Double jump power of the Zepeto character (default: 13)
- Gravity: The gravity value applied to the world. (default: 0.8)
- Changes to the Gravity value during runtime will not be applied. To modify Gravity, please set it in Edit mode.
- Fall Area Position: Height below which character resets position (default: -200)
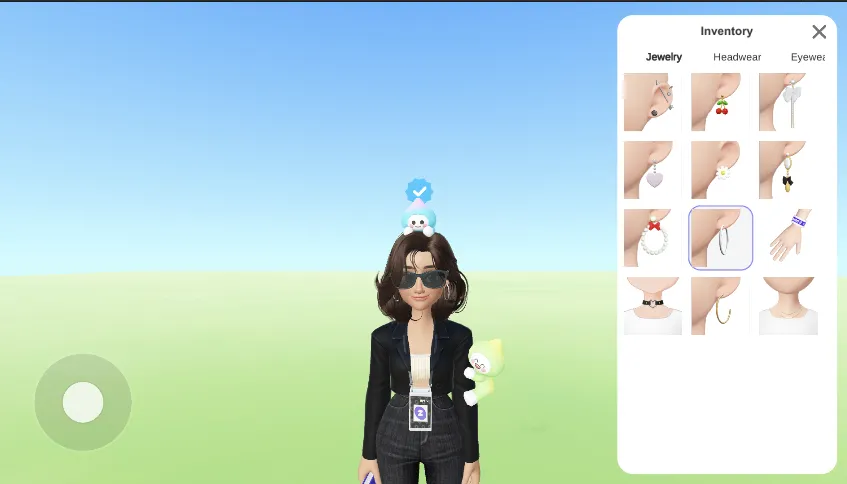
Starting with Build It plugin V.1.0.5, an inventory feature has been added that allows you to change into the costumes you own.
Clicking on the wardrobe icon on the right will open your inventory and change into the selected costume.
However, please note that the changed costumes will only be visible to you and will not be reflected to other people in the room.
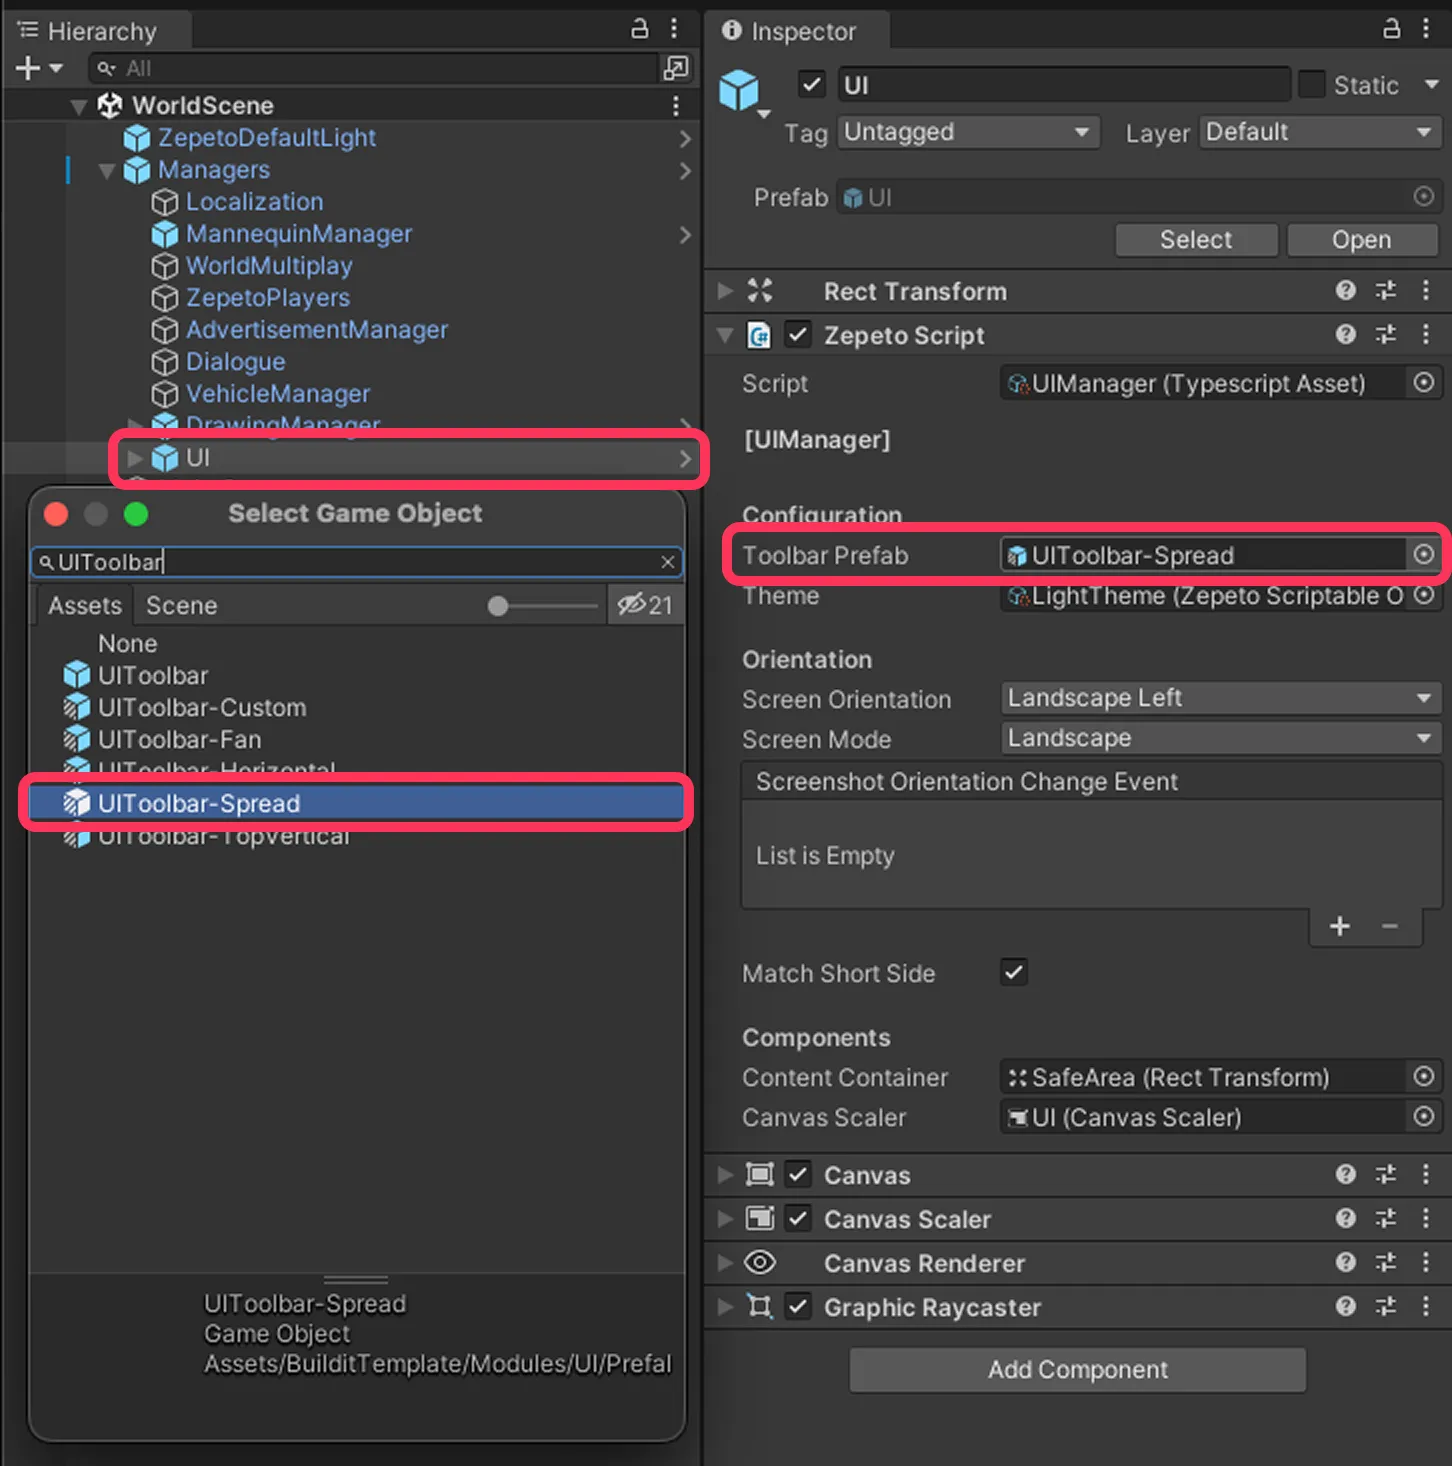
Select Managers then UI in the Hierarchy tab on the left and adjust values in the Inspector on the right. In UIManager you are able to pick the Toolbar and Theme.
Select Toolbar Prefab and choose one of the available options:
- UIToolbar vertical menu, center-right screen position
- UIToolbar-TopVertical vertical menu, top-right screen position
- UIToolbar-Horizontal horizontal menu, top-right screen position
- UIToolbar-Fan radial menu, top-right screen position
- UIToolbar-Spread corner menu, top-right screen position
- UIToolbar-Custom freestyle menu
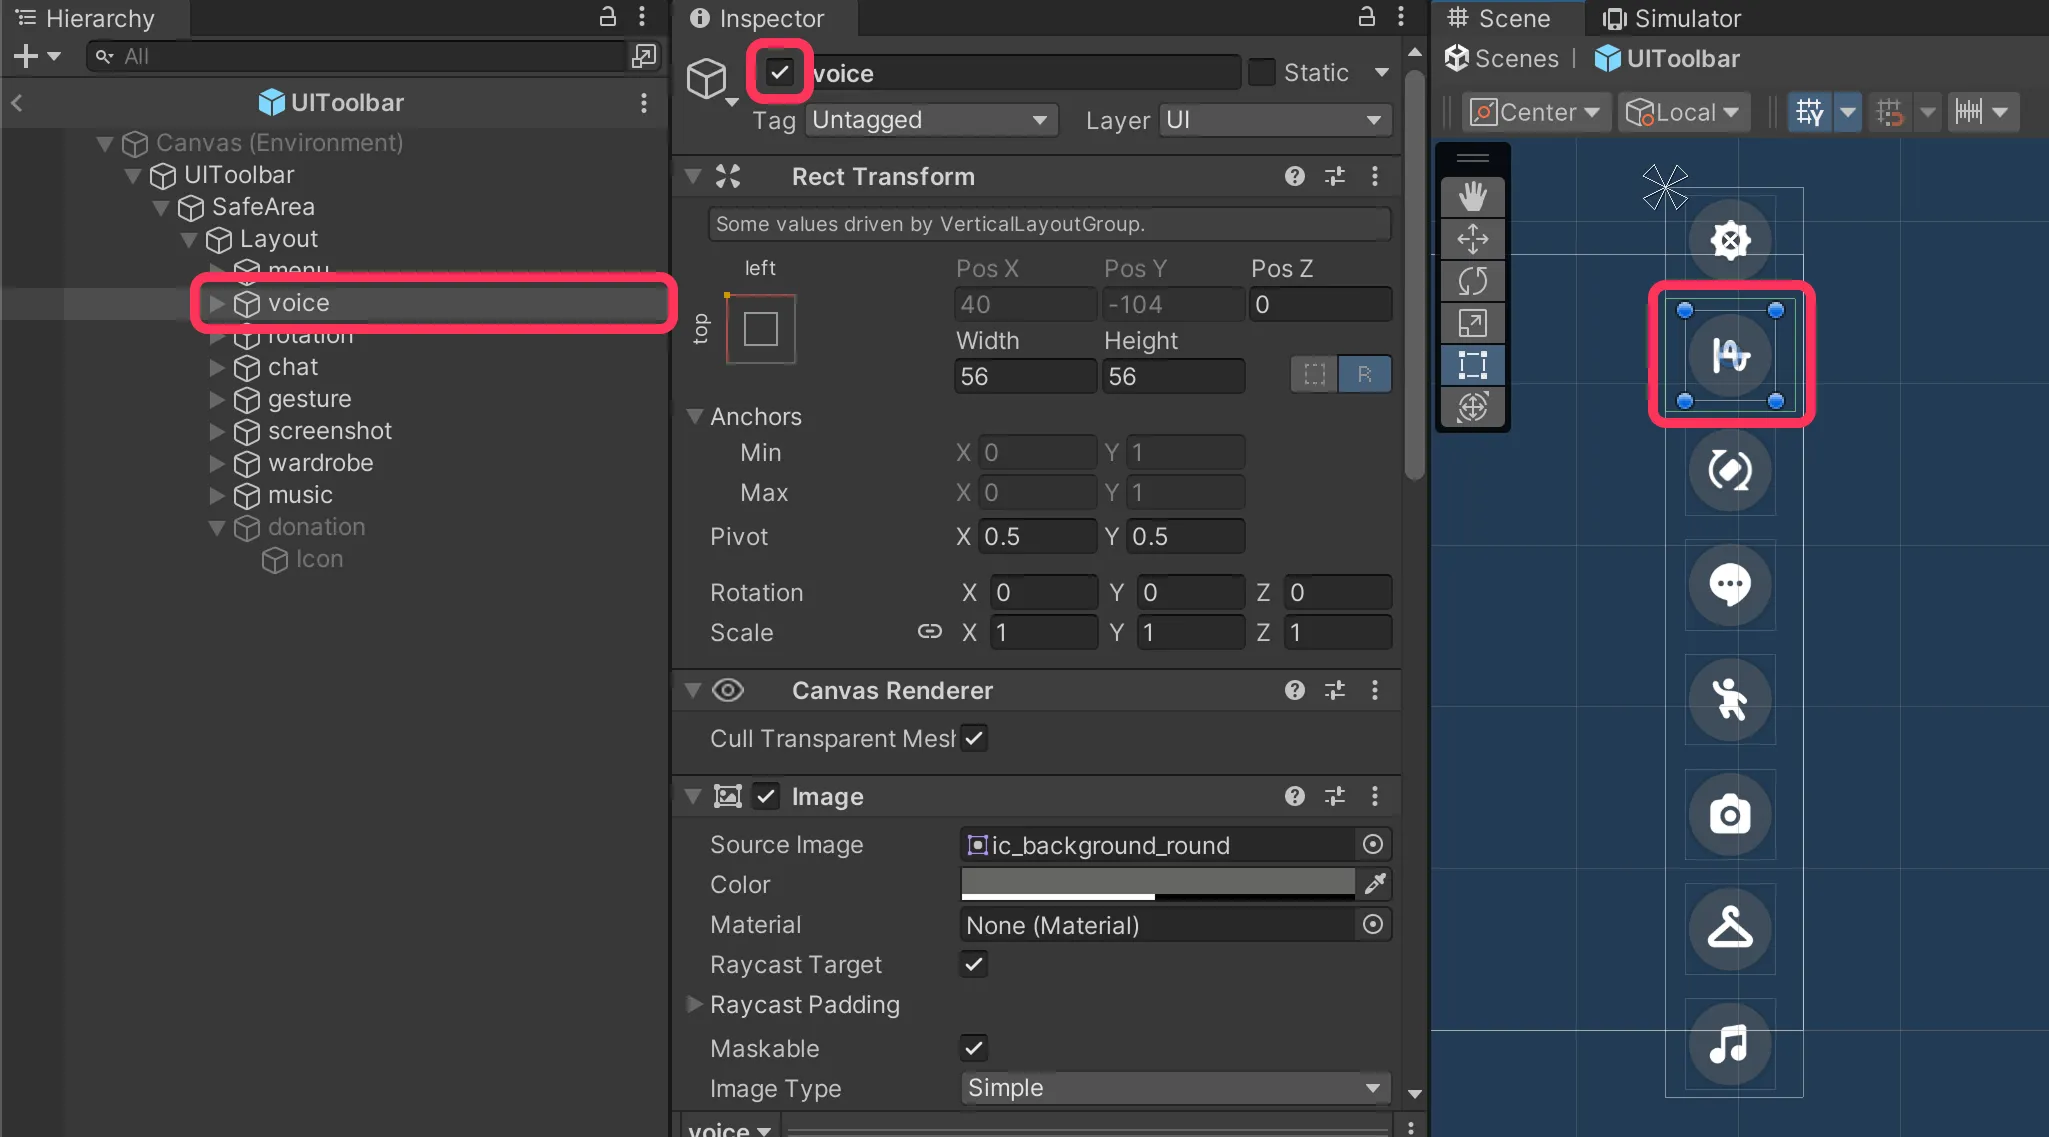
You can also customize the toolbar buttons.
Open and edit your toolbar prefab object. All the buttons are located under SafeArea/Layout.
- Remove a button: Disable its GameObject, and the toolbar leaves it out.
- Rearrange buttons: In UIToolbar, TopVertical and Horizontal, drag a button up or down in the Hierarchy. In Fan and Spread, freely position the menu buttons in the Scene view.
- Change a button’s look: Change the icon, background icon or color for a custom look.
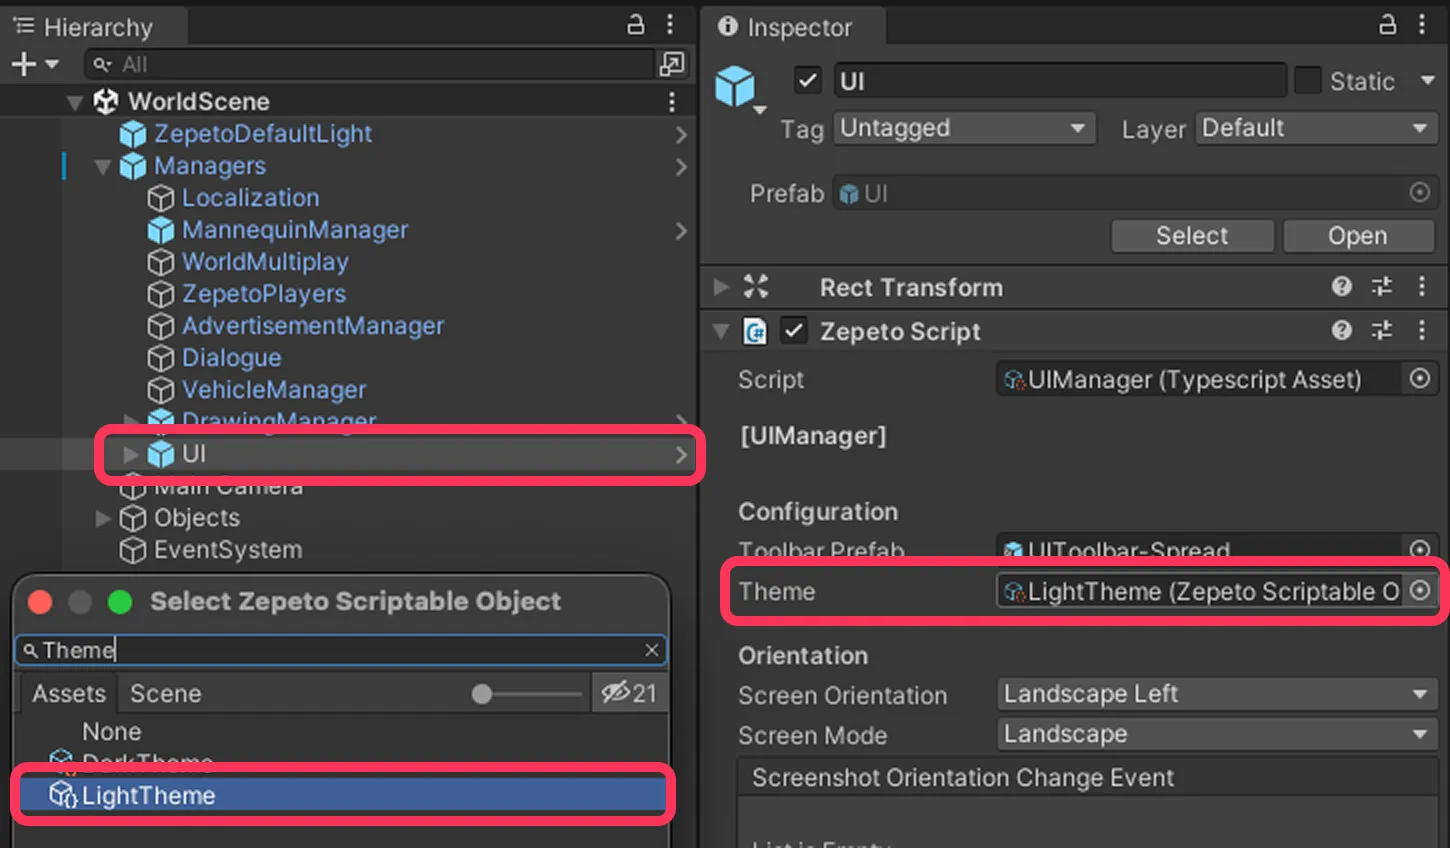
The visual look of all the menus. Select Theme and choose one of the available options:
- LightTheme bright look with white background and black text
- DarkTheme dark look with black background and white text
Congratulations 🎉 You’ve mastered the basic controls! Now it’s time to design your world.