8. Creating a 2D World
We’re introducing a 2D World that lets you build worlds faster and more easily.
With only your own background image and portal connections, you can quickly and easily create and release a world.
You can install and use the 2D World package in your existing Buildit Unity plugin project!
How to apply
In Unity Hub, select the Buildit plugin folder and click the Open button.
📘 Note If this is your first time, follow 1. Installation tjf to install the Buildit Unity plugin first and learn the basic controls.
Once the Buildit plugin project is open, choose ZEPETO > Buildit at the top, then select Plugin Package Manager > 2D World.
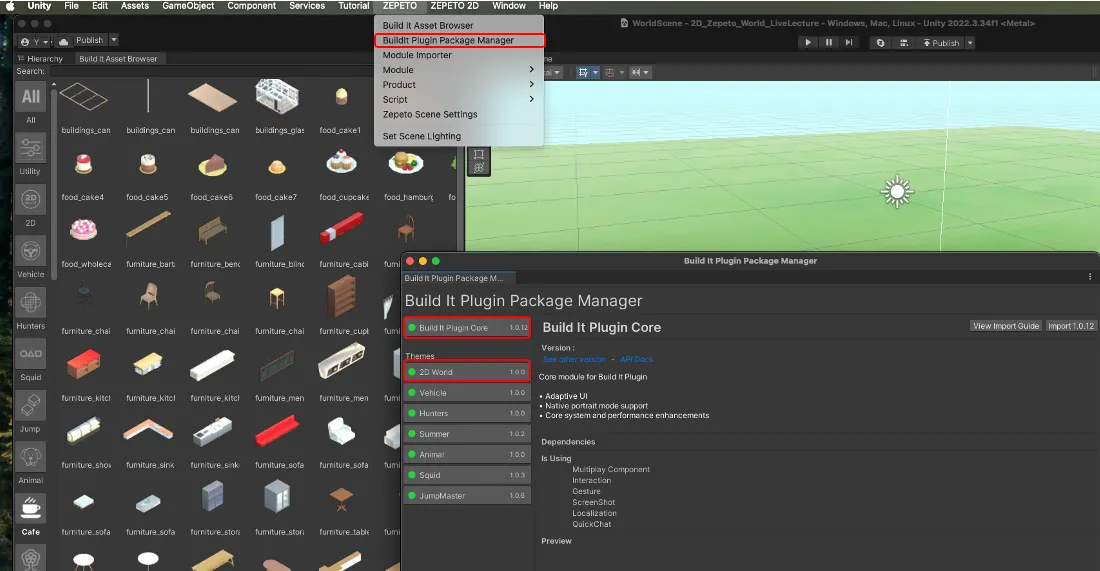
Click Import to bring in all components.
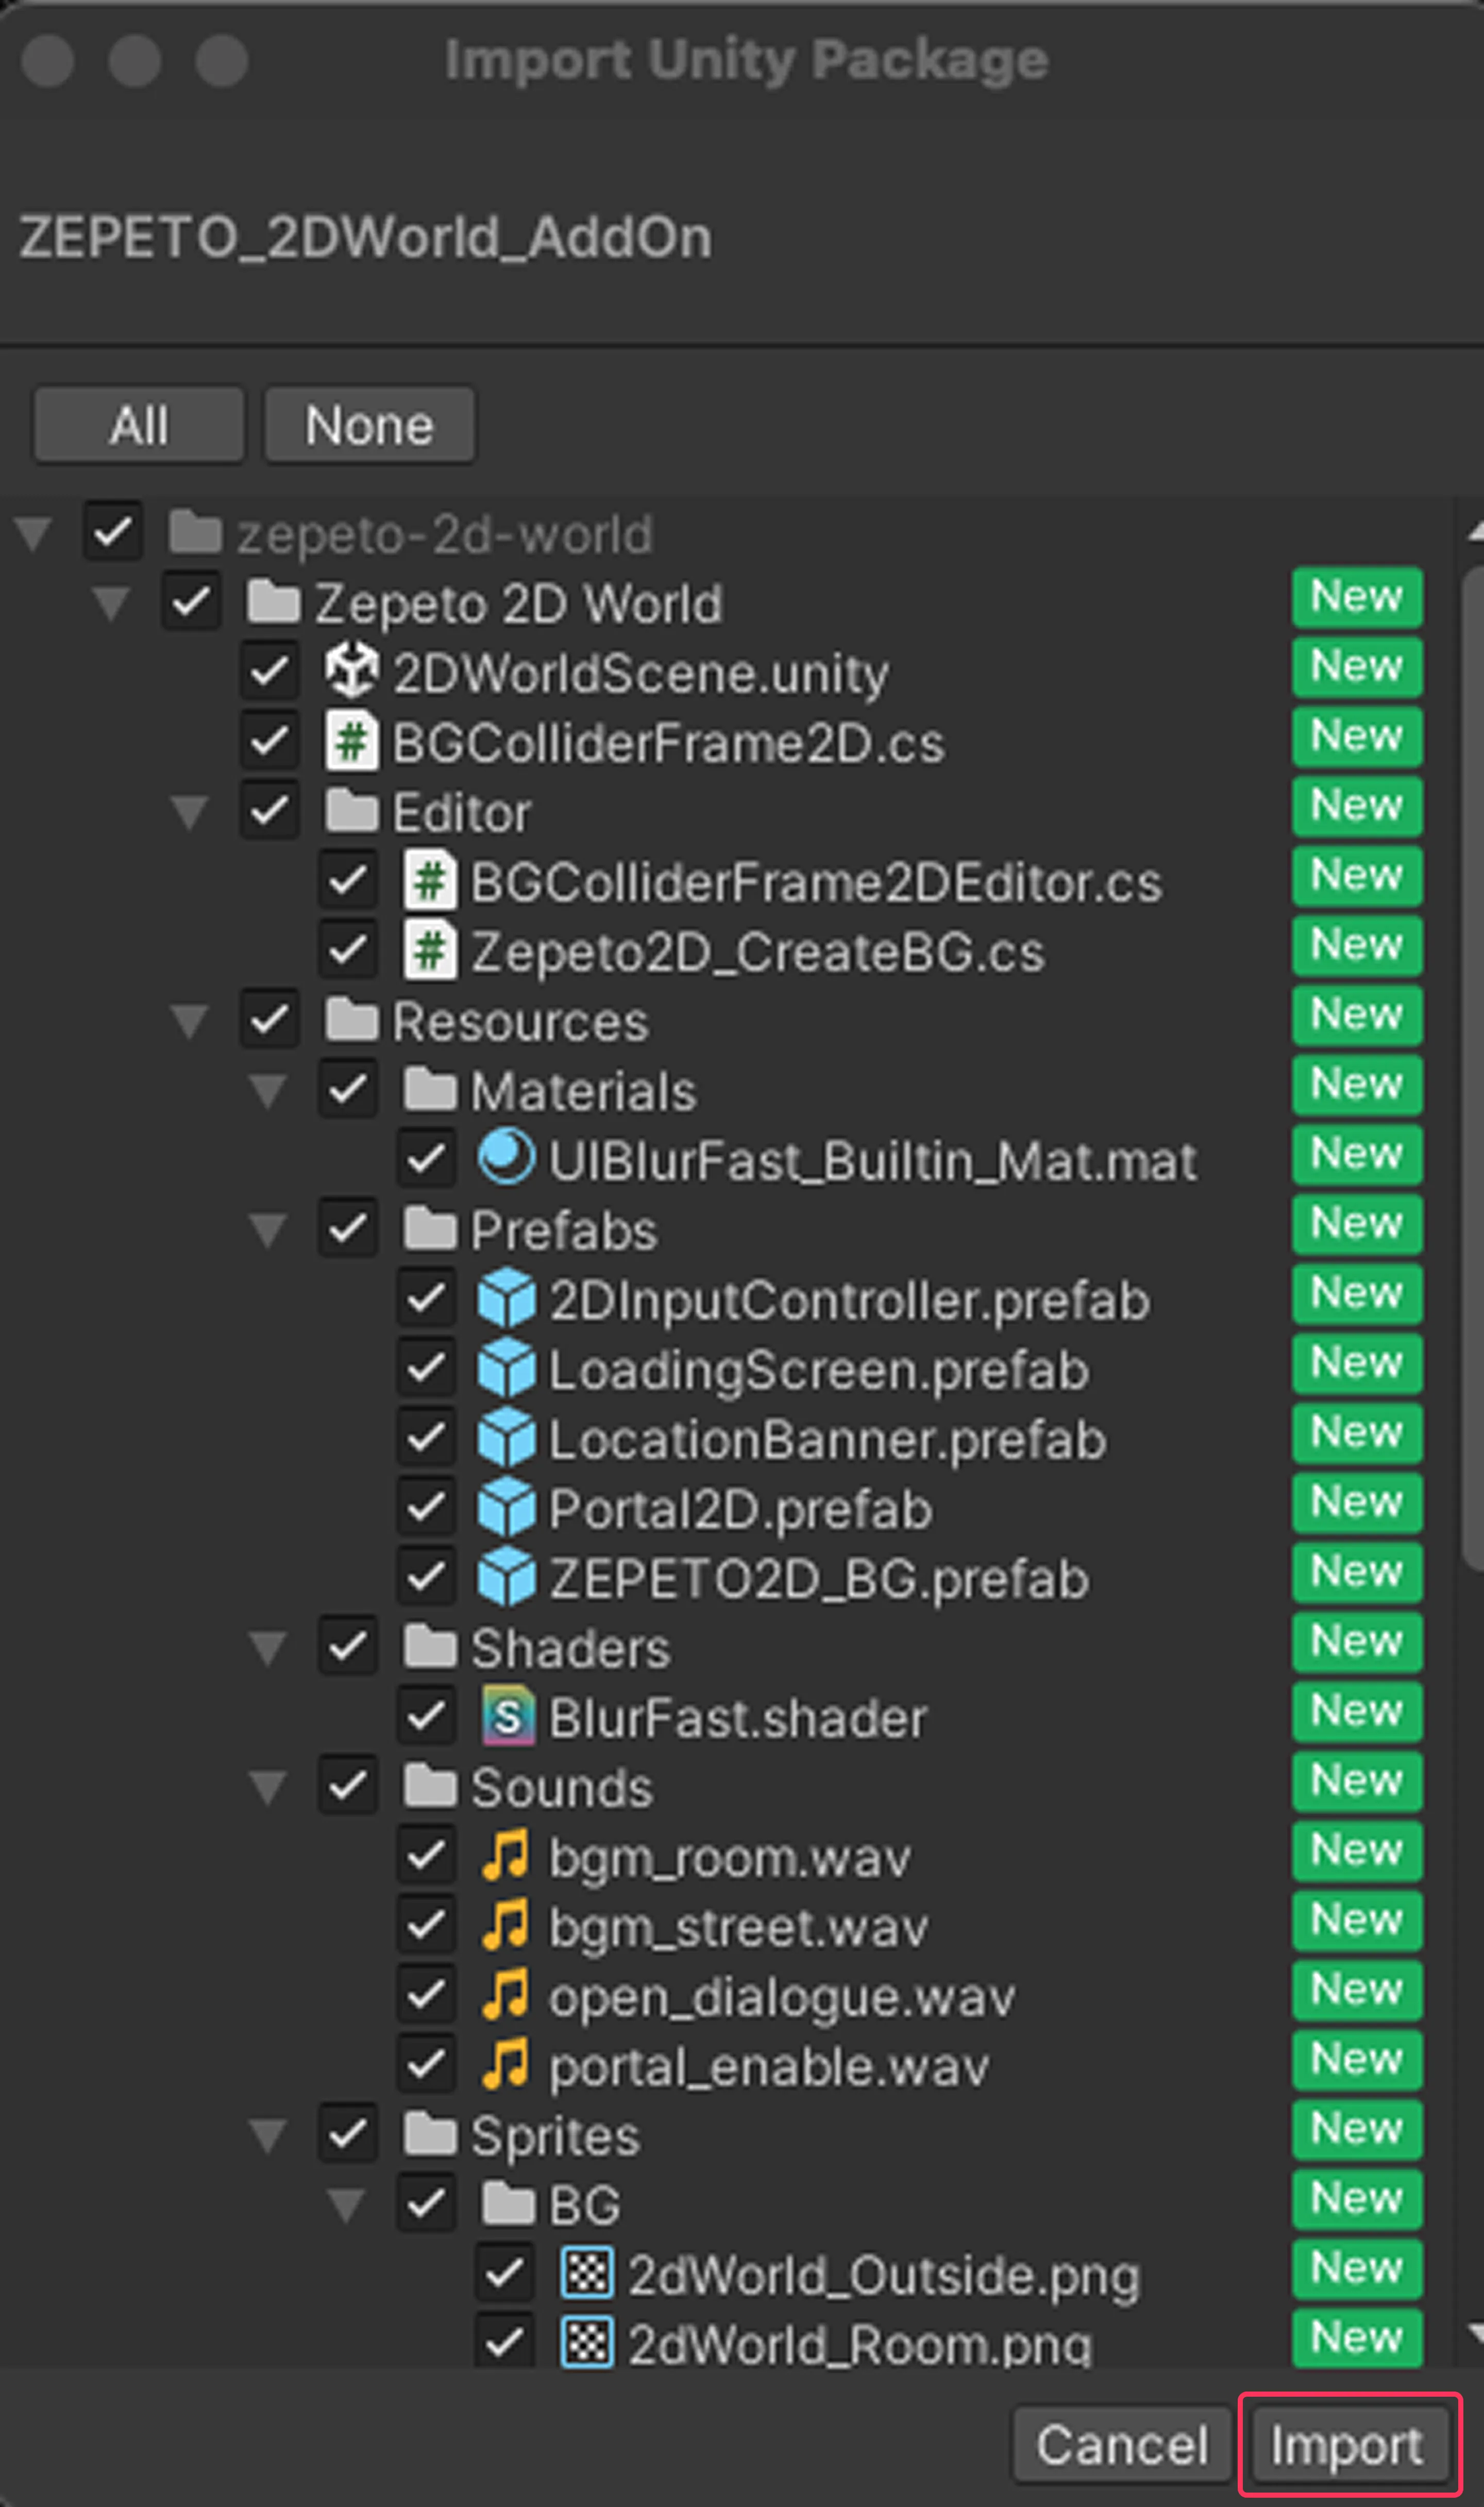
After completing step 3, the Assets > Zepeto 2D World folder has been created.

Double-click the 2DWorldScene file in the folder to open it.
After logging into your account at the top, turn the multiplayer server On, and press the Play button to play the 2D World.
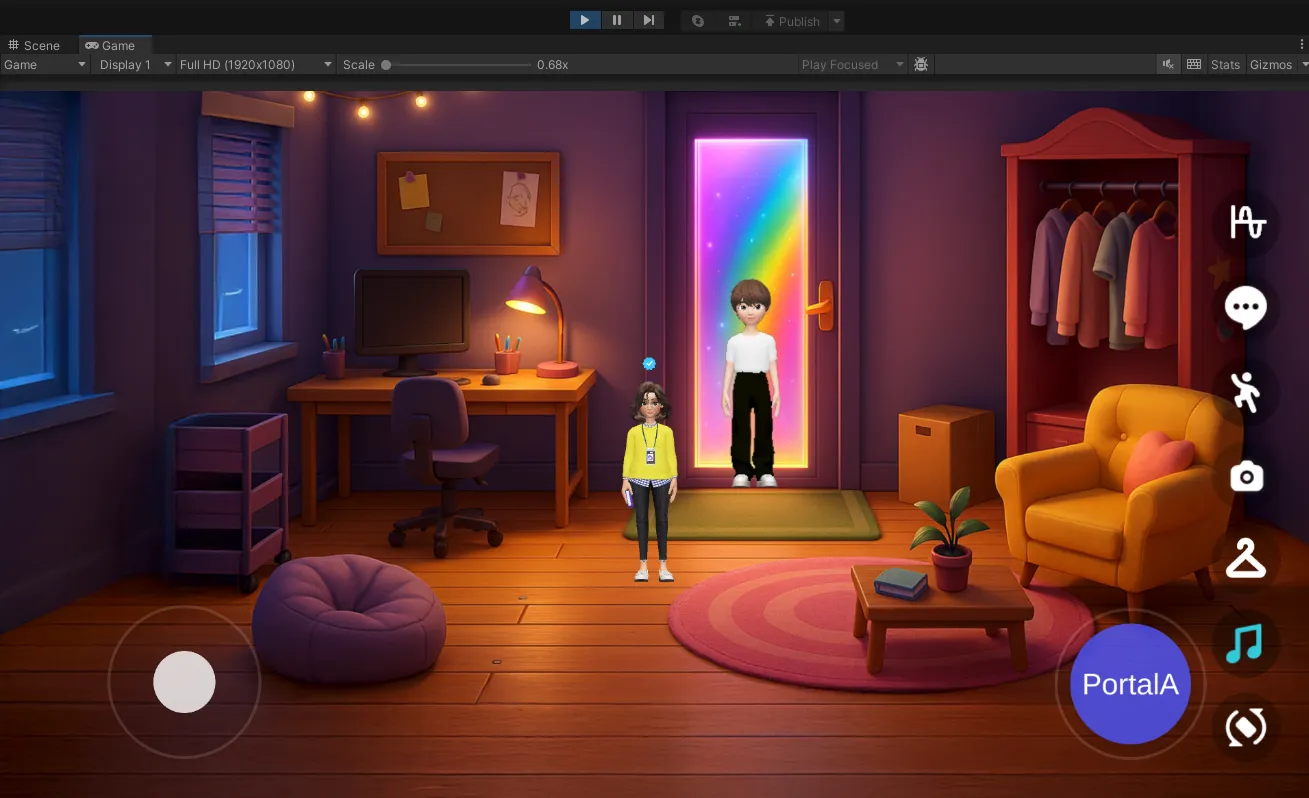
2D World features
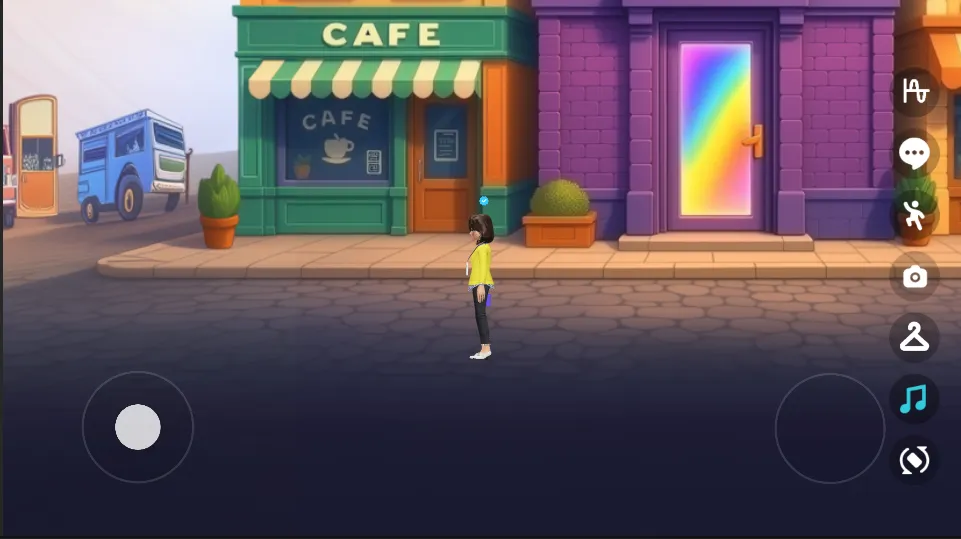
- You can use the Buildit plugin’s basic module features.
- You can use voice chat, quick chat, gestures, screenshots/screen recording, wardrobe, and BGM features.
- Landscape/portrait mode switching is provided.
- You can change the loading screen.
- You can change the map background.
- You can add as many maps as you want and connect them with portals to create a creative space.
There is no limit to the number of maps, but when releasing to Zepeto Studio, the build file size must be within 1GB and the values must stay within the optimization guidelines.
- You can change the background music (BGM).
- Since this is a 2D world, placing 3D objects doesn’t fit well and is not recommended.
- The goal is to make world creation fast and easy with only backgrounds and portal connections.
Creating a 2D World
2DWorldScene default setup
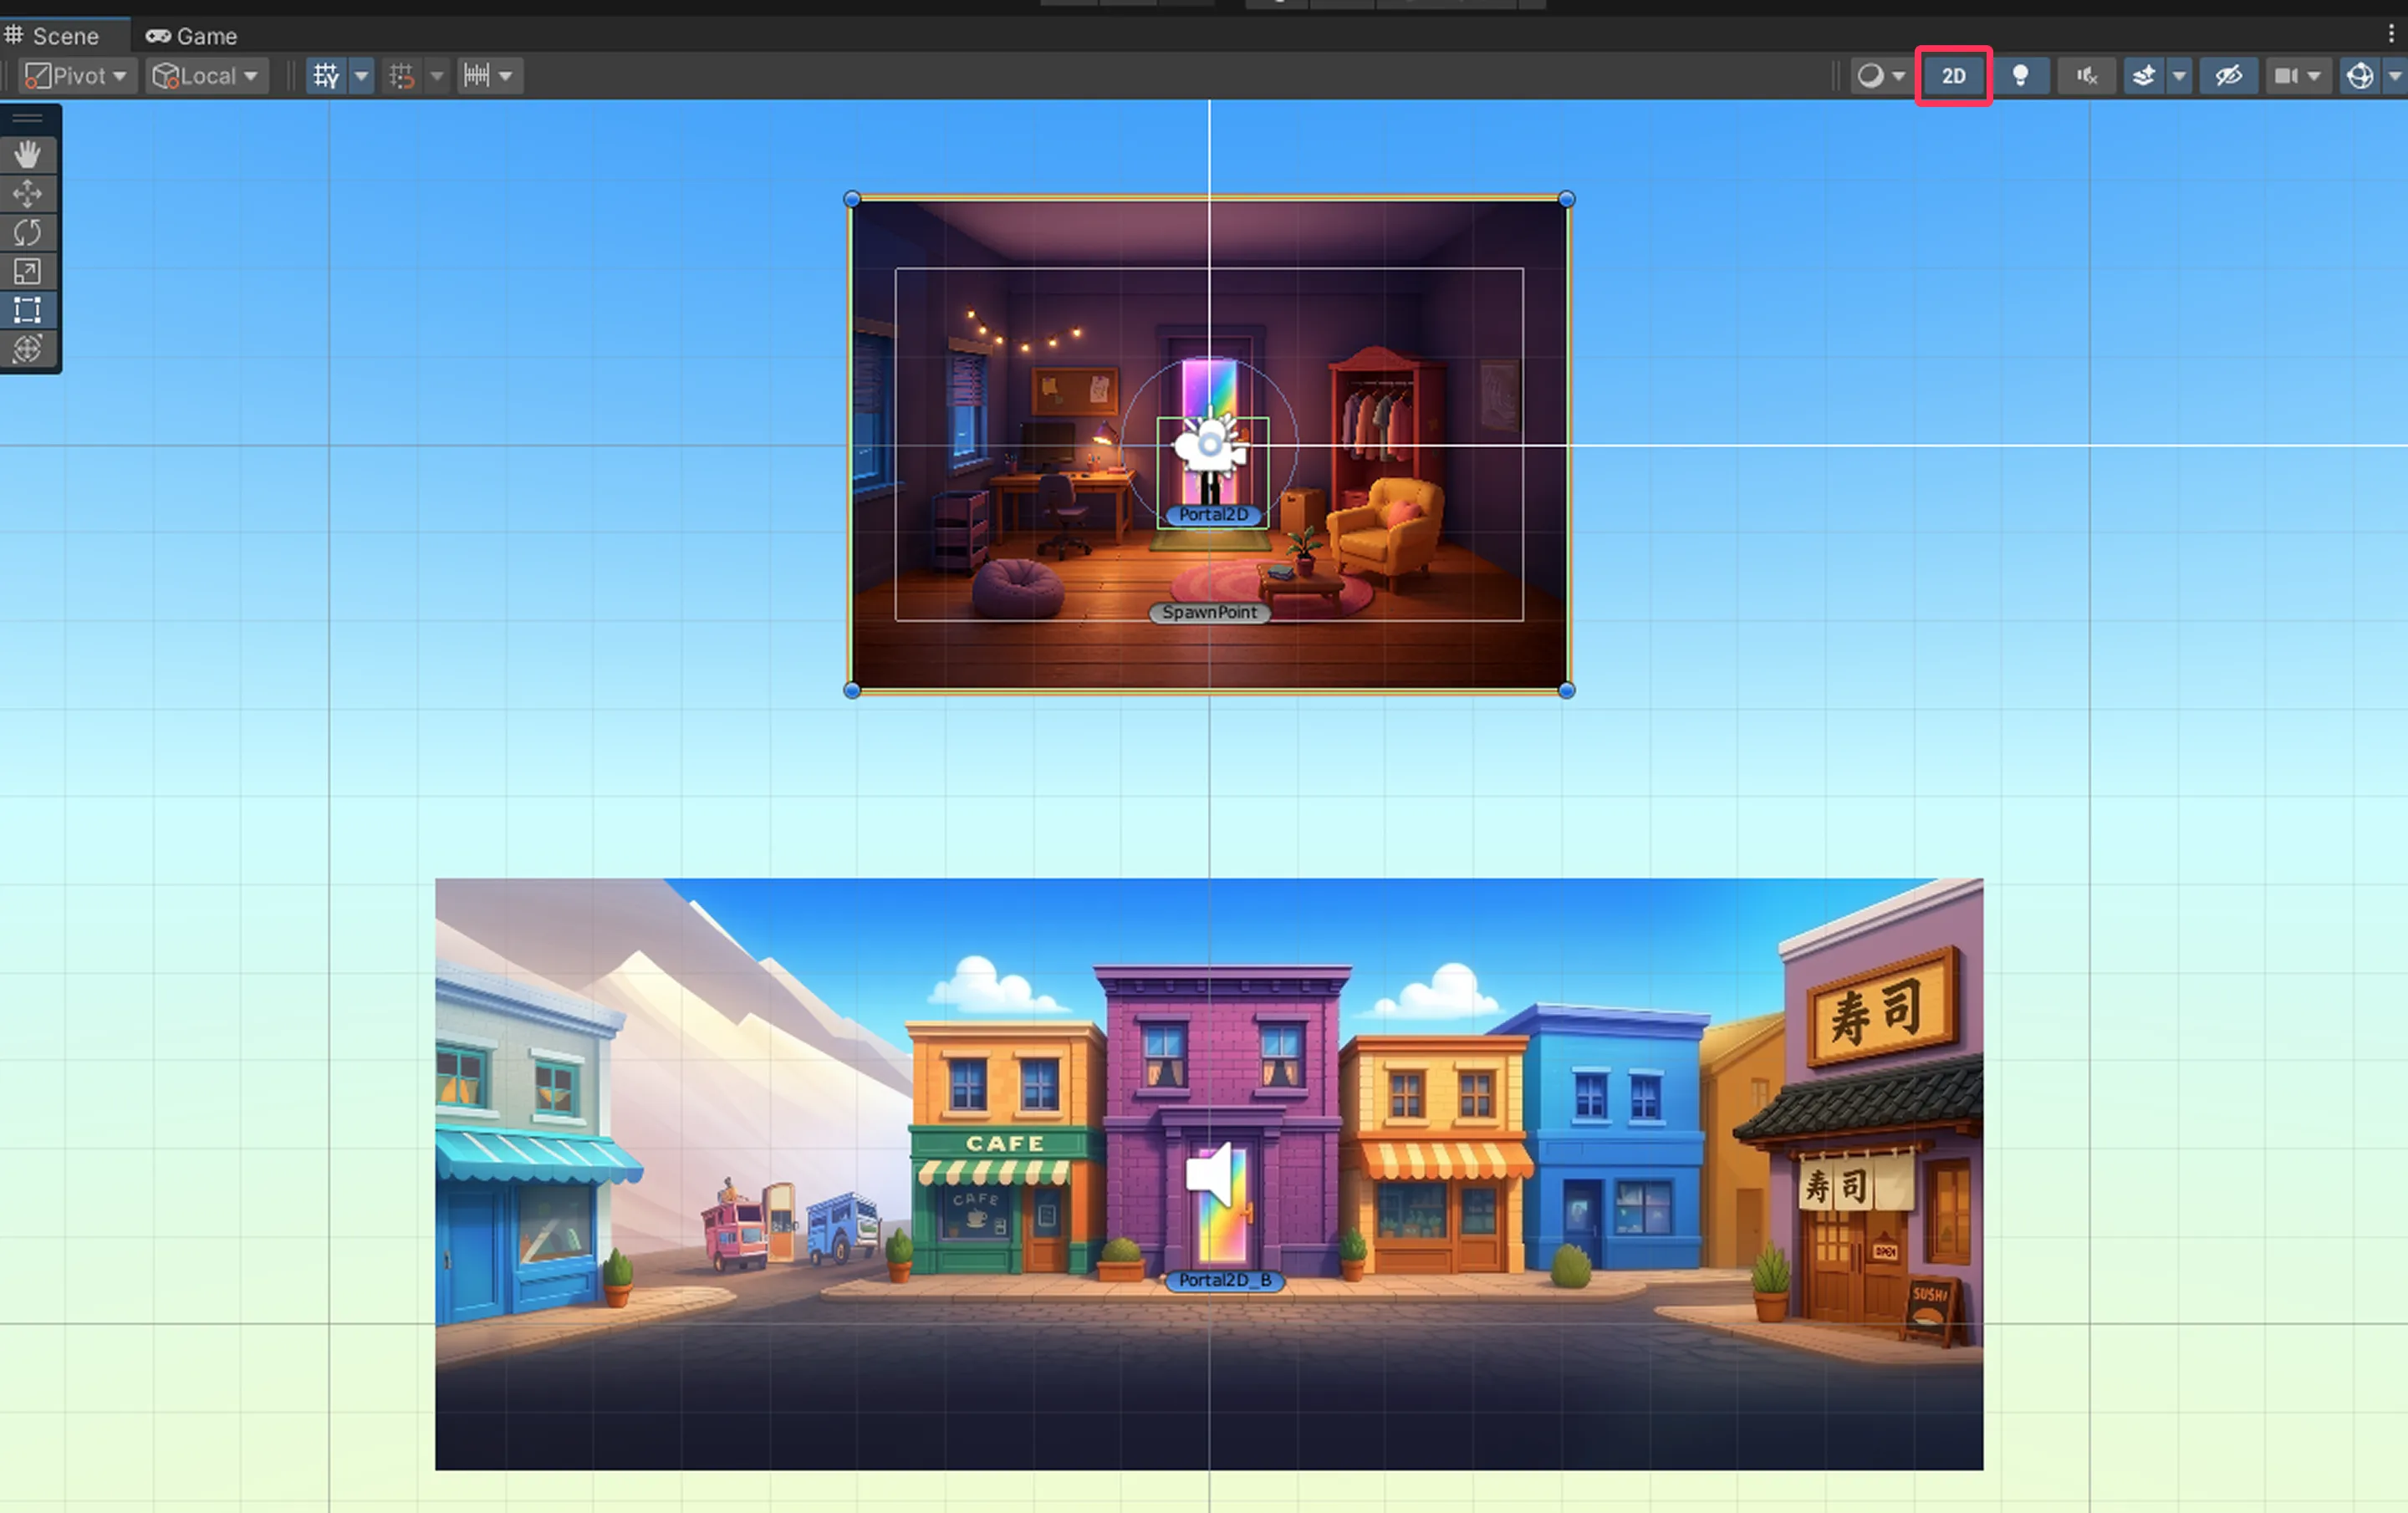
- By default, an example is included with a loading screen and two maps connected by a portal.
- For convenience while working, please click the 2D menu in the Unity Editor Scene.
Loading screen
- If you enable (check) the Managers > LoadingScreen object in the Inspector, you can use the loading screen feature.
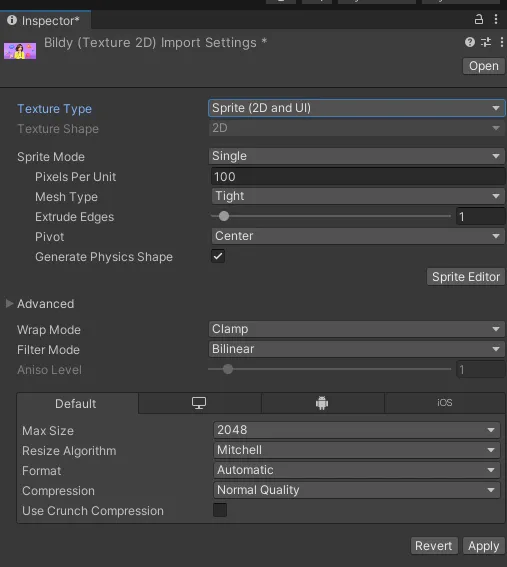
- Drag the image you want to use as the loading image into Assets, change Texture Type to Sprite(2D and UI), then click Apply.
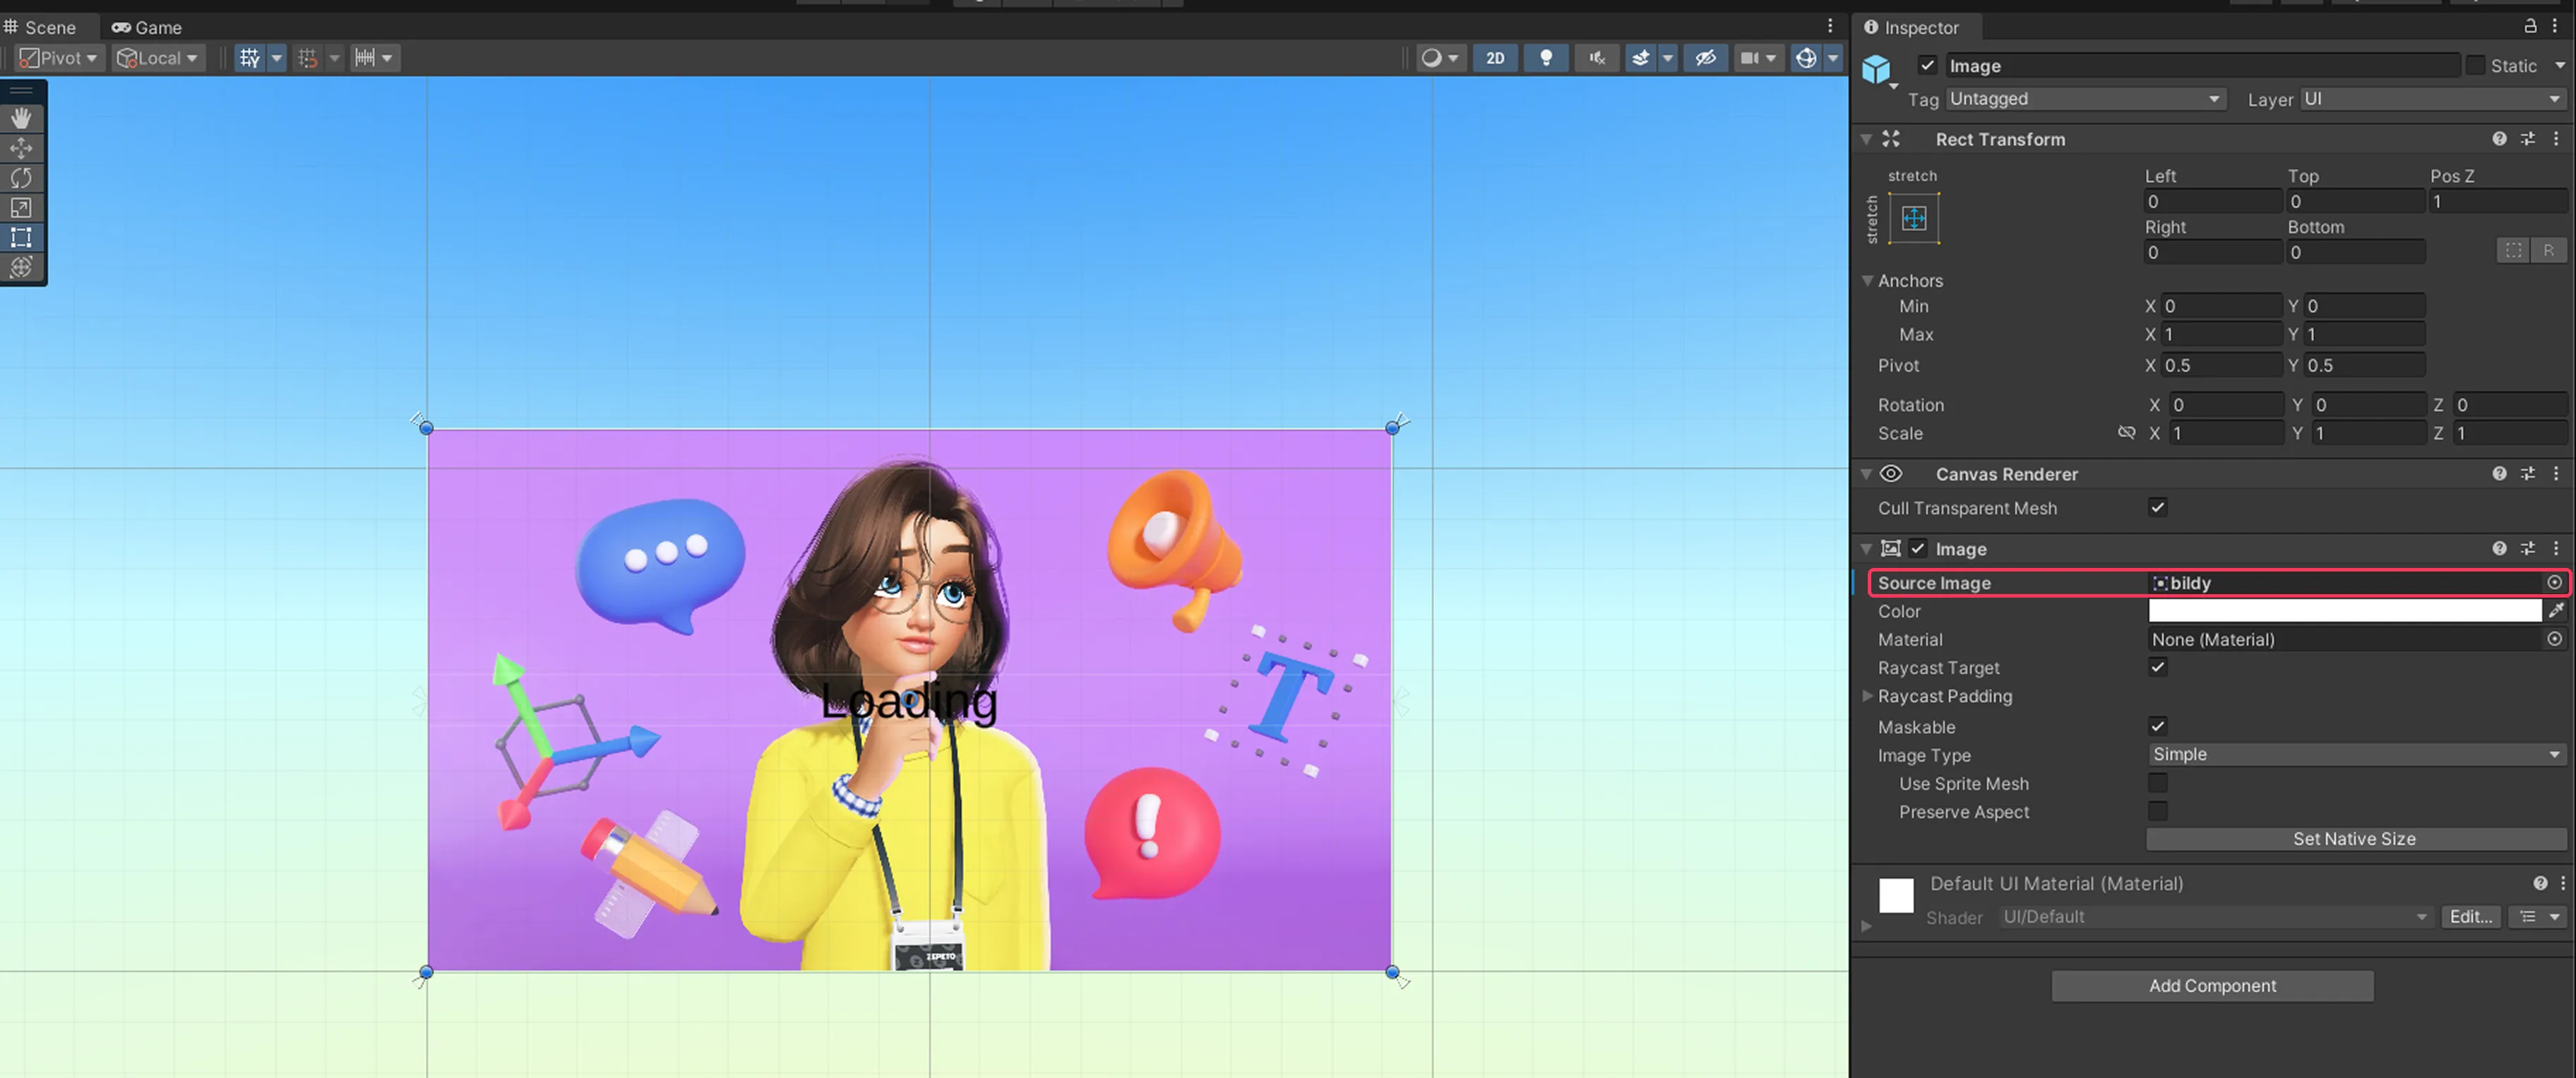
Select Managers > LoadingScreen > Image.
Drag the loading image you just added into the SourceImage property of the Image object to change the loading image.
Select Managers > LoadingScreen > Text(TMP).
Enter the loading text in TextMeshPro-Text(UI). If you don’t want text, you can leave it blank.
Managers > LoadingScreen > Delay After Ready indicates how long (seconds) the loading screen remains after the Zepeto character is created. The default value is 0.1.
Changing character movement speed
- Managers : You can adjust the character’s movement speed.
- Run Speed : Adjusts the character’s running speed.
- Walk Speed : Adjusts the character’s walking speed.
The jump feature cannot be used in a 2D world.
Editing maps
You can change the map background image, portals, character walkable area, BGM, and the map title.
Changing the background image
In the Hierarchy, select the ZEPETO2D_BG object.
- Sprite Renderer > Sprite : Drag the image you want to change the background.
- Rebuild Borders2D : If you changed the image, you must click this button. It will generate a BoxCollider2d as the walkable area border to match the image size.
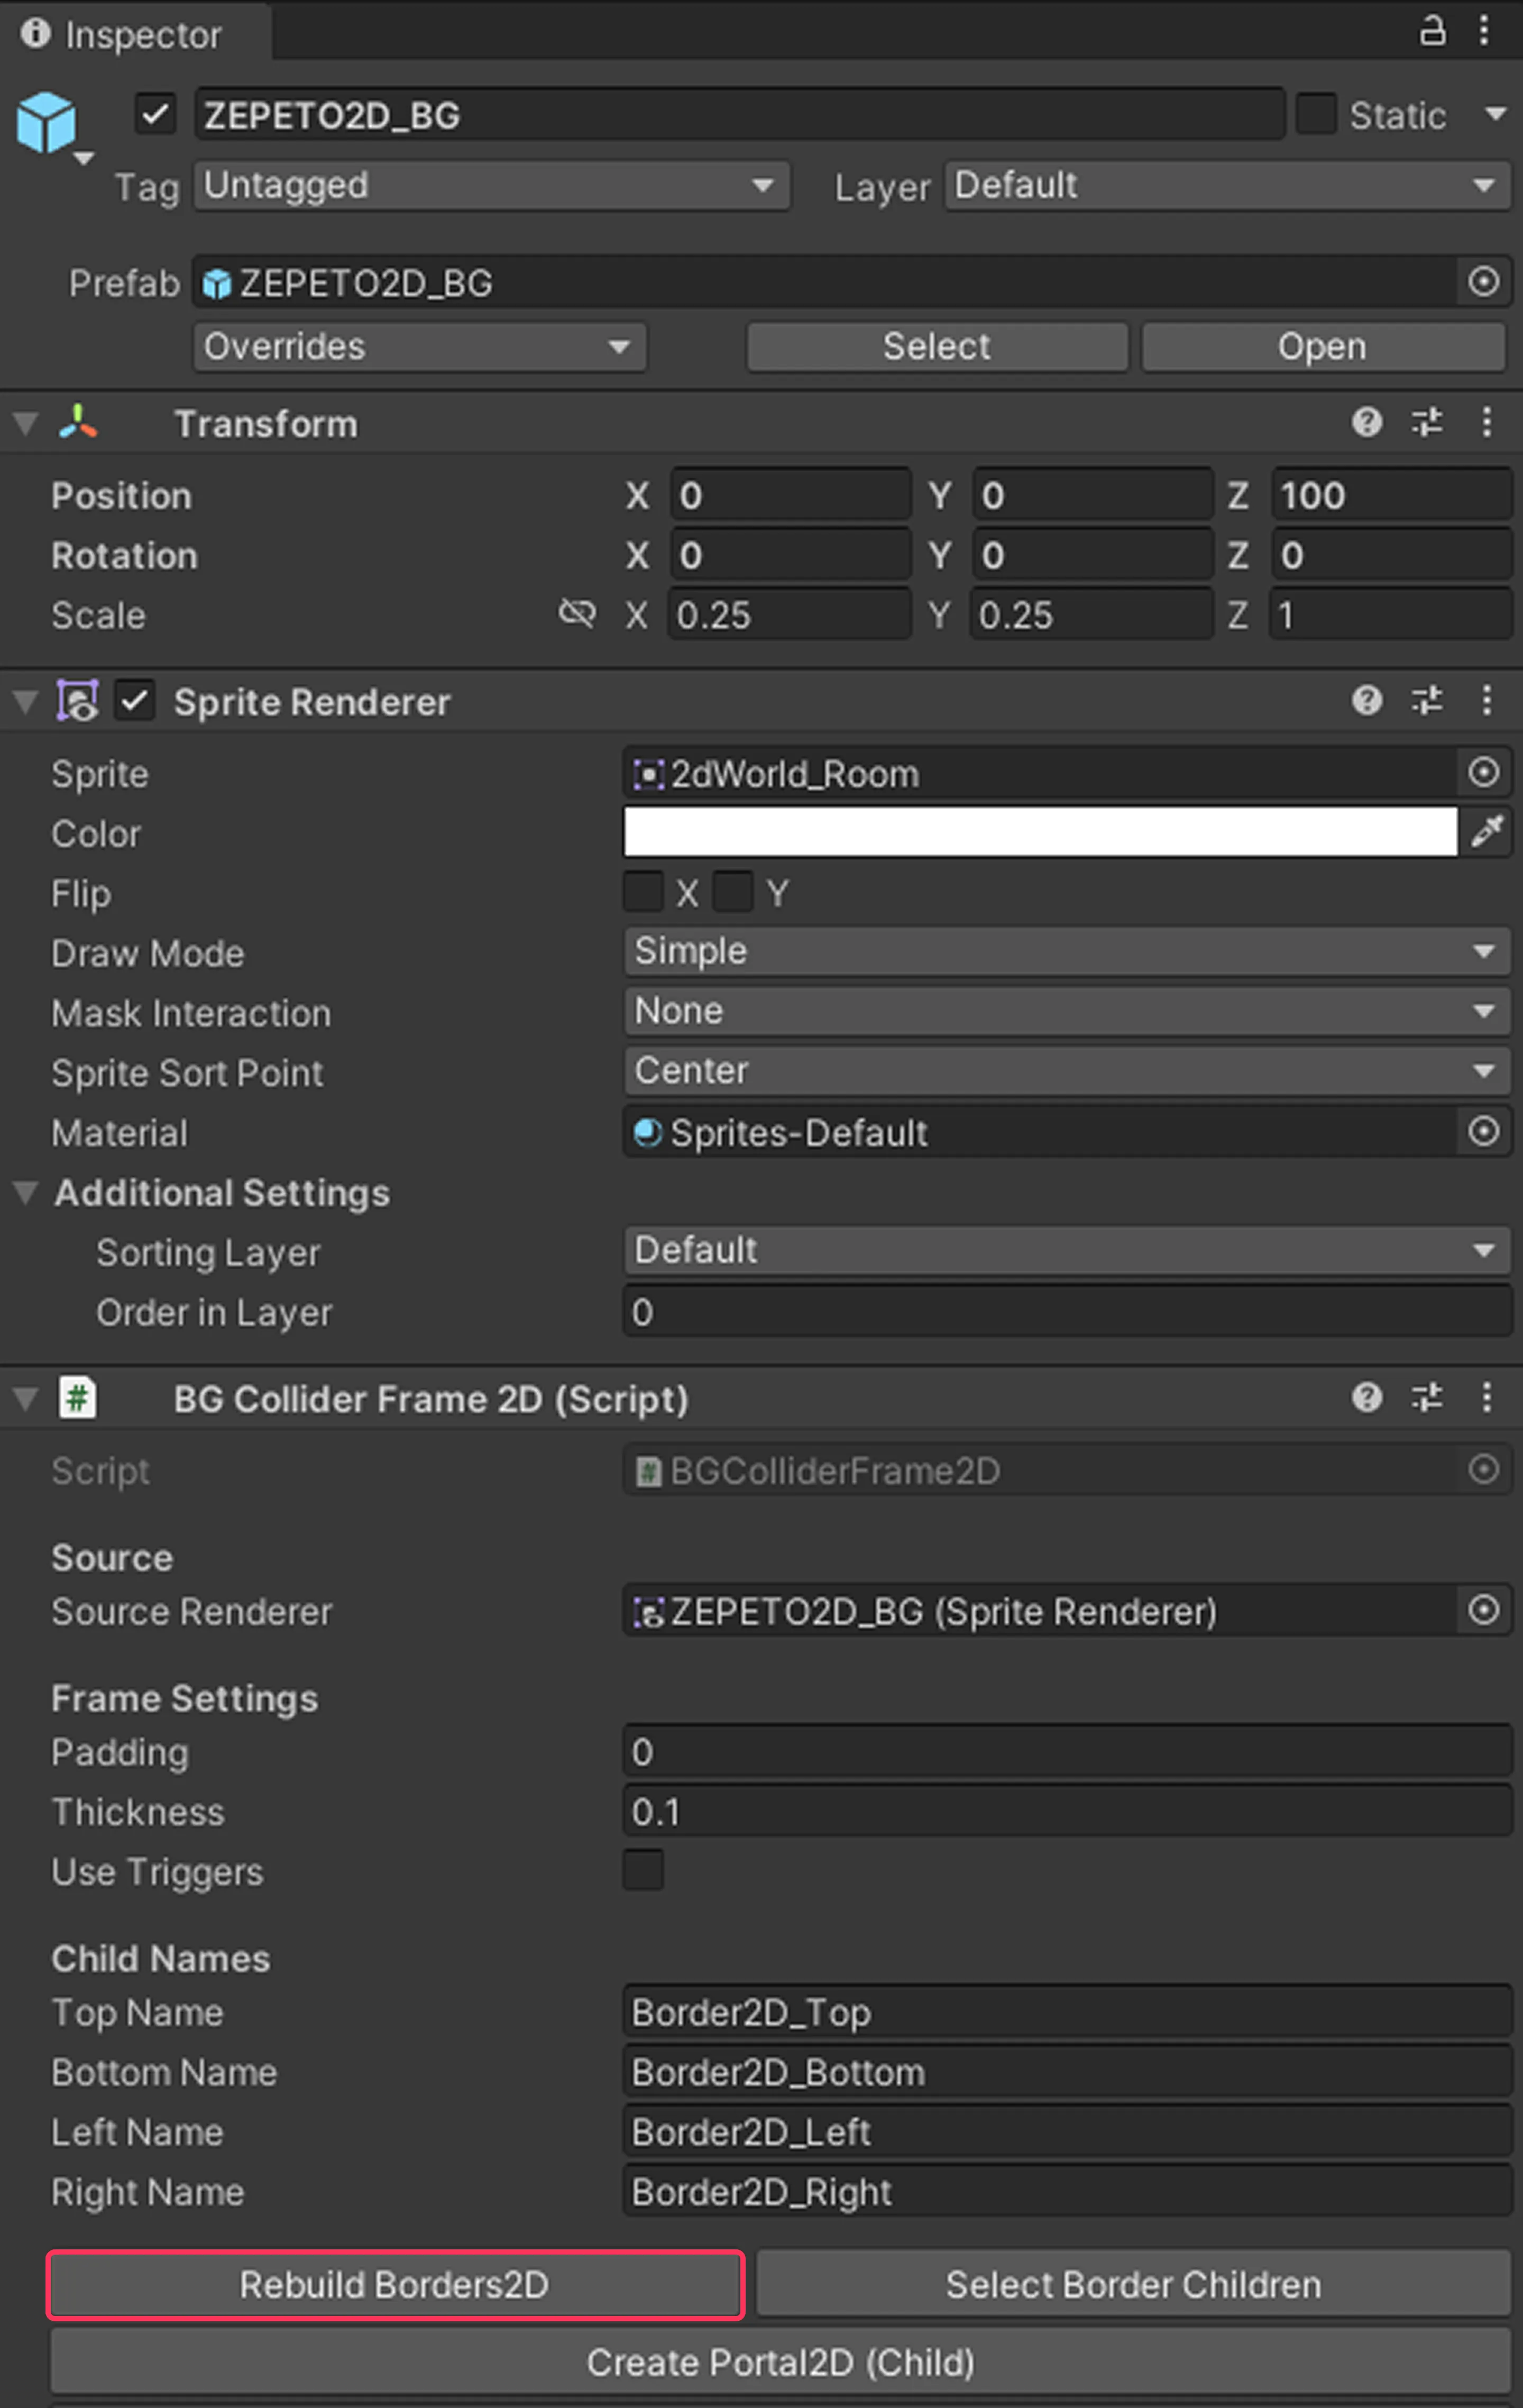
Move Border2D-Top with the Move tool and position it at the floor boundary area in the image.
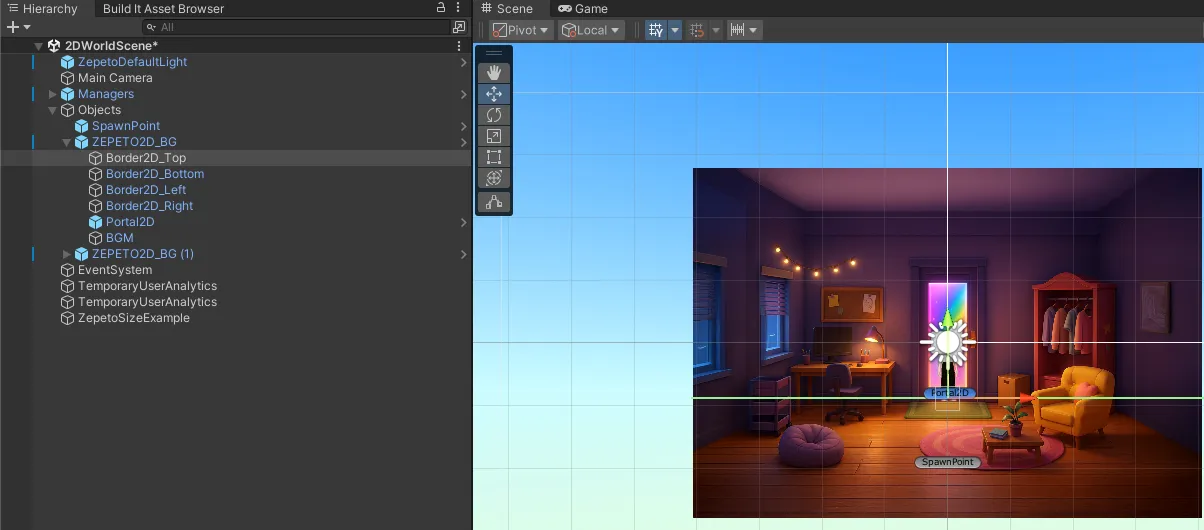
You don’t need to modify the other Borders separately.
The map size is created to match the original image size, but you can adjust it to the size you want by entering a Scale value in Transform.
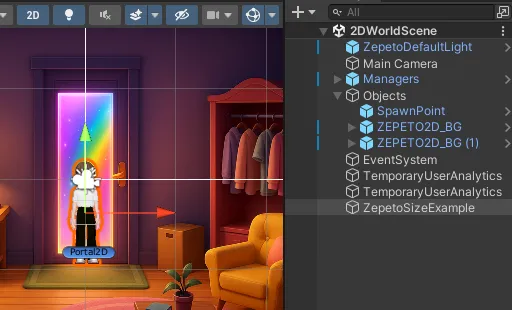
Recommended original image size : 3400×1530px This is a horizontally scrolling 2D background image size. Even if your image size differs from the recommended size, it won’t prevent you from creating the world.
Connecting portals
In the Hierarchy, select the ZEPETO2D_BG object.
- Linked Portal Obj : When the character enters the portal’s Box Collider area, the portal activates, and clicking the button moves to the linked destination. Drag and add the destination portal.
- Interact Button Text : The text shown on the portal button. If there is no linked portal, the text will not appear.
- Show Map Title Toast : If checked, the Map Title you entered will appear when moving via portal.
- Map Title : Name text.
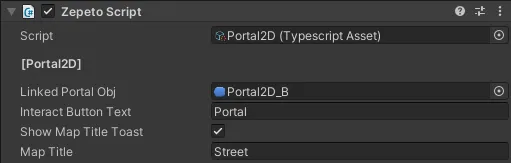
You can create additional portals via ZEPETO2D_BG > Create Portal2D(Child).
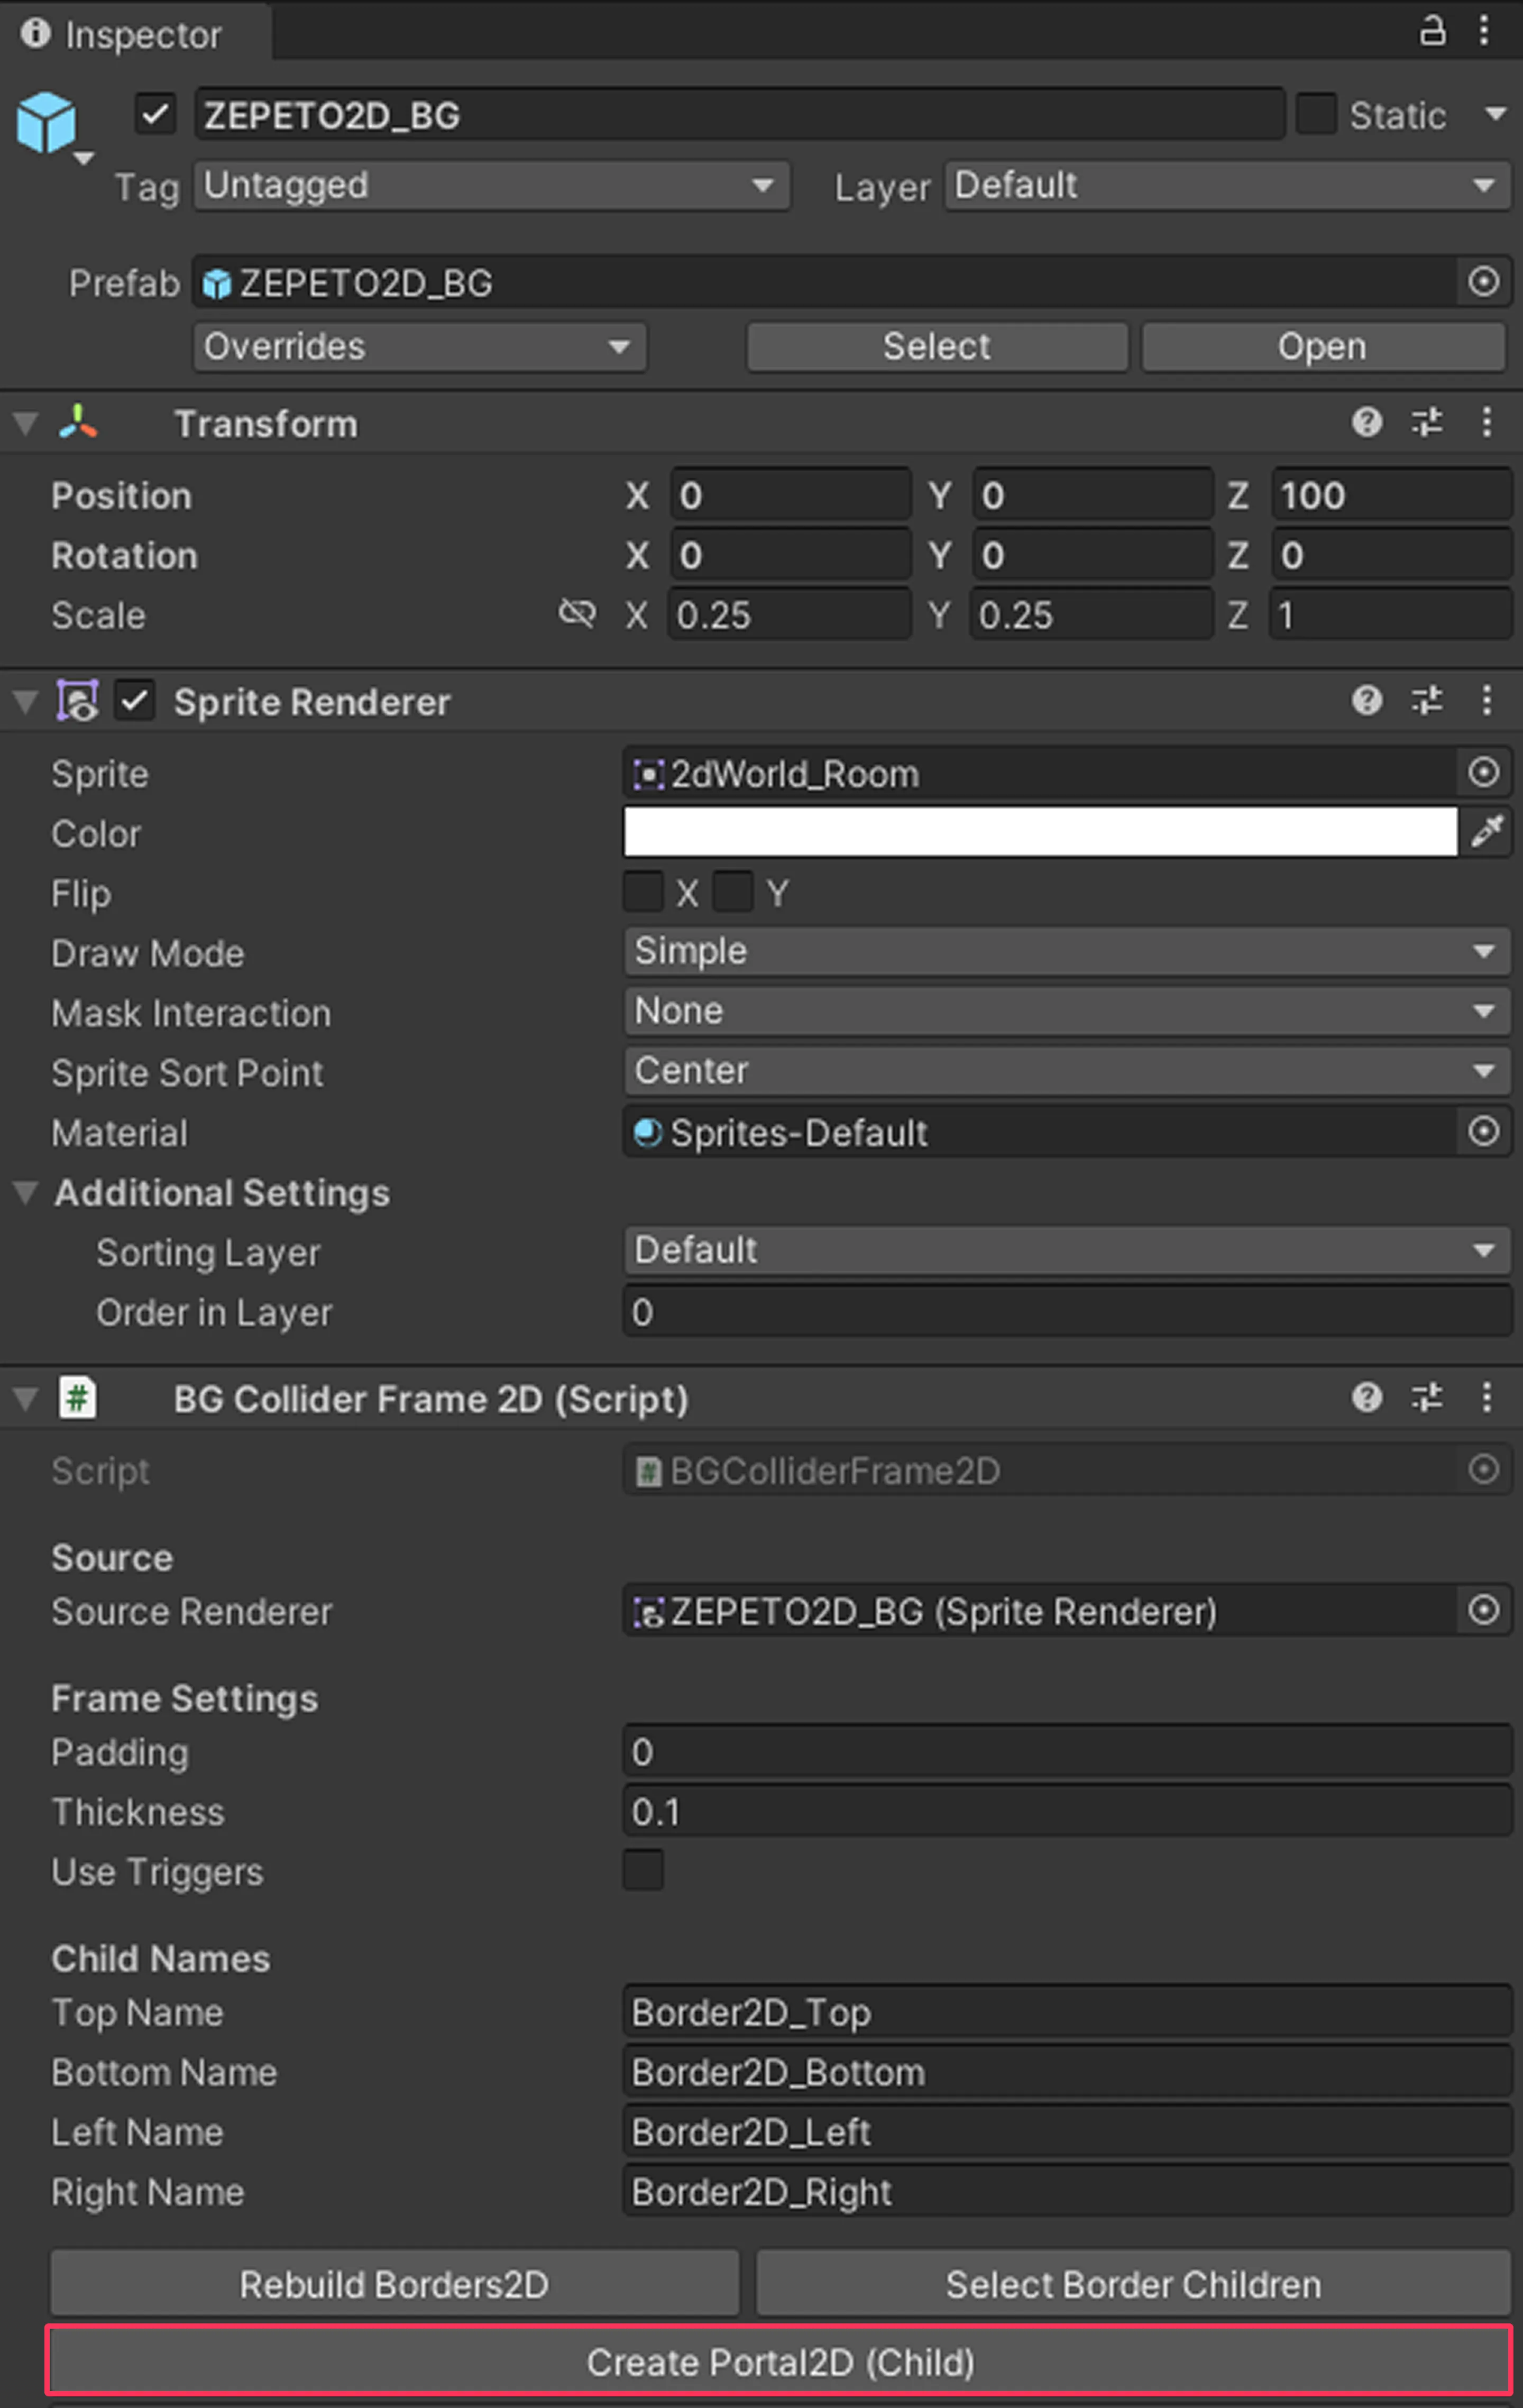
Changing BGM
In the Hierarchy, select the ZEPETO2D_BG > BGM object.
Drag your desired music into the BGM Audio Source to change it. You can set different BGM for each map.
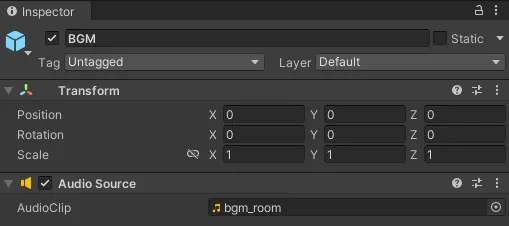
Editing the map title UI
- You can change where the title appears by adjusting the Rect Transform position values of Managers > UIToolbar > MapTitleToast.
- In Managers > UIToolbar > MapTilteToast>Background, you can change Color or use a custom image, and adjust the background area size by editing the Rect Transform values.
- Select Managers > UIToolbar > MapTilteToast>Background>Text(TMP) to change the text color using Font Size and Vertex Color.
Adding maps
- Click ZEPETO 2D > Create BG at the top to add a new map.

- For newly added maps, change the image and connect portals in the same way.
Adding NPCs
In a 2D world, you can use NPCs you can talk with.
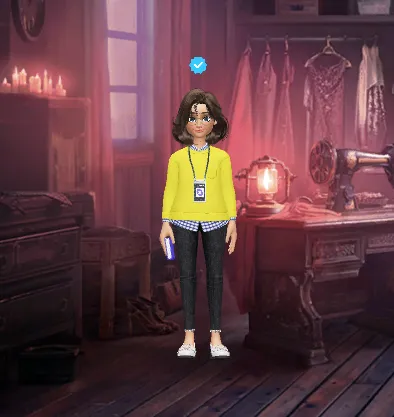
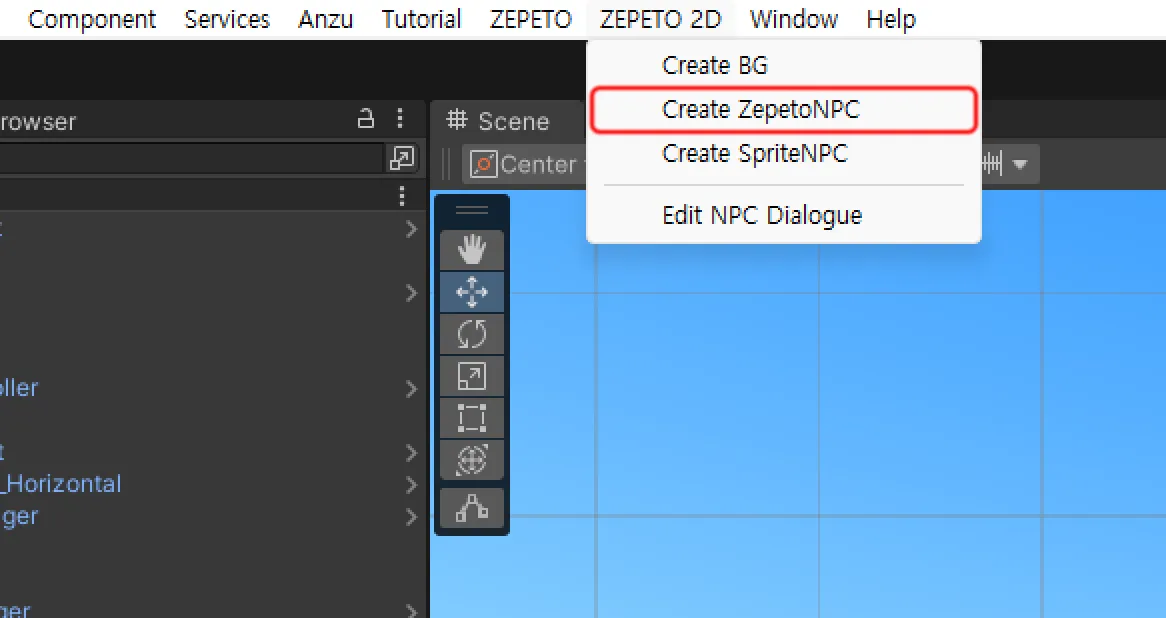
You can modify the NPC placed in the sample scene, or click ZEPETO 2D > Create ZepetoNPC from the top menu to add a Zepeto NPC.
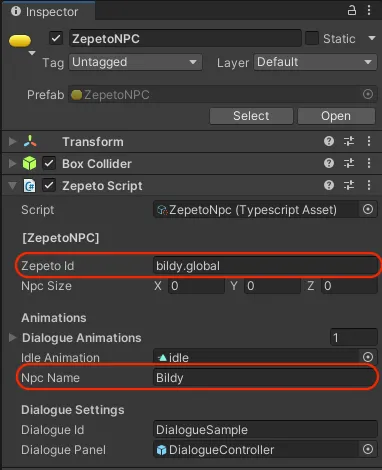
In the Hierarchy, select the created ZepetoNPC.
- Zepeto ID : Enter the ZEPETO account ID to use.
- Npc Name : Enter the NPC's name to be displayed on the screen.
- Dialogue ID : Enter the Dialogue ID to use.
The Dialogue ID is a unique value for a Dialogue created with the NPC Dialogue Editor.
📘 Note For more details on dialogue settings, please refer to Setting up NPC Dialoguedd.
Adding a Sprite NPC
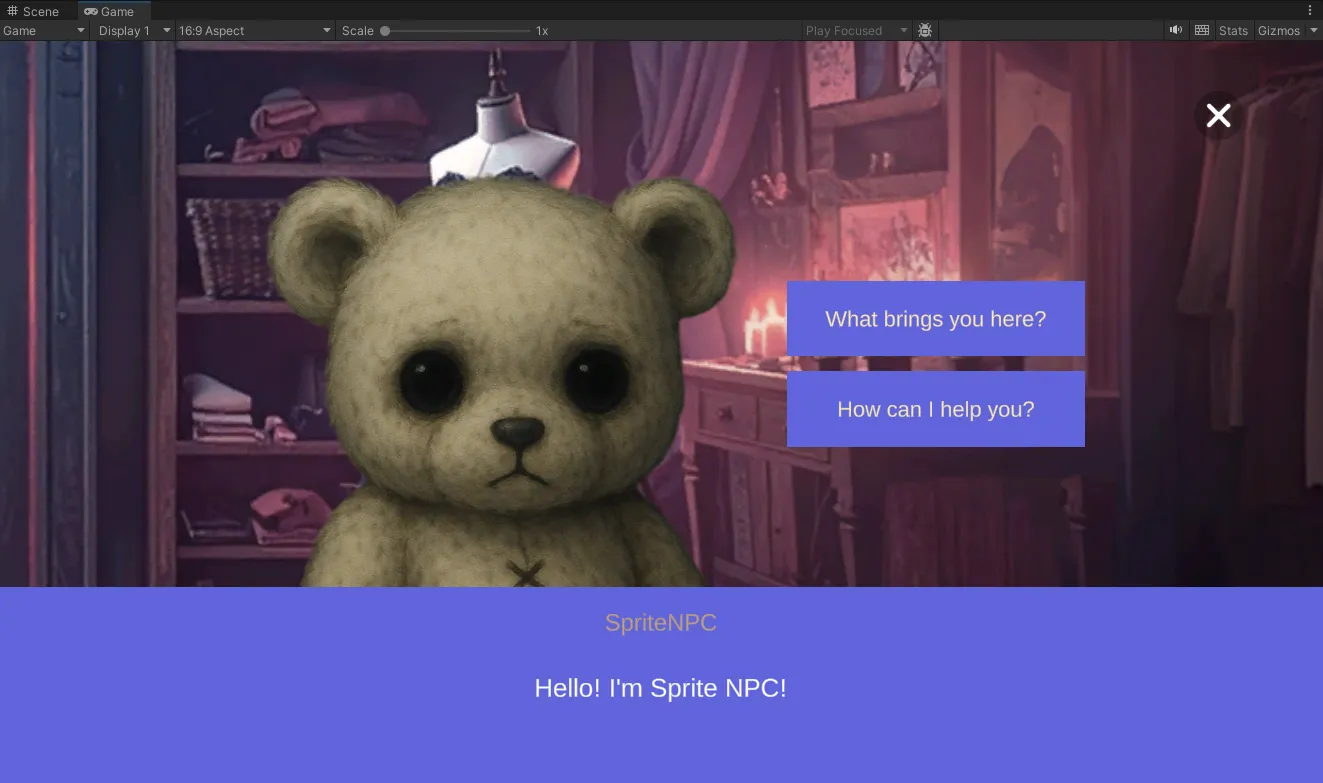
With the Sprite NPC feature, you can turn any custom image you import into an NPC.
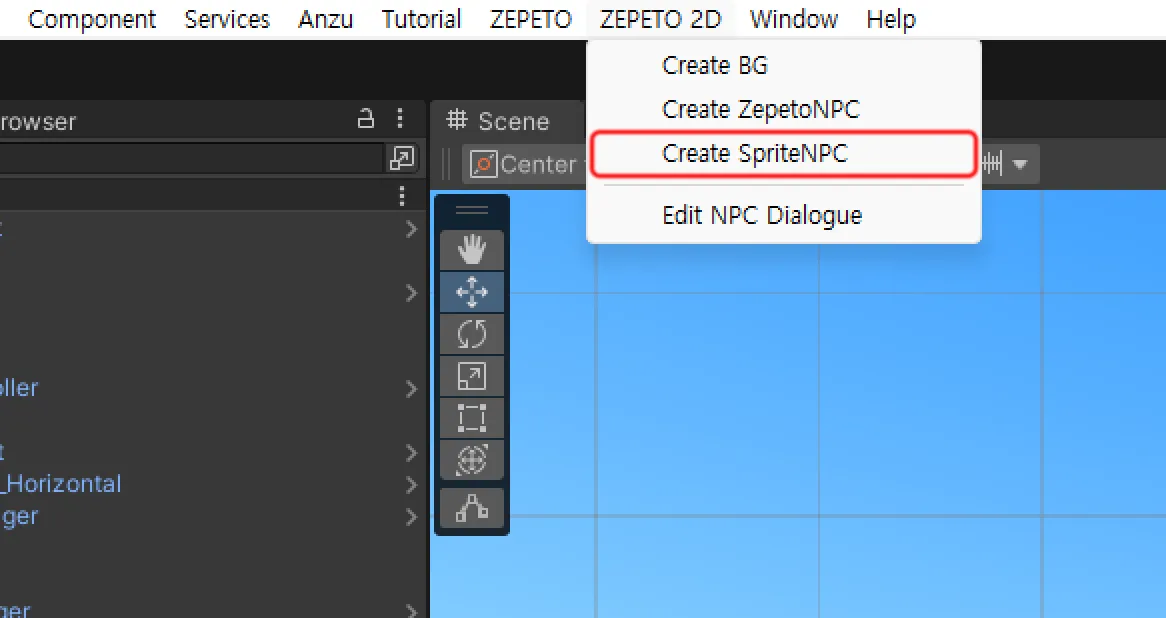
Select ZEPETO 2D > Create SpriteNPC from the top menu.
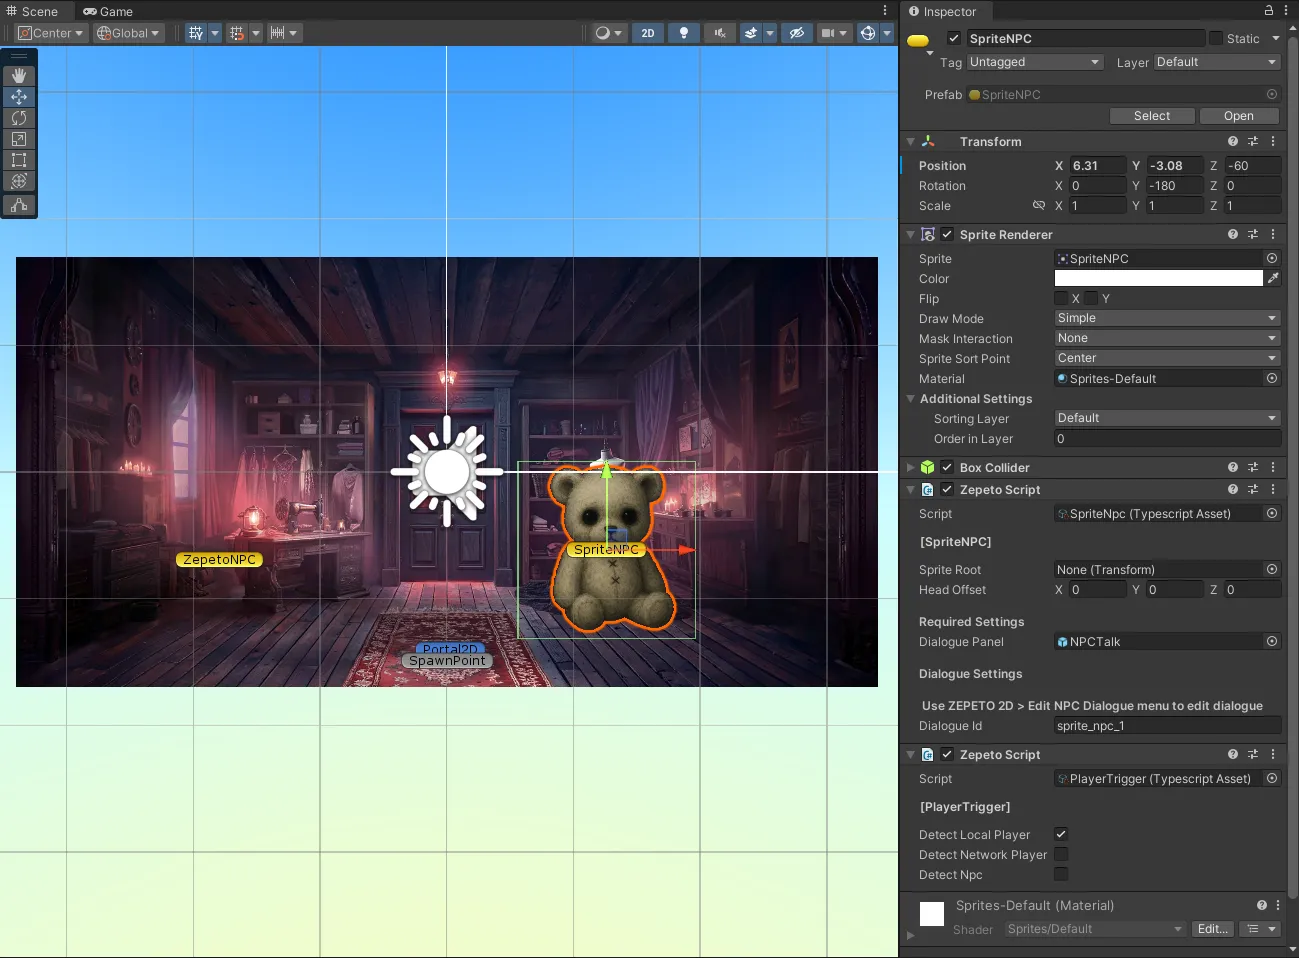
In the Hierarchy, select the created SpriteNPC.
- Sprite: You can set the Sprite to be used as the NPC.
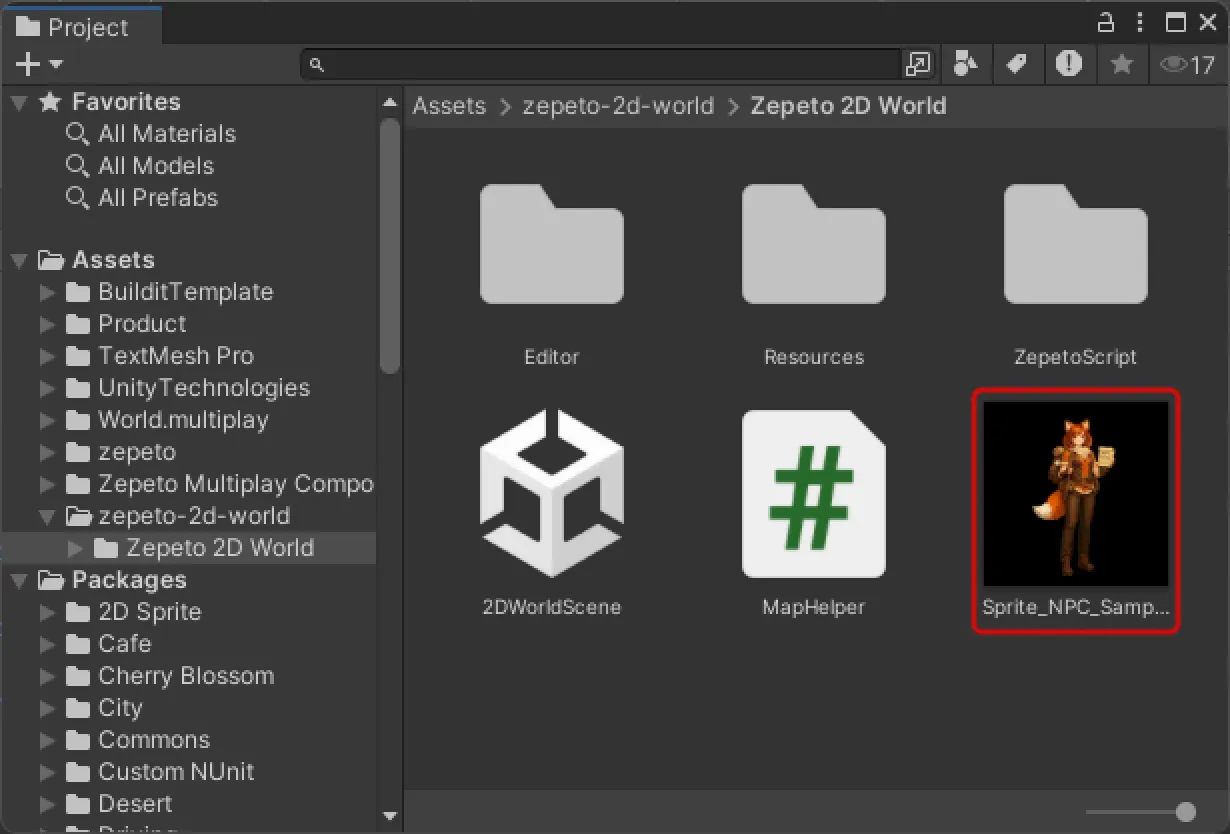
Add the image you want to use as an NPC into the Project panel.
- Please use a PNG image with a transparent background.
- Recommended image size: 720*720
- Even if it's not the recommended size, you can easily adjust the scale in Unity while testing.
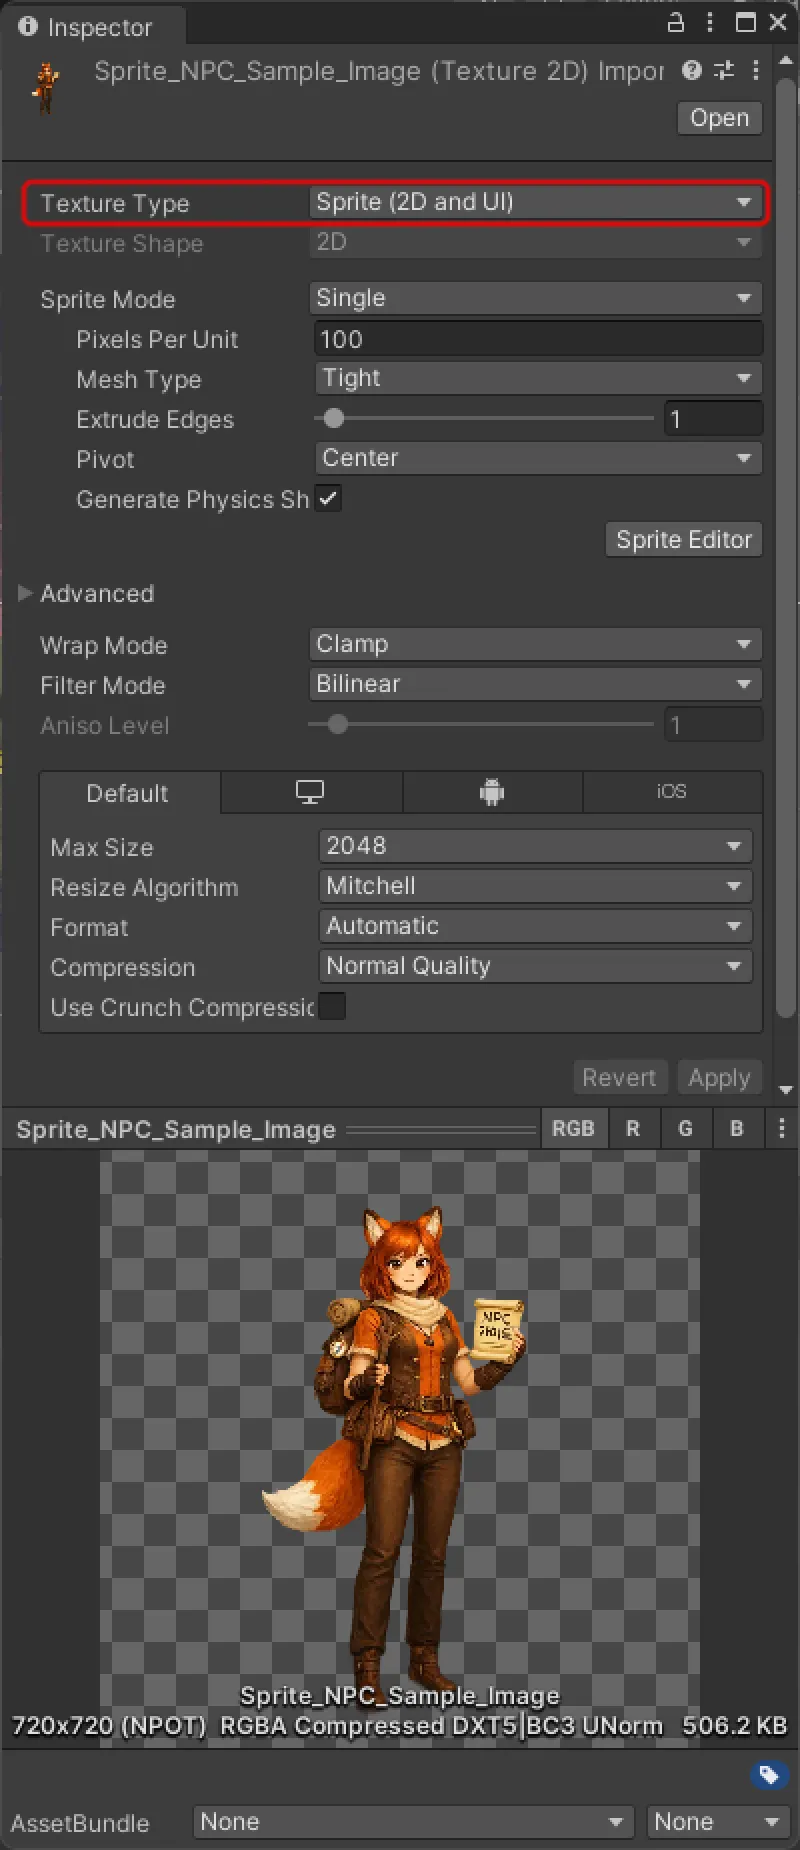
Select the imported image and change its Inspector > Texture Type to Sprite (2D and UI).
- Click Apply at the bottom to save your changes.
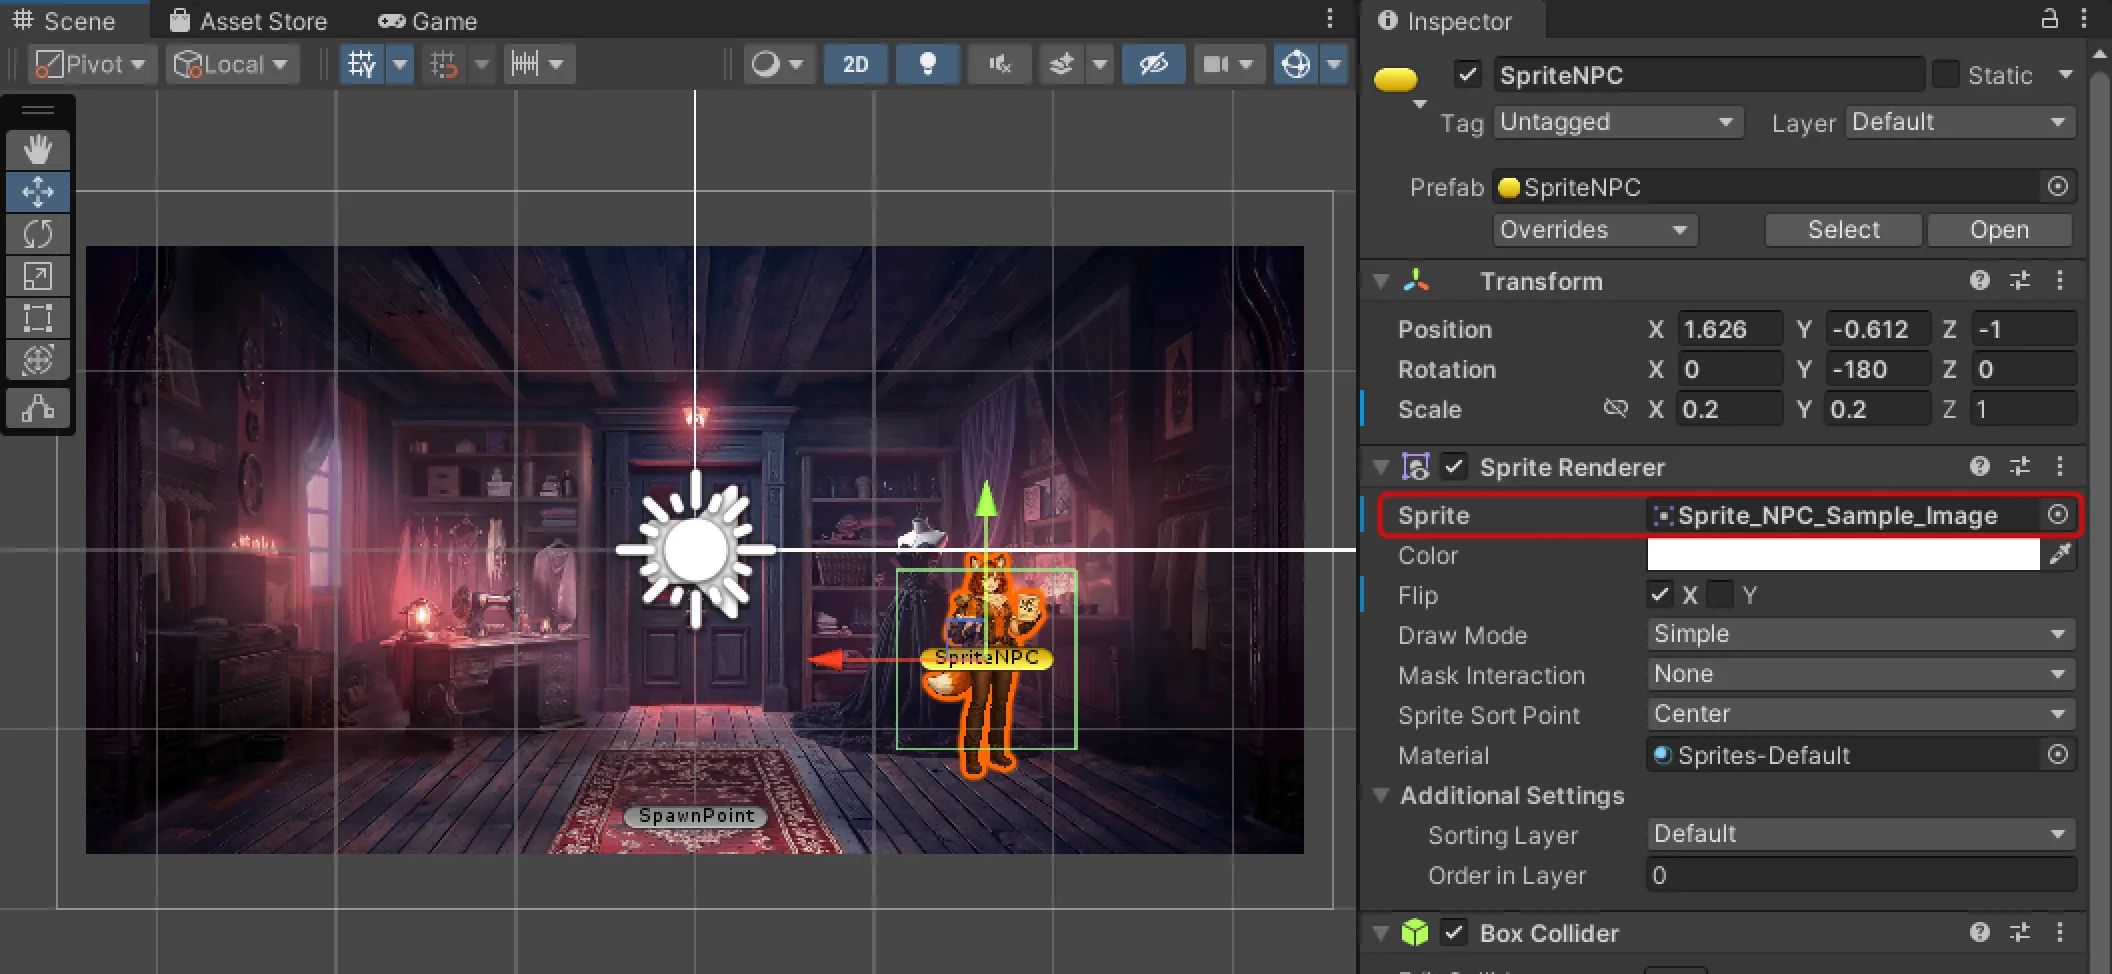
Change the Sprite NPC’s Inspector > Sprite Renderer > Sprite to your newly imported Sprite.
- If you want to adjust the NPC's size, try tweaking the Transform > Scale > X, Y values.
- You can flip the image horizontally or vertically using Inspector > Sprite Renderer > Flip.
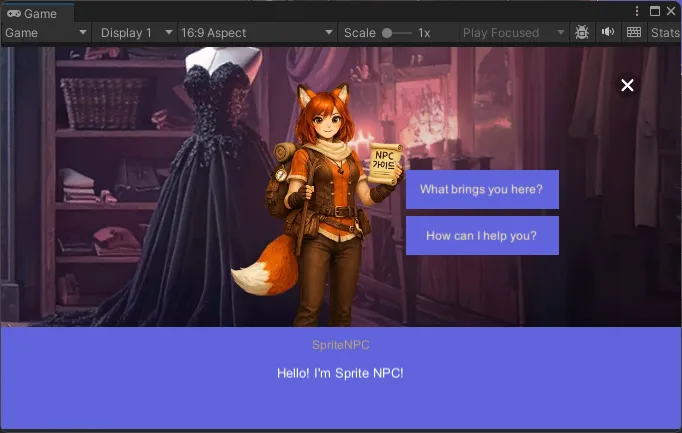
Press Play to verify that your custom image Sprite NPC displays correctly.
- If you need to adjust the interaction distance, select the Sprite NPC and tweak the Inspector > Box Collider > Size > X, Y, Z values.
Please make sure to place NPCs so they do not overlap with portals or other NPCs.
📘 Note For more details on dialogue settings, please refer to Setting up NPC Dialoguedd.
Placing AD Teleport 2D
You can also earn revenue in a 2D world by placing an AD Teleport 2D object.
- Try earning revenue along with fun in your own world through a Teleport that only works when users watch an ad.
- The AD Teleport2D object is a 2D world-specific object that works exactly the same as the existing Advertisement object.
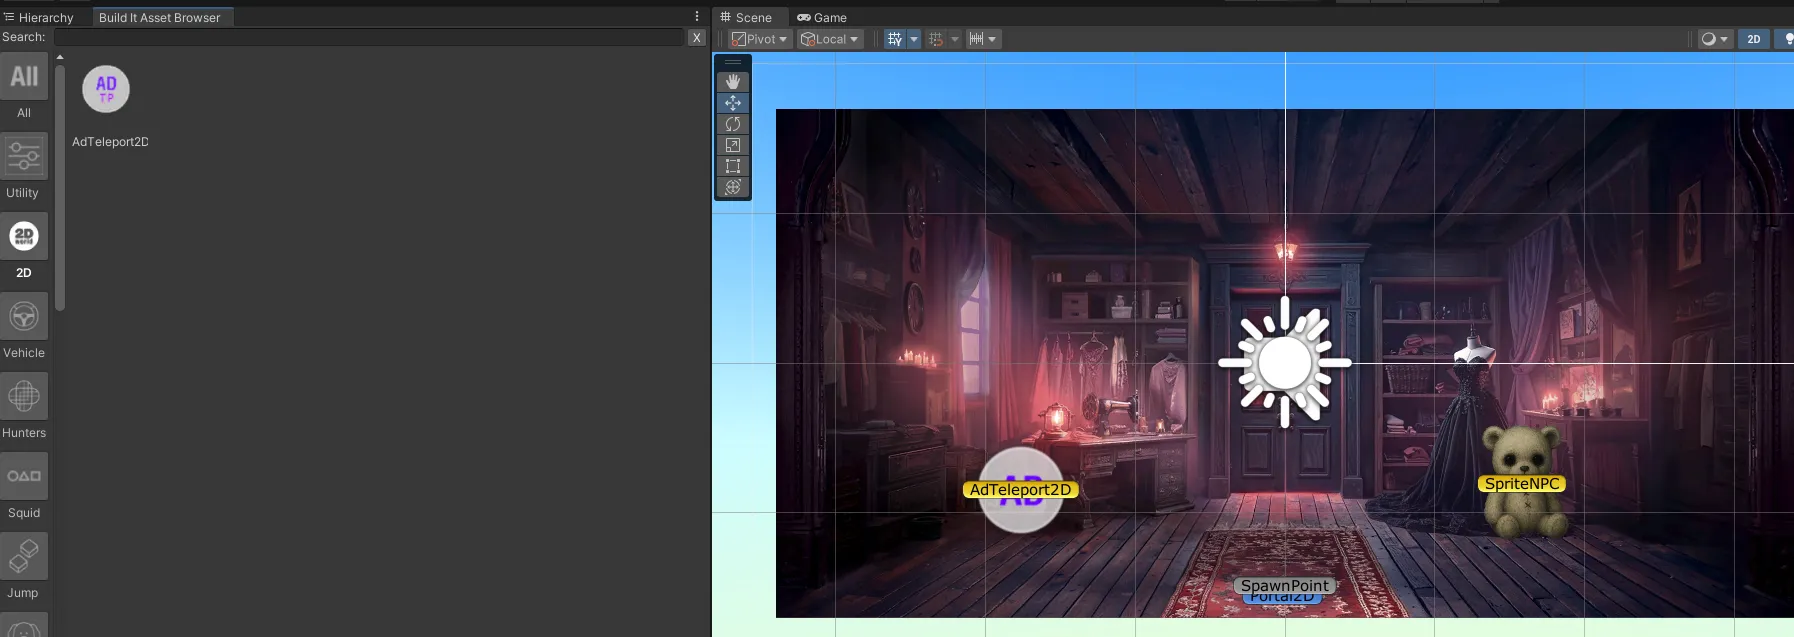
Select the AdTeleport2D object in Build it Asset Browser > 2D.
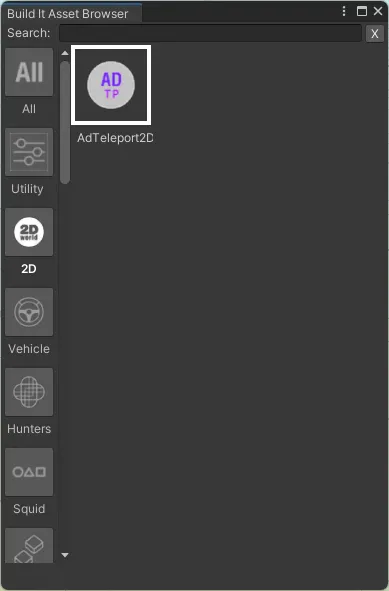
Drag and place it in the desired position in the Scene.
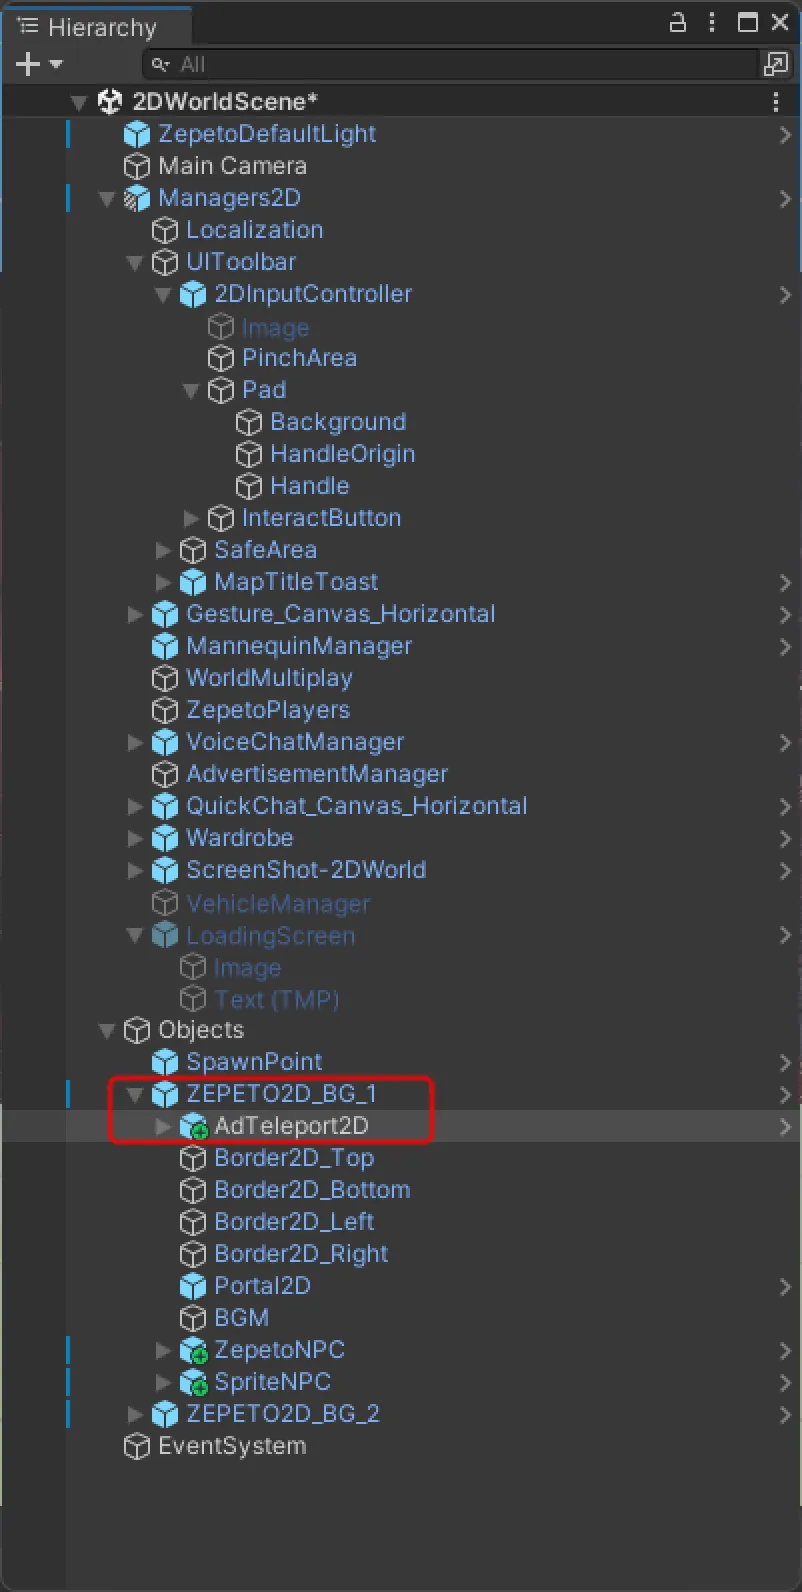
In the Hierarchy, place the AdTeleport2D object you want to use under (as a child of) the BG where you want it.
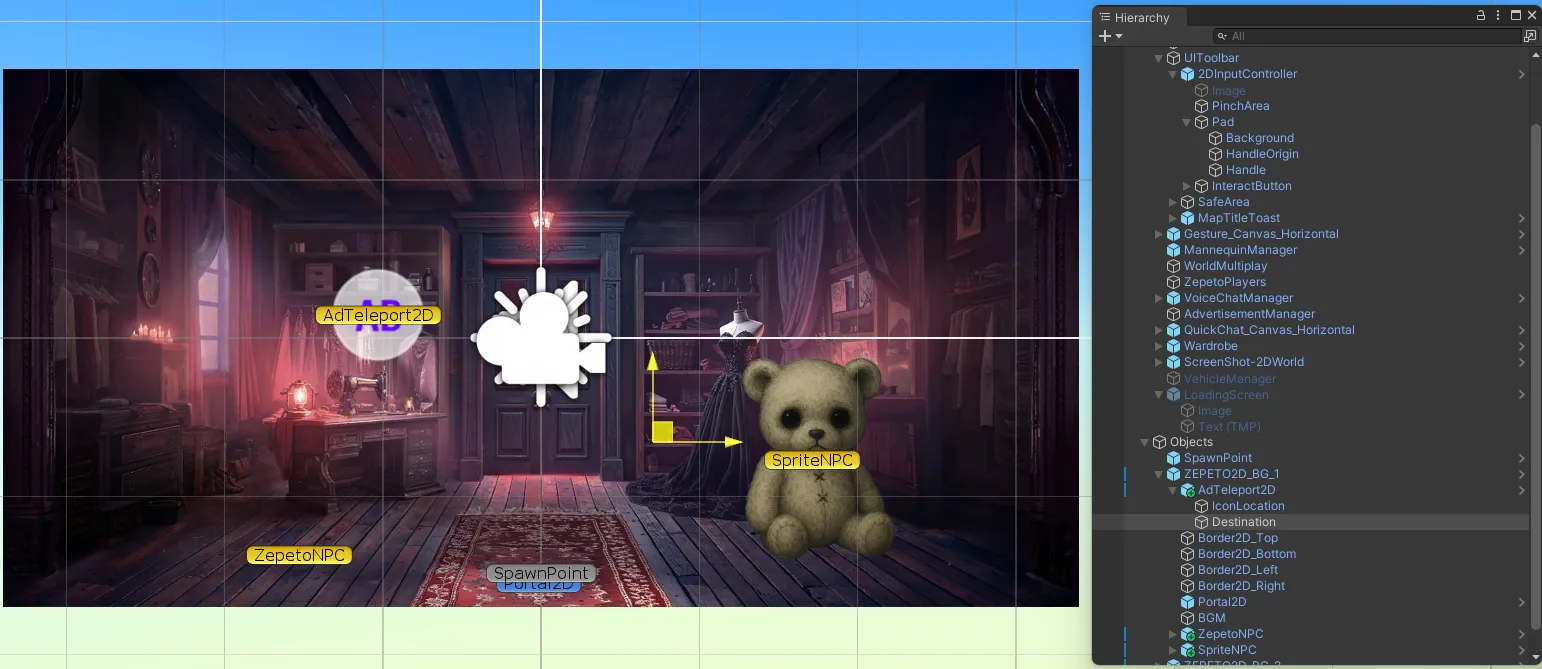
Place the AdTeleport2D > Destination object at the position you want to use as the arrival point.
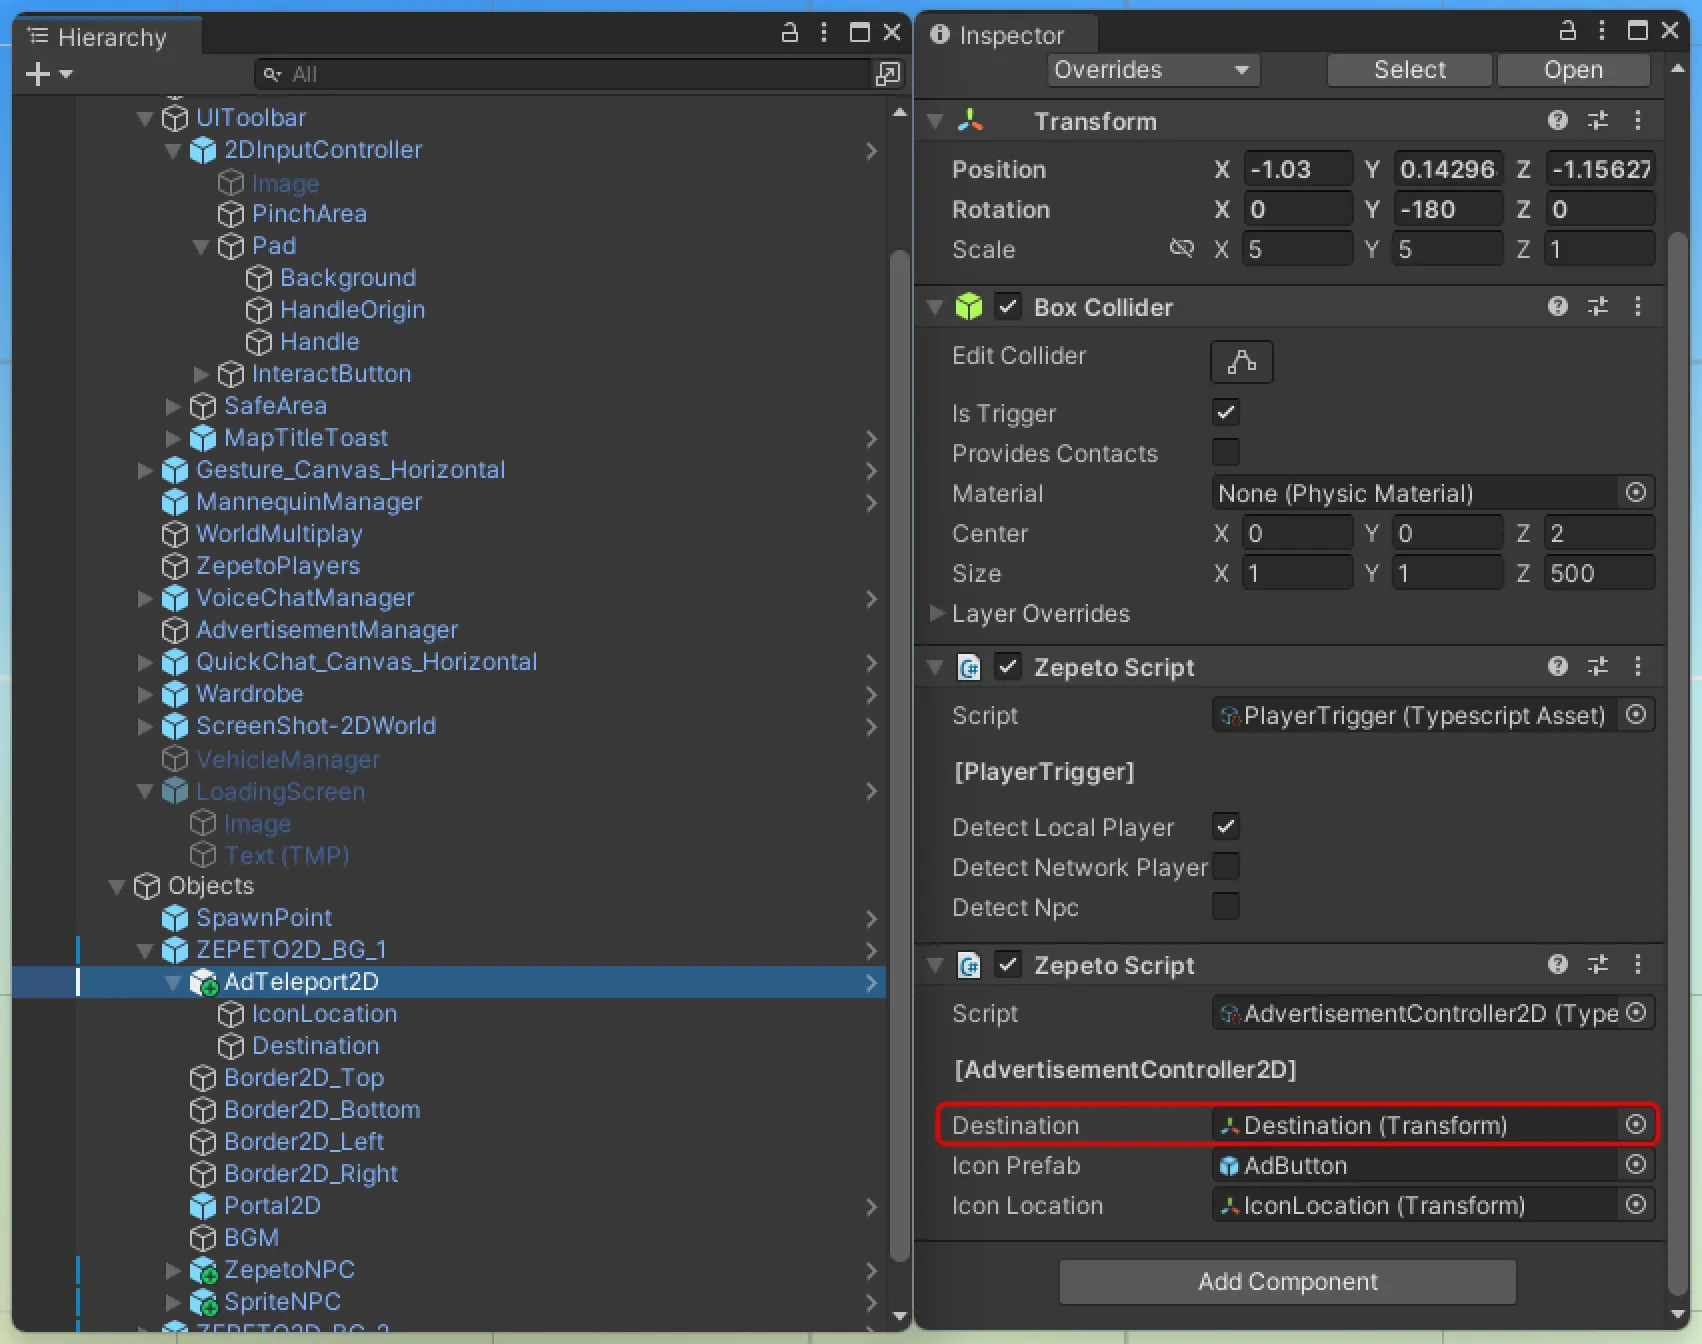
- If you want to place the arrival point in a different BG, place an empty GameObject under that BG, then put the created empty GameObject into AdTeleport2D > Inspector > Zepeto Script > Destination to use it as the Destination.
Testing the AdTeleport2D object is not possible in Unity and must be done on mobile. You can do this by registering the build file in Zepeto Studio.
4. Test Your World4. Test Your World
2D world production tips
- We recommend keeping each map’s z coordinate fixed at the default value of 100 and adjusting x, y values to position them.
- If maps overlap in the Scene, in multiplayer you may see players from other maps on screen, so you need to leave space between maps as shown below.
- You may use AI-generated images.
- When releasing to Zepeto Studio, please specify in the world description that the image is AI-generated.
💡 To generate an AI image with a sense of depth and space, try using the following prompt.
- Try creating your own space easily with just image additions, portal connections, and background music!