Rigging, Masking
❗️ Warning This course is relatively challenging. Follow the guide step by step and if you get stuck, check out the video at the bottom.
Rigging is the process of preparing a character for movement. It involves binding the objects you have created to an armature and creating controllers for movement. For creating items for ZEPETO, only the binding phase of rigging will be performed.
To move ZEPETO's avatar, you will need an object mesh and an armature. Each part of the mesh moves according to a specific bone, and each bone creates the movement of the avatar.
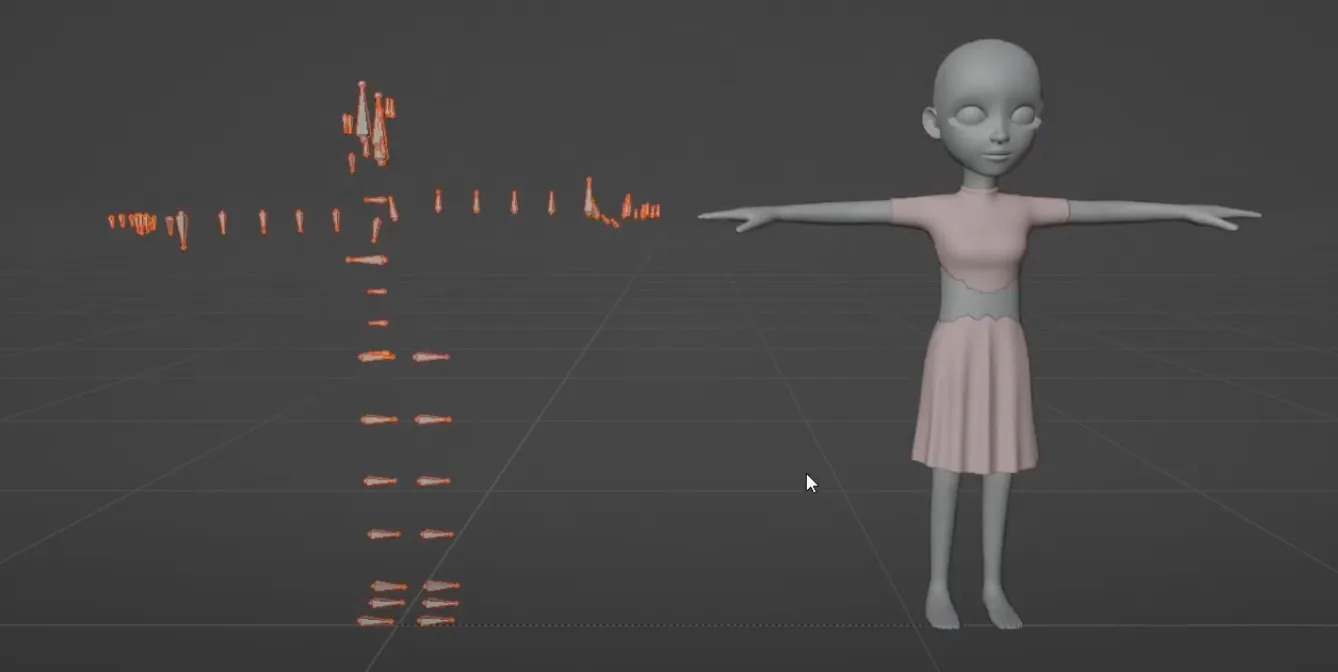
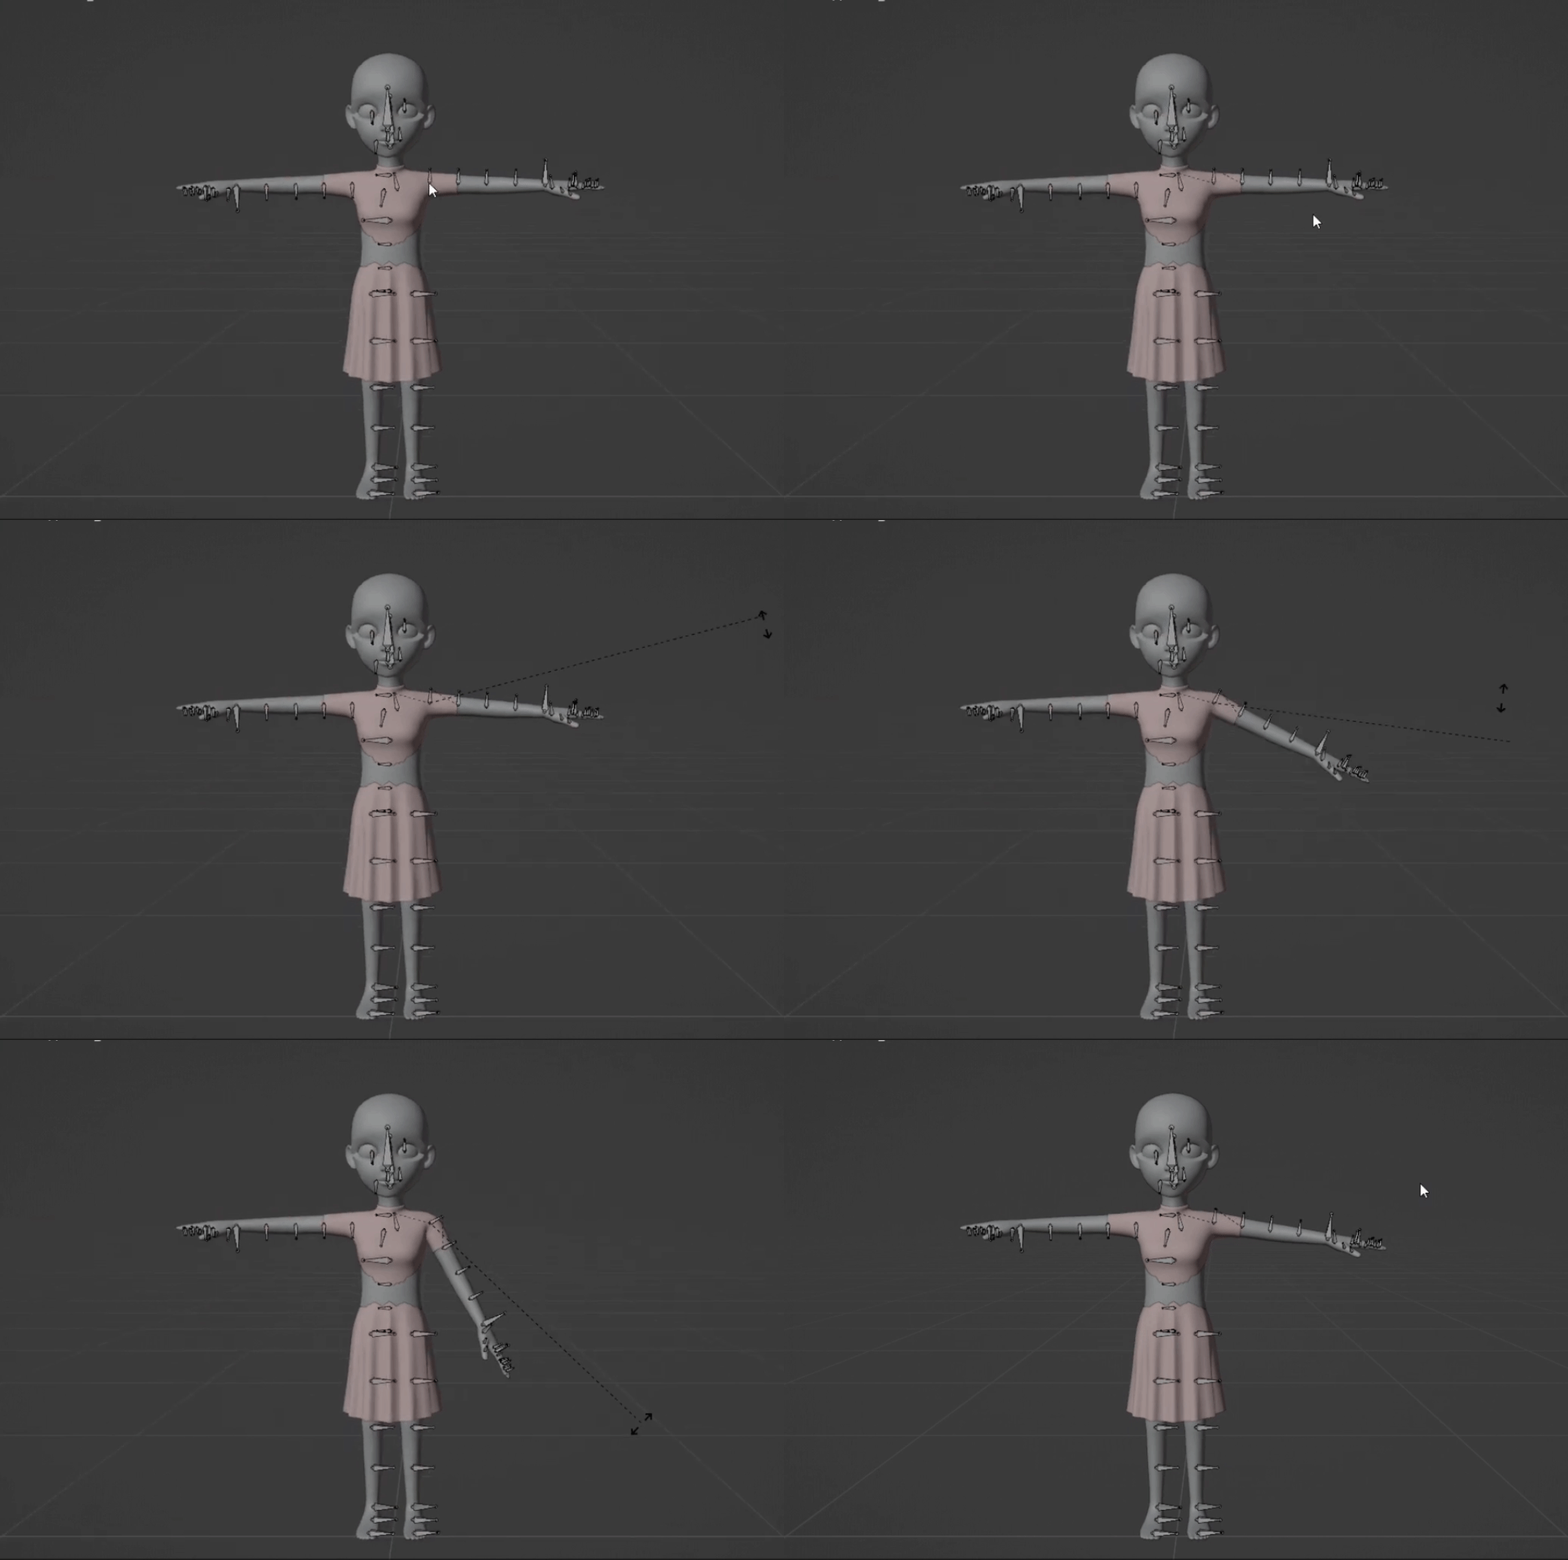
To make the mesh follow the movement of the skeleton, you can set an influence value for how much each vertex will follow the corresponding bone. This influence value is called the Weight.
The skeletal structure of the ZEPETO Avatar is composed of scale bones and base bones. Scale bones are related to body shape deformation, while base bones deform poses and motions.
We will be attaching object meshes to the scale bones to move items based on changes in motion while maintaining the avatar's body shape.
Editing the weights will be done in the Weight Paint Mode. When you select a mask and switch to weight paint mode, the mask mesh will change color.
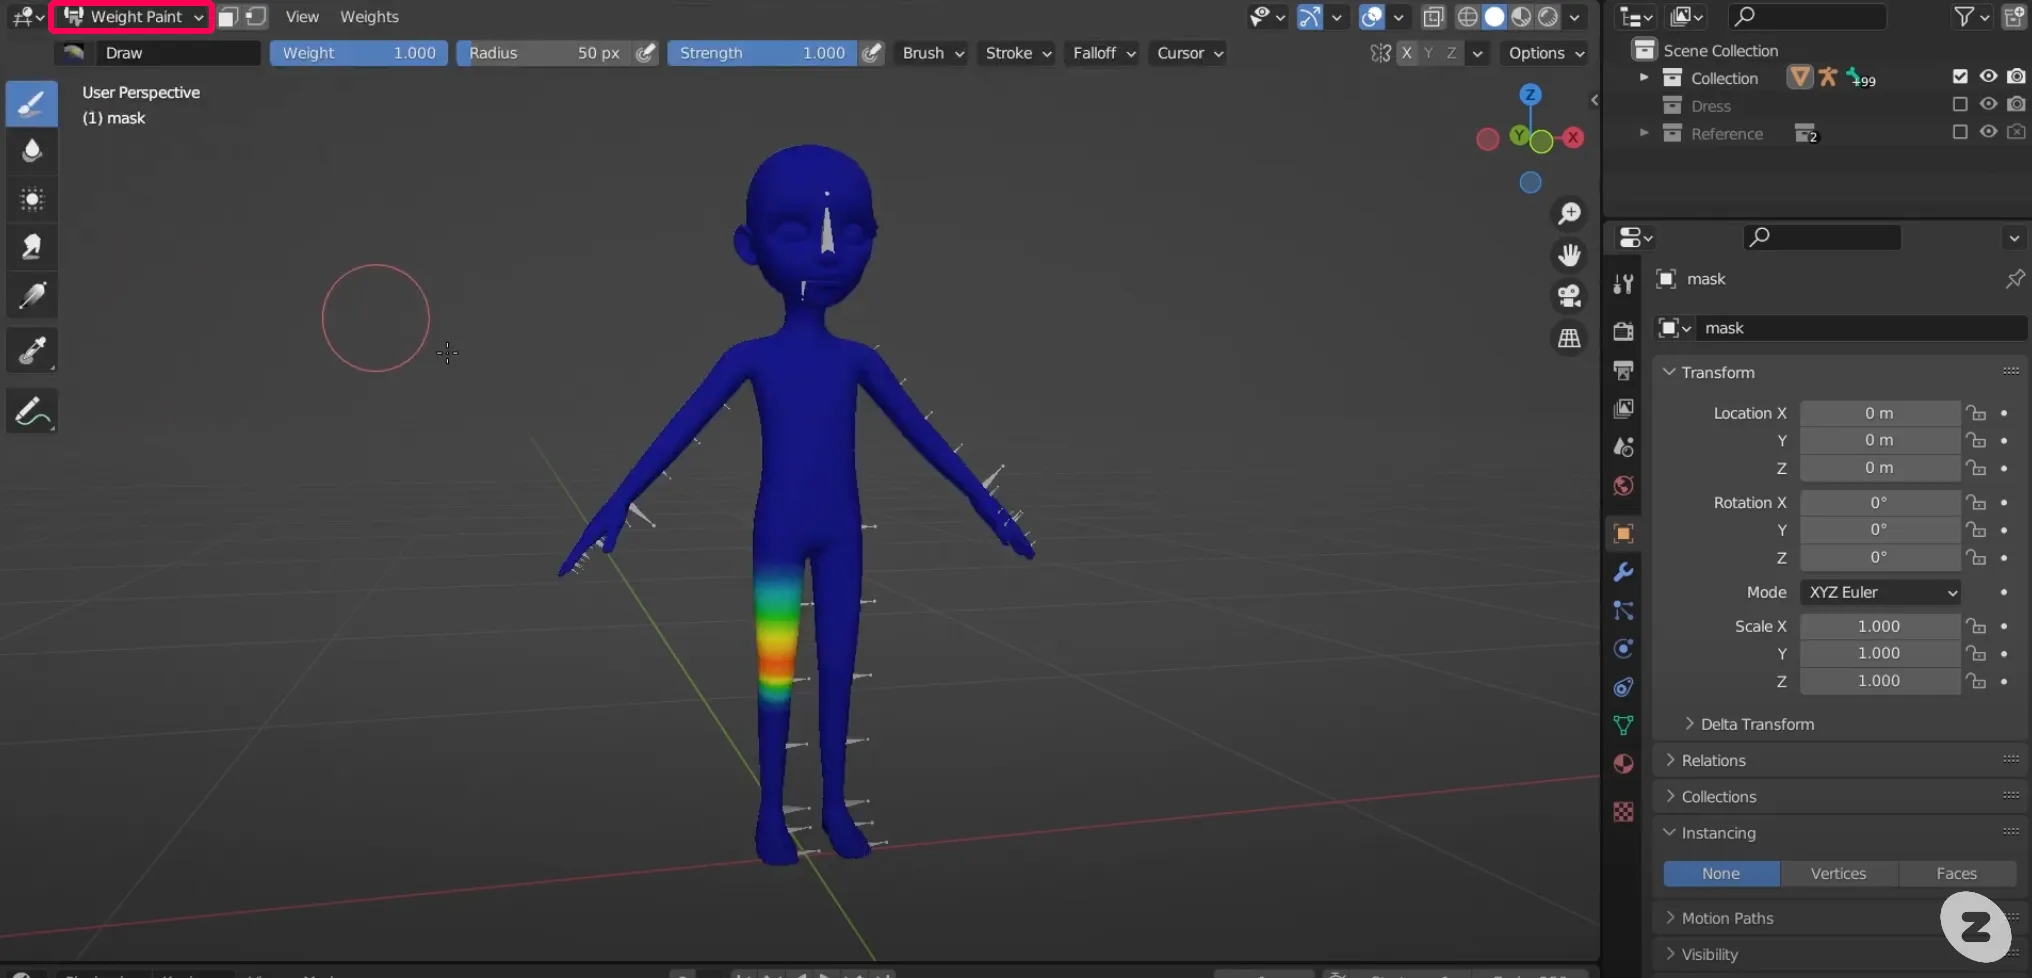
In the Properties window, pressing the vertex group icon will bring up a list that shows you which parts of the mask are affected by which framing.
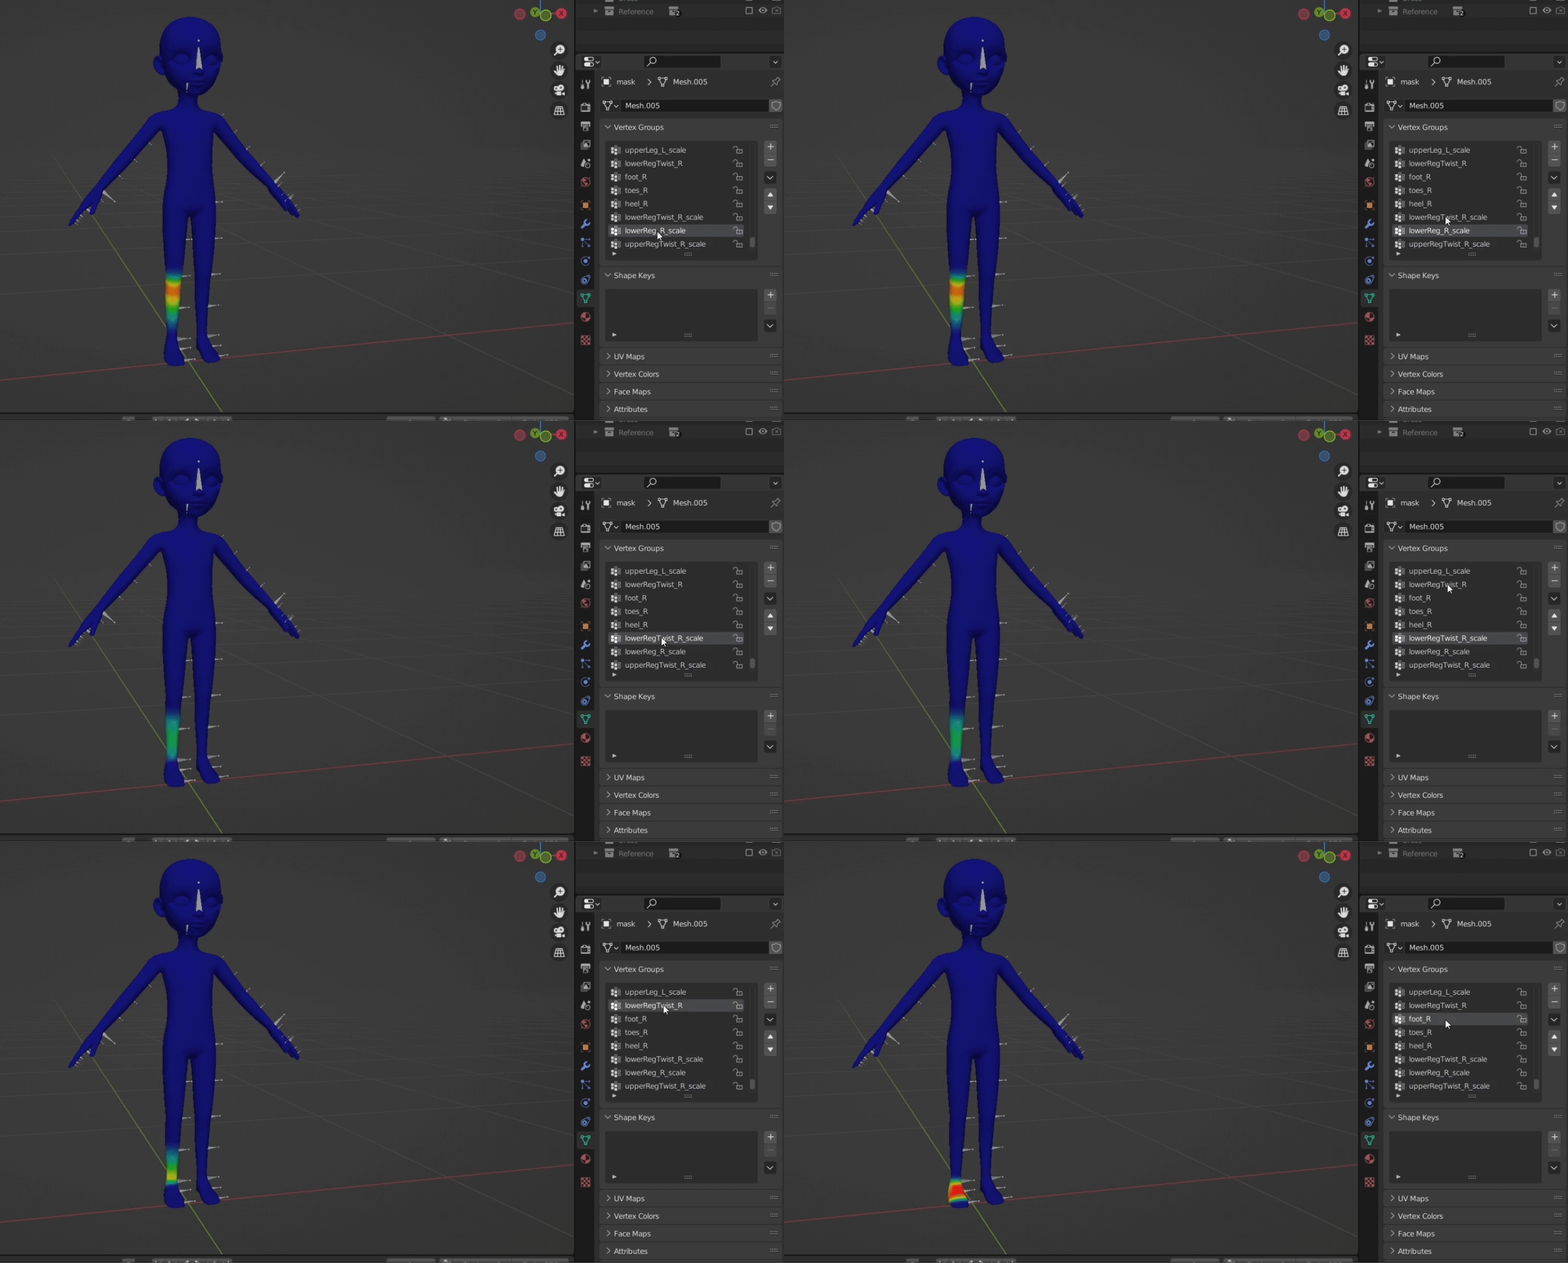
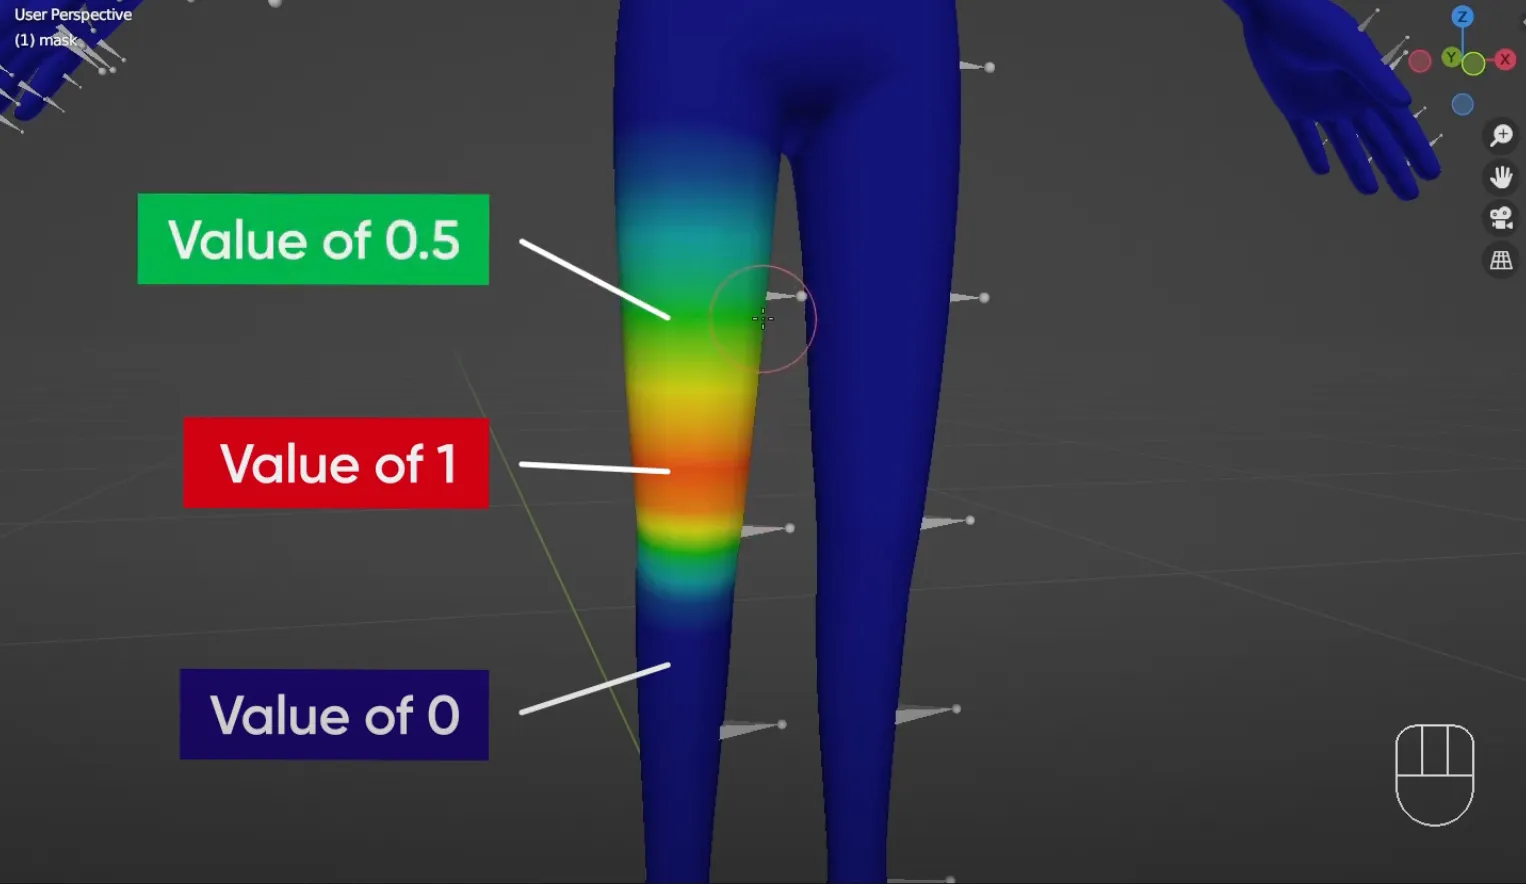
In Blender, the weight values are represented by colors.
- Blue: 0, Red: 1, Green: 0.5
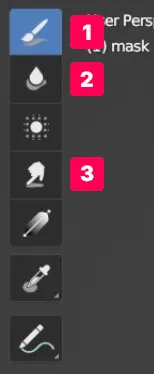
You can use the tools in the Weight Paint mode to adjust the weight values.
- 1 - Drawing Brush Tool: Use to set the weight value directly with the brush and add or remove weights to a vertex group.
- 2 - Blur Brush Tool: Use to blur or smooth out vertex groups and weights between vertex groups.
- 3 - Smear Brush Tool: Use to smooth out weights. You can also push or move the effects of the weights around the mesh.
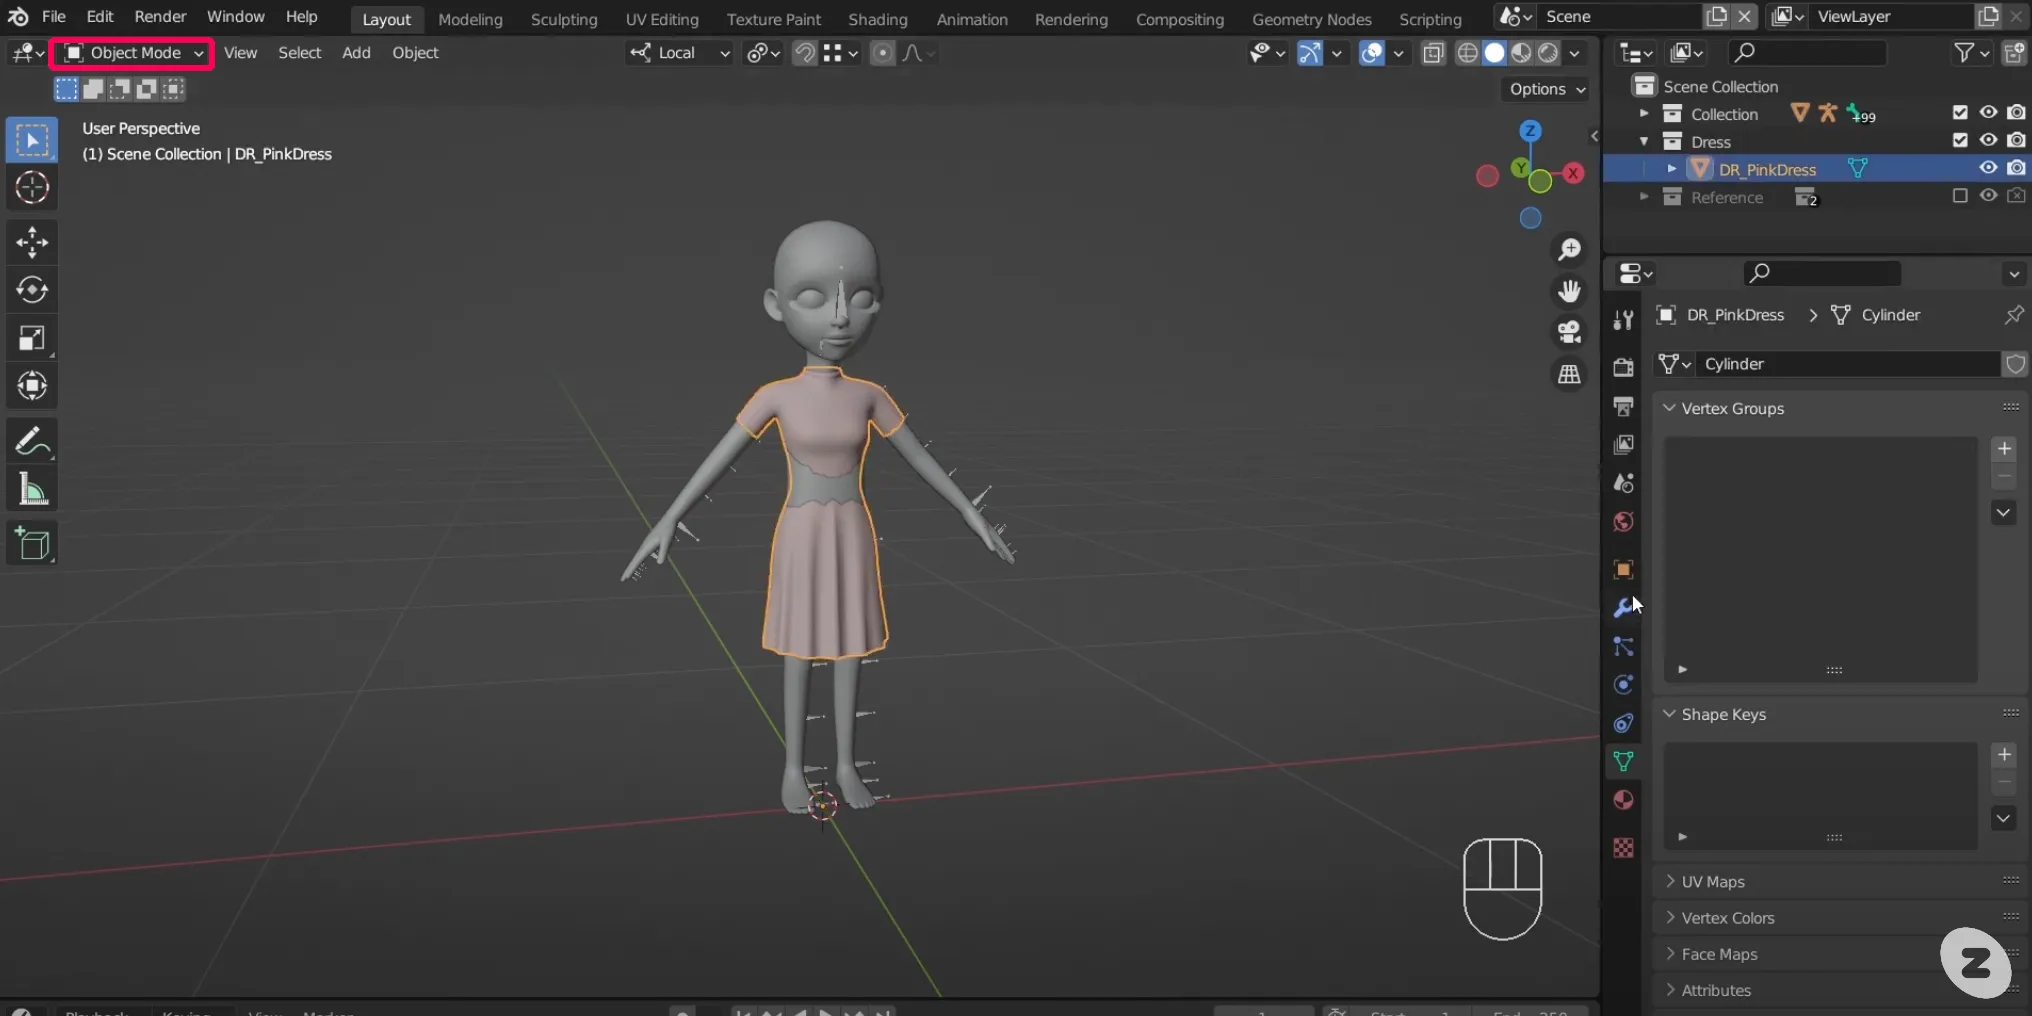
- Before we get into the nitty-gritty of working with weights, we need to set up our objects and armature. First, switch to object mode.
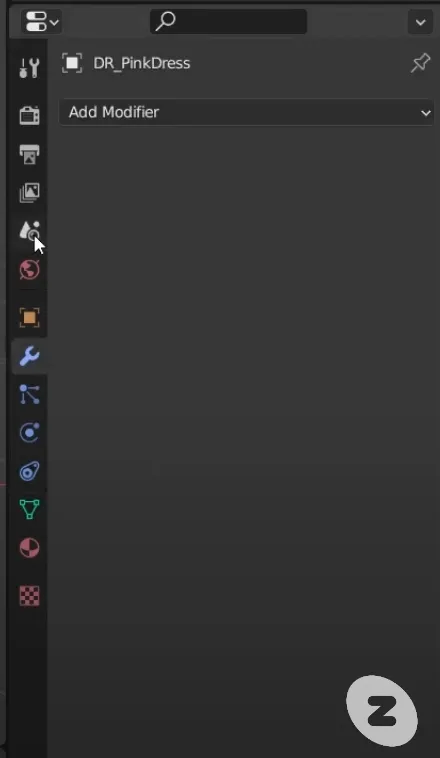
2. Make sure there are no active mirror modifiers or deformer modifiers on the item.
❗️ Caution Rigging is a time-consuming task, and it also makes a big difference to the mesh of the object. It's a good idea to check carefully so you don't do the same thing twice.
3. Blender's rigging system is designed to bind to the avatar's default pose. If the object is modeled in an A-pose, the frame we rig should be in the same pose. If you modeled your object in a T-pose, you can skip this step.
❗️ Caution If the object was modeled in a pose other than T-pose, you will need to transform the object modeling to fit the T-pose.
4. It is recommended that you duplicate the creatorBaseSet rig to keep the original rig before working with it. In Object mode, select the creatorBaseSet's armature and mask objects and duplicate them by pressing the hotkey Shift+D or by selecting Object > Duplicate Objects in the viewport.
5. Create a new collection to contain the copied objects and armatures.
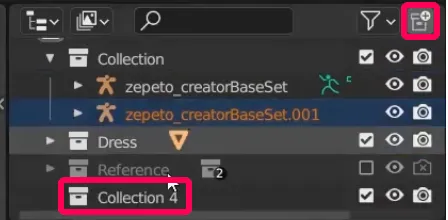
6. Rename the collection created in step 5 with a name that includes Apose to make it more manageable.

7. The pose we are now working with is the A-pose. In the A-pose, the shoulder blade is rotated -7.5 degrees on the z-axis and the upper arm bone is rotated -40 degrees on the z-axis.
8. Hide any existing objects and armatures, select the newly created collection, and go into pose mode.
To have the mask's weight follow the armature in the new pose, apply the modified armature to the mask object again.
- Switch to Object mode, then select the Mask object, and then press Modifier in the Properties panel.
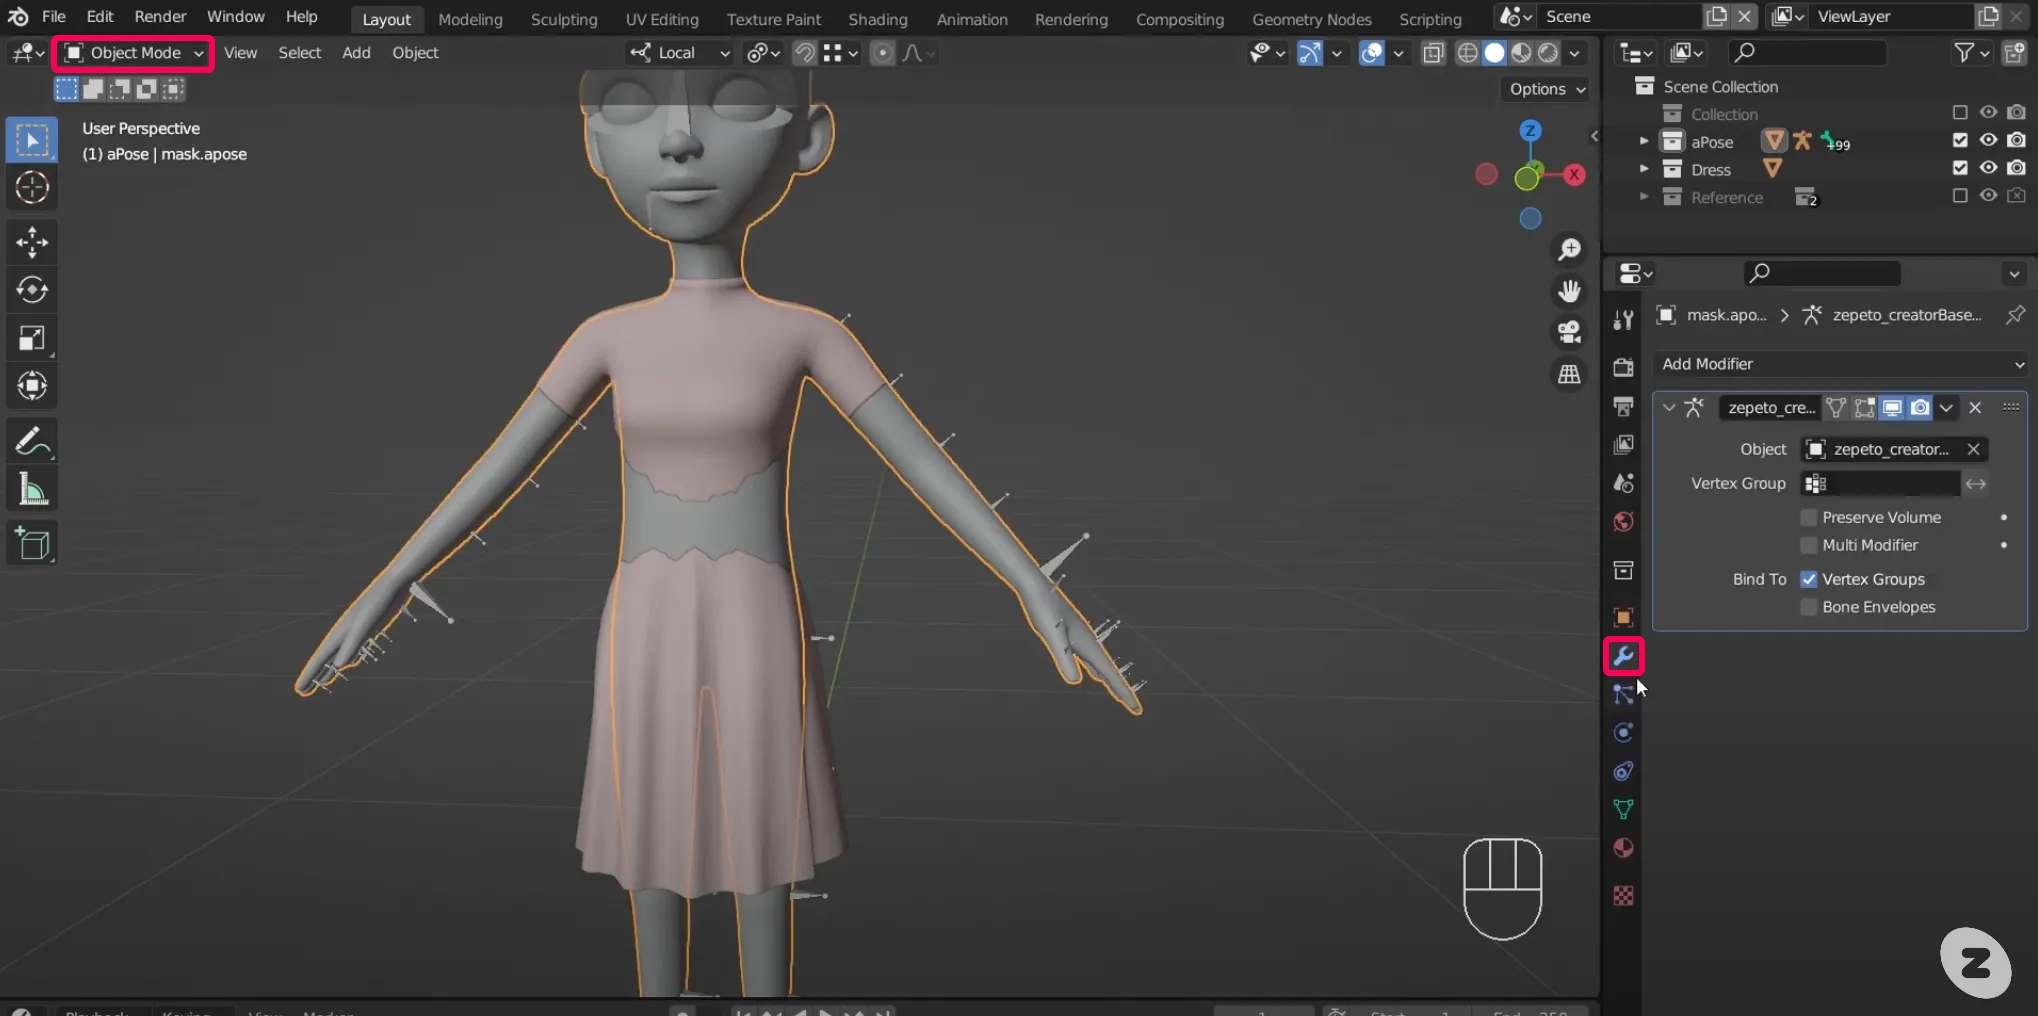
2. Select Apply from the drop-down menu. The mesh is now applied to the pose.
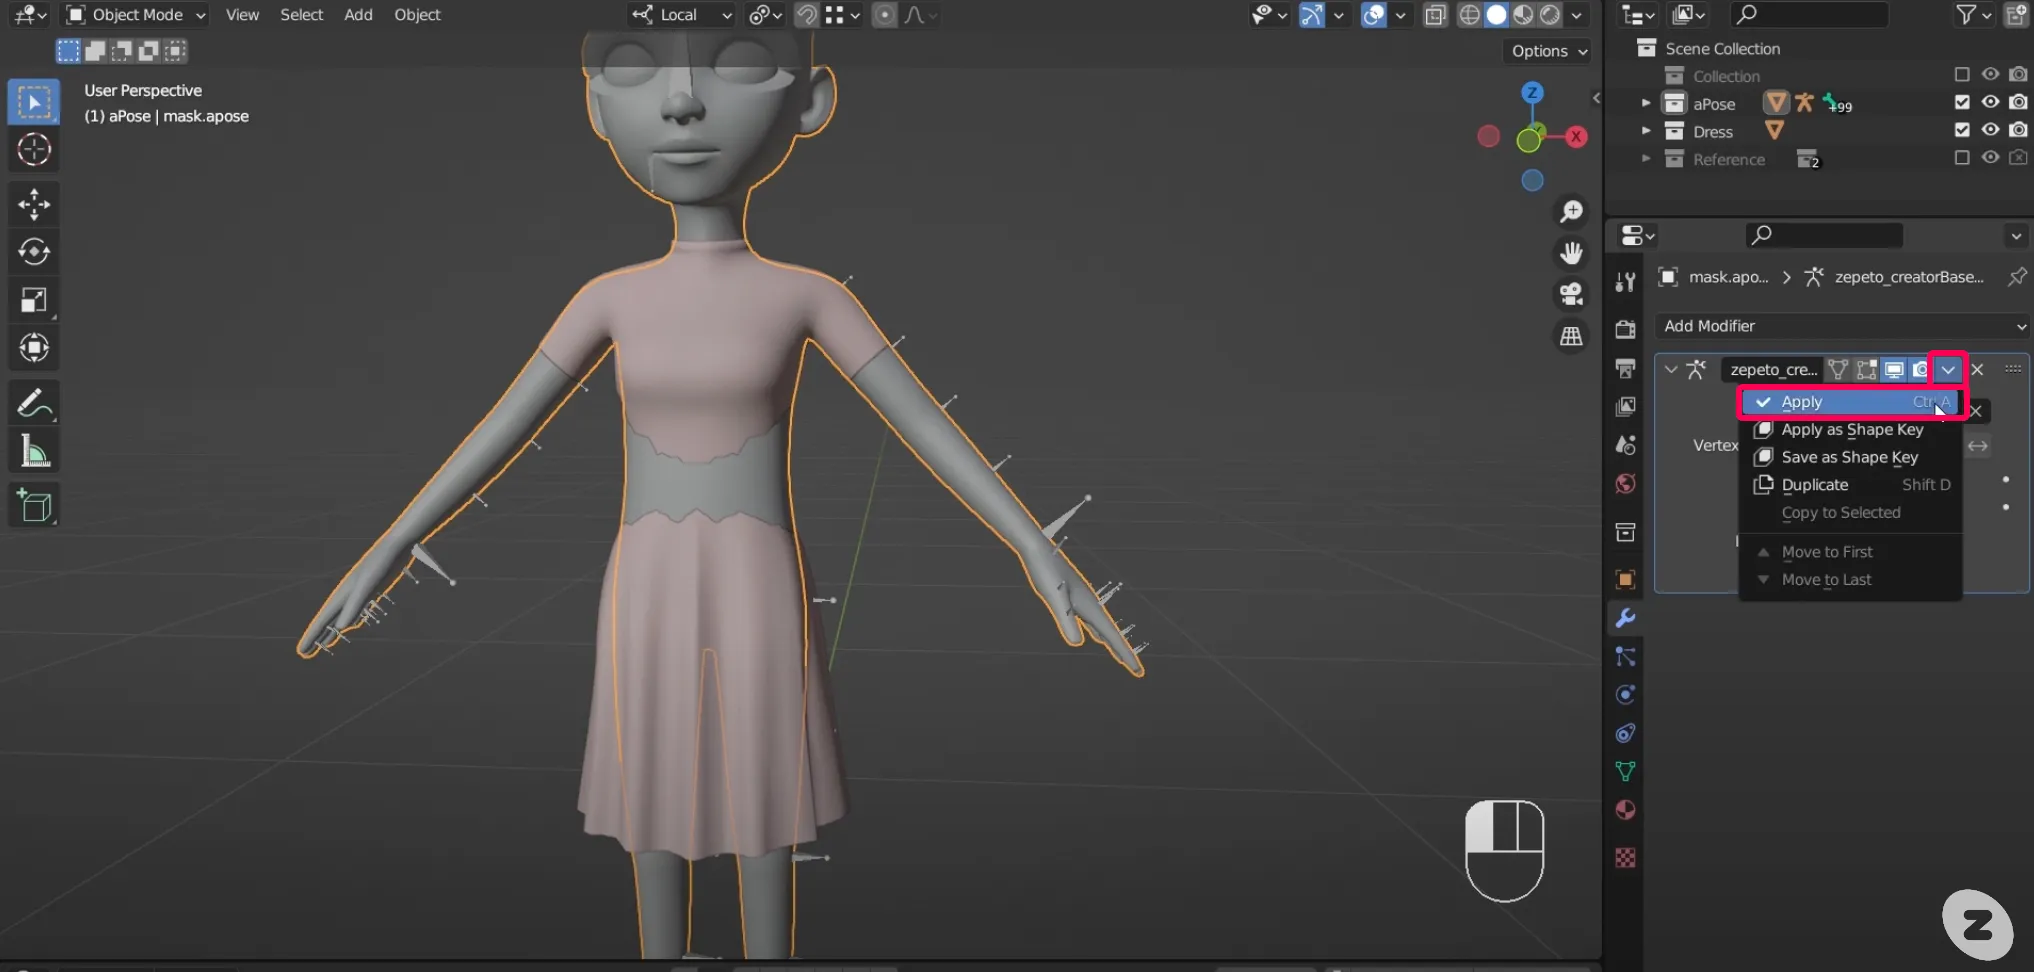
3. To apply the Rest Pose to the A-pose, select the A-pose armature and enter Pose mode.
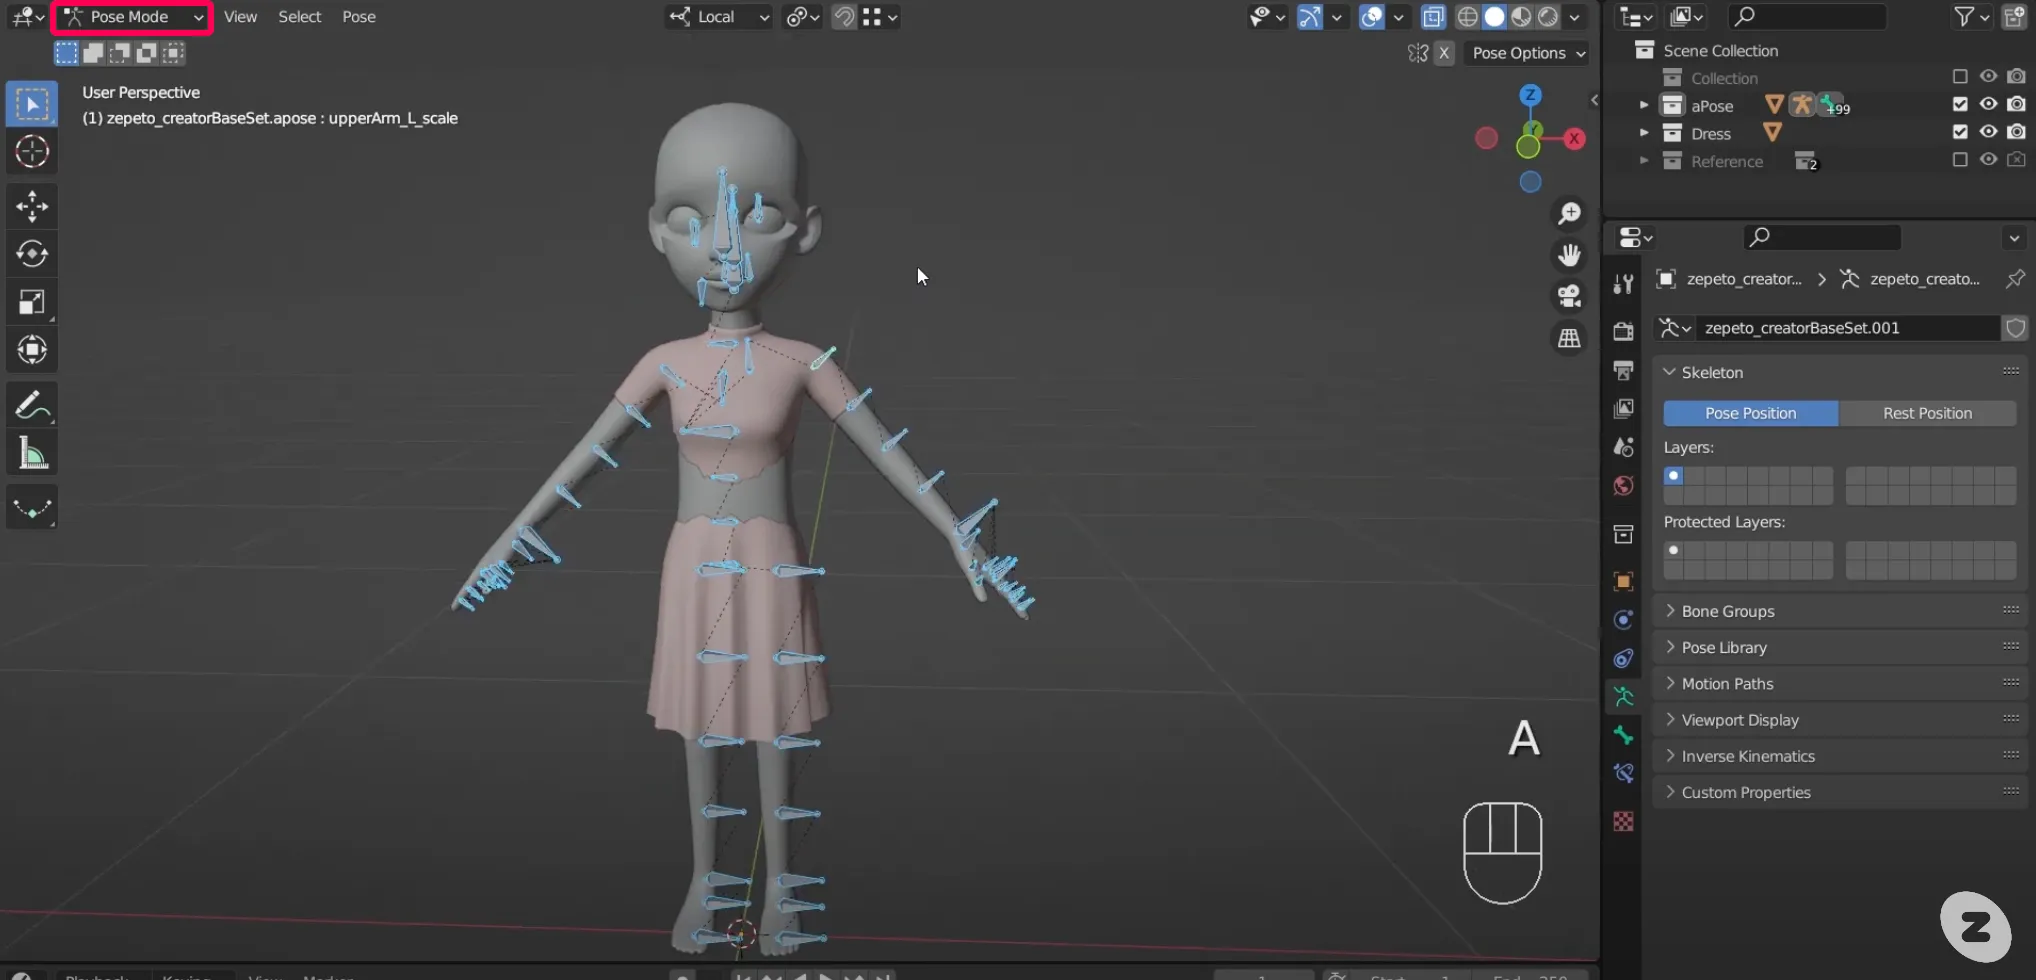
4. Select all the skeletons and click Pose > Apply > Apply Pose as Rest Pose.
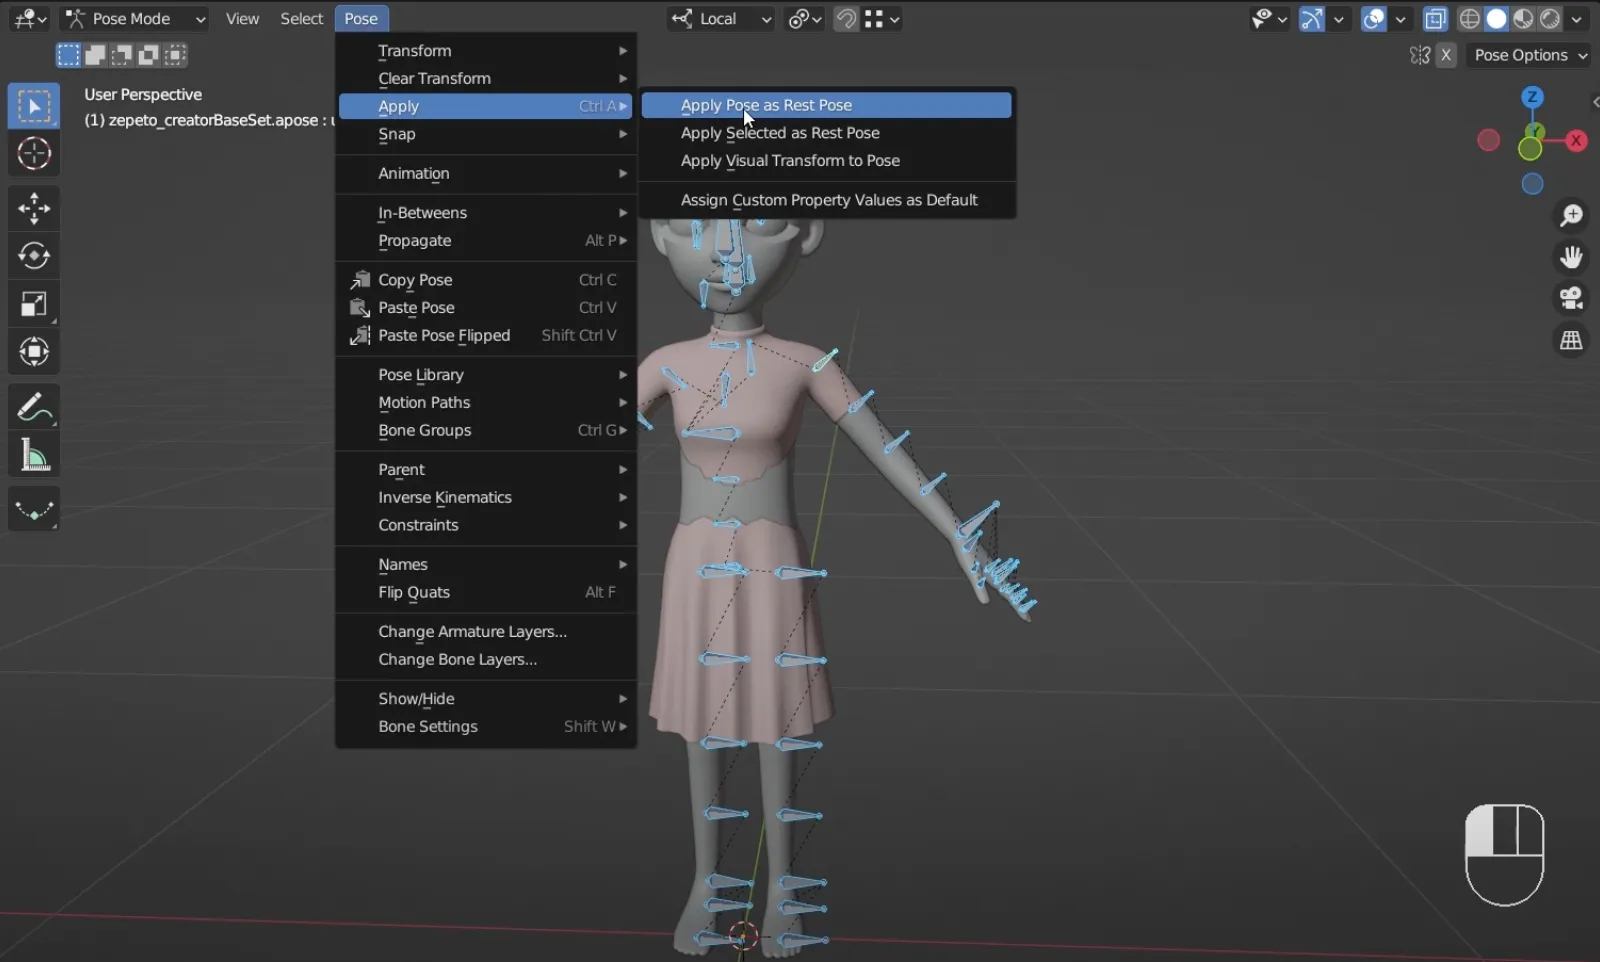
5. The Rest Pose of the armature is now set to the pose position of the object. You can now bind your object to the armature more effectively.
Once you have the proper default pose set up, you can bind items to the armature.
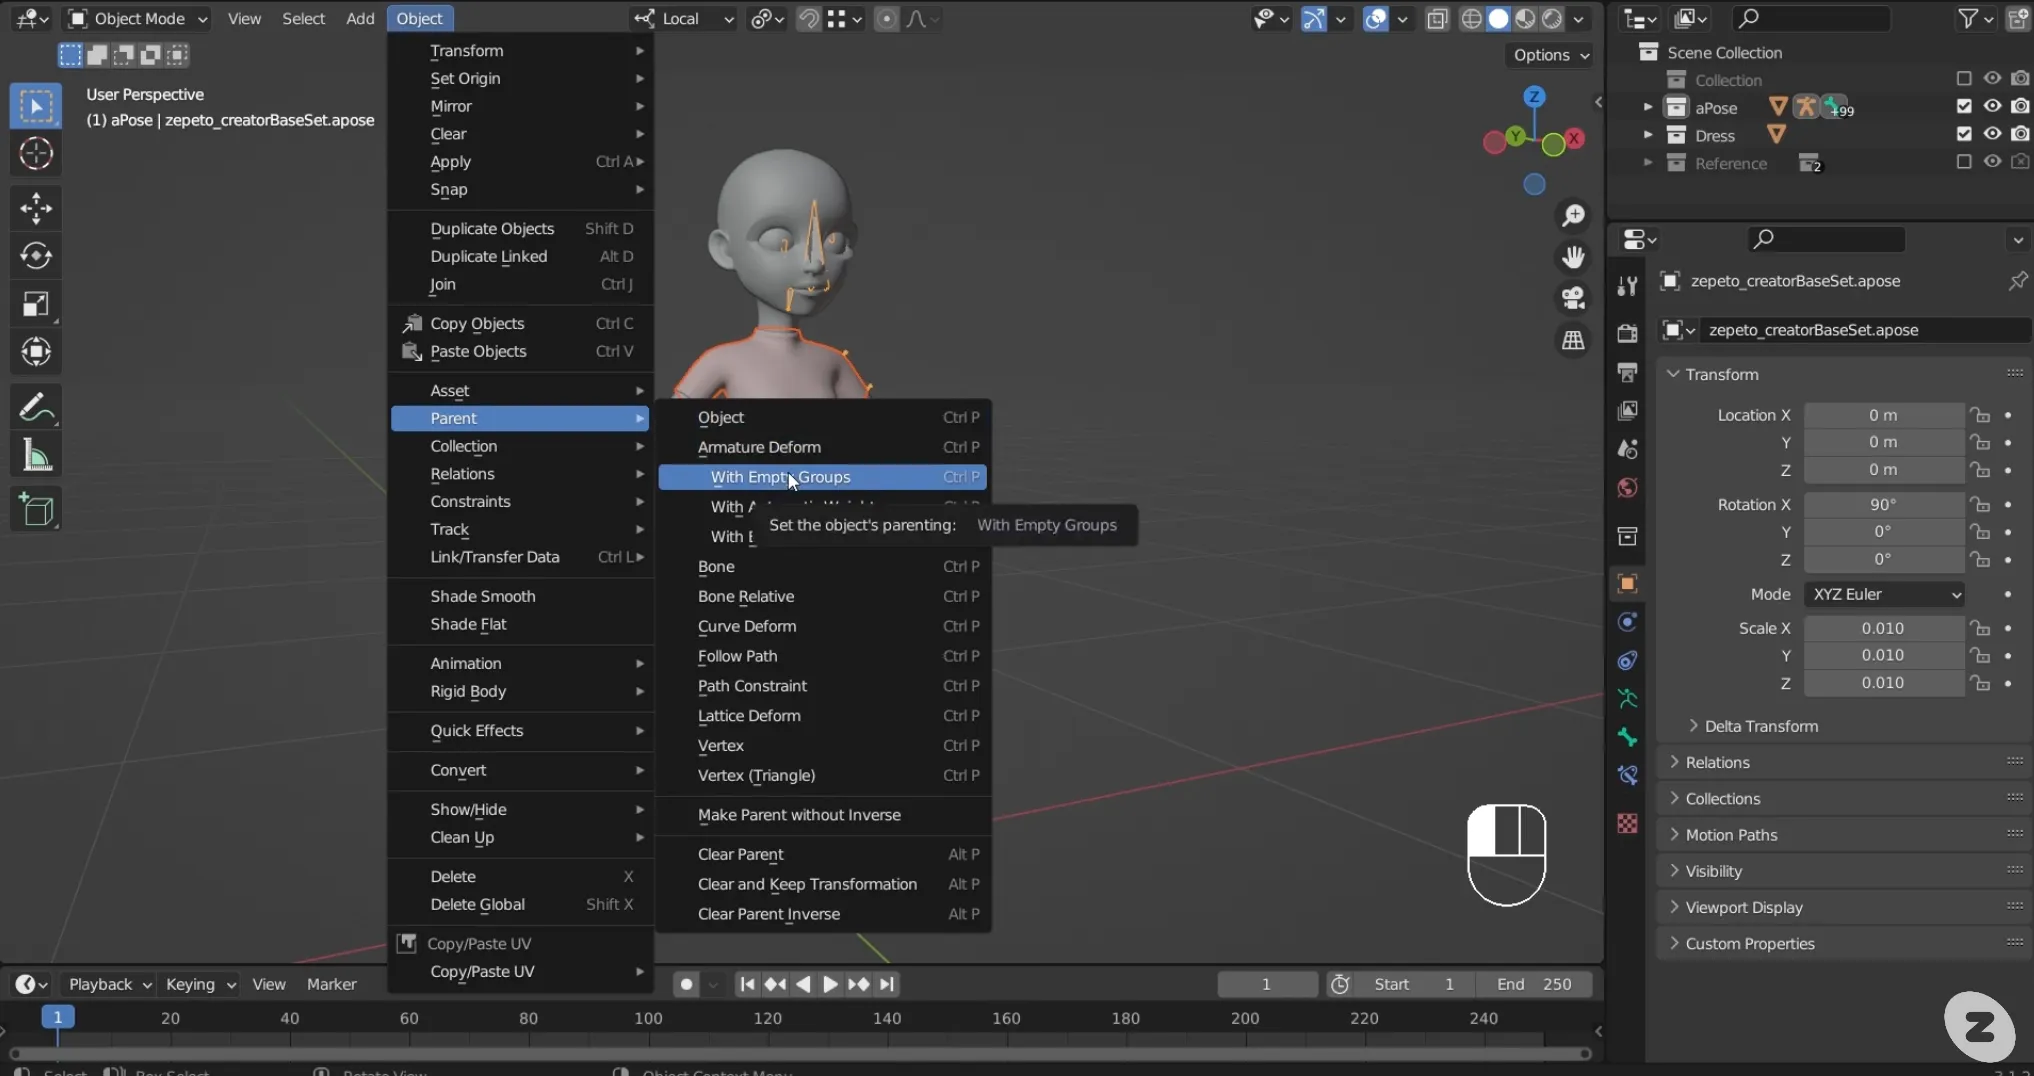
- Select the item, then select the armature. Then press Object > Parent > With Empty Groups.
- This will make the Object Mesh the parent of the CreatorBaseSet armature, and the armature modifier will be placed under the object mesh, creating a Vertex Group to which you can bind the weights to the object mesh.
- A Vertex Group is a block of mesh data that stores data at its vertices.
- You can see the vertex groups for an object by selecting it and going into the Object Data properties. You can utilize vertex groups in a variety of situations, including selective application of certain modifiers. Vertex groups are also used to assign weights to each bone.
- If you look at the vertex group, you will notice that the vertex group matches the name of each bone.
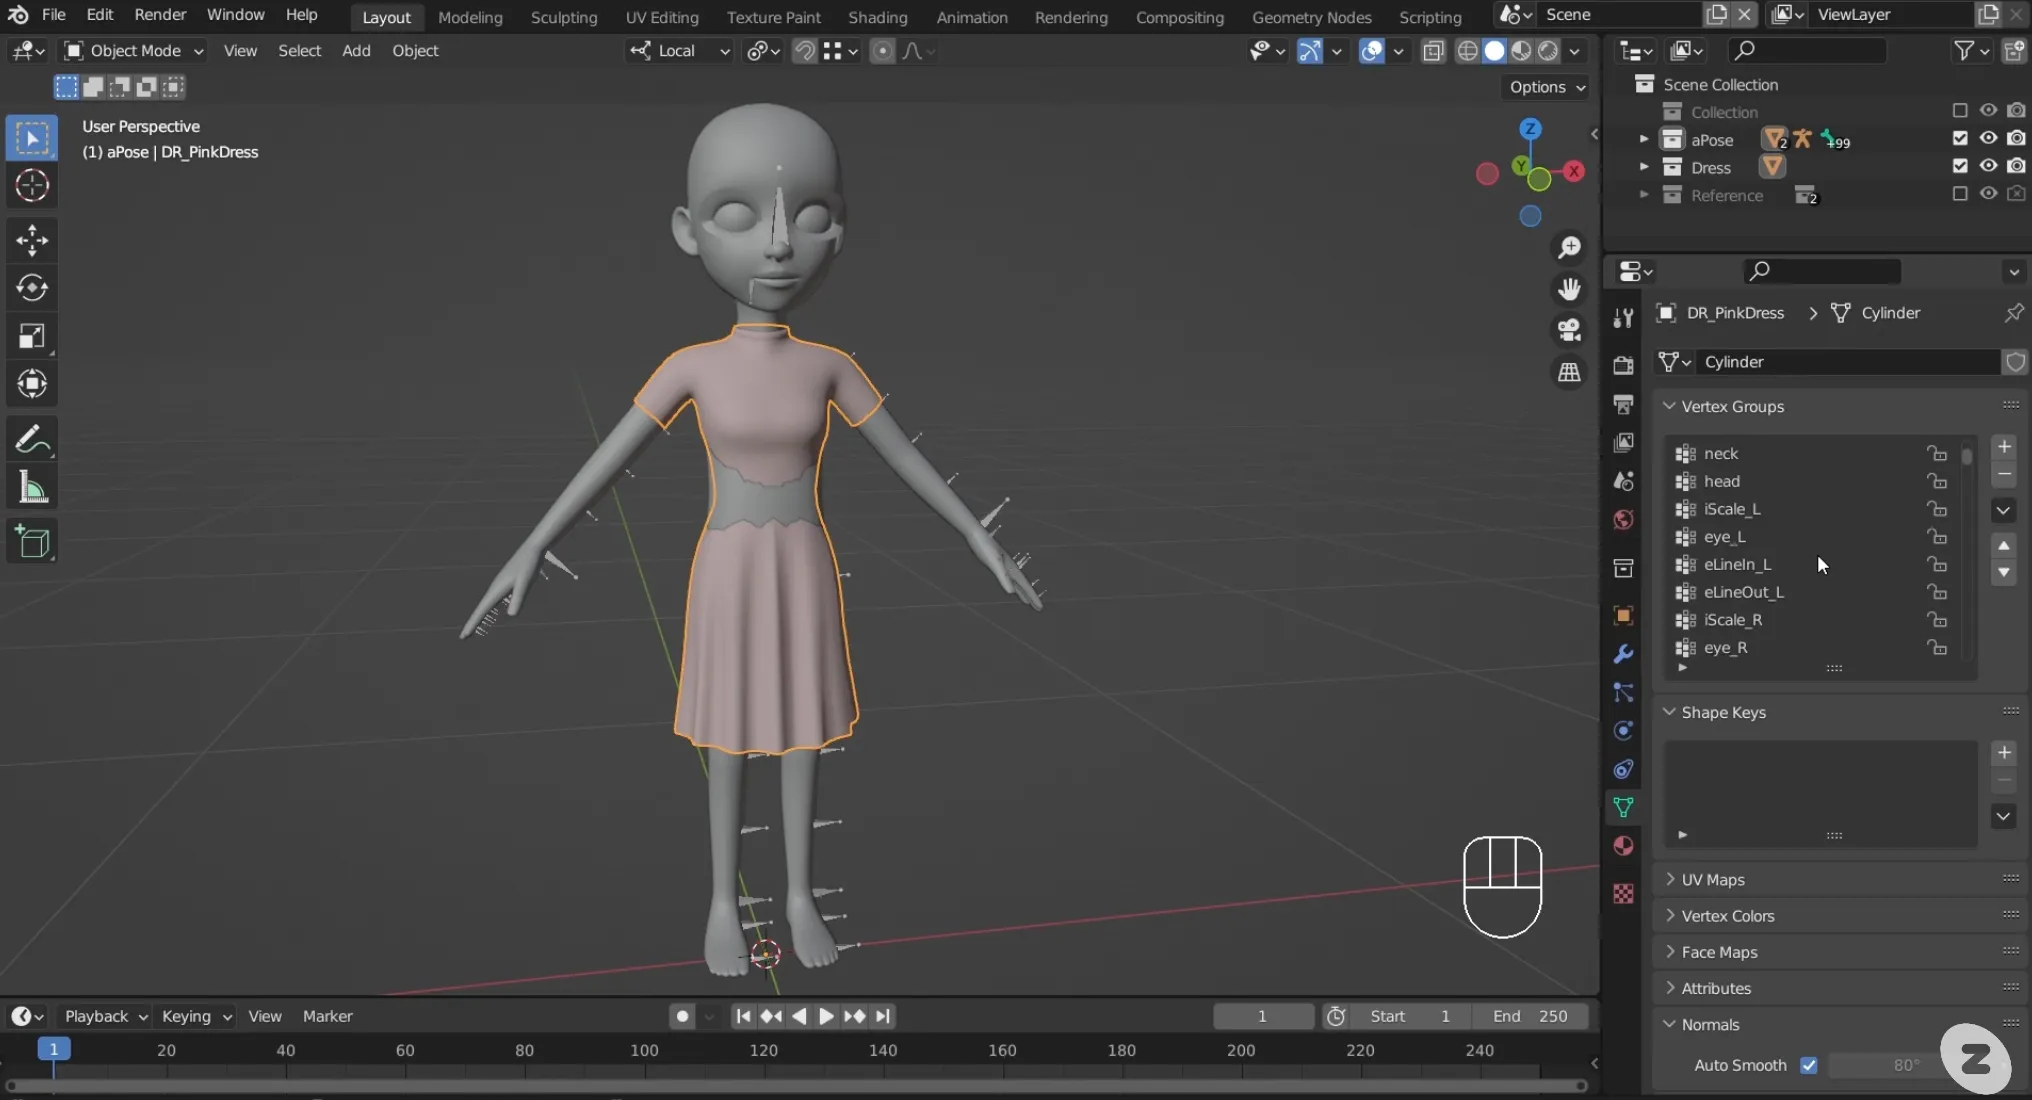
In the previous step, while setting up the Parent, Child relationship, we used the Empty Weight option. In doing so, a vertex group was created for all the items that had no weights assigned to them.
Still, when we move the armature, the items don't follow the movement. To fix this, we need to assign weights directly to the parts of each bone. Normally, when doing this, you would have to set the weights from scratch, but the mask object we are using contains a template that already has the weights applied. This template is the same weight that was applied to ZEPETO's default avatar.
So all we need to do is copy and paste that weight template into our item.
- Select the mask in Object mode, press Shift, and then select the Item object. This will make the Item object active and highlight it with a lighter color.
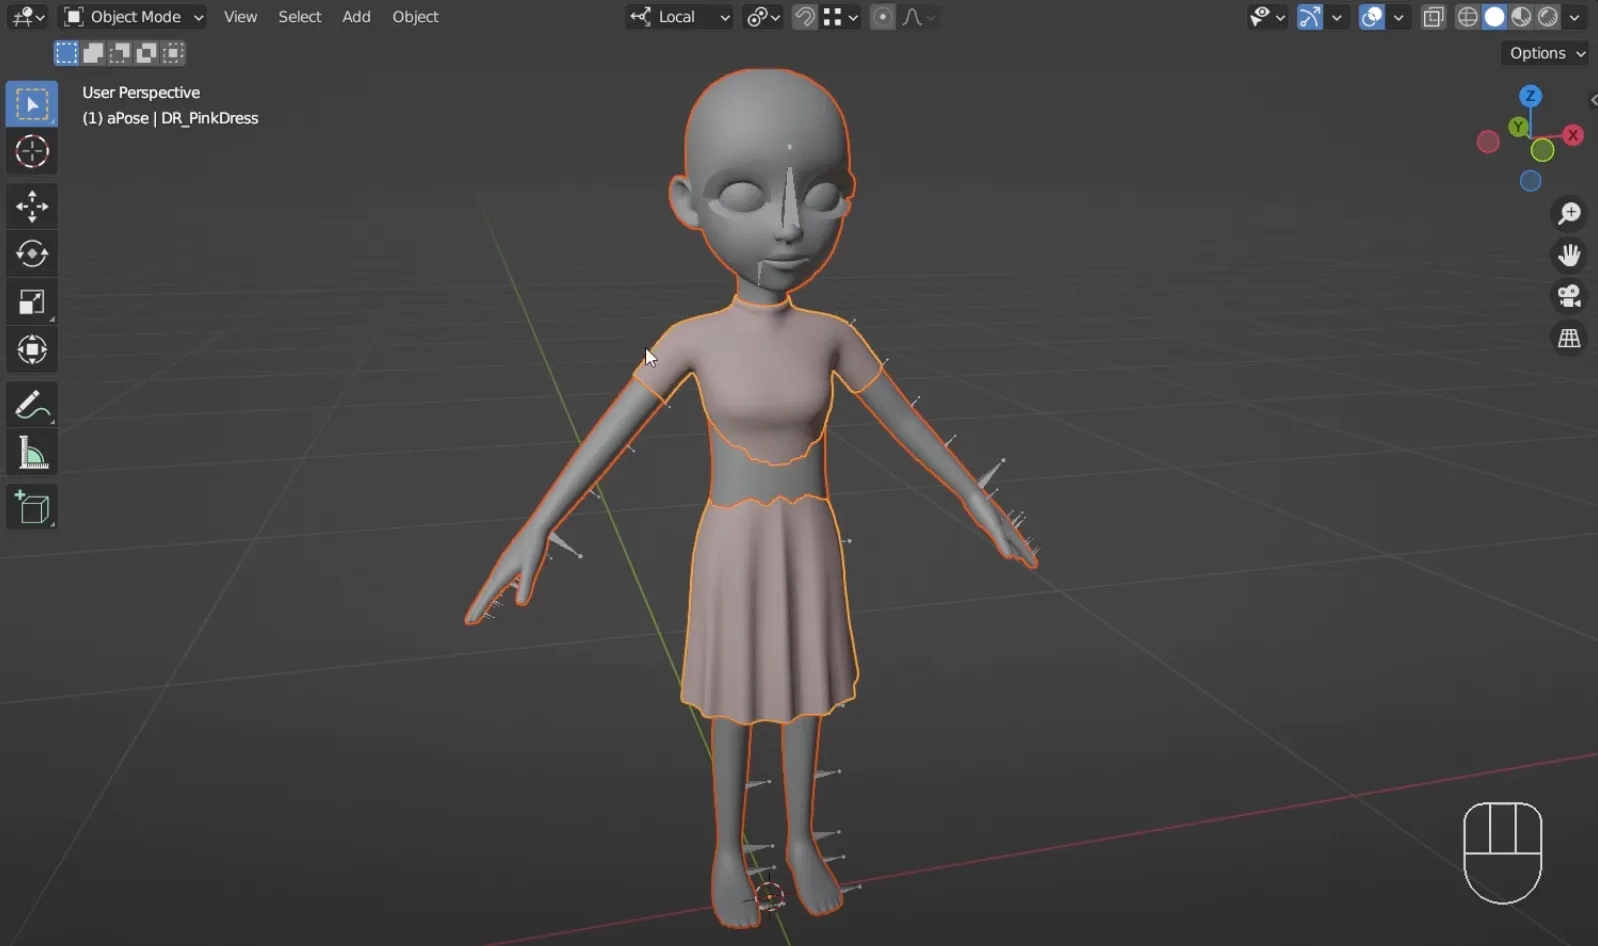
2. While still in this state, switch to Weight Paint mode and select Weights > Transfer Weights.
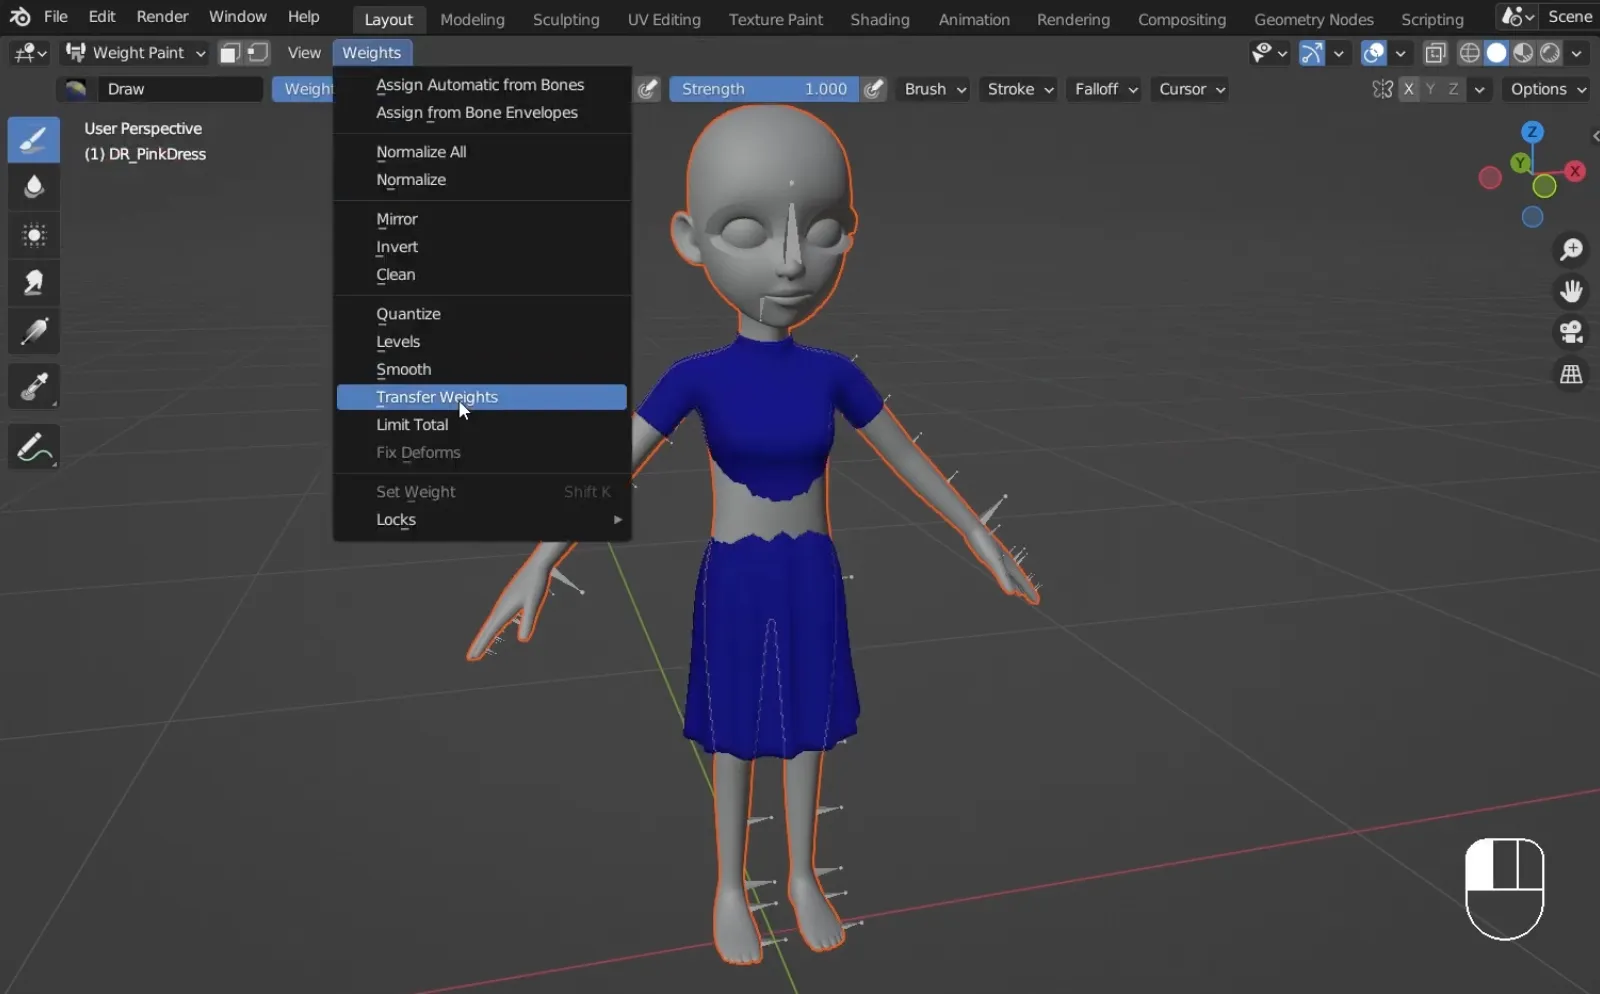
3. In the Options menu at the bottom of the viewport, change the Source Layer Selection to By Name. Immediately below, under Destination Layers Matching, change it to All Layers.
- After selecting these options, the color of the object should change, indicating that the weight transfer went well.
- In the Options menu, under Vertex Mapping, you can make the vertex mapping a little smoother. Play around with these options to see which one works best for your item object.
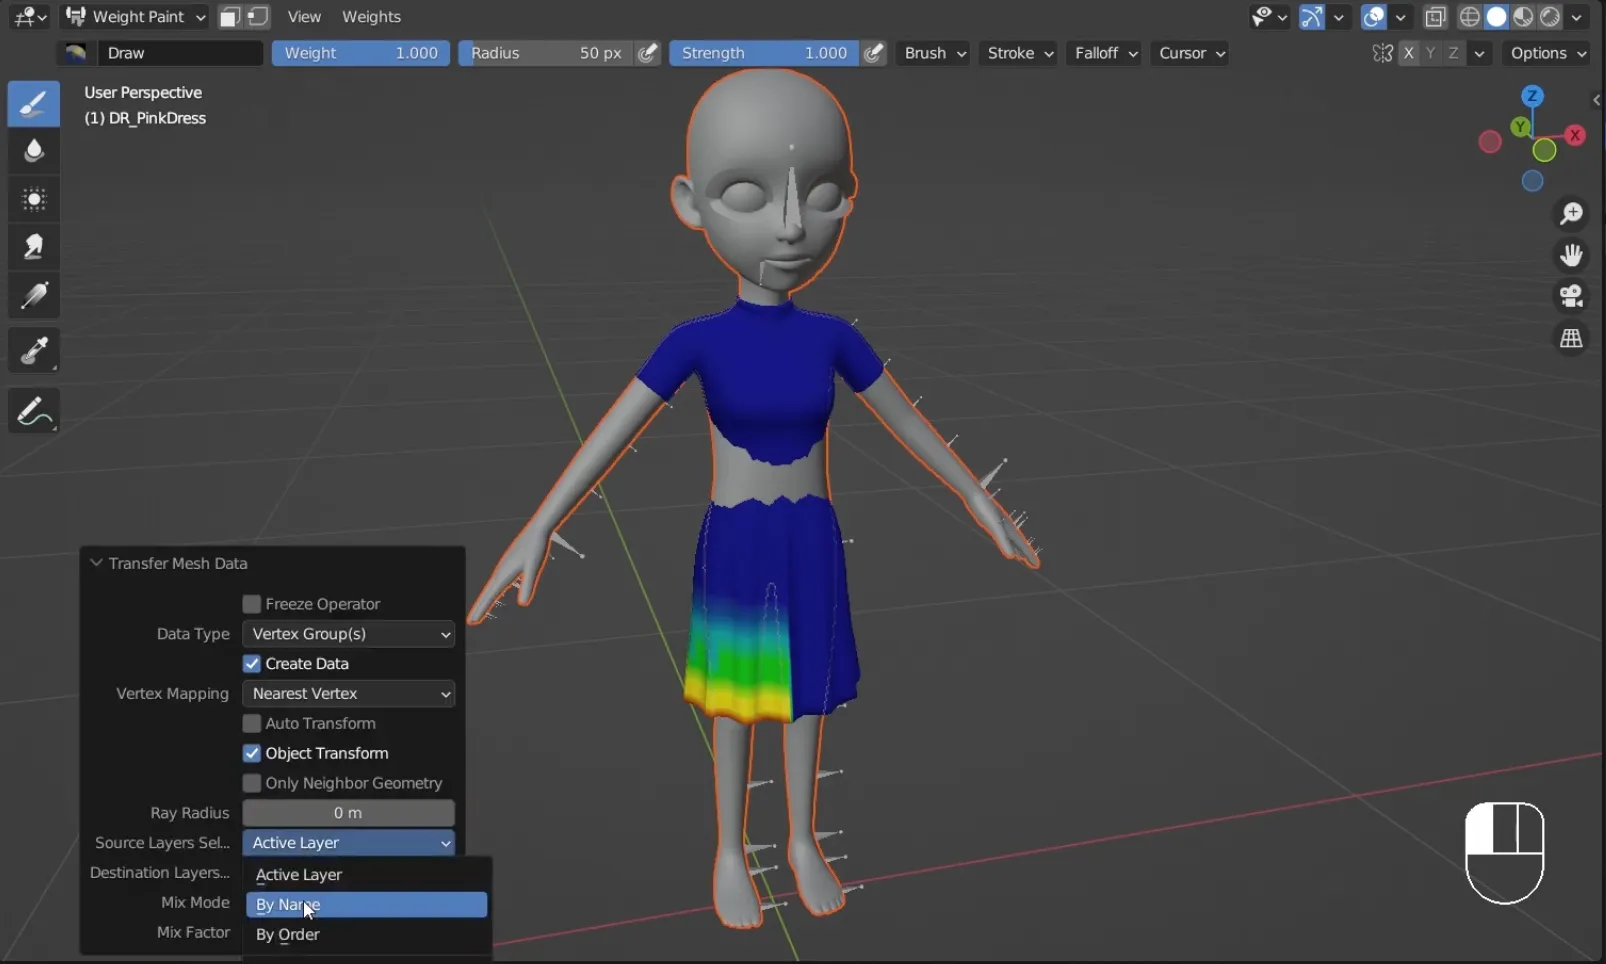
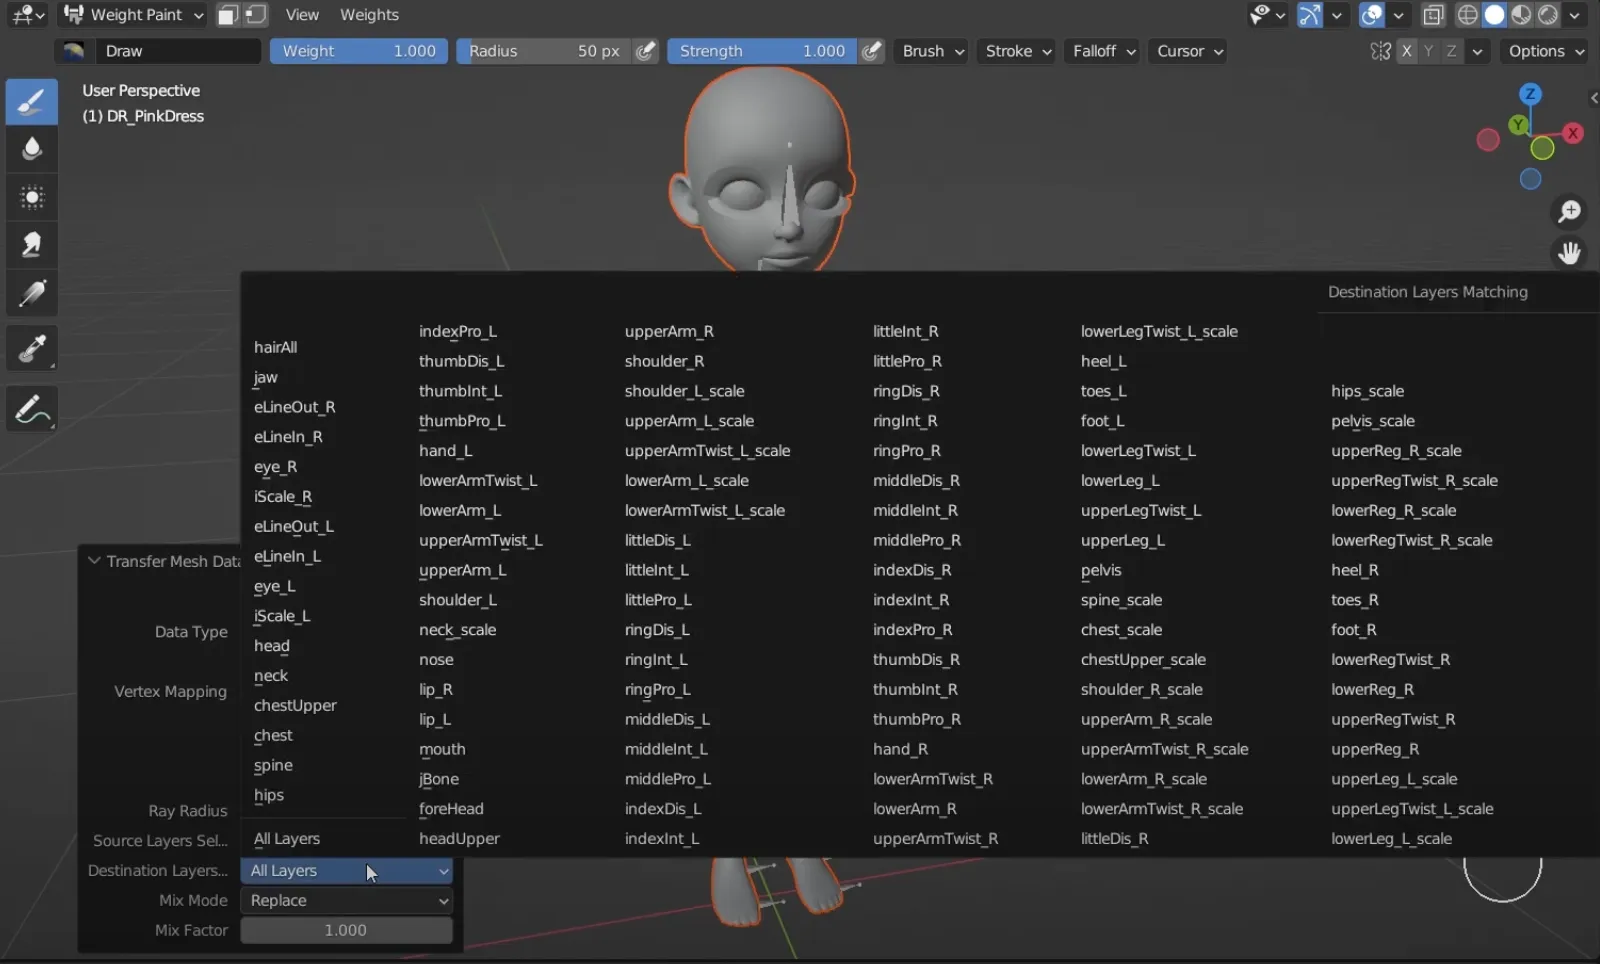
4. The weights from the mask have now been copied to the item object. In the next step, you will need to check and modify the weights applied to the item.
- To check the weights, switch to Pose mode. Rotate the chest bone in the center to see if the item object is following correctly.
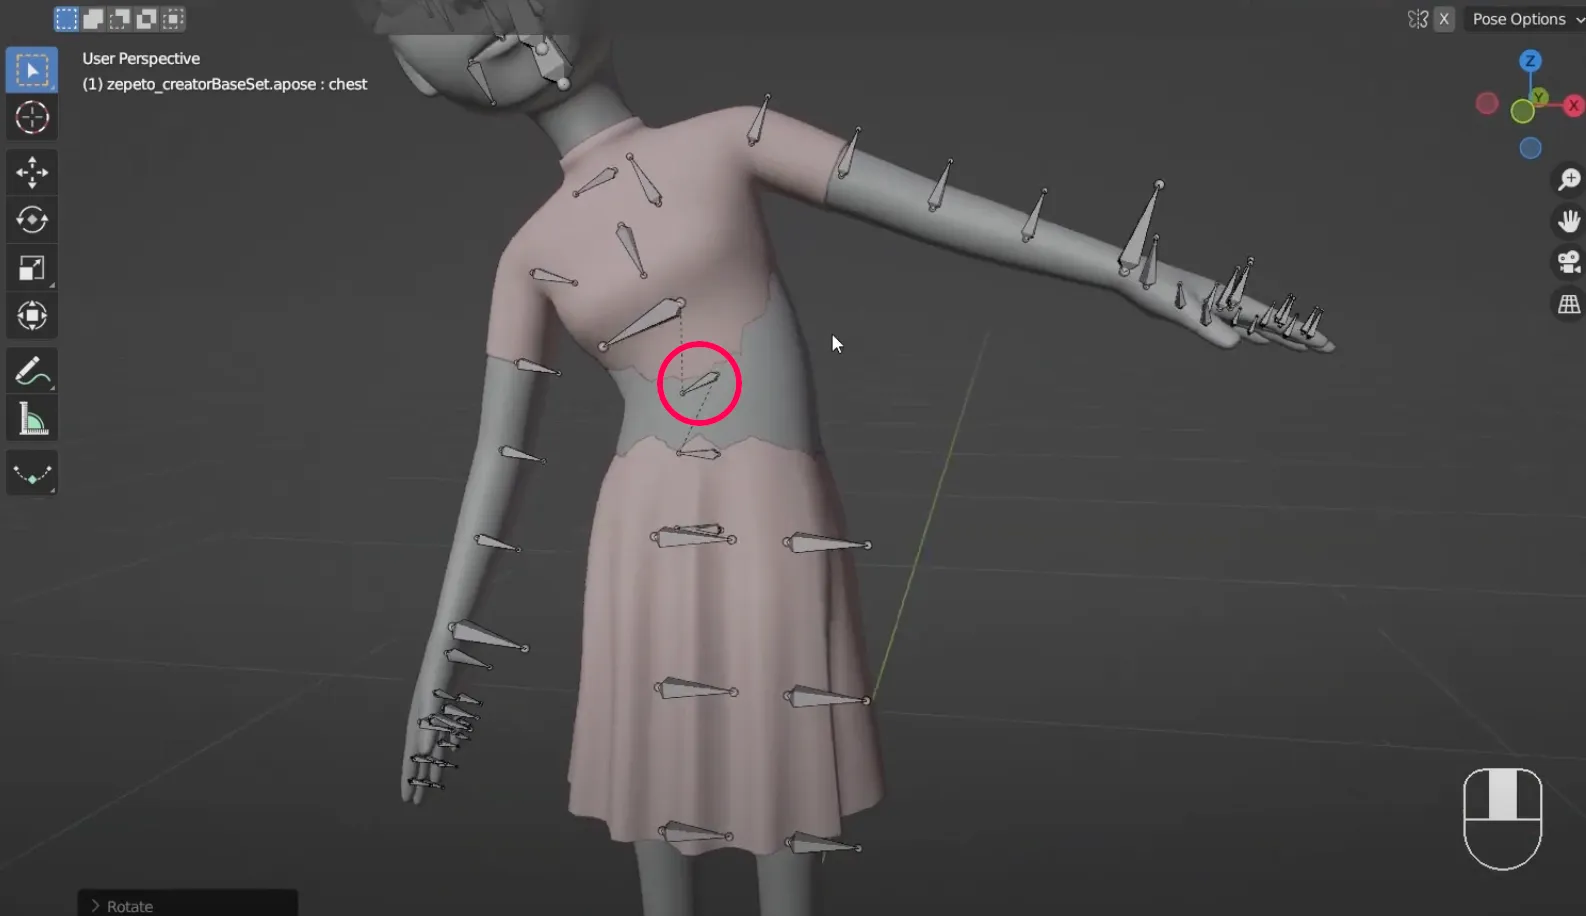
2. If you want to change the way the object follows, use the Weight Painting Tool to edit the weight values. Switch back to Weight Painting mode, and in the Vertex Group, find the vertex group with the name of the rotated skeleton.
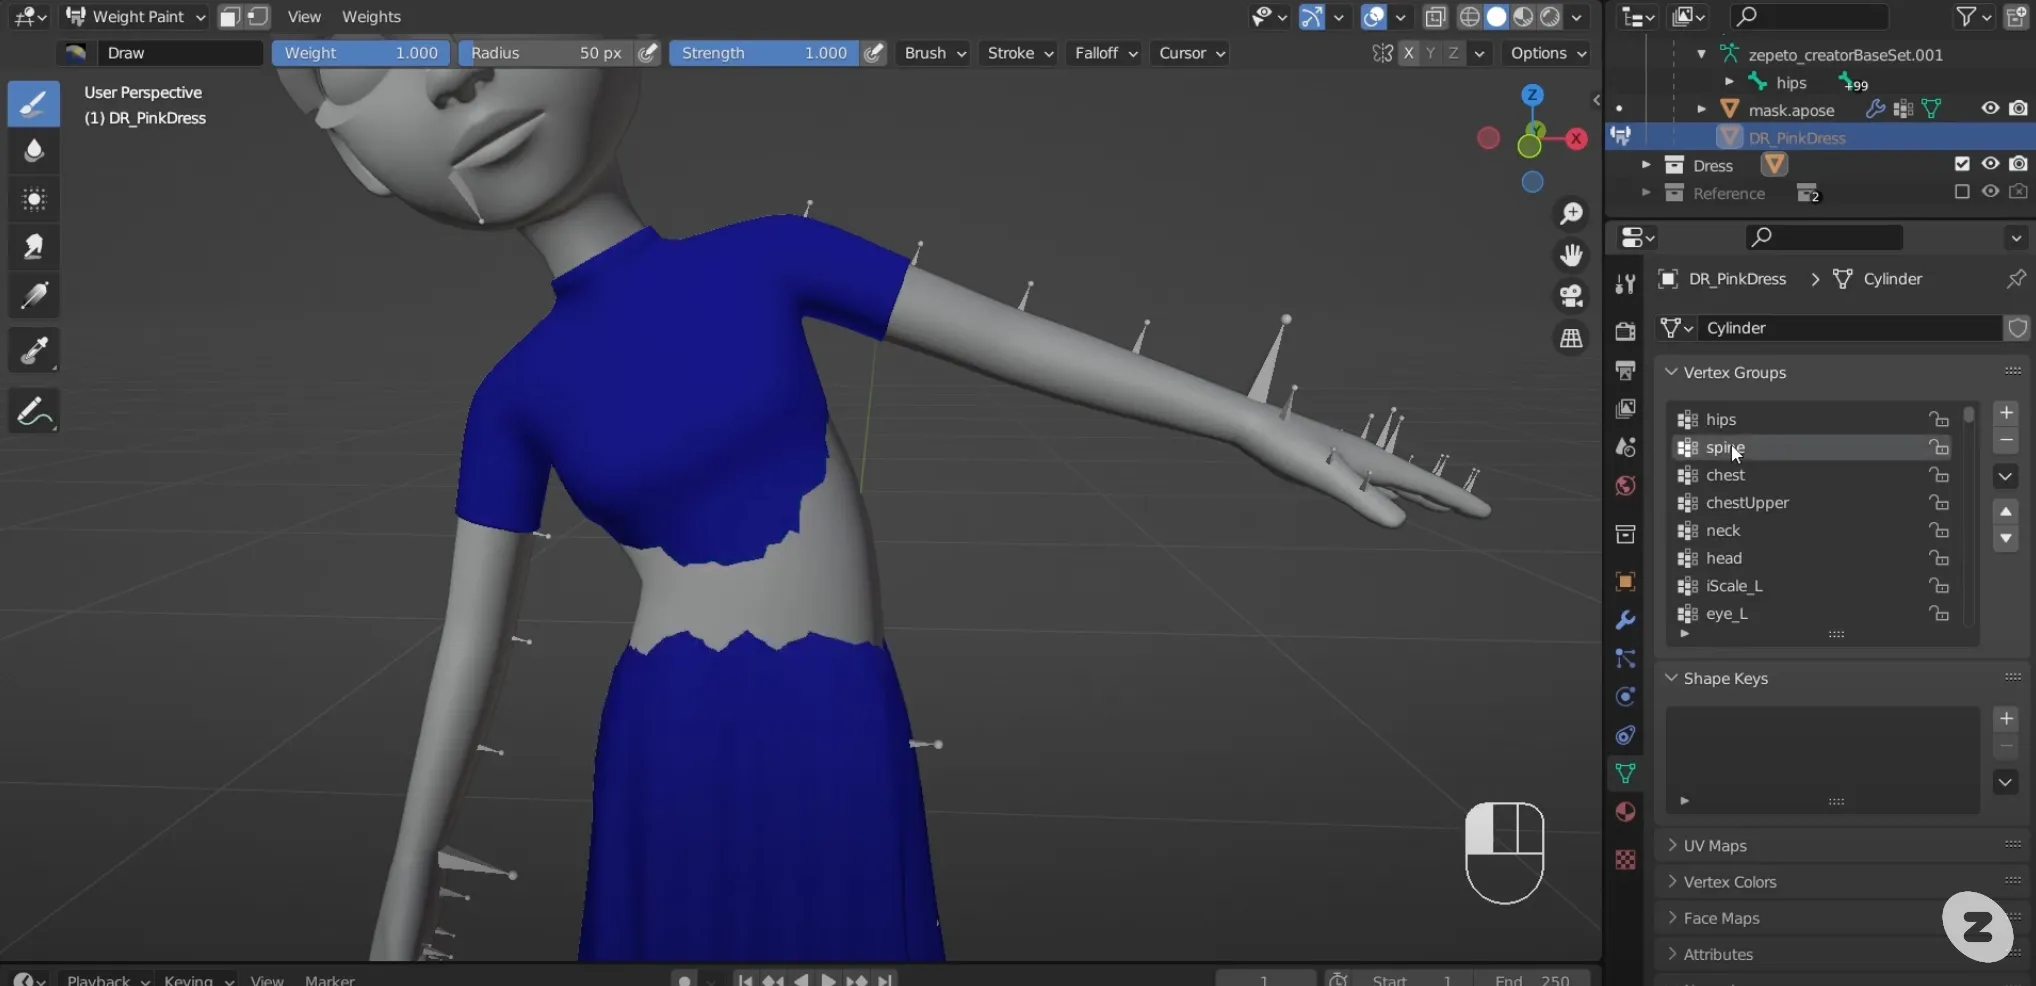
👍 If no weight is set for that group (it's not colored), then the weight is set for the scale of the same name. ex) If no weight is set for spine, find and select the spine_scale group.
3. Once you have checked how much the weight affects that bone, you can edit the weight with the Weights tool. Before using the tool, be sure to check Auto Normalize in the Options menu in the top right corner. This setting allows you to automatically add or subtract the influence of vertex groups when performing paint operations.
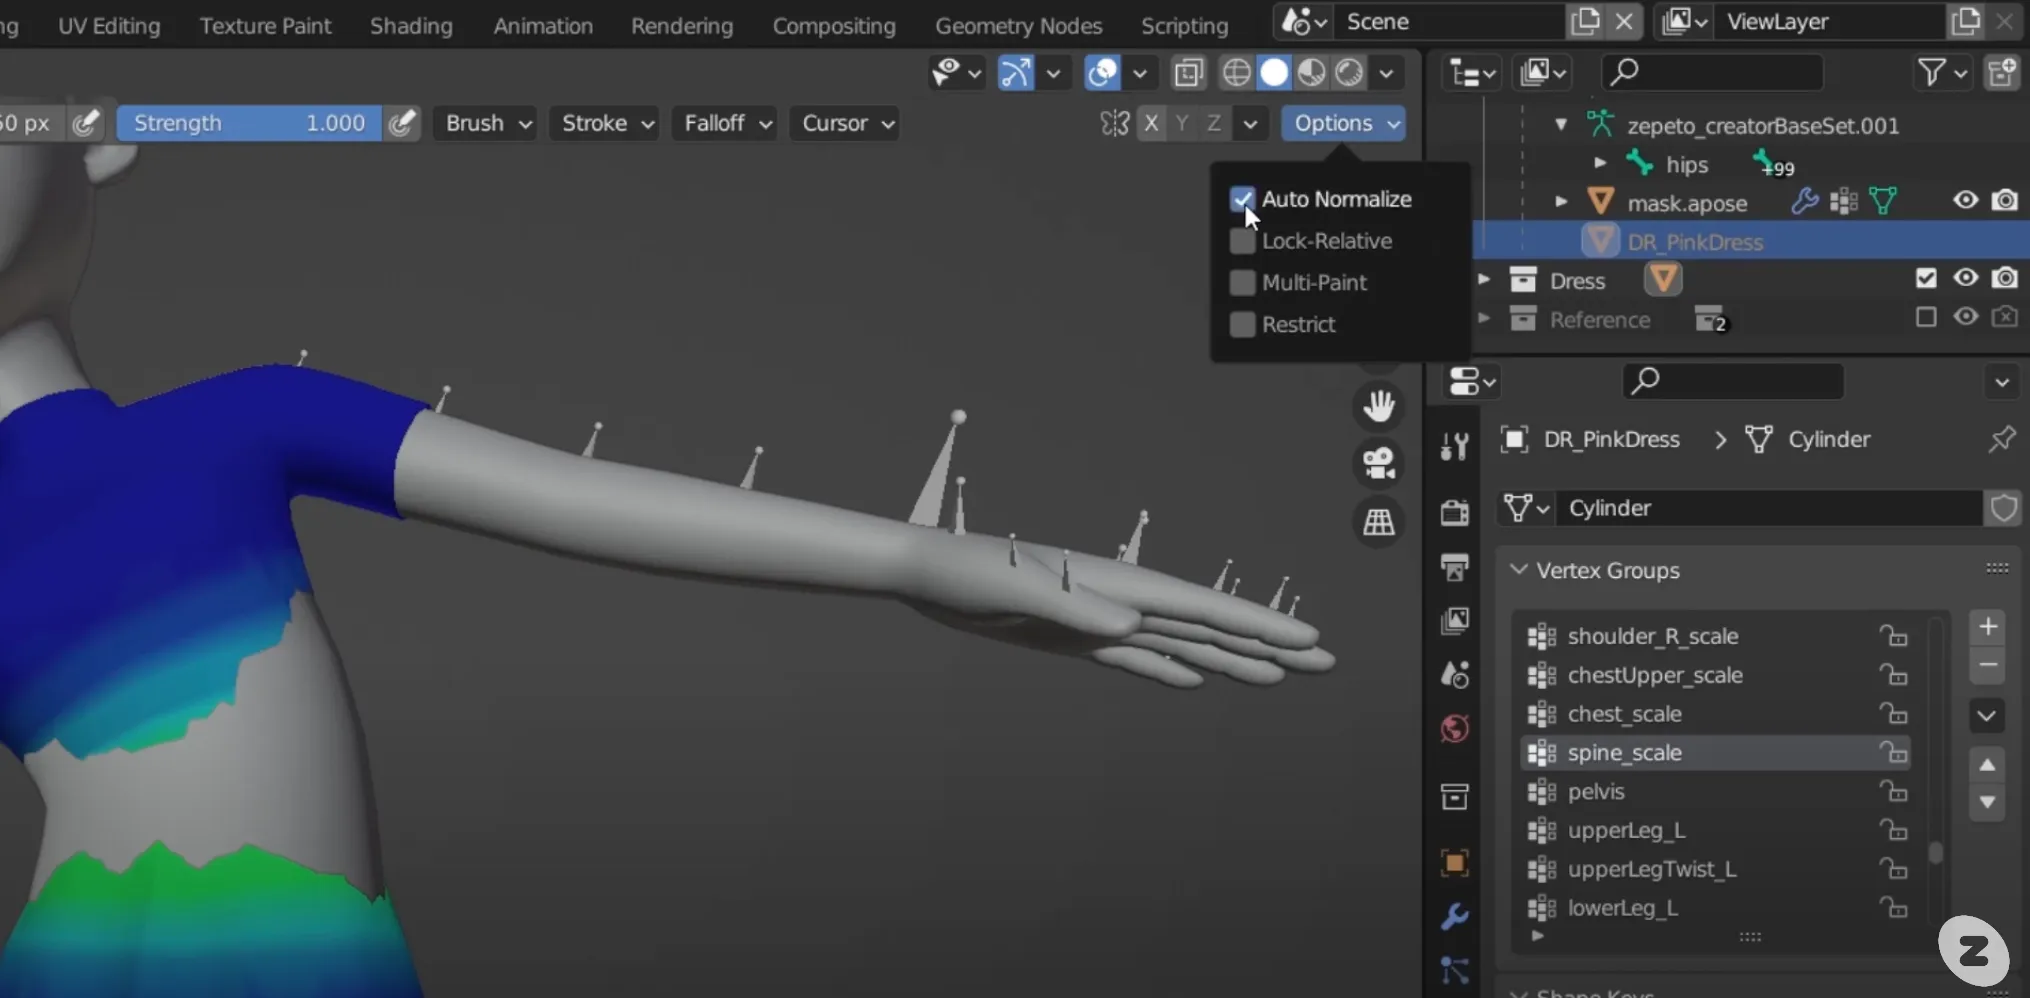
When you select the Drawing Brush Tool, the weight of the vertex group selected with this brush will affect the item object. You can change the brush conditions at the top of the Brush Tool. Setting the Strength to 0.2 and working with it should be adequate.

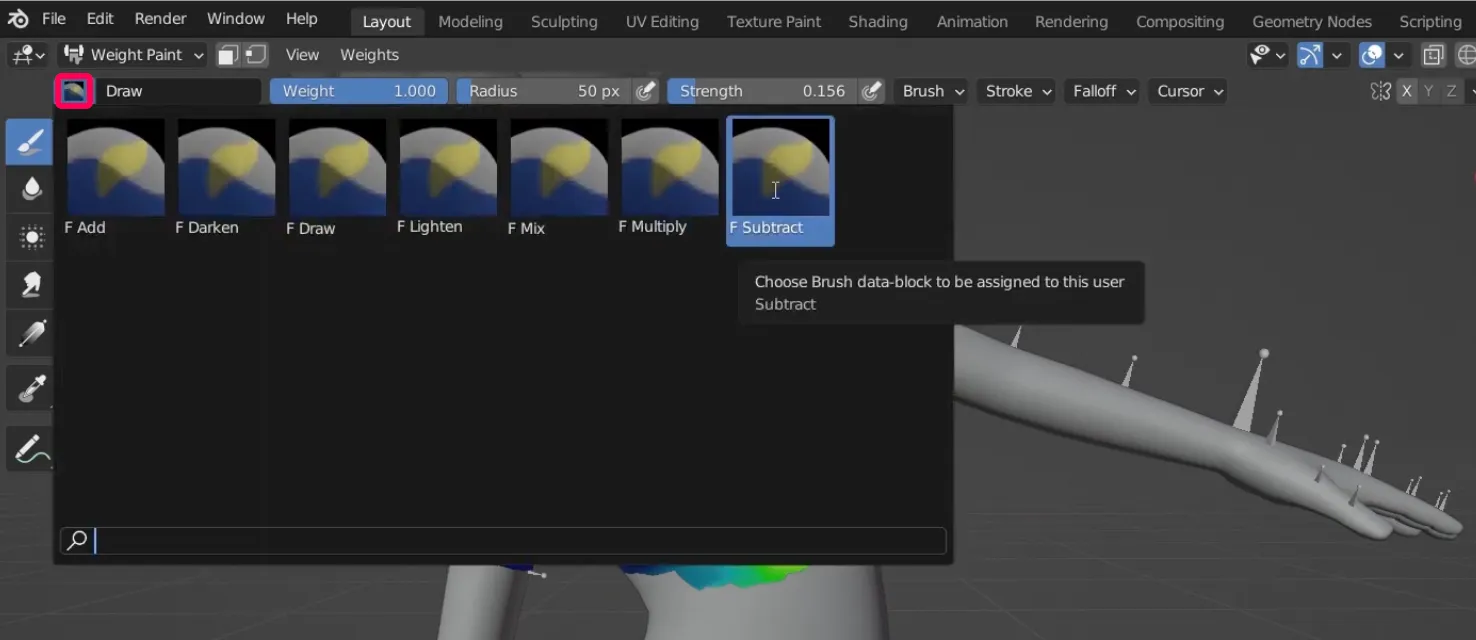
- To remove the effect on each bone, change the Brush Mode by selecting Subtract in the Brush section.
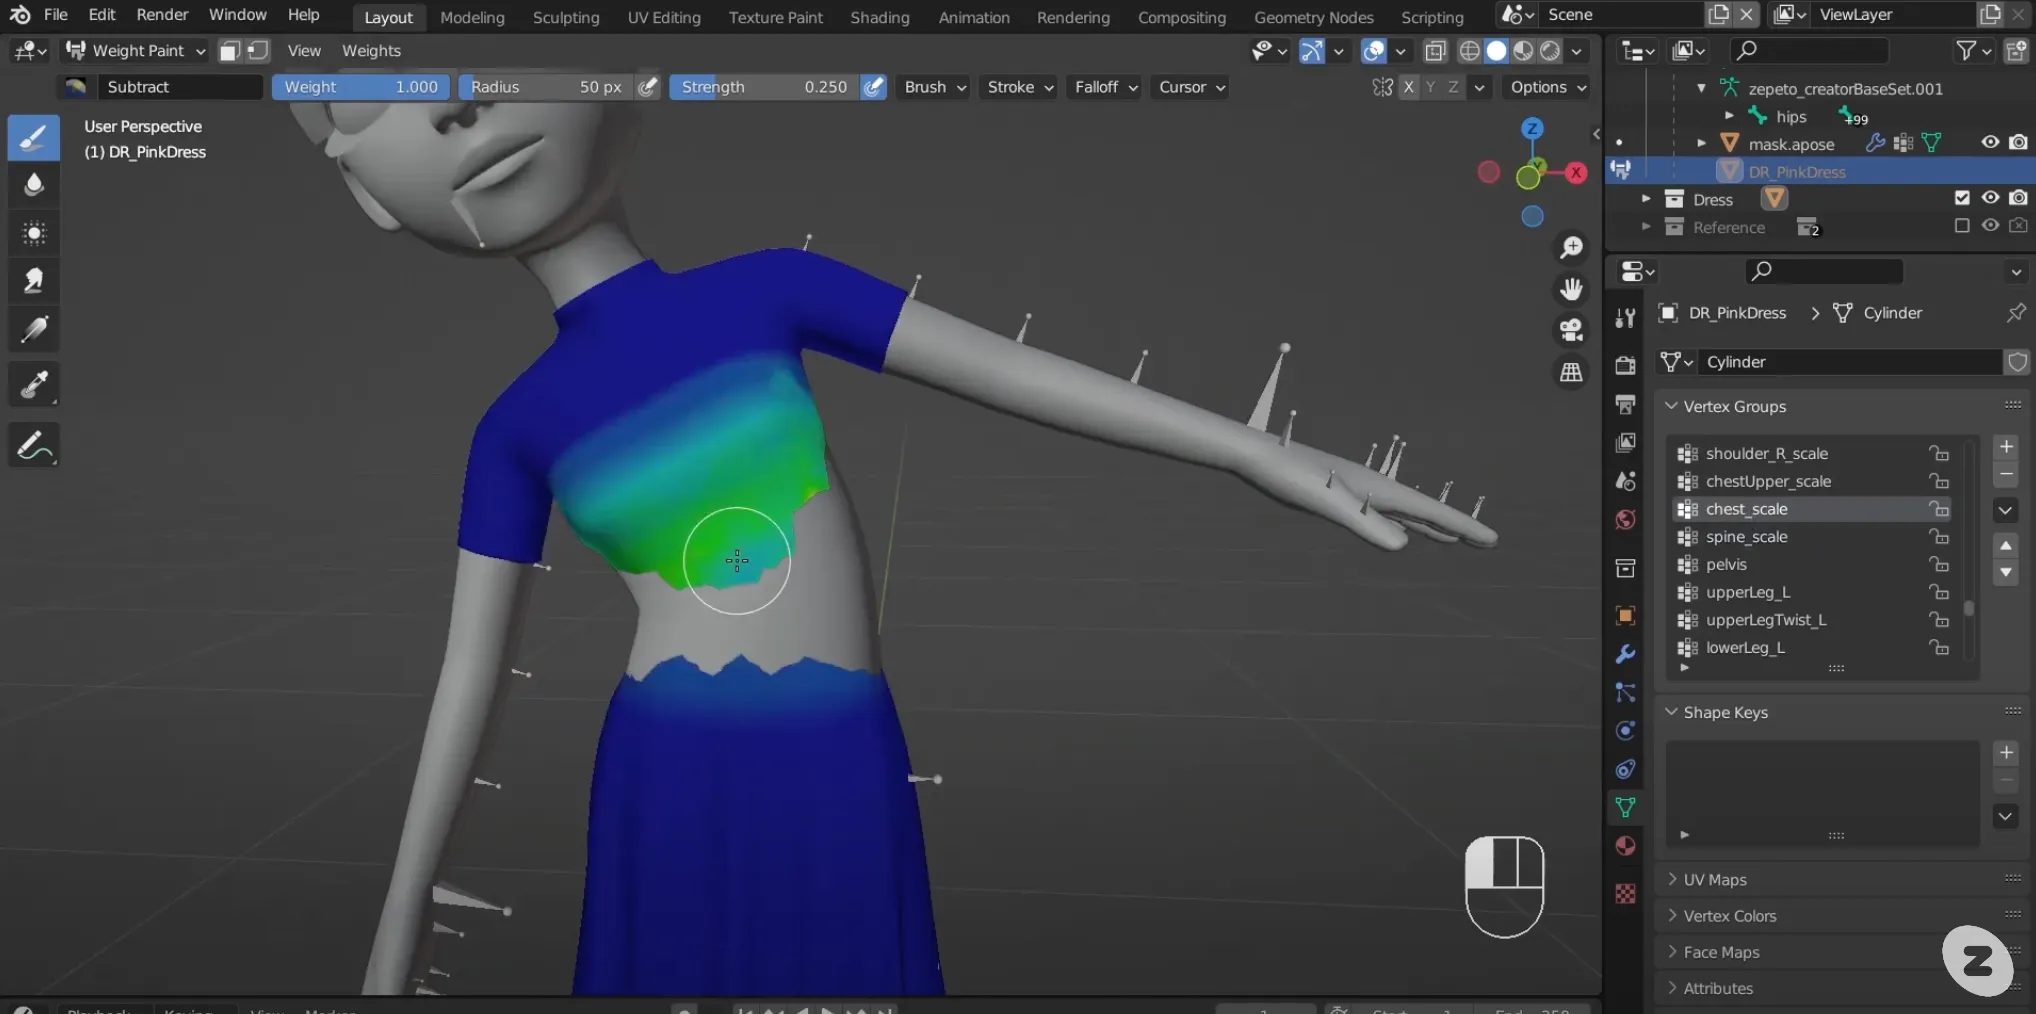
- You can select a vertex group on neighboring bones to edit their weights. You can see vertex groups affect the Item object by pressing the group name in the list of vertex groups.
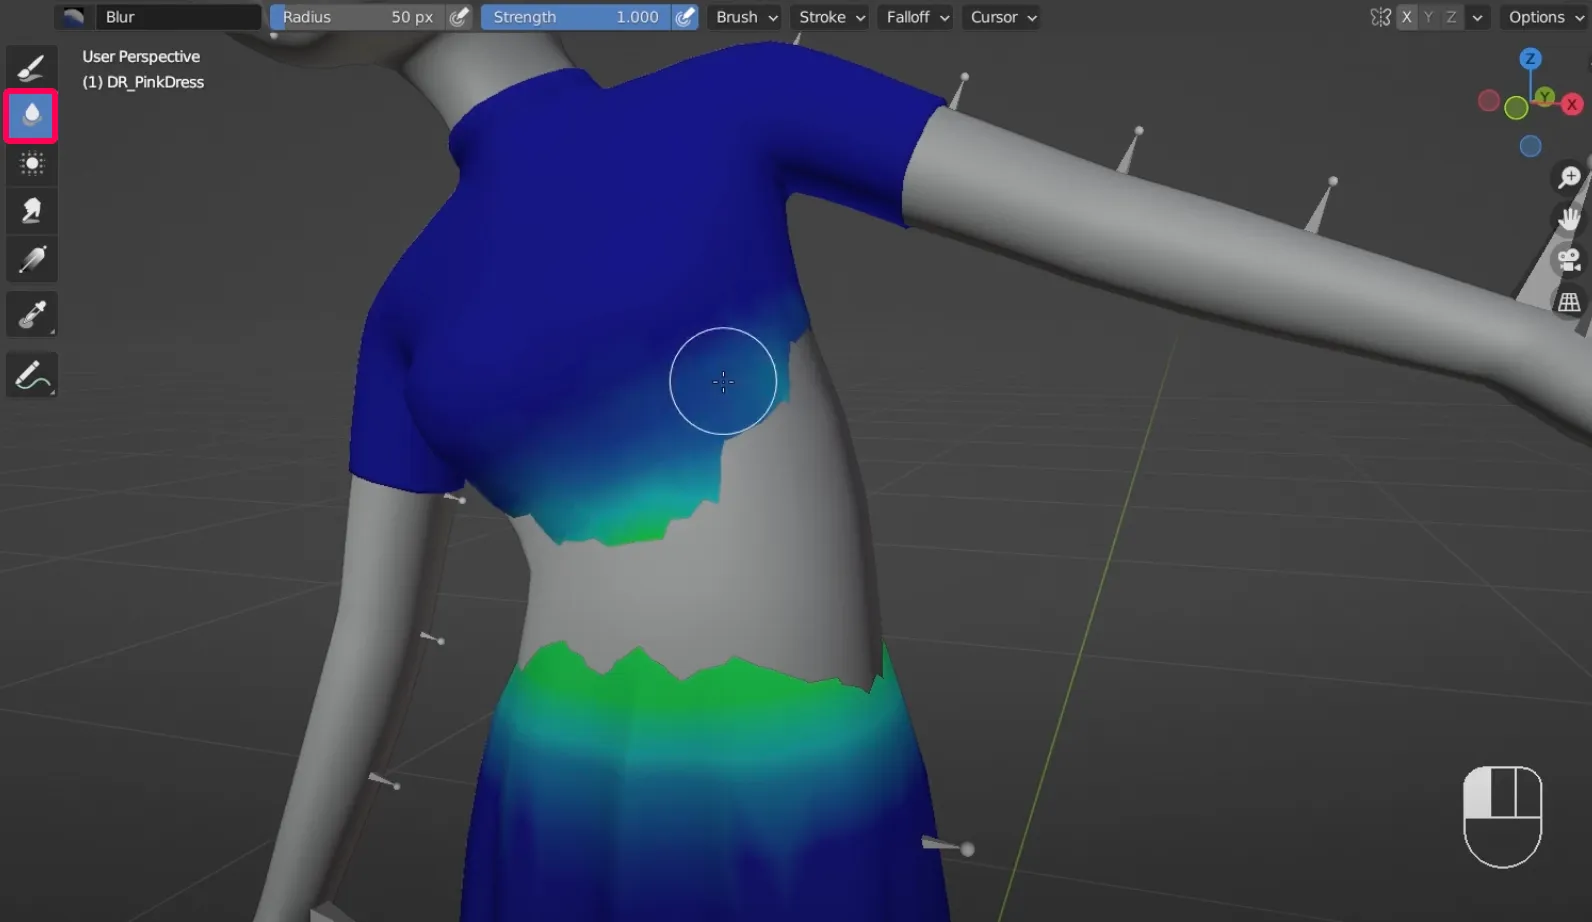
- The Blur Brush tool is responsible for blending the vertex weight with the weights of nearby vertices. You can adjust the strength of the brush to use it however you like. The Blur Brush is especially good to use where items bend.
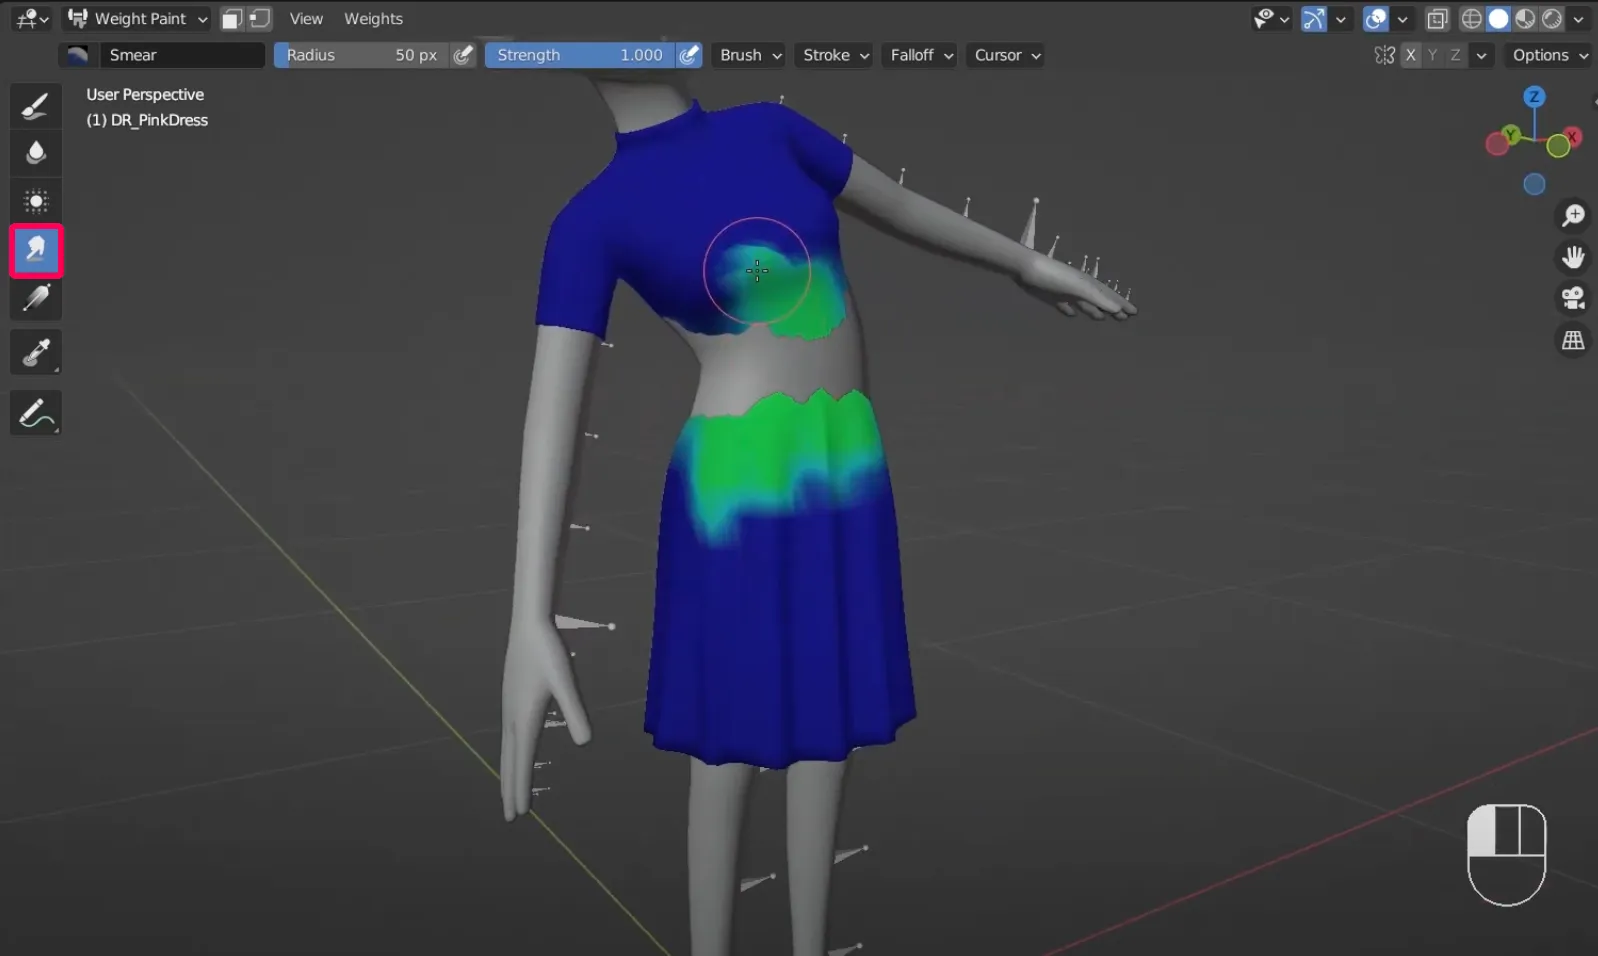
- The Smear Brush blends the weight at the start of the brush with the weight at the end. The Smear Brush has a finger-swiping effect, so it's a great way to undo accidental painting.
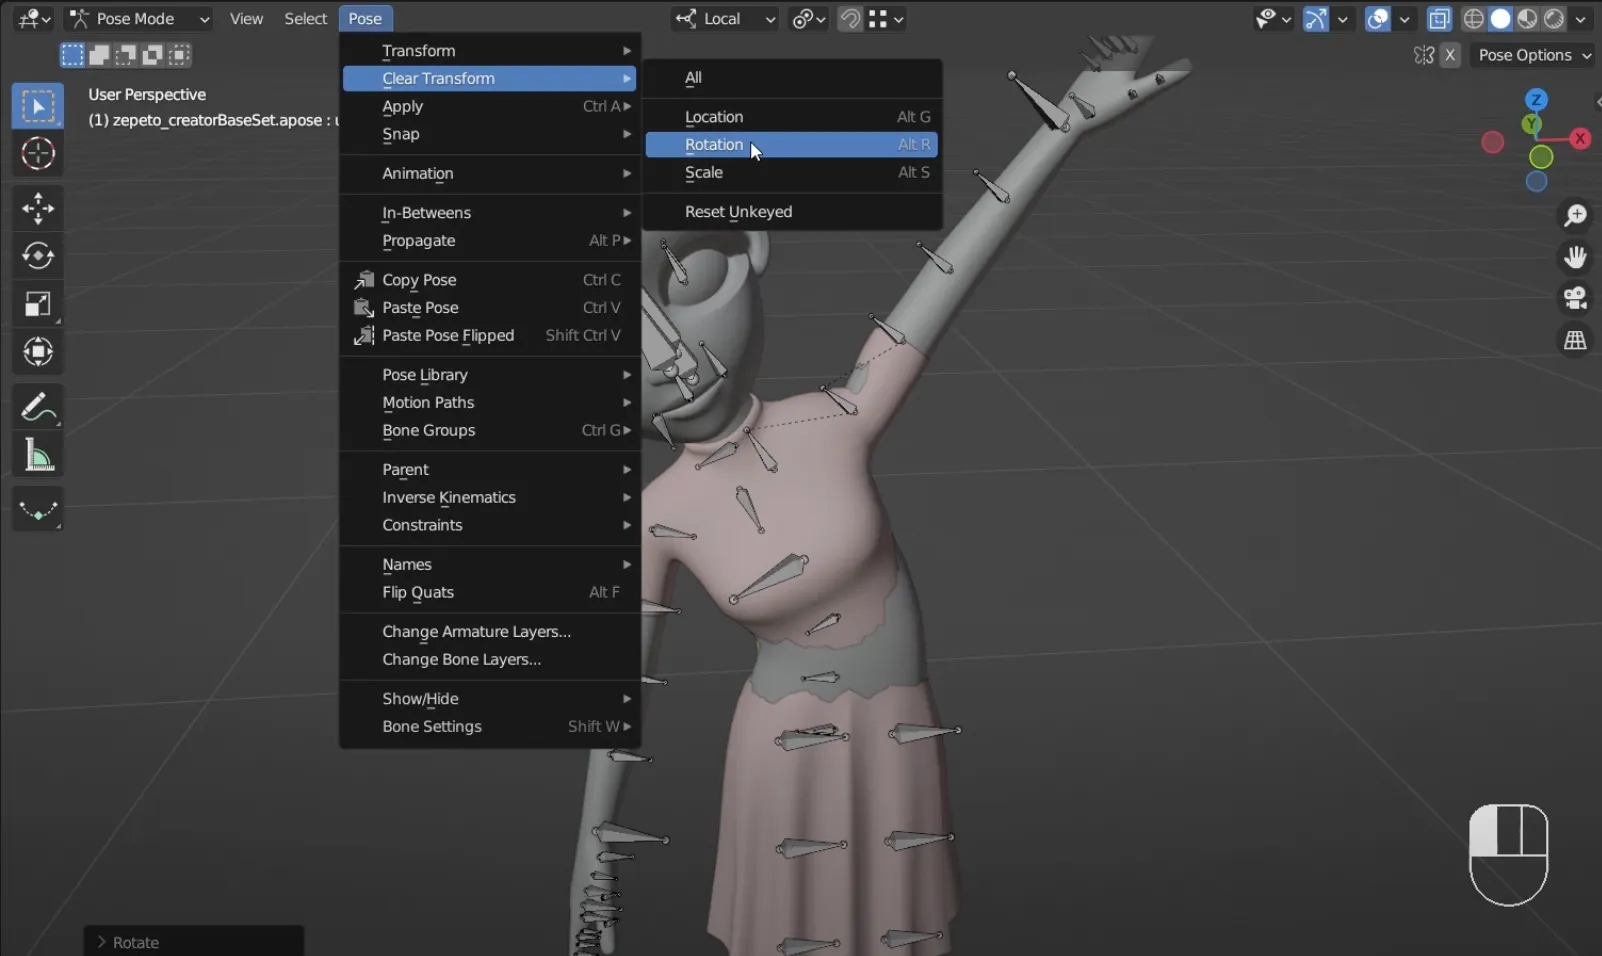
- Once you have the Item Object weights set appropriately for the skeleton, select the skeleton and choose Pose > Clear Transform > Rotation to reposition the skeleton. Then rotate the bones in different parts of the skeleton to see how the item object weights are set for each part.
👍 By rotating the skeleton to more extreme shapes, you can get a better idea of how the object is changing with the movement of the skeleton.
❗️ Caution This is a very repetitive and time-consuming task, so you'll need to be patient. The rigging of the skirt we worked on as an example in this guide took about 2 hours.
- Watch out for areas where the mask bends and goes through the object, this means that the weights are distributed too softly.
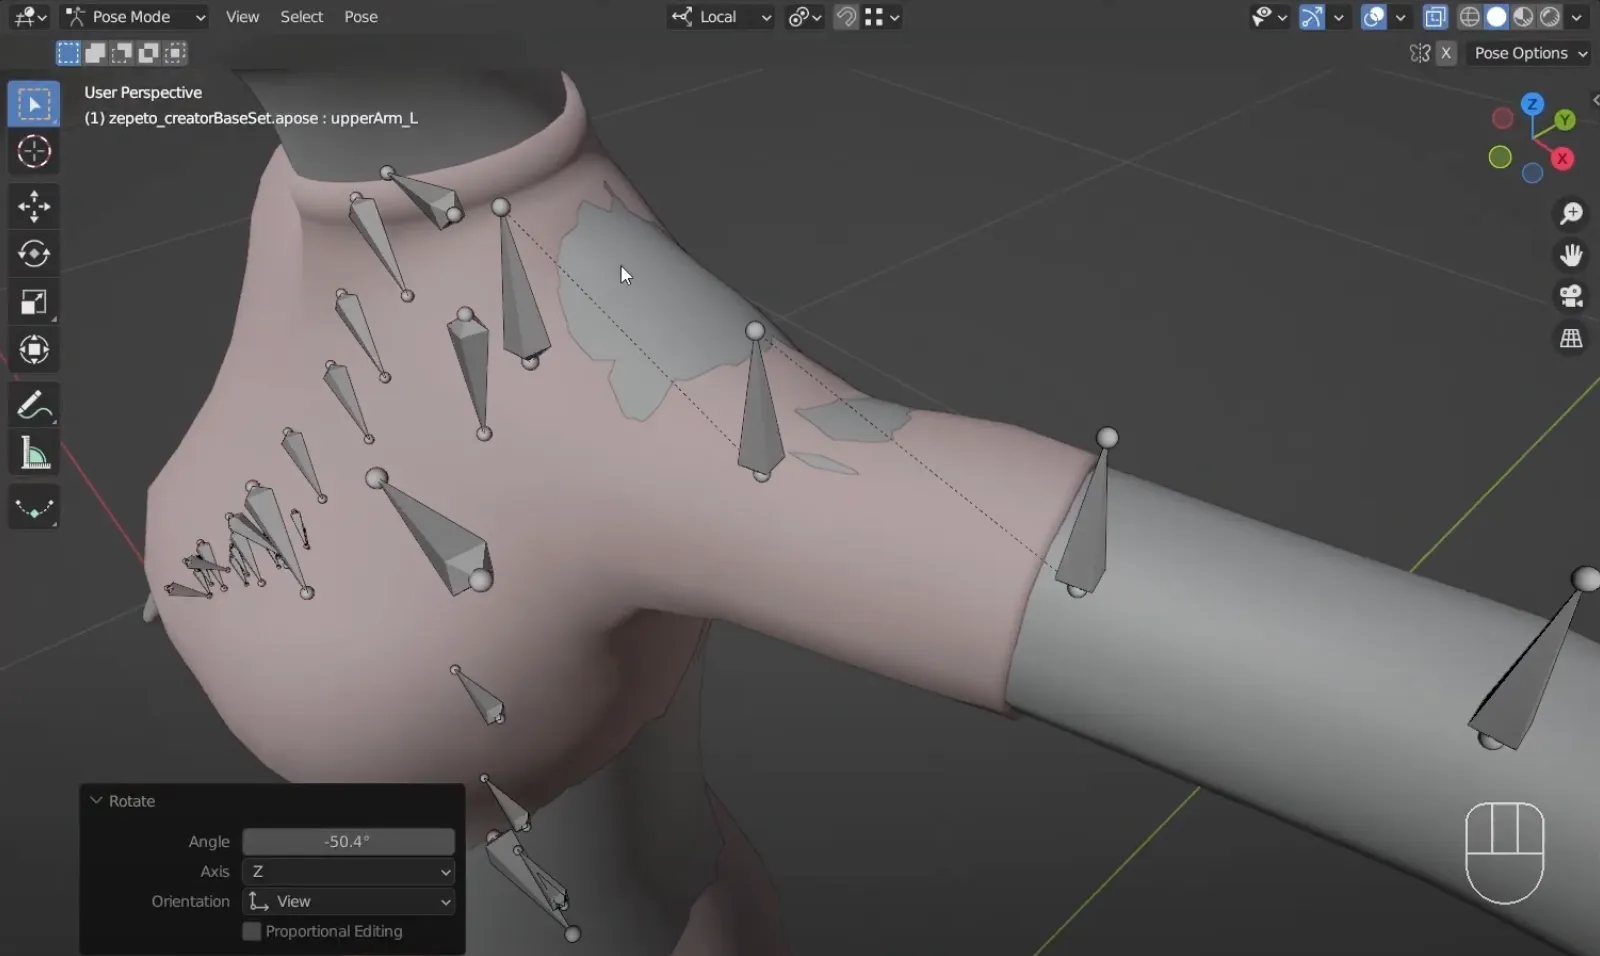
- This can be fixed by using the Weight Brush to add weights to those bones.
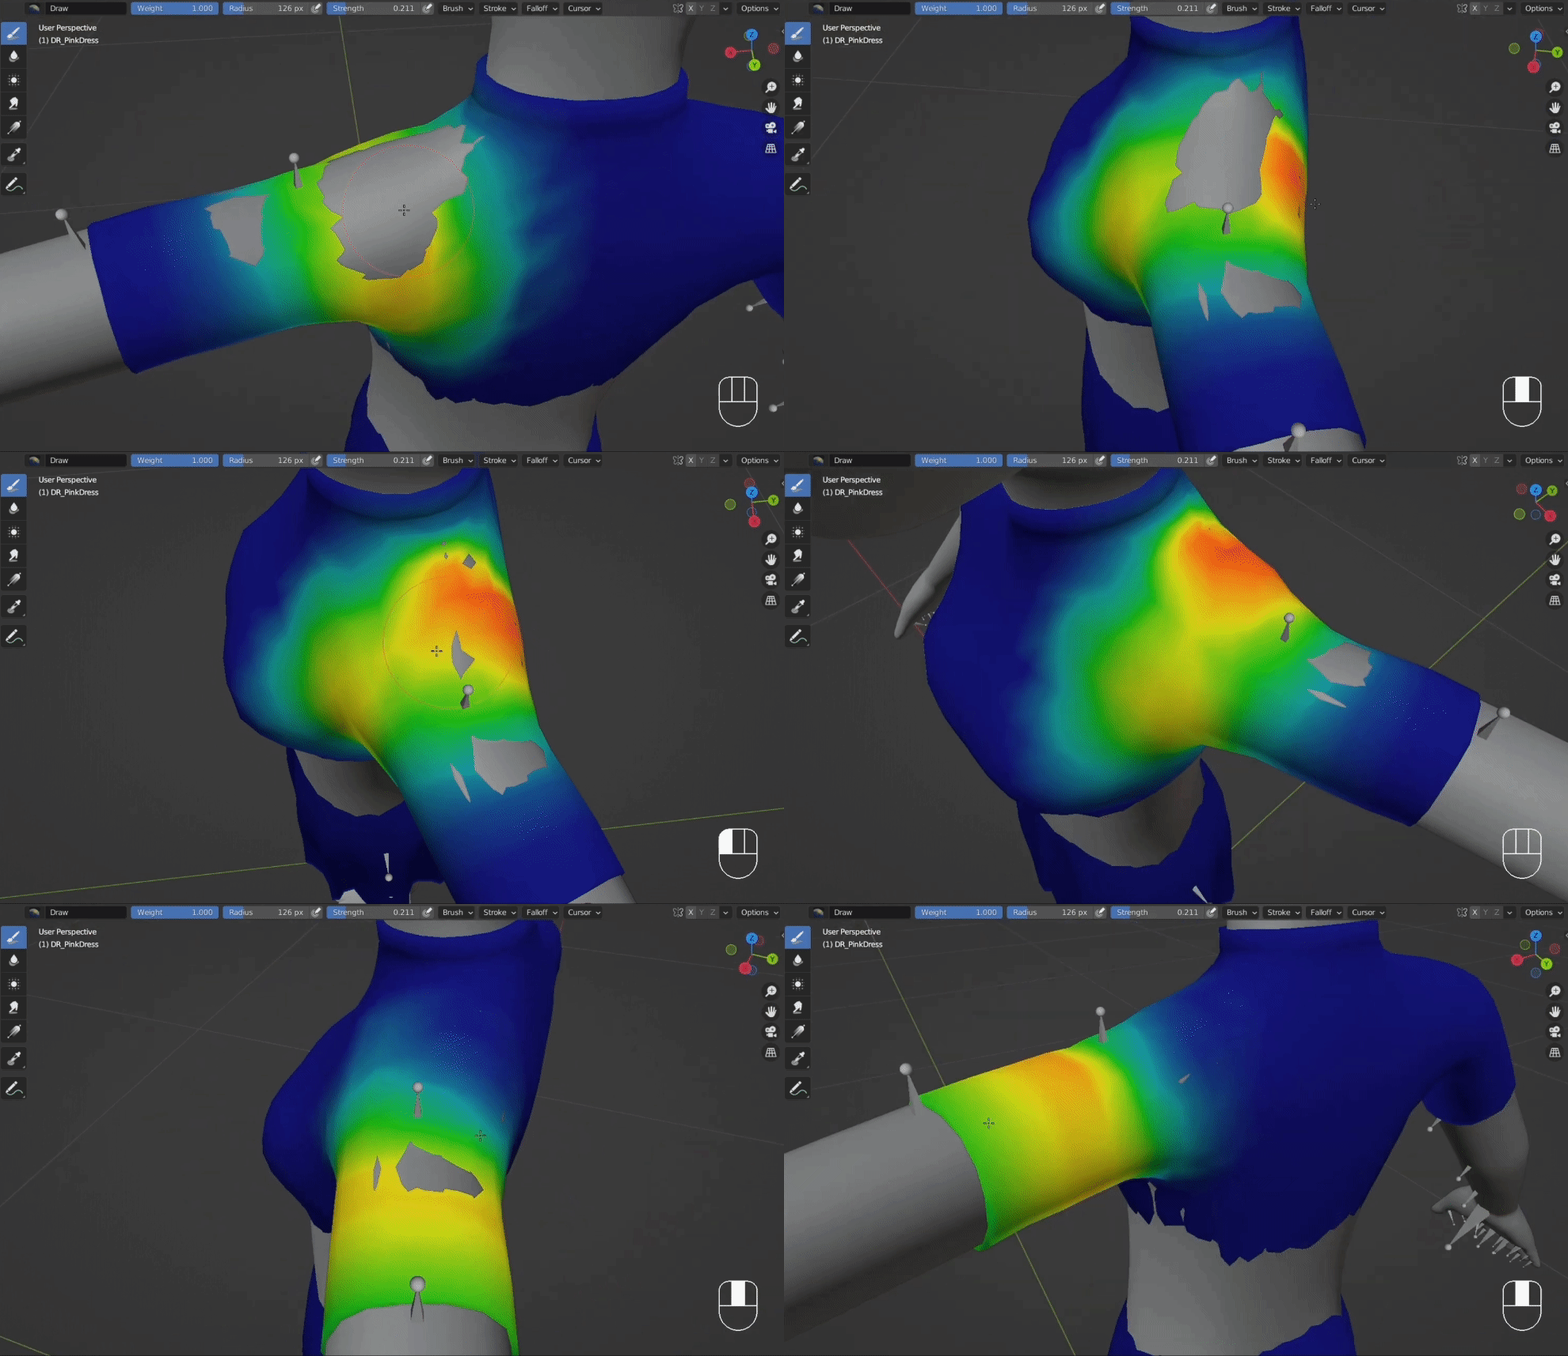
- Test this by rotating several bones. If this process is too difficult, you should consider changing the mesh of your object.
2. If the bends in your object are too rough, you may need to add more edge loops.
📘 Please refer to the following guides. [Modeling Basics]
- Changing the poly count of an object will change its UVs, so you may need to rework your textures.
Once the weights are all organized, it's time to switch to the T-pose.
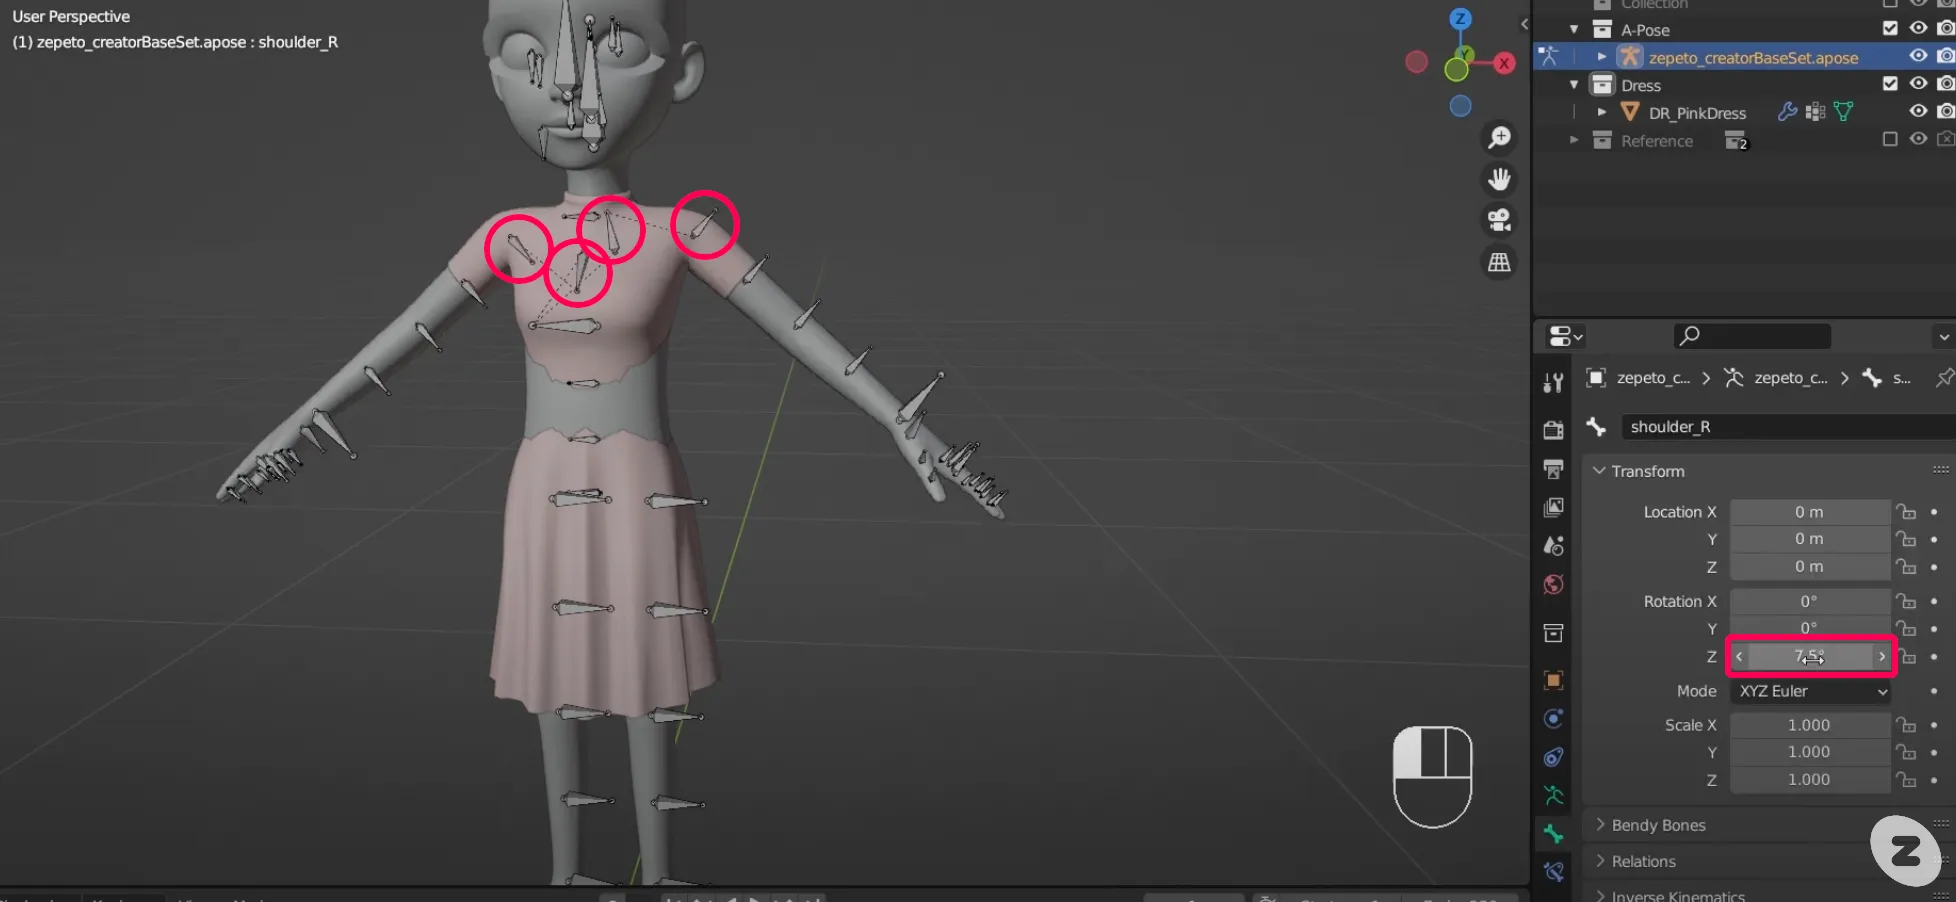
- The shoulder blade is rotated 7.5 degrees on the z-axis (See circle in image)
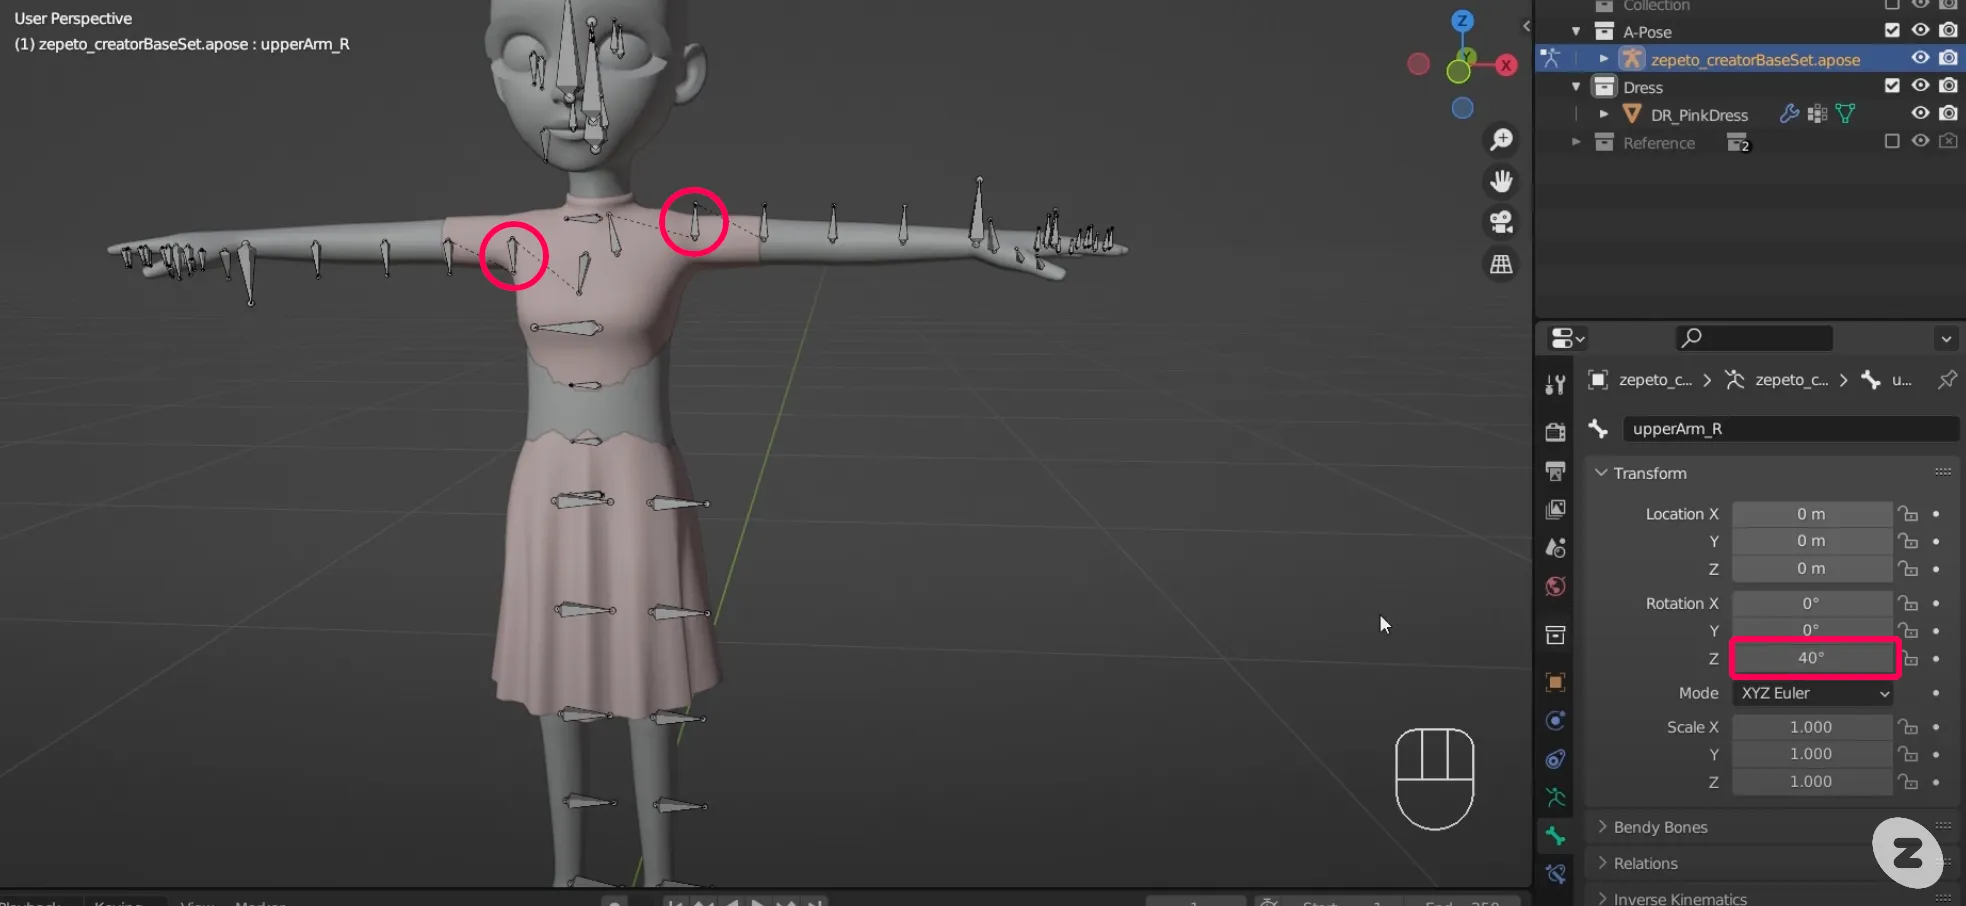
2. The upper arm bone is rotated 40 degrees on the z-axis. (See circle in image)
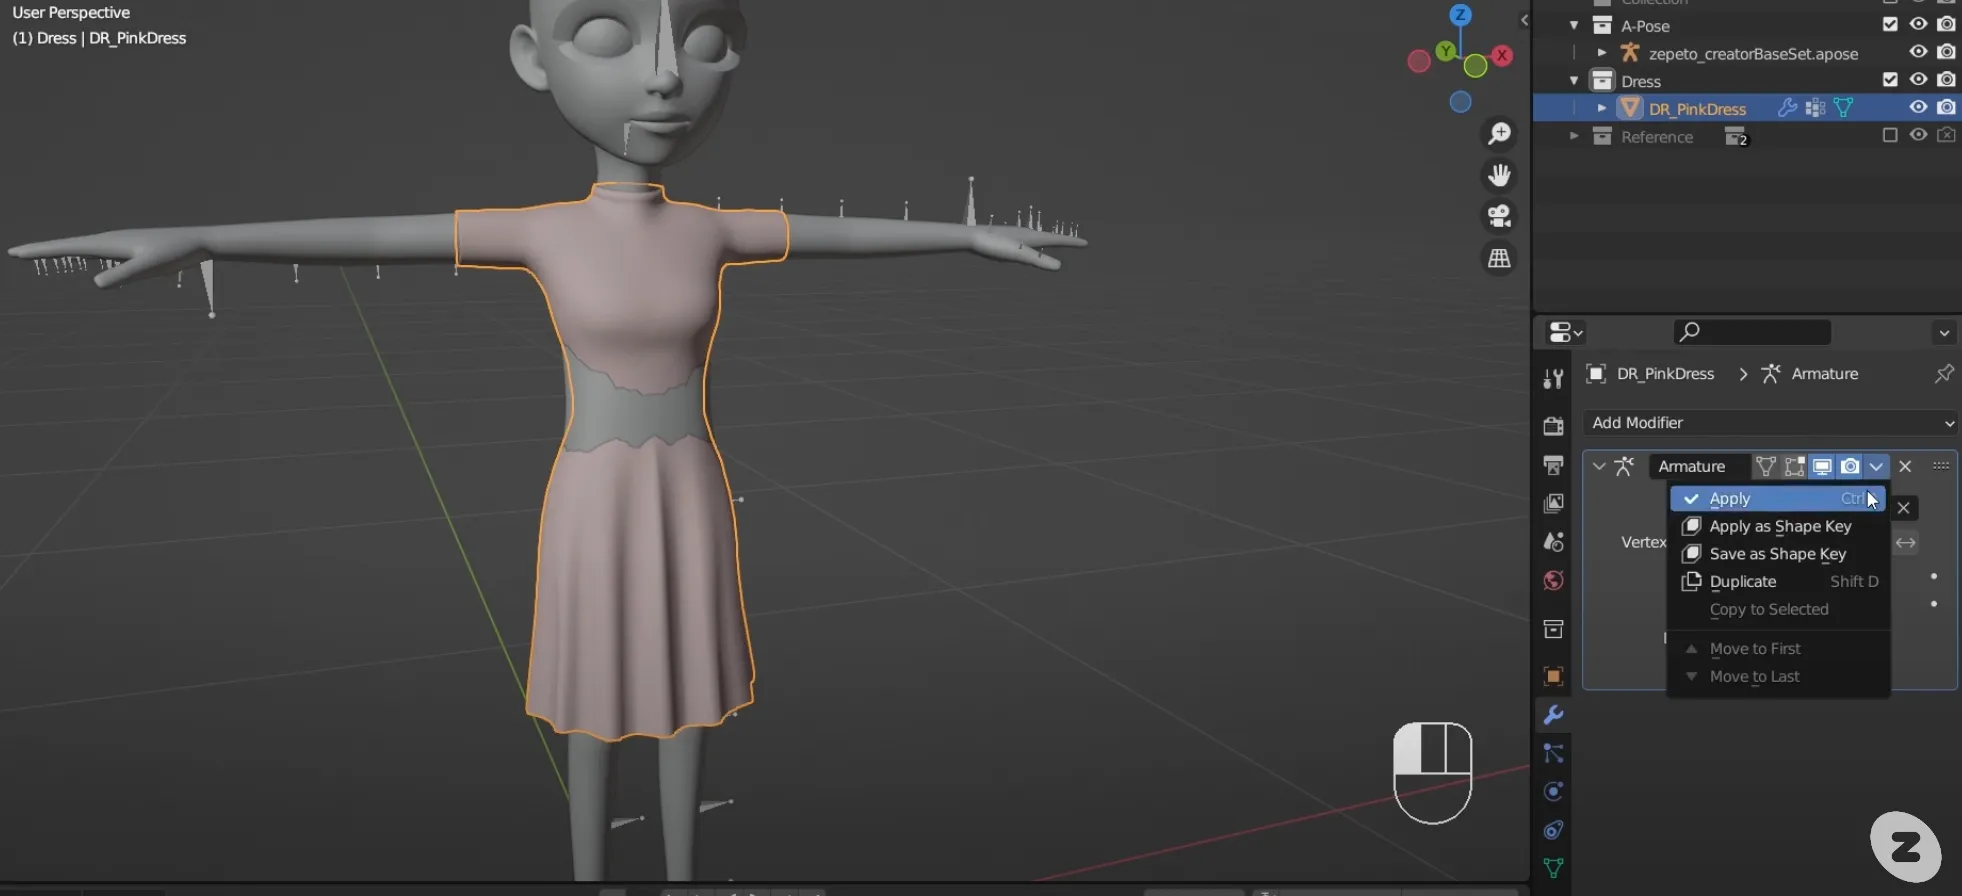
3. Select the item object in Object mode and go to the Modifier tab in the Properties. Press the drop-down menu and select Apply.
4. Select Add Modifier > Armature to add the armature modifier again.
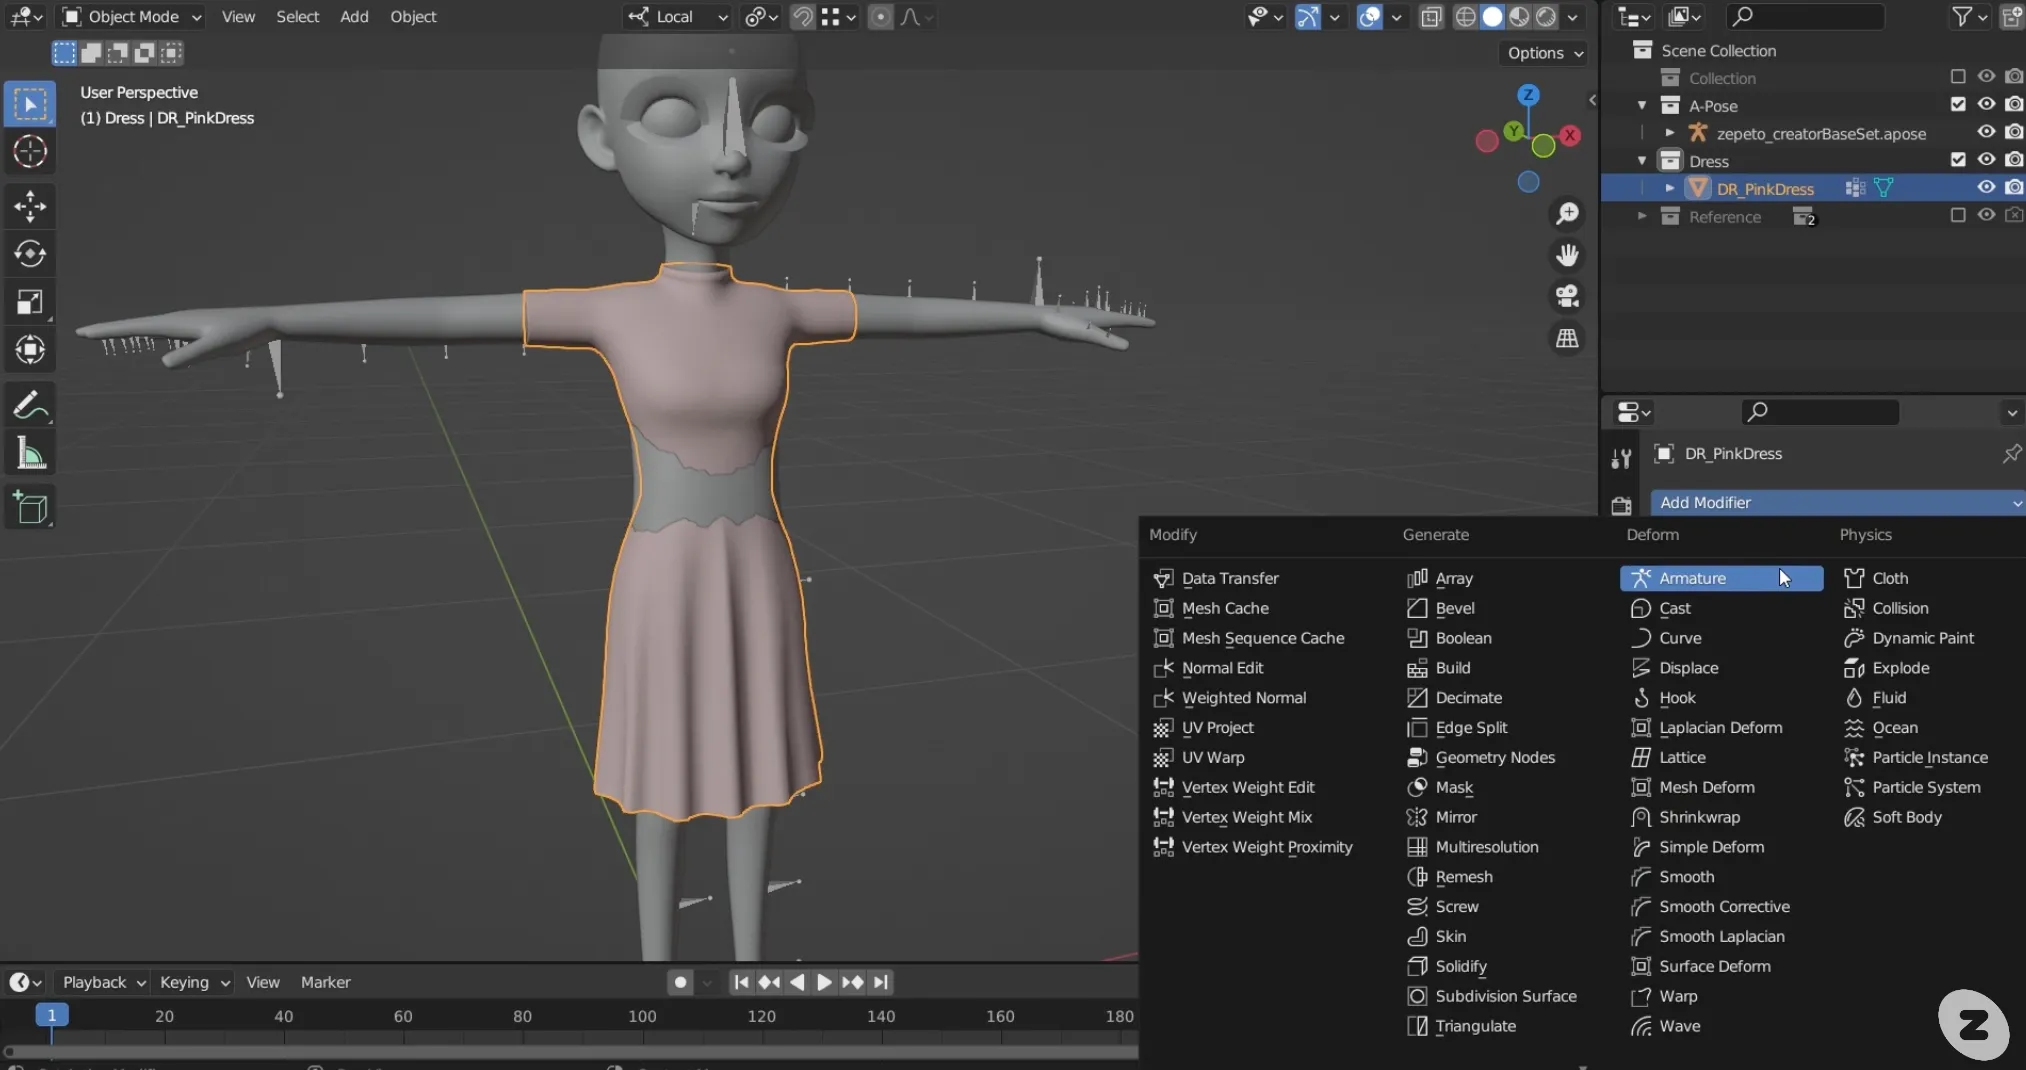
5. Under Object, select zepeto_creatorBaseSet so that the item is again in A-pose.
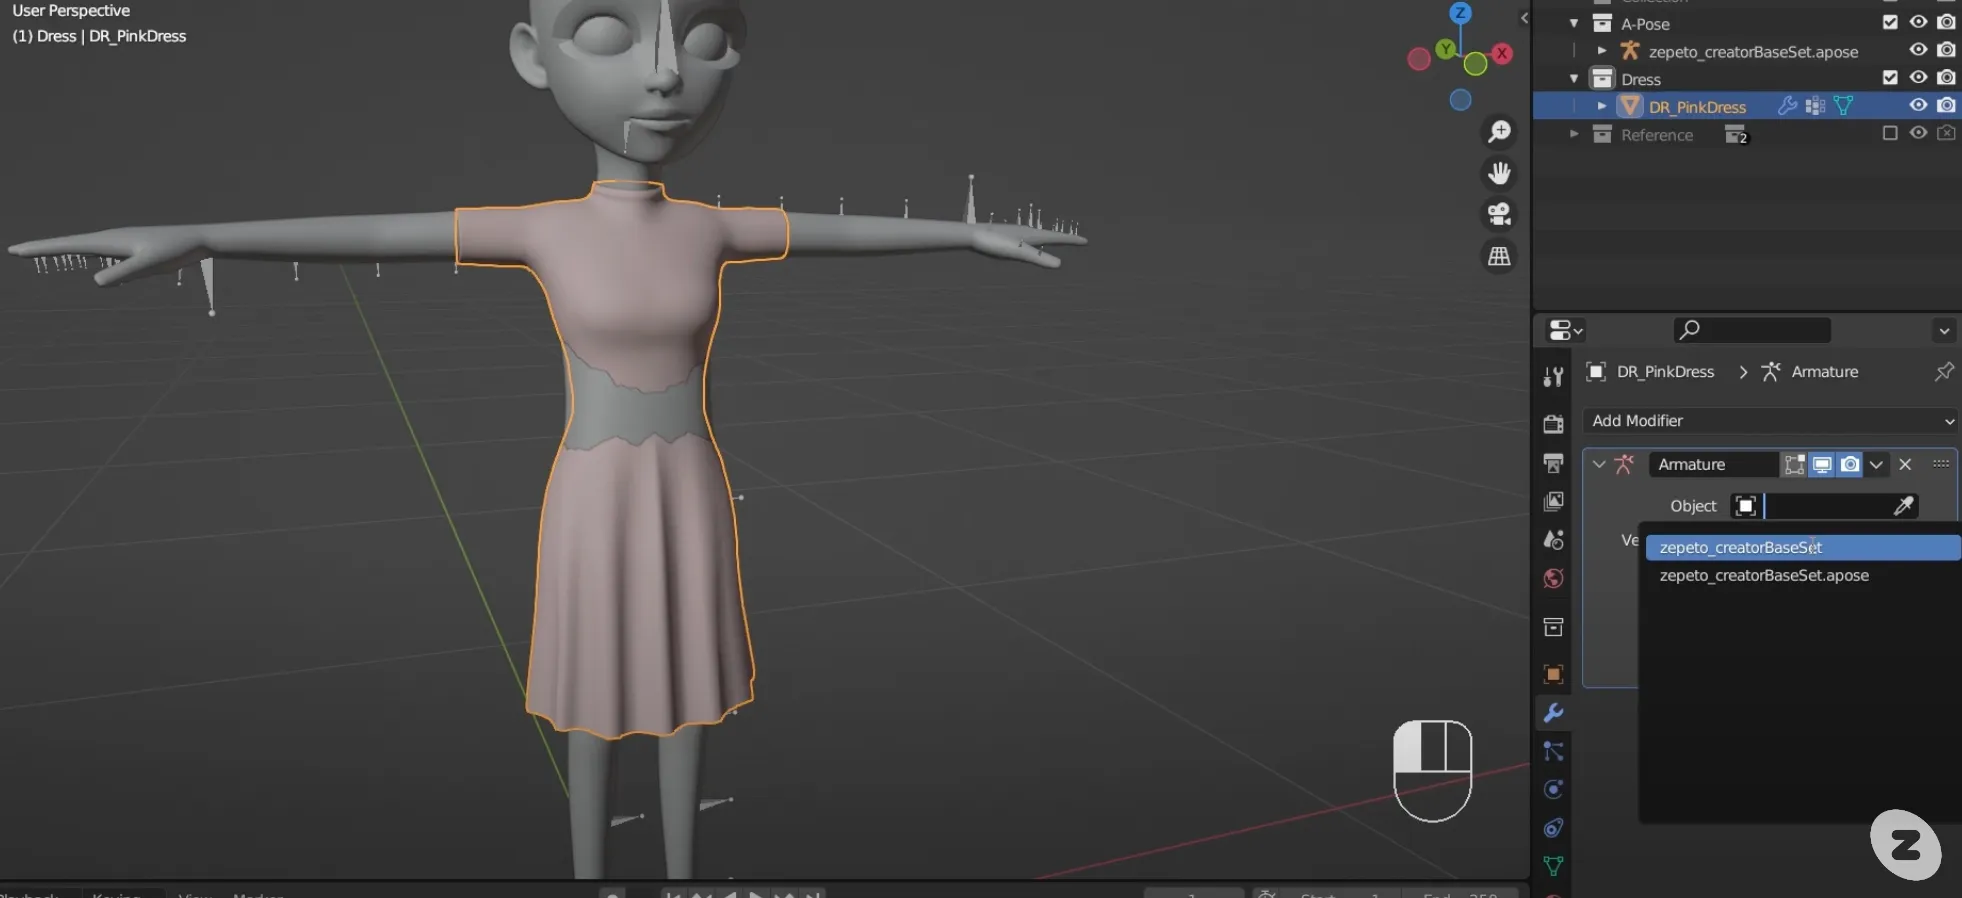
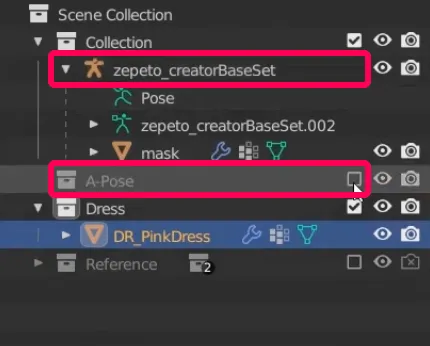
6. Hide the A-pose armature and select the zepeto_creatorBaseSet bone to make sure the item object moves with the avatar's movement.
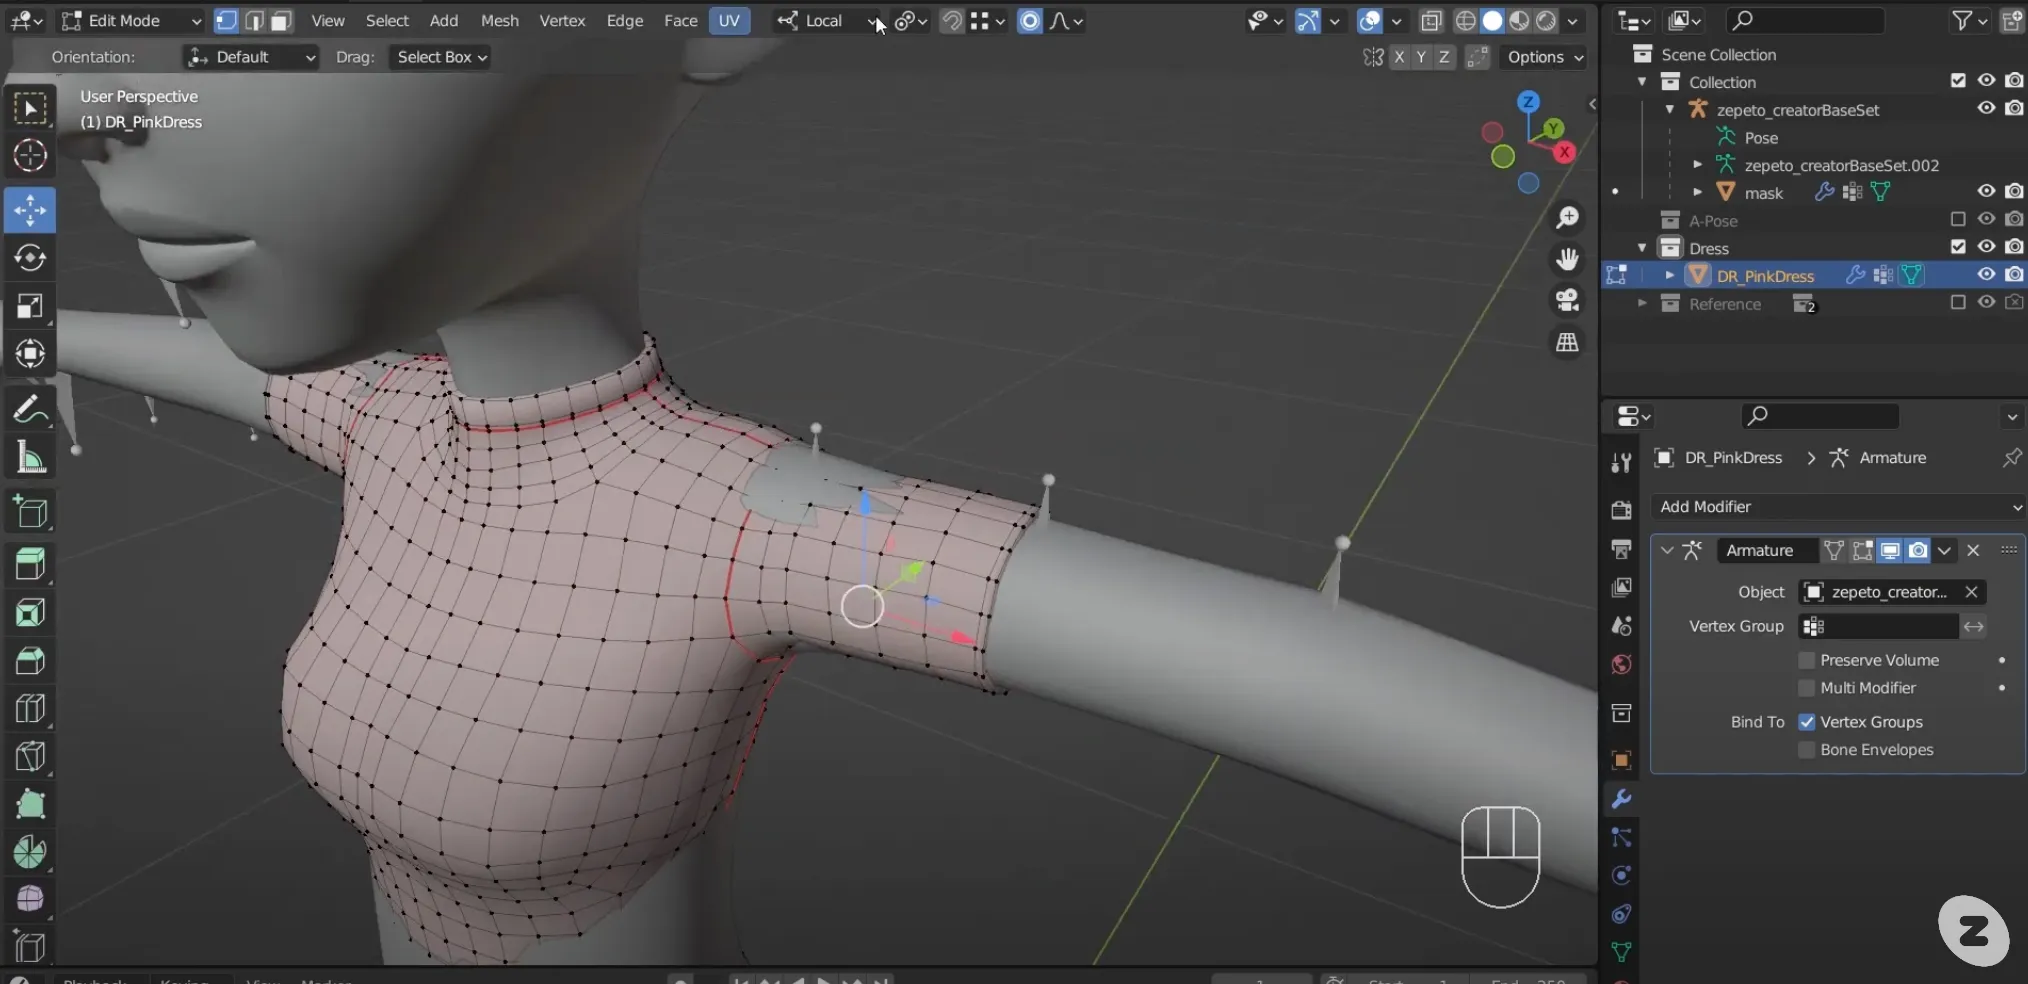
7. If the object unexpectedly changes shape while rigging, go into edit mode and move the vertices to edit it.
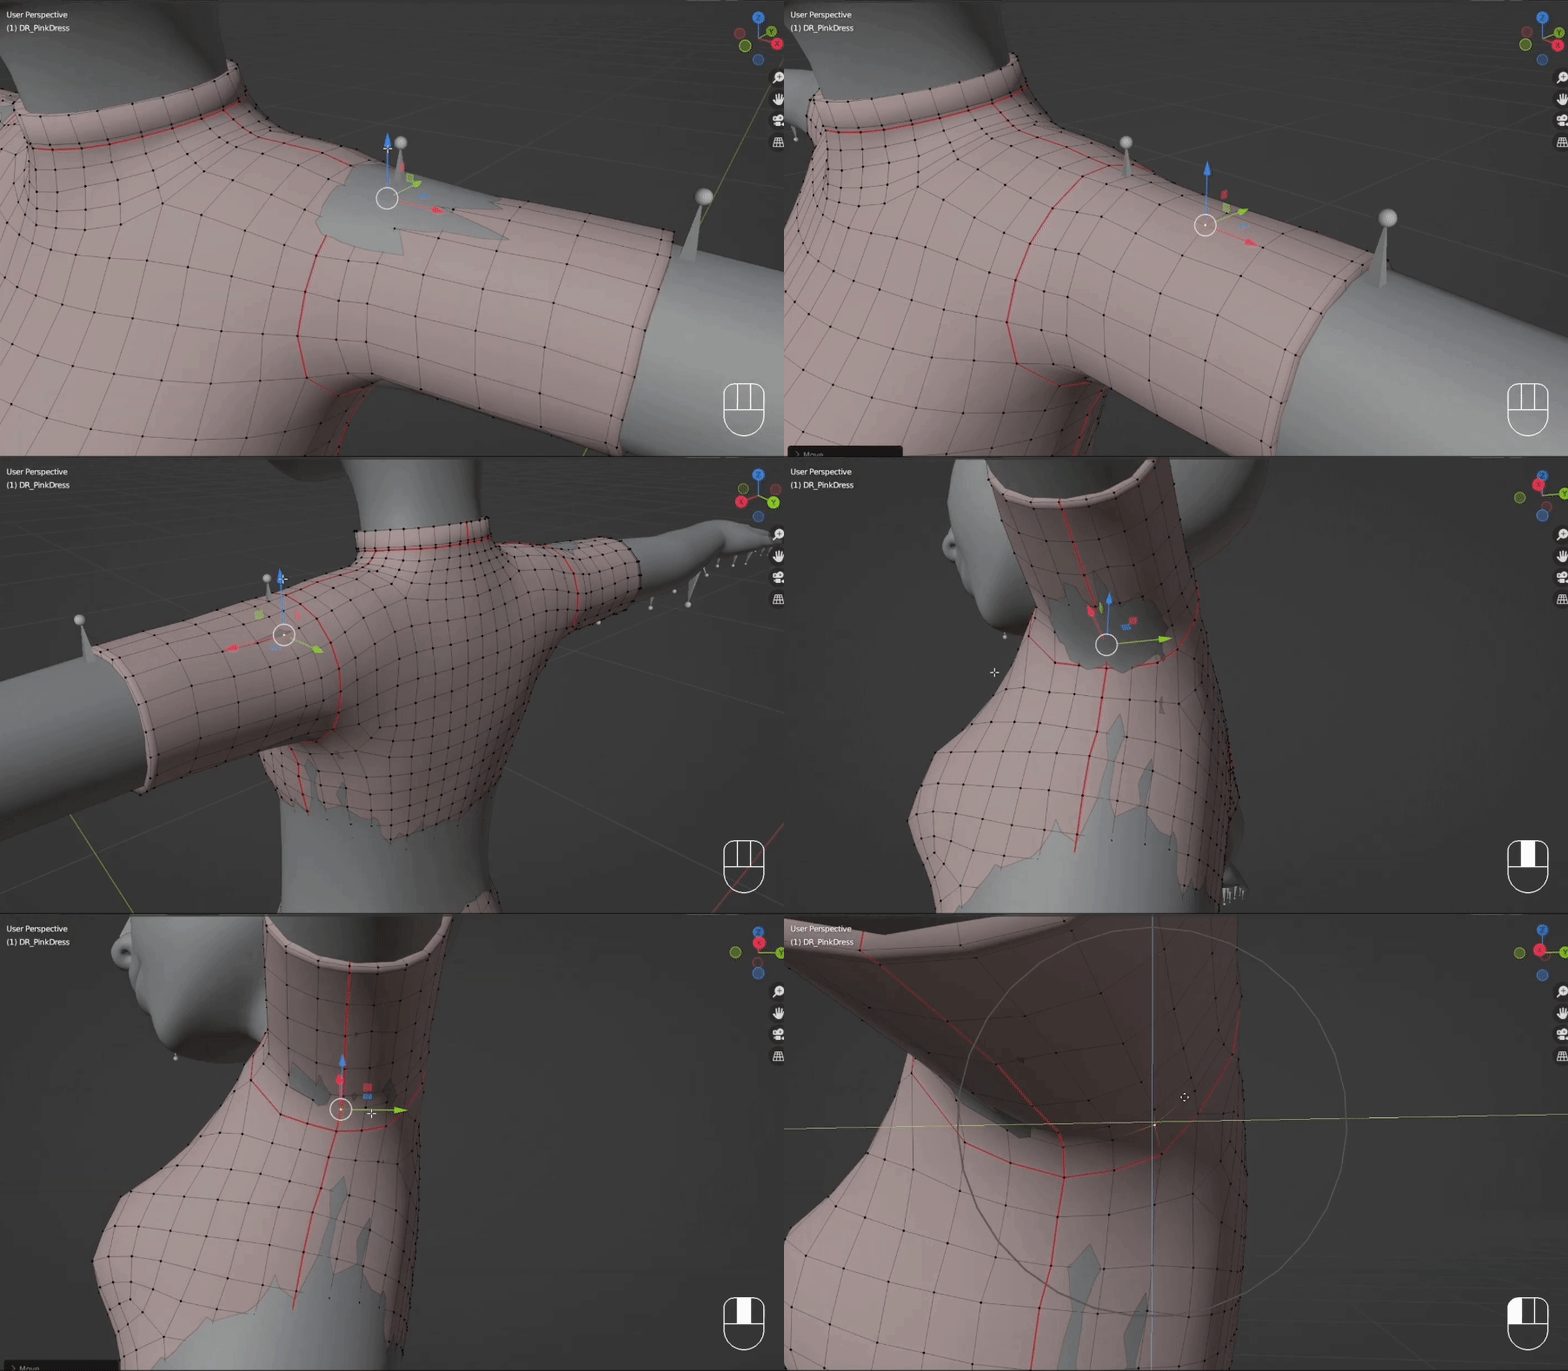
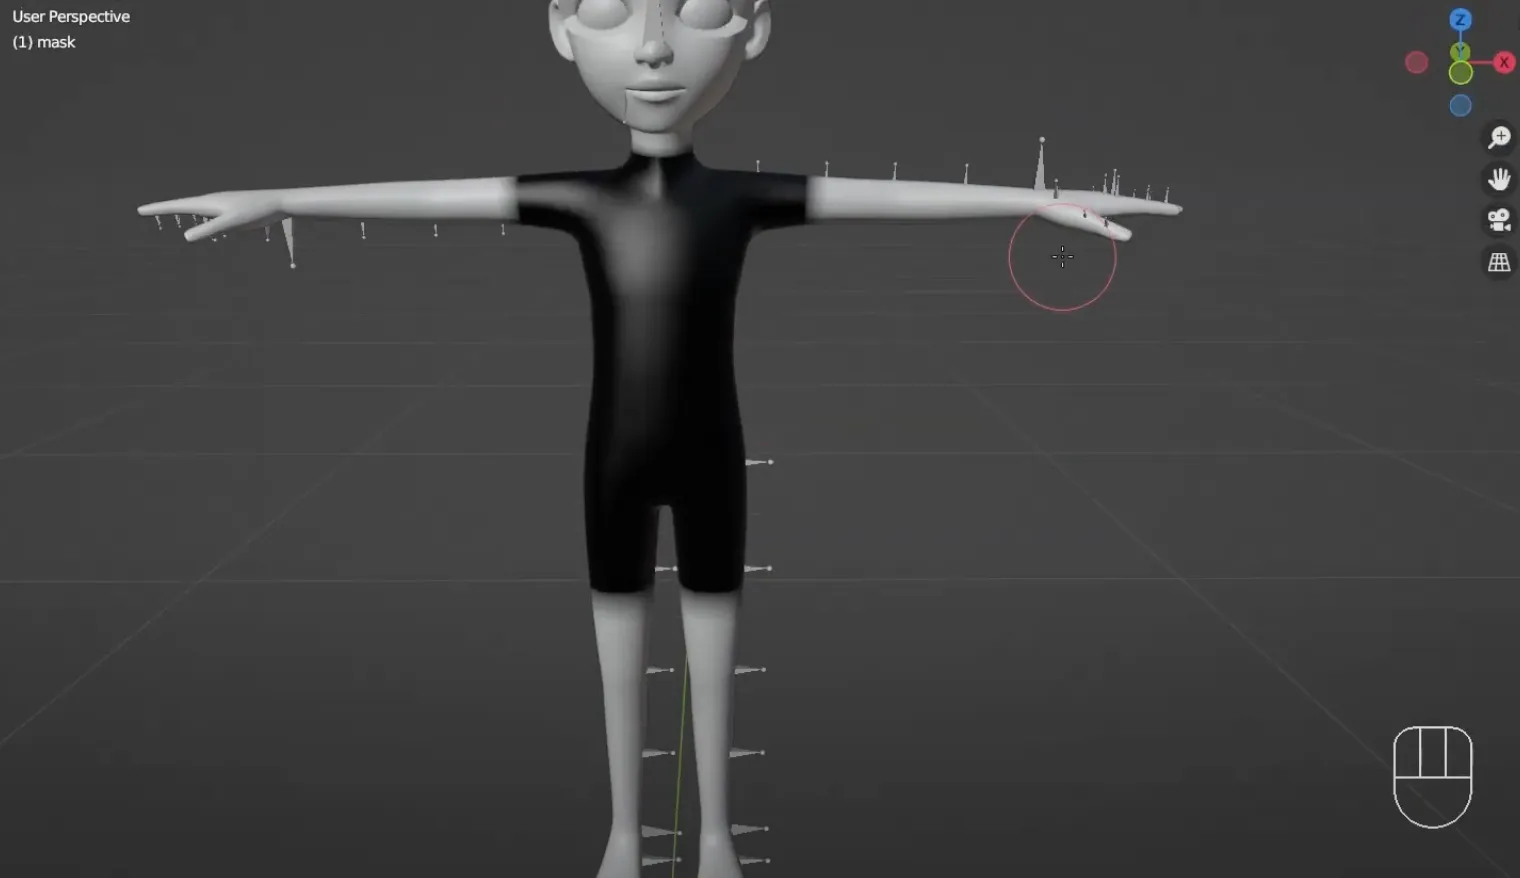
Masking is the act of specifying which parts of an item object are active or inactive when worn by an avatar by coloring the avatar mask with white and black.
- Black is the area that is deactivated. White is the area that is activated. In Unity, avatar faces are disabled by default.
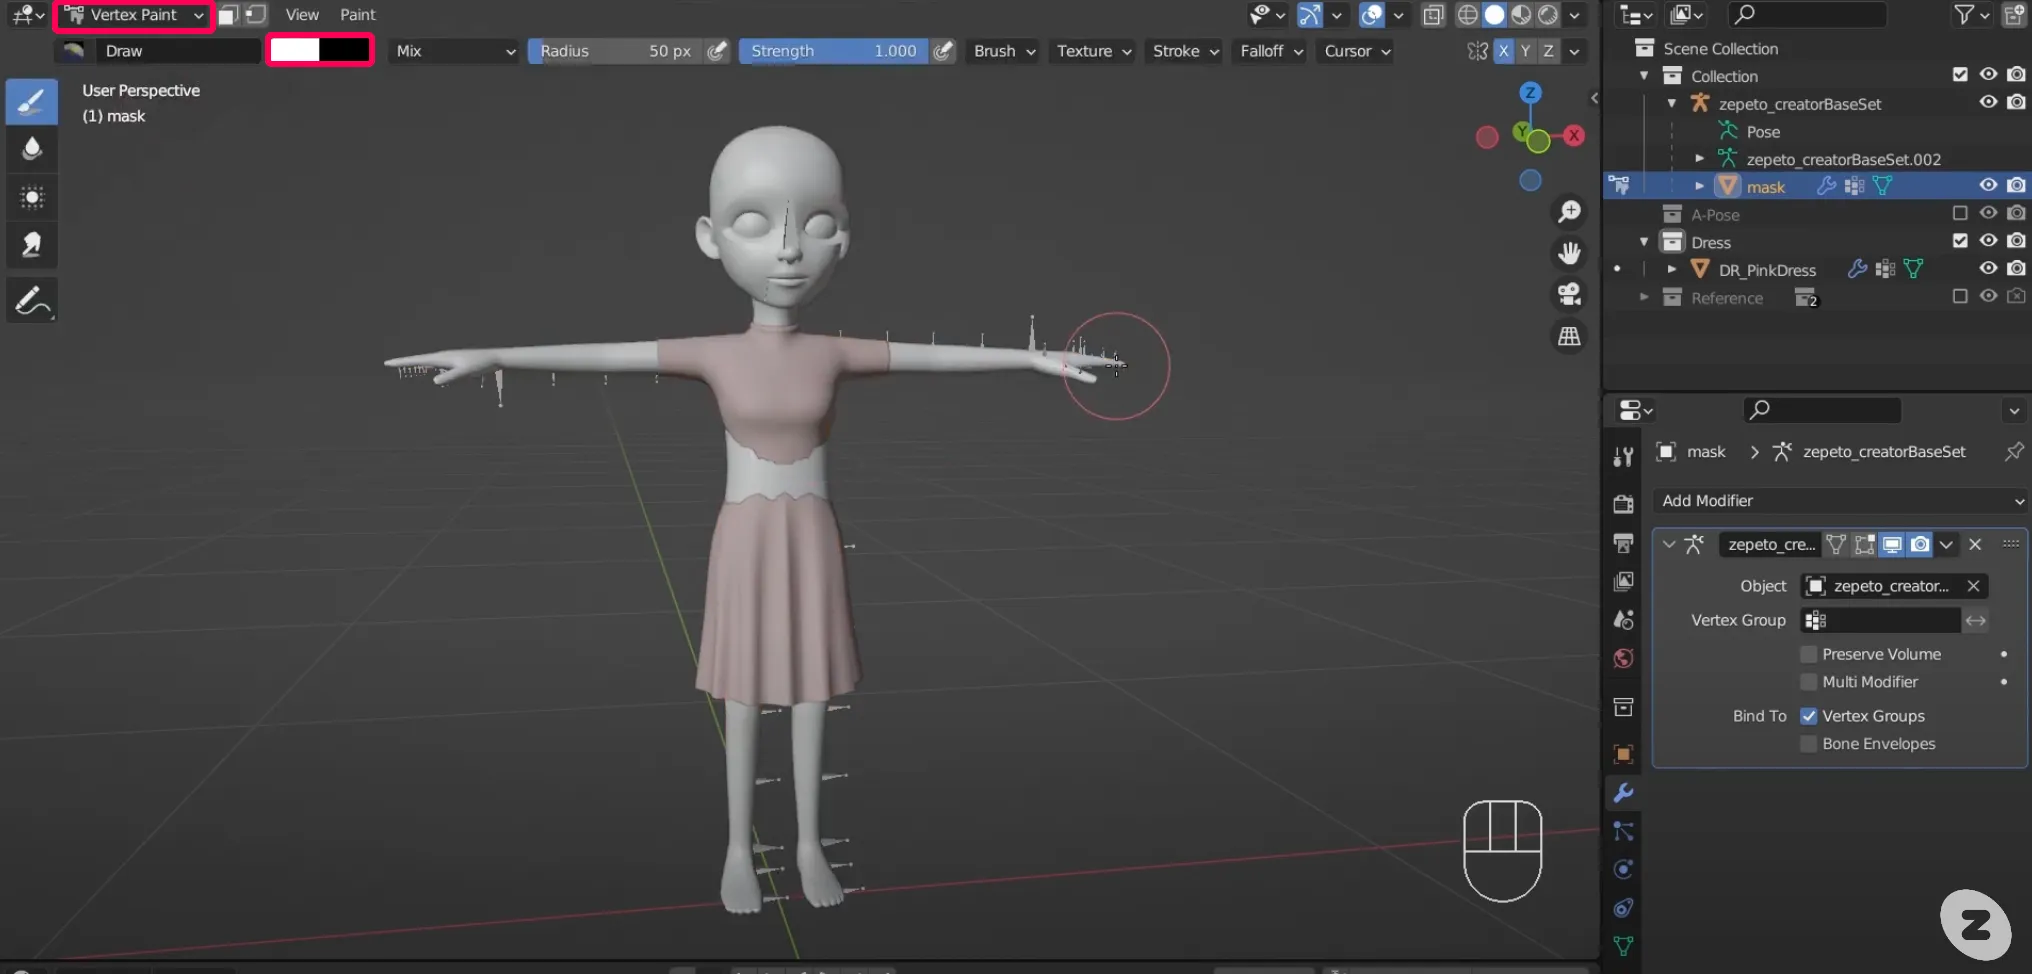
- Select the mask and switch to Vertex Paint mode, which will make the mask appear white.
- The Brush Color is set to White and Black.
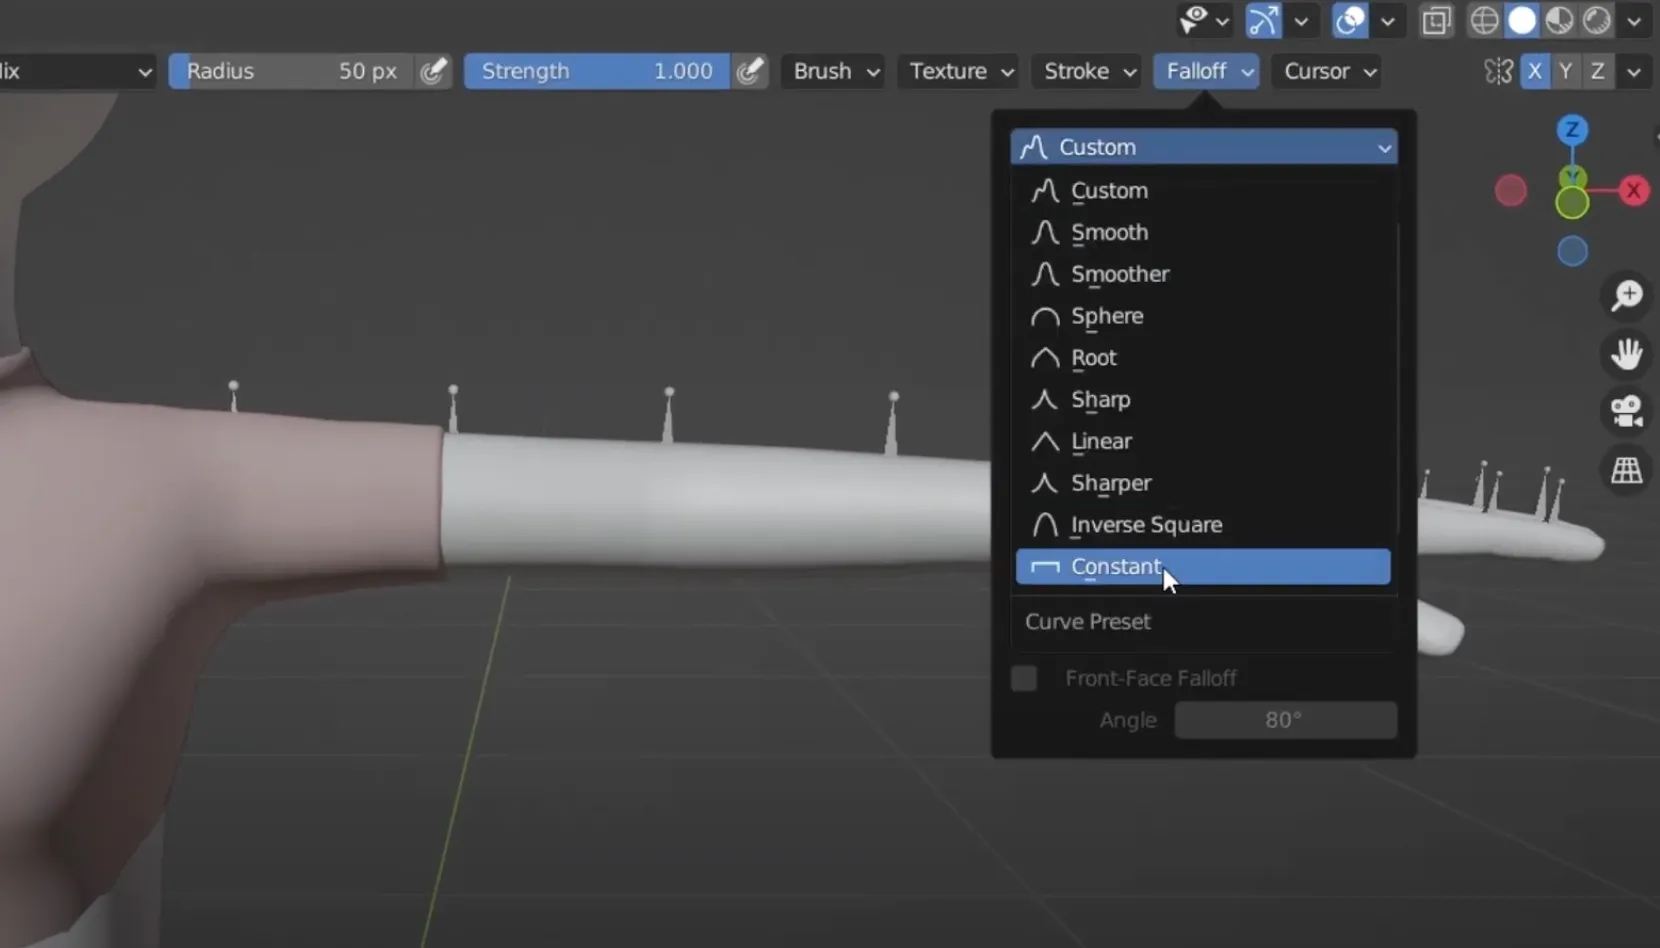
- Change the Brush Falloff option to Constant. This setting helps to keep the brush clearly visible as white and black, avoiding any gray areas.
- Turn on the X-mirror so that you can paint the left and right sides at the same time.
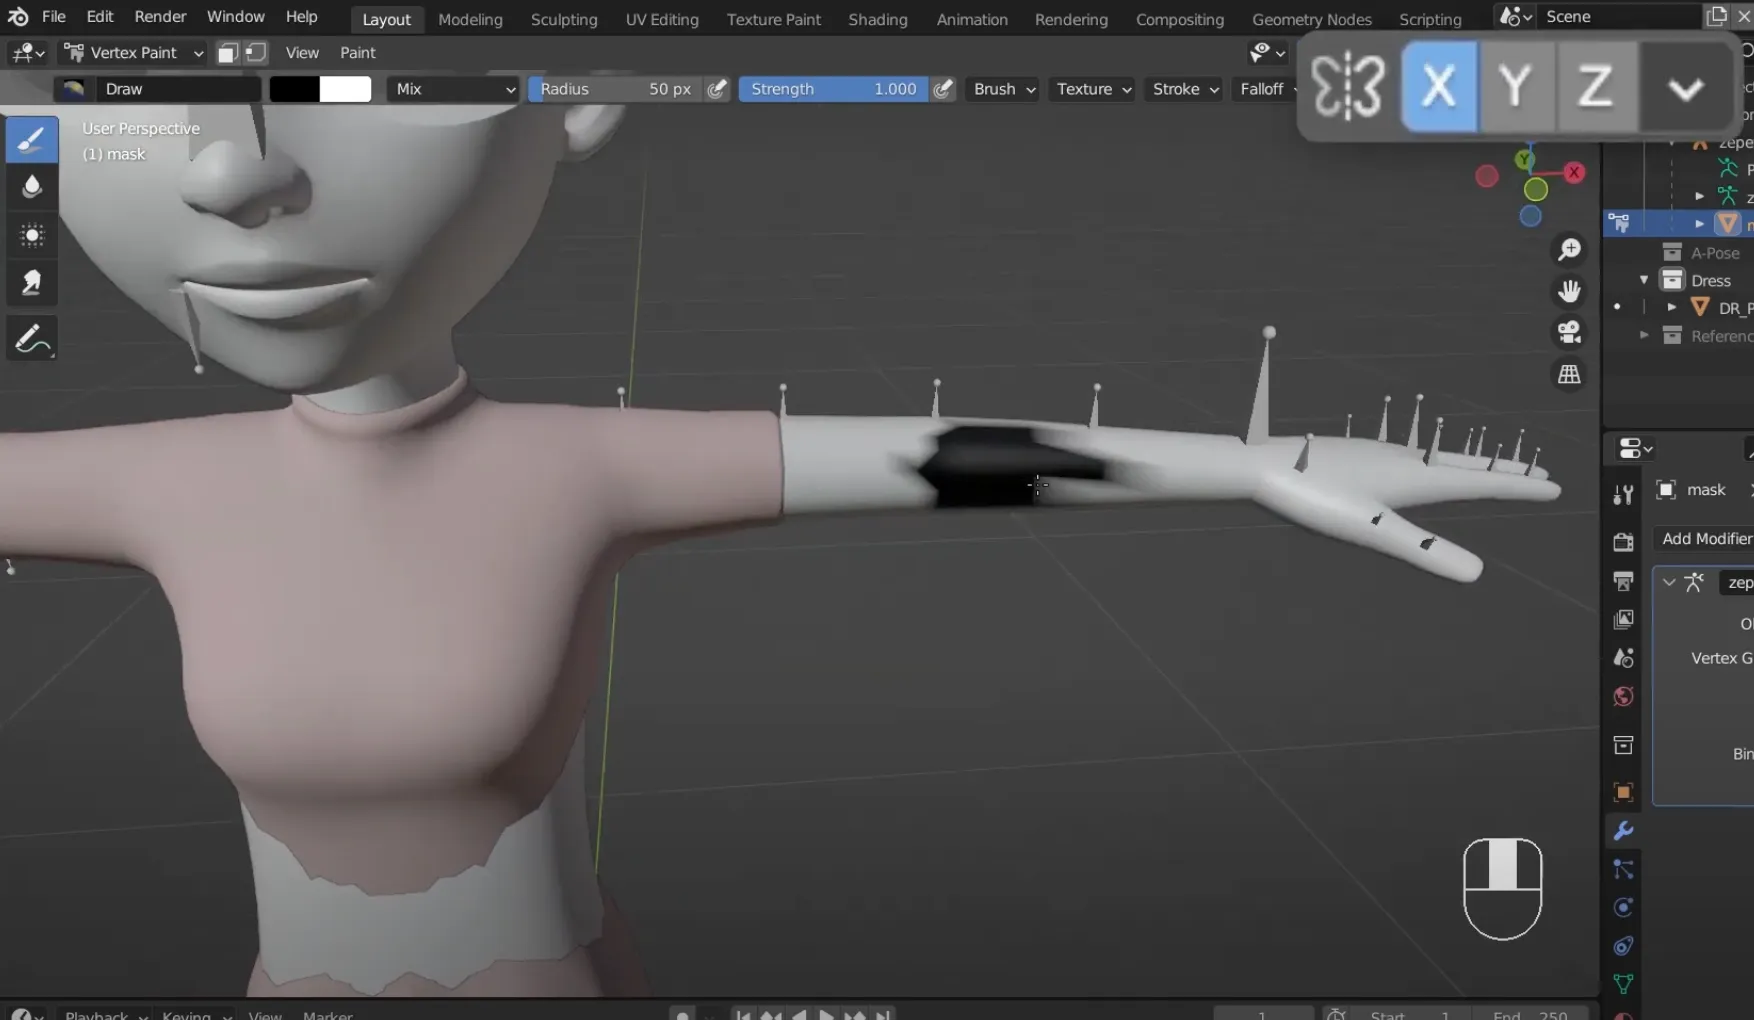
2. Hide the item object to make sure it is being painted correctly.
That's all the steps to creating an item!

