3D 맵핑하기 - 렌즈
먼저 앞서 다운로드했던 LENS_sample을 열어줍니다.
- 이 파일에는 fbx, prefab, material, sample texture가 포함되어 있습니다.

❗️ 주의사항 각 파일에는 meta 파일이 포함되어 있습니다. 이것은 Unity에서 자동으로 생성된 파일로 옵션 정보를 가지고 있기 때문에 파일 이동 시 항상 함께 이동이 되어야 합니다.
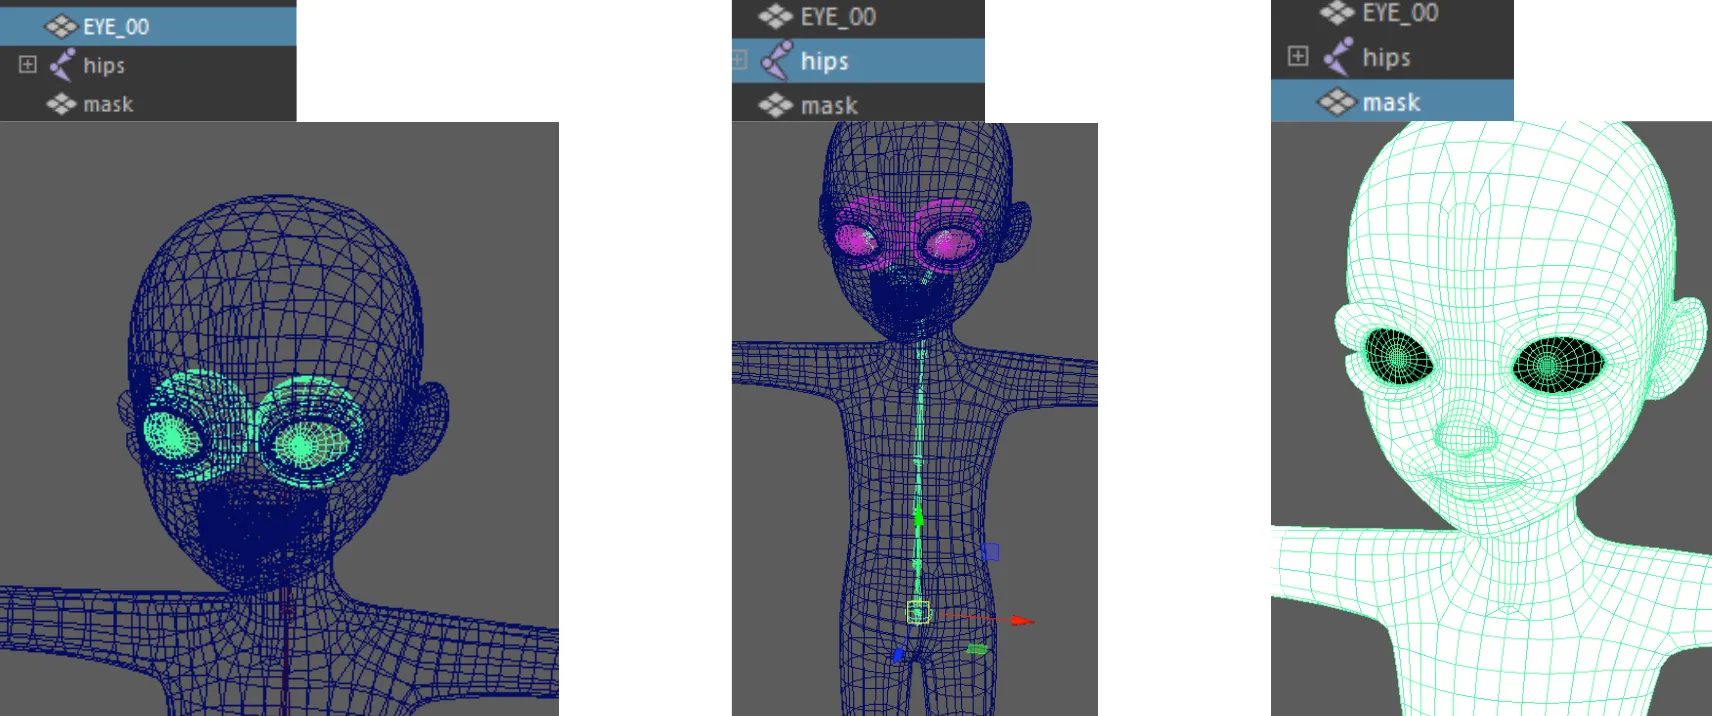
Maya에서 fbx파일을 import하면 EYE_00(렌즈 mesh), hips 조인트(EYE_00과 연결된 조인트) 그리고 렌즈 영역에 맞게 버텍스 컬러가 칠해진 mask mesh가 보여집니다.
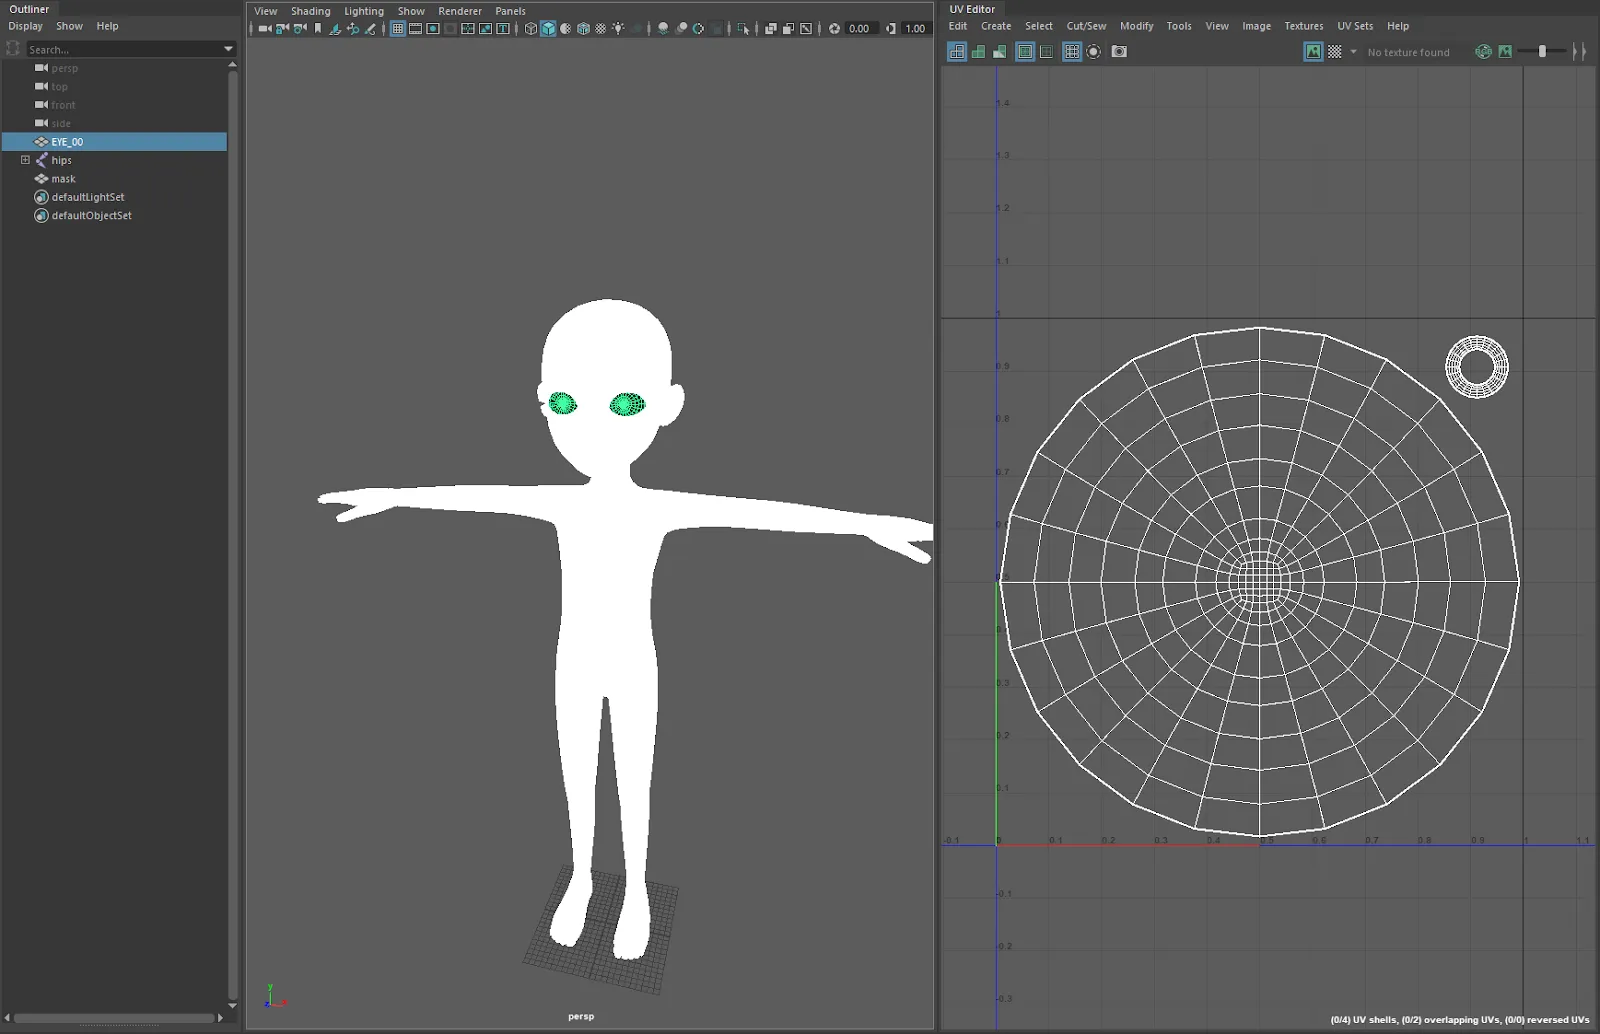
EYE_00을 선택하고 UV Editor를 열어 UV를 저장합니다.
EYE_00의 웨이트 값을 확인하면 eye_L, eye_R 모두 1씩 할당되어 있는 것을 확인할 수 있습니다.
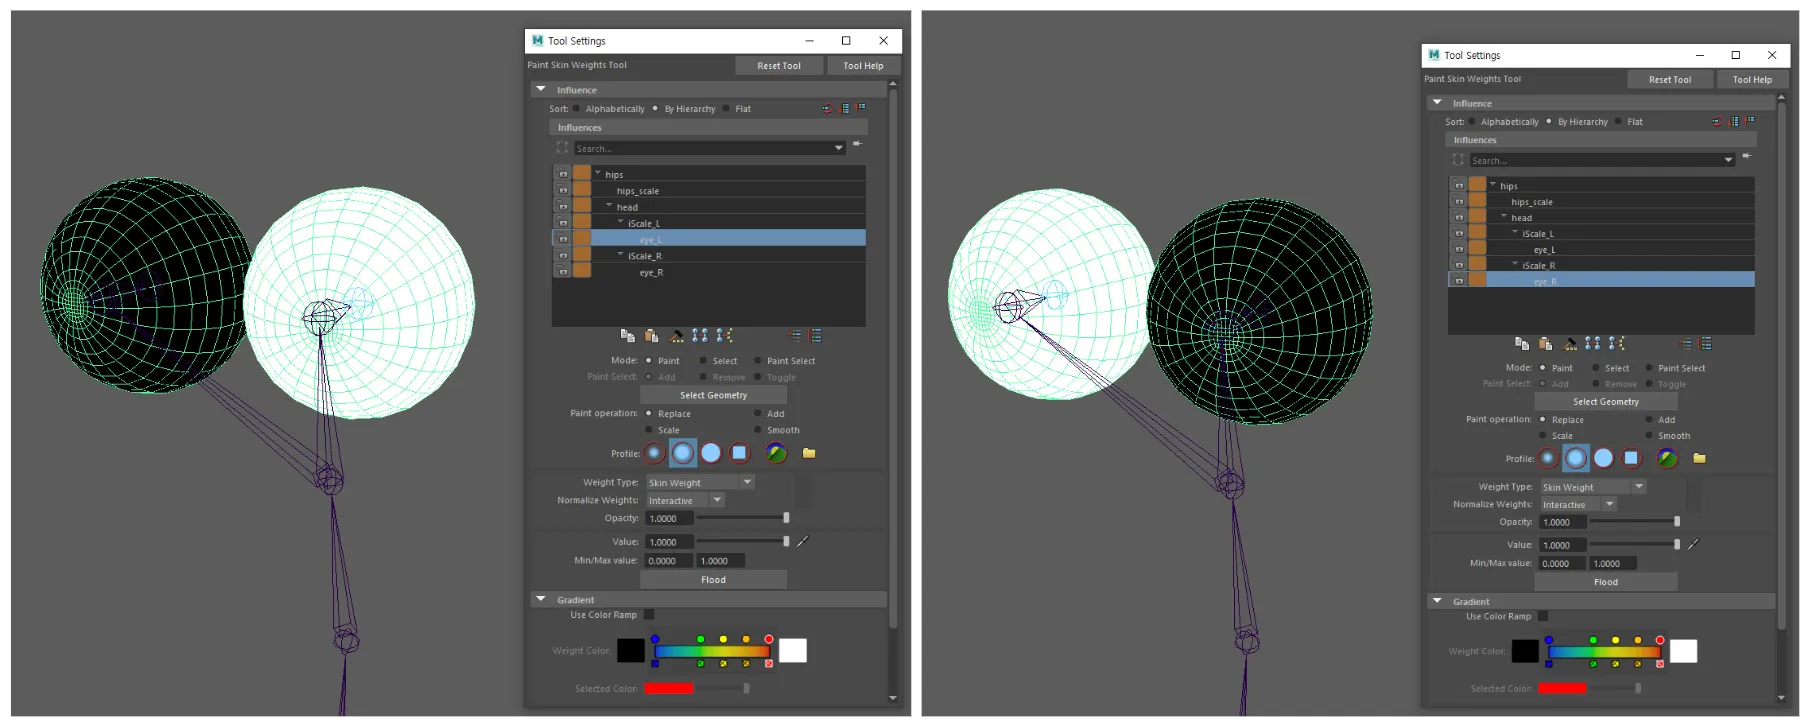
👍 해당 웨이트 값은 샘플 파일을 사용하지 않고 렌즈를 제작할 때 참고하시면 됩니다.
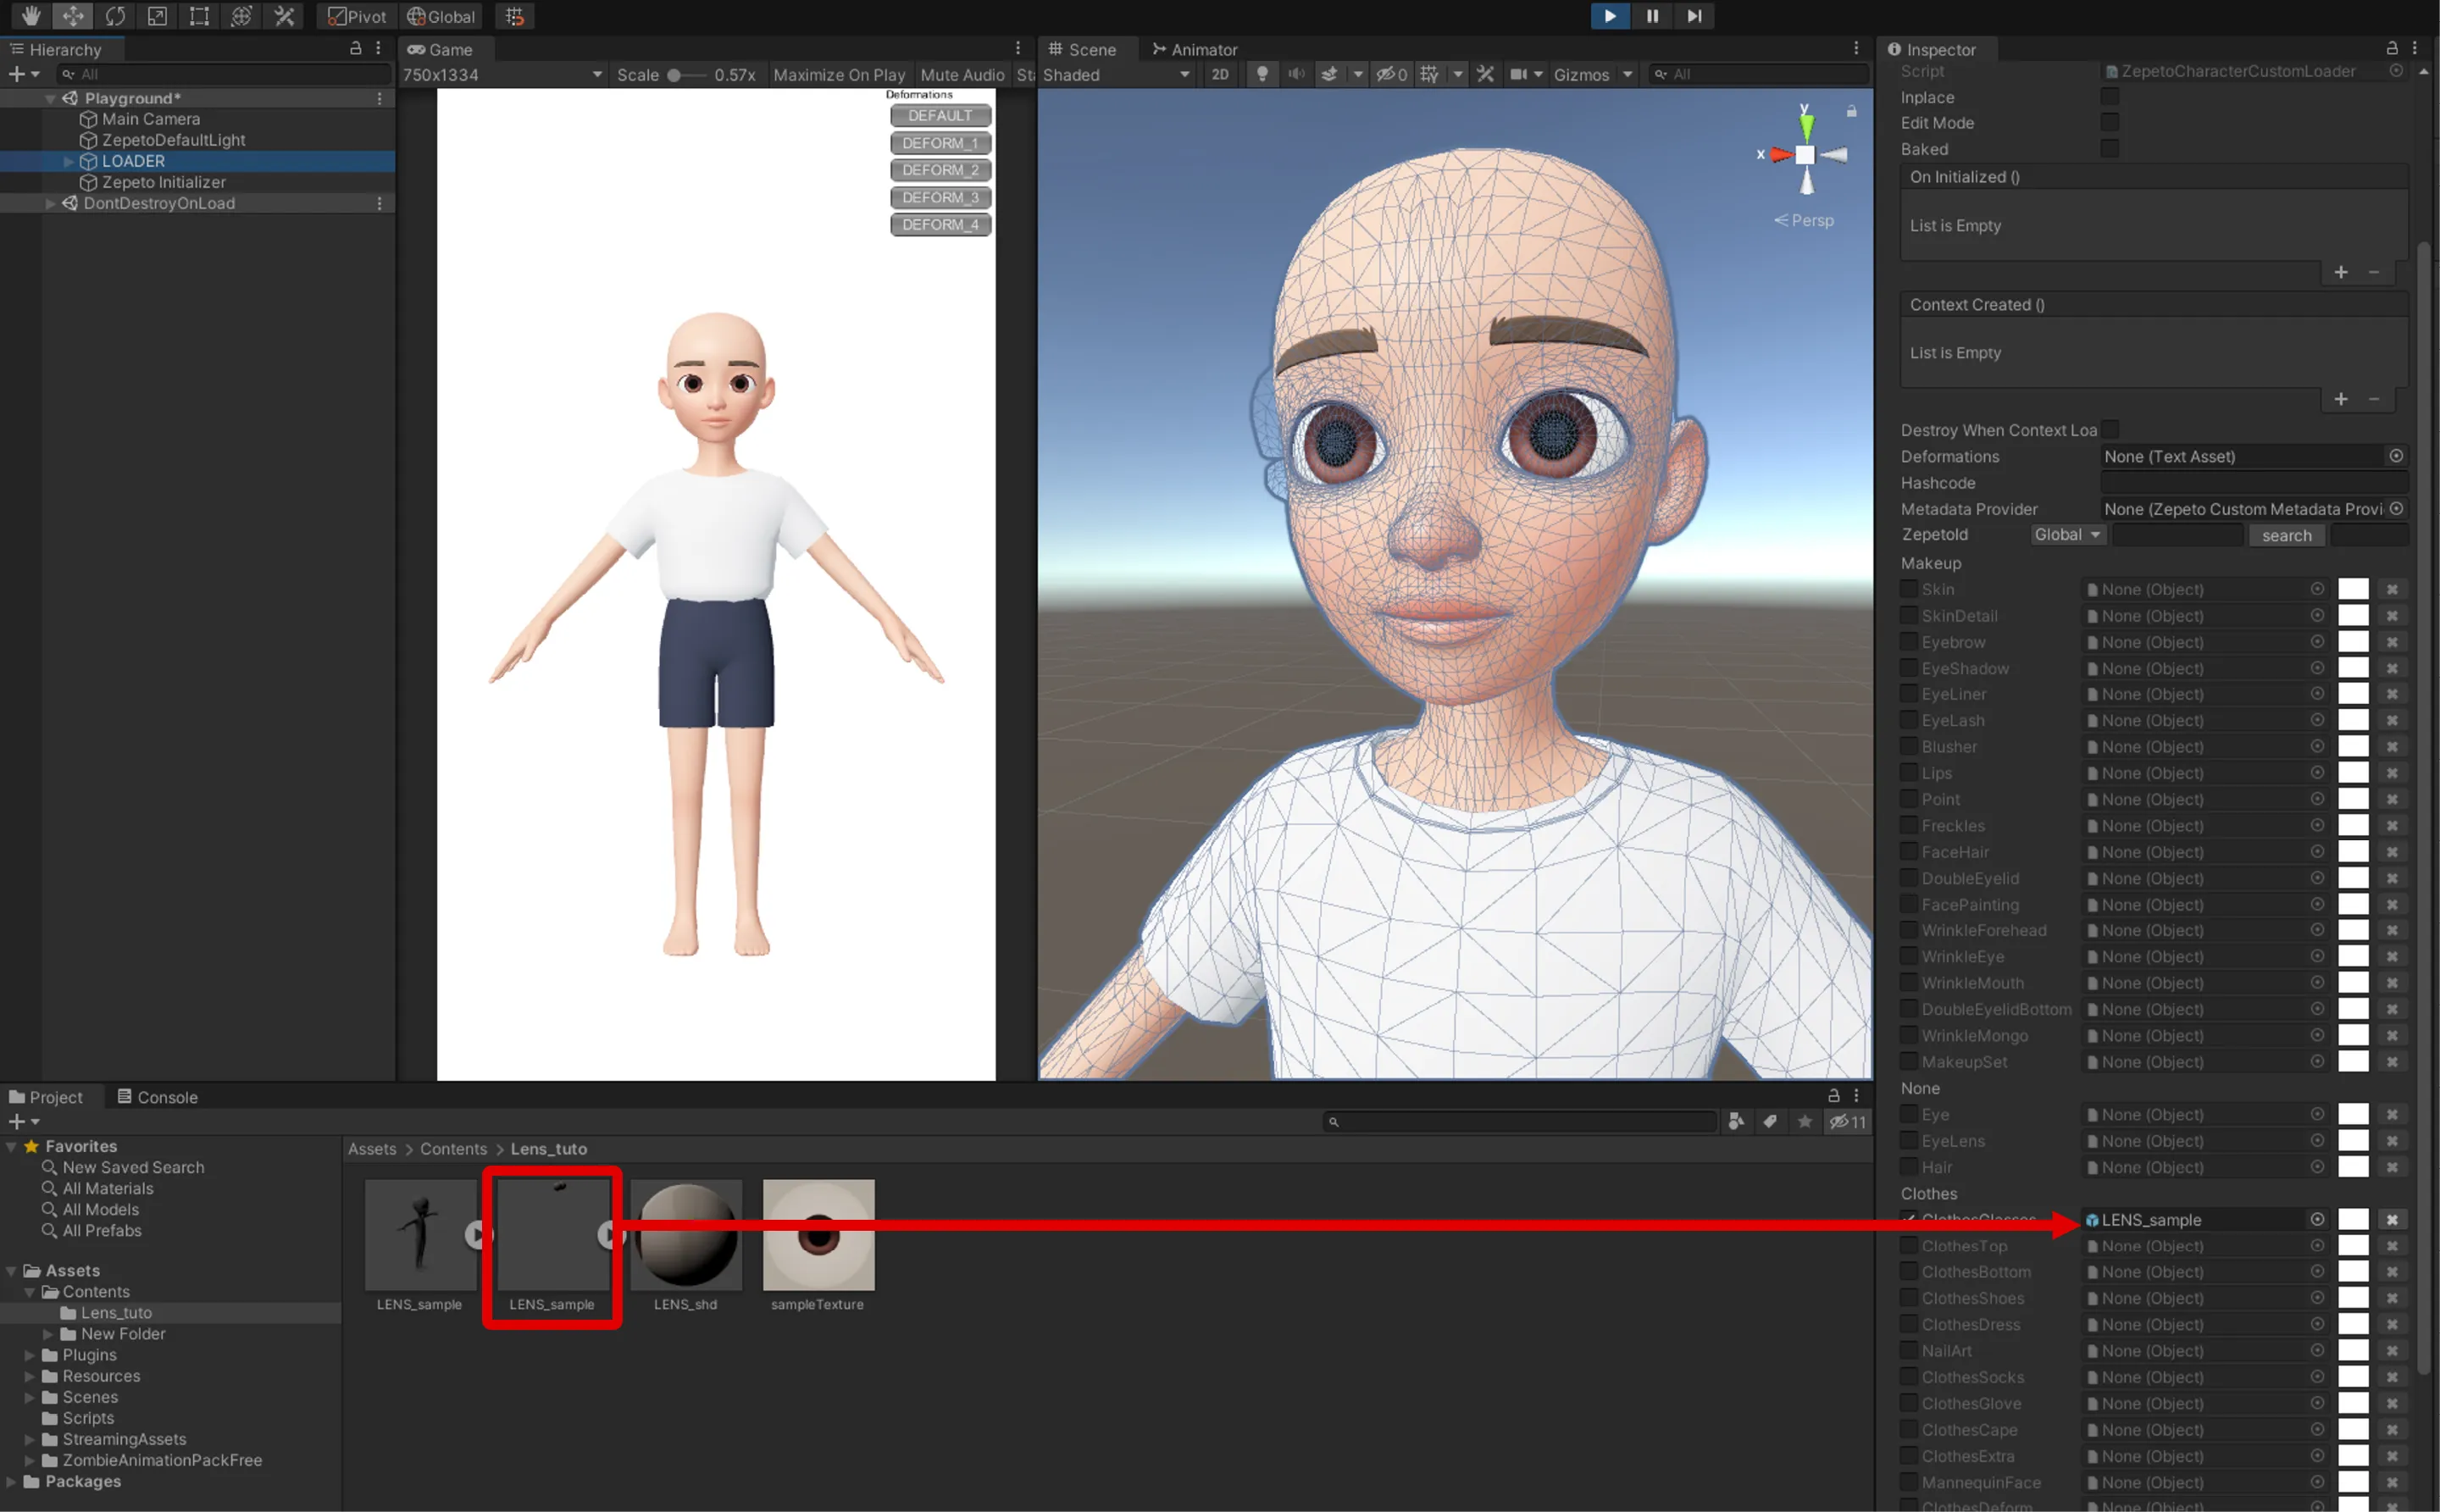
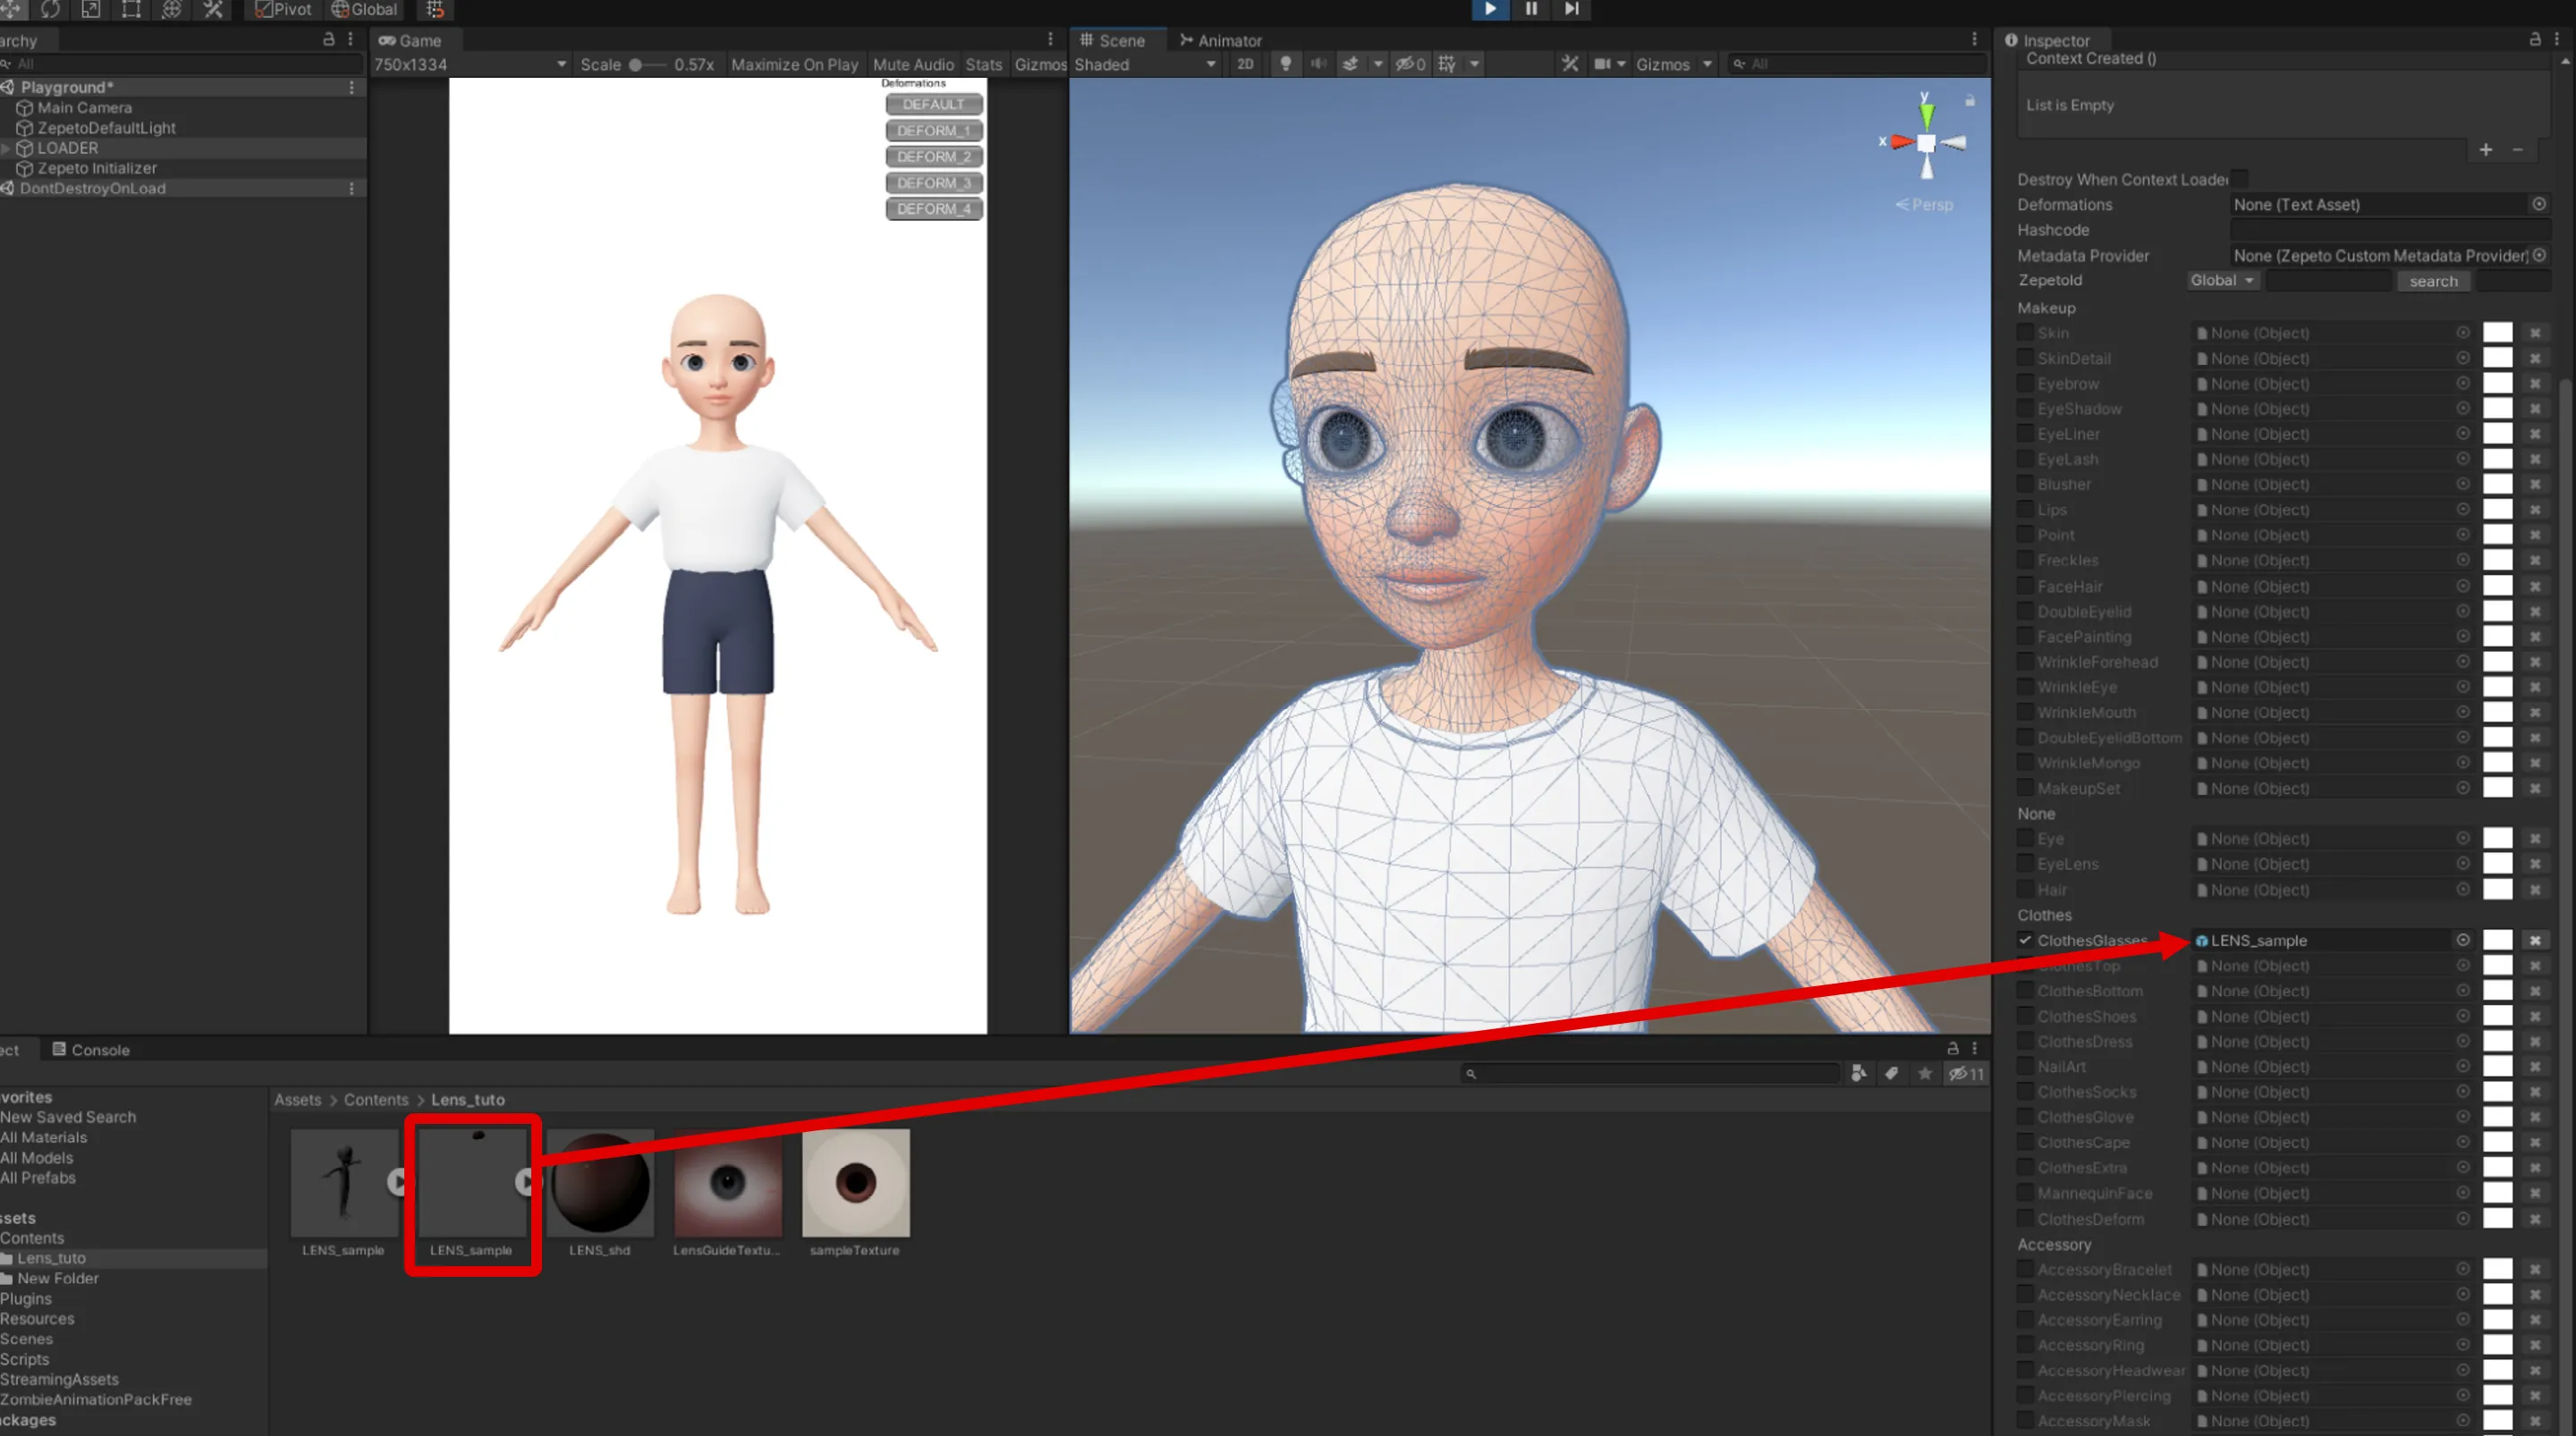
Unity를 실행하고 LENS_sample파일을 가져오면 LENS_sample prefab이 있습니다. 해당 prefab을 ClothesGlasses 탭에 연결하시면 캐릭터의 눈이 바뀌는 것을 확인할 수 있습니다.
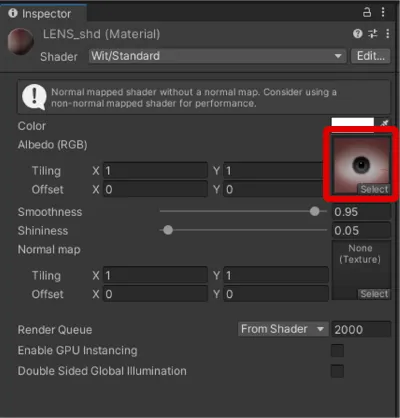
앞서 저장한 UV를 참고하여 원하는 텍스처를 만든 후, 제작한 텍스처를 연결합니다.
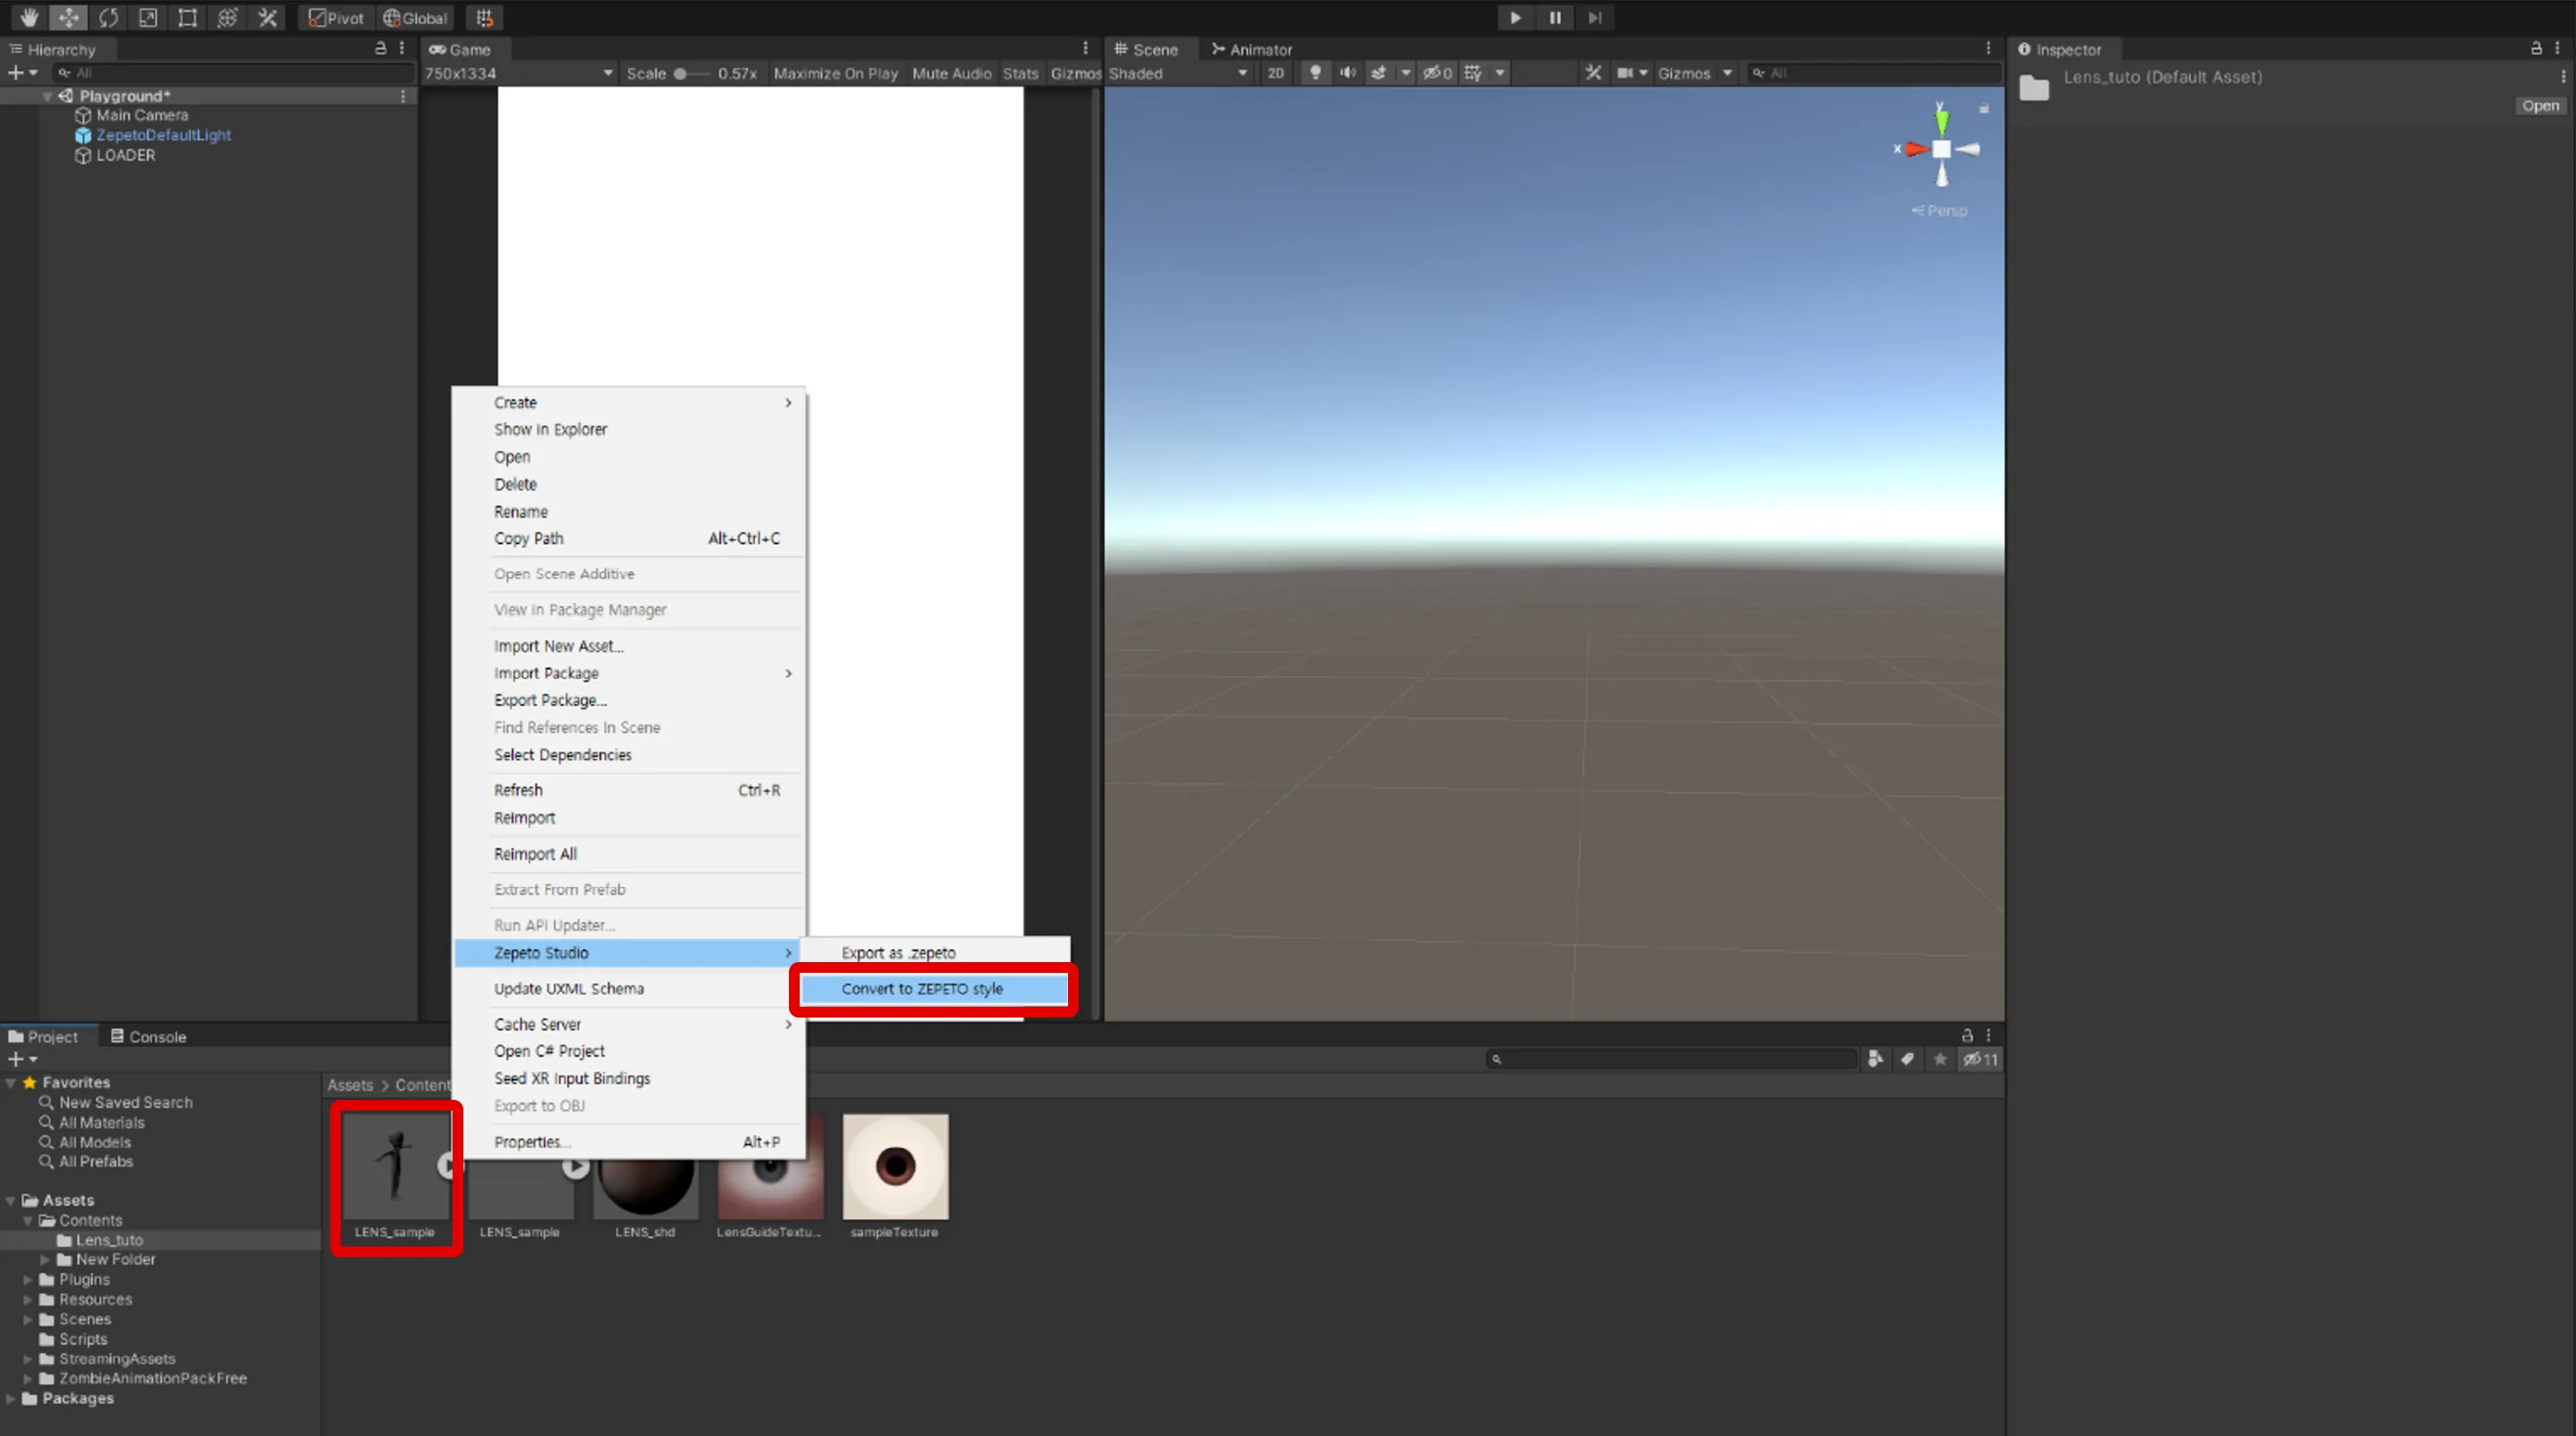
fbx 파일을 Convert to ZEPETO style를 통해 prefab으로 변환해주세요.
Unity에서 prefab을 ClothesDress 탭에 연결해보시면 제작한 렌즈가 적용된 것을 확인할 수 있습니다.
Prefab을 선택하고 . ZEPETO 파일을 통해 ZEPETO 파일을 -> ZEPETO로 내보내기 메뉴를 통해 파일을 만듭니다.

