커스텀 애니메이션 적용 방법
외부 애니메이션 파일을 가져오고 이를 ZEPETO 캐릭터에 적용하는 방법을 배워봅시다.
애니메이션을 다운로드할 사이트에 접속하세요. 이 가이드는 Mixamo 사이트를 사용하는 예시입니다.
📘 Mixamo
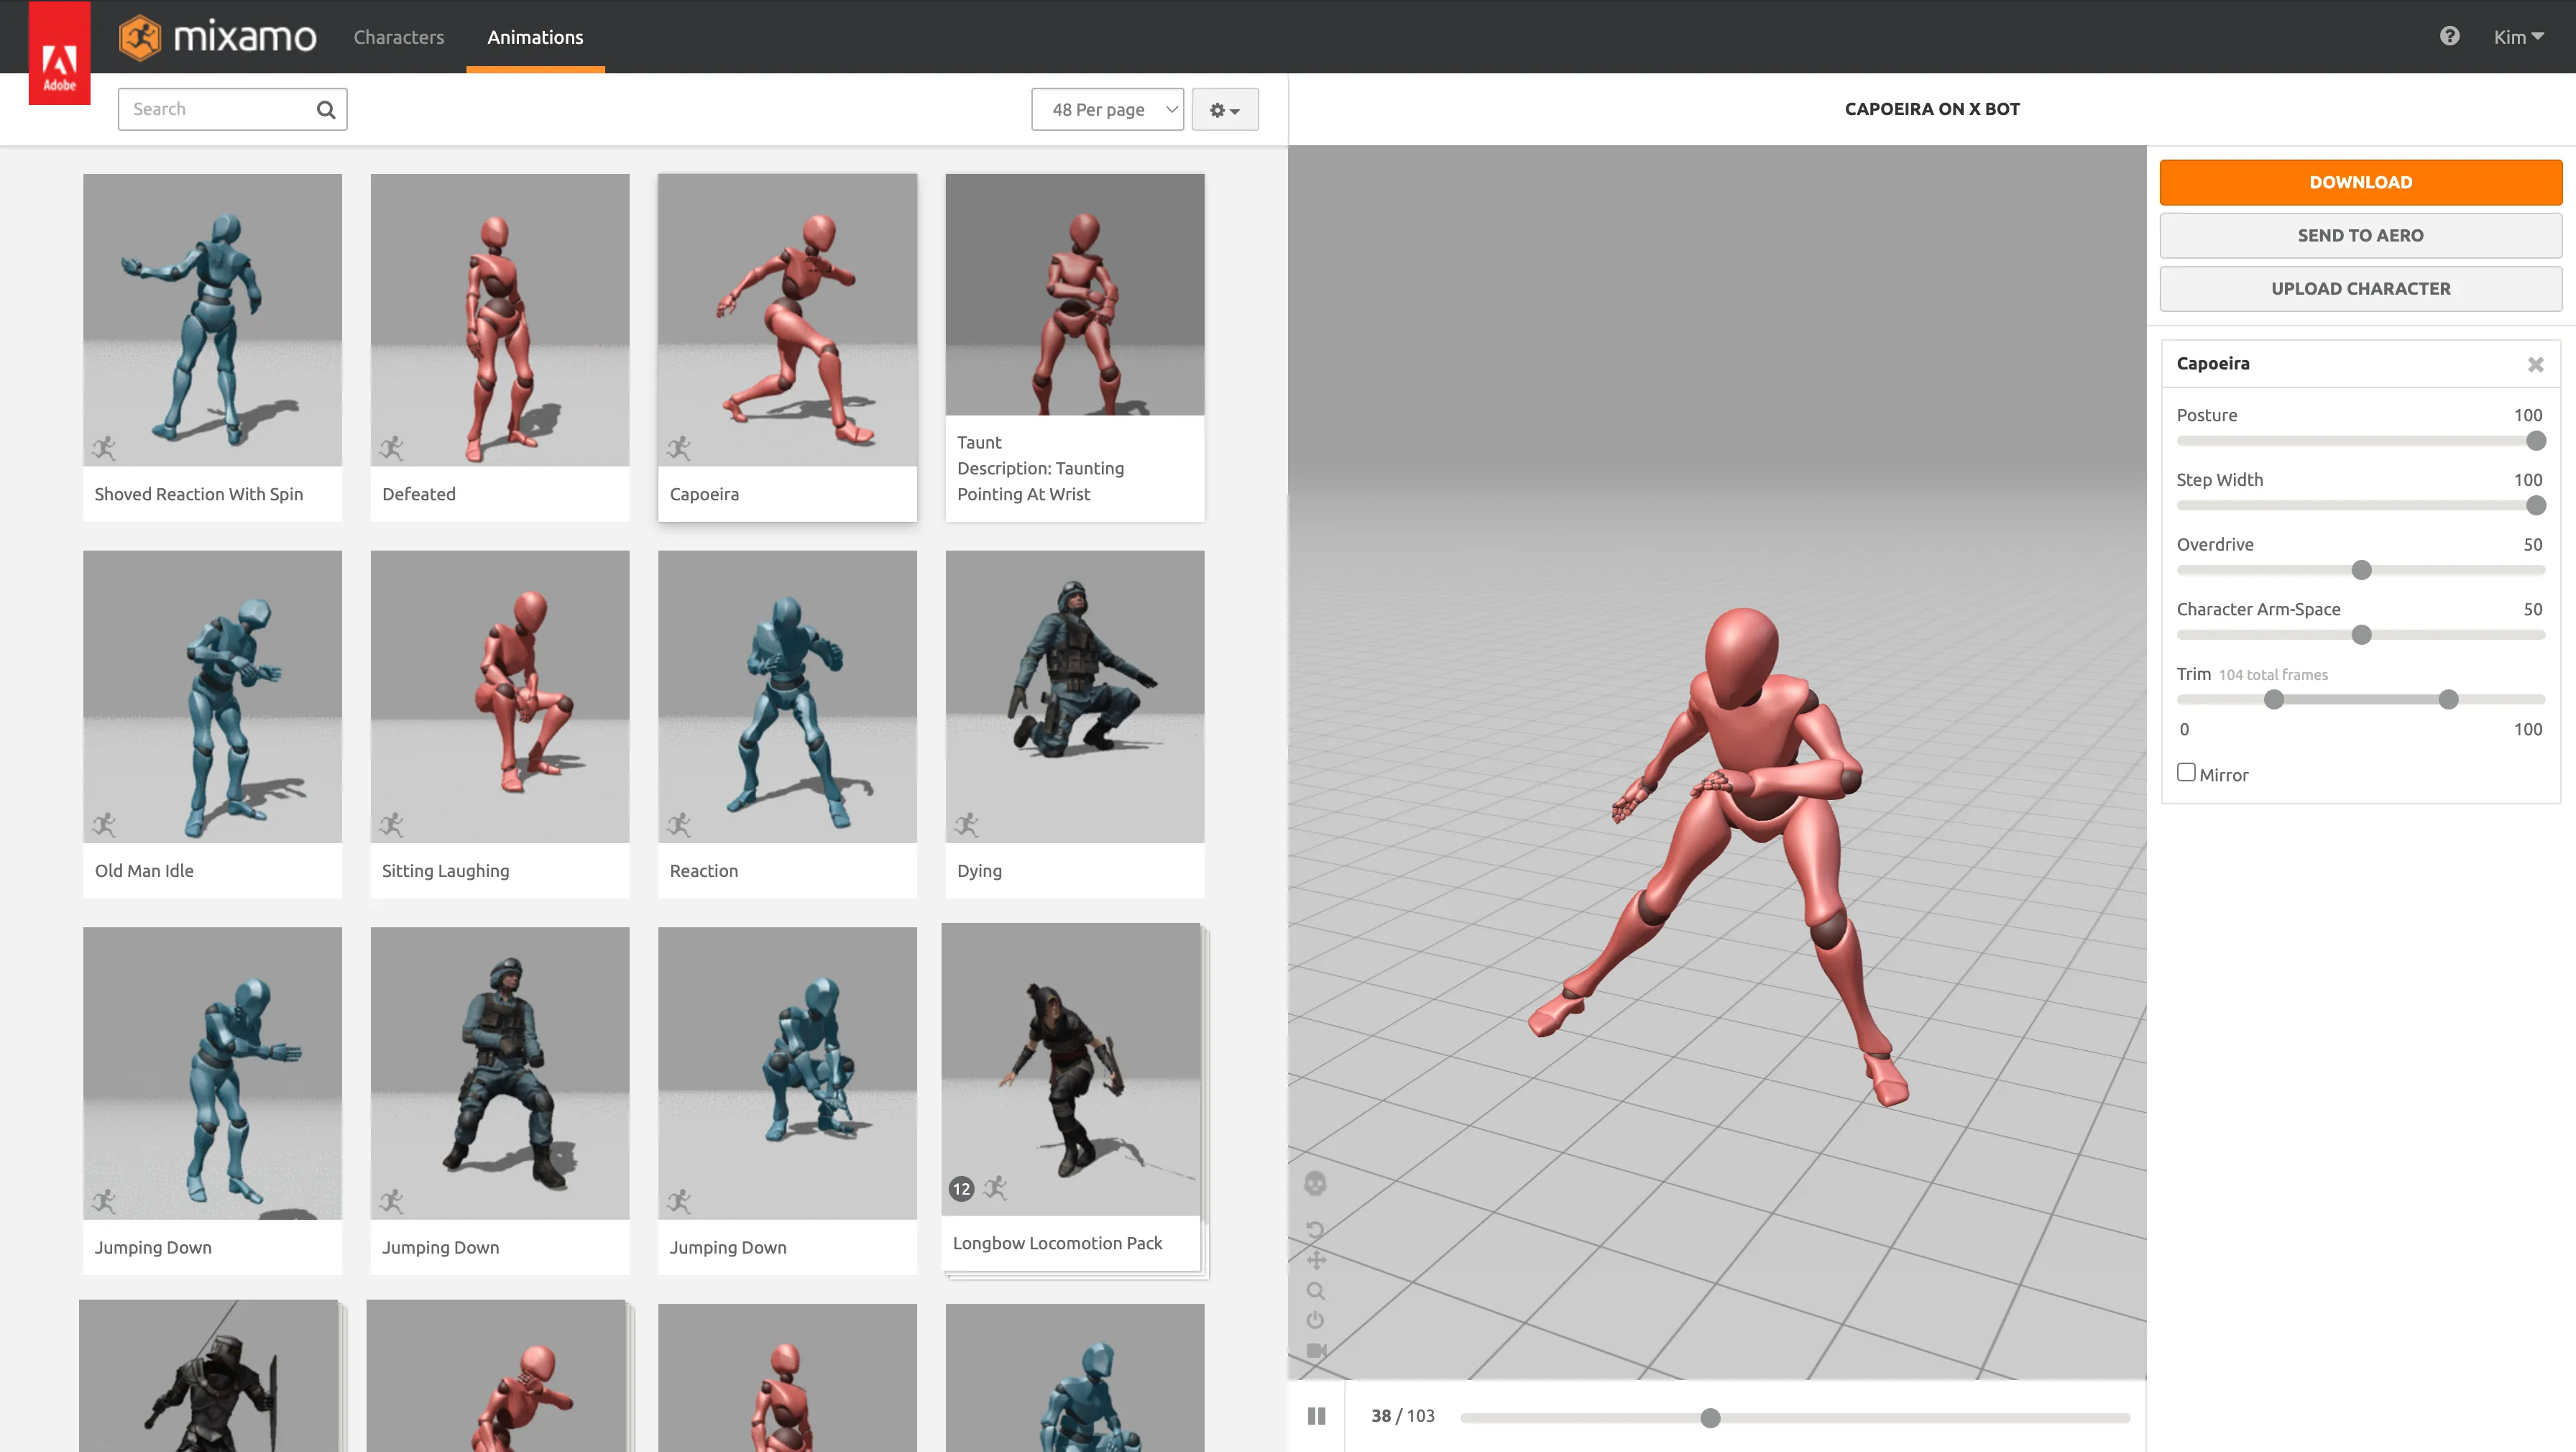
원하는 휴머노이드 애니메이션을 클릭하세요.
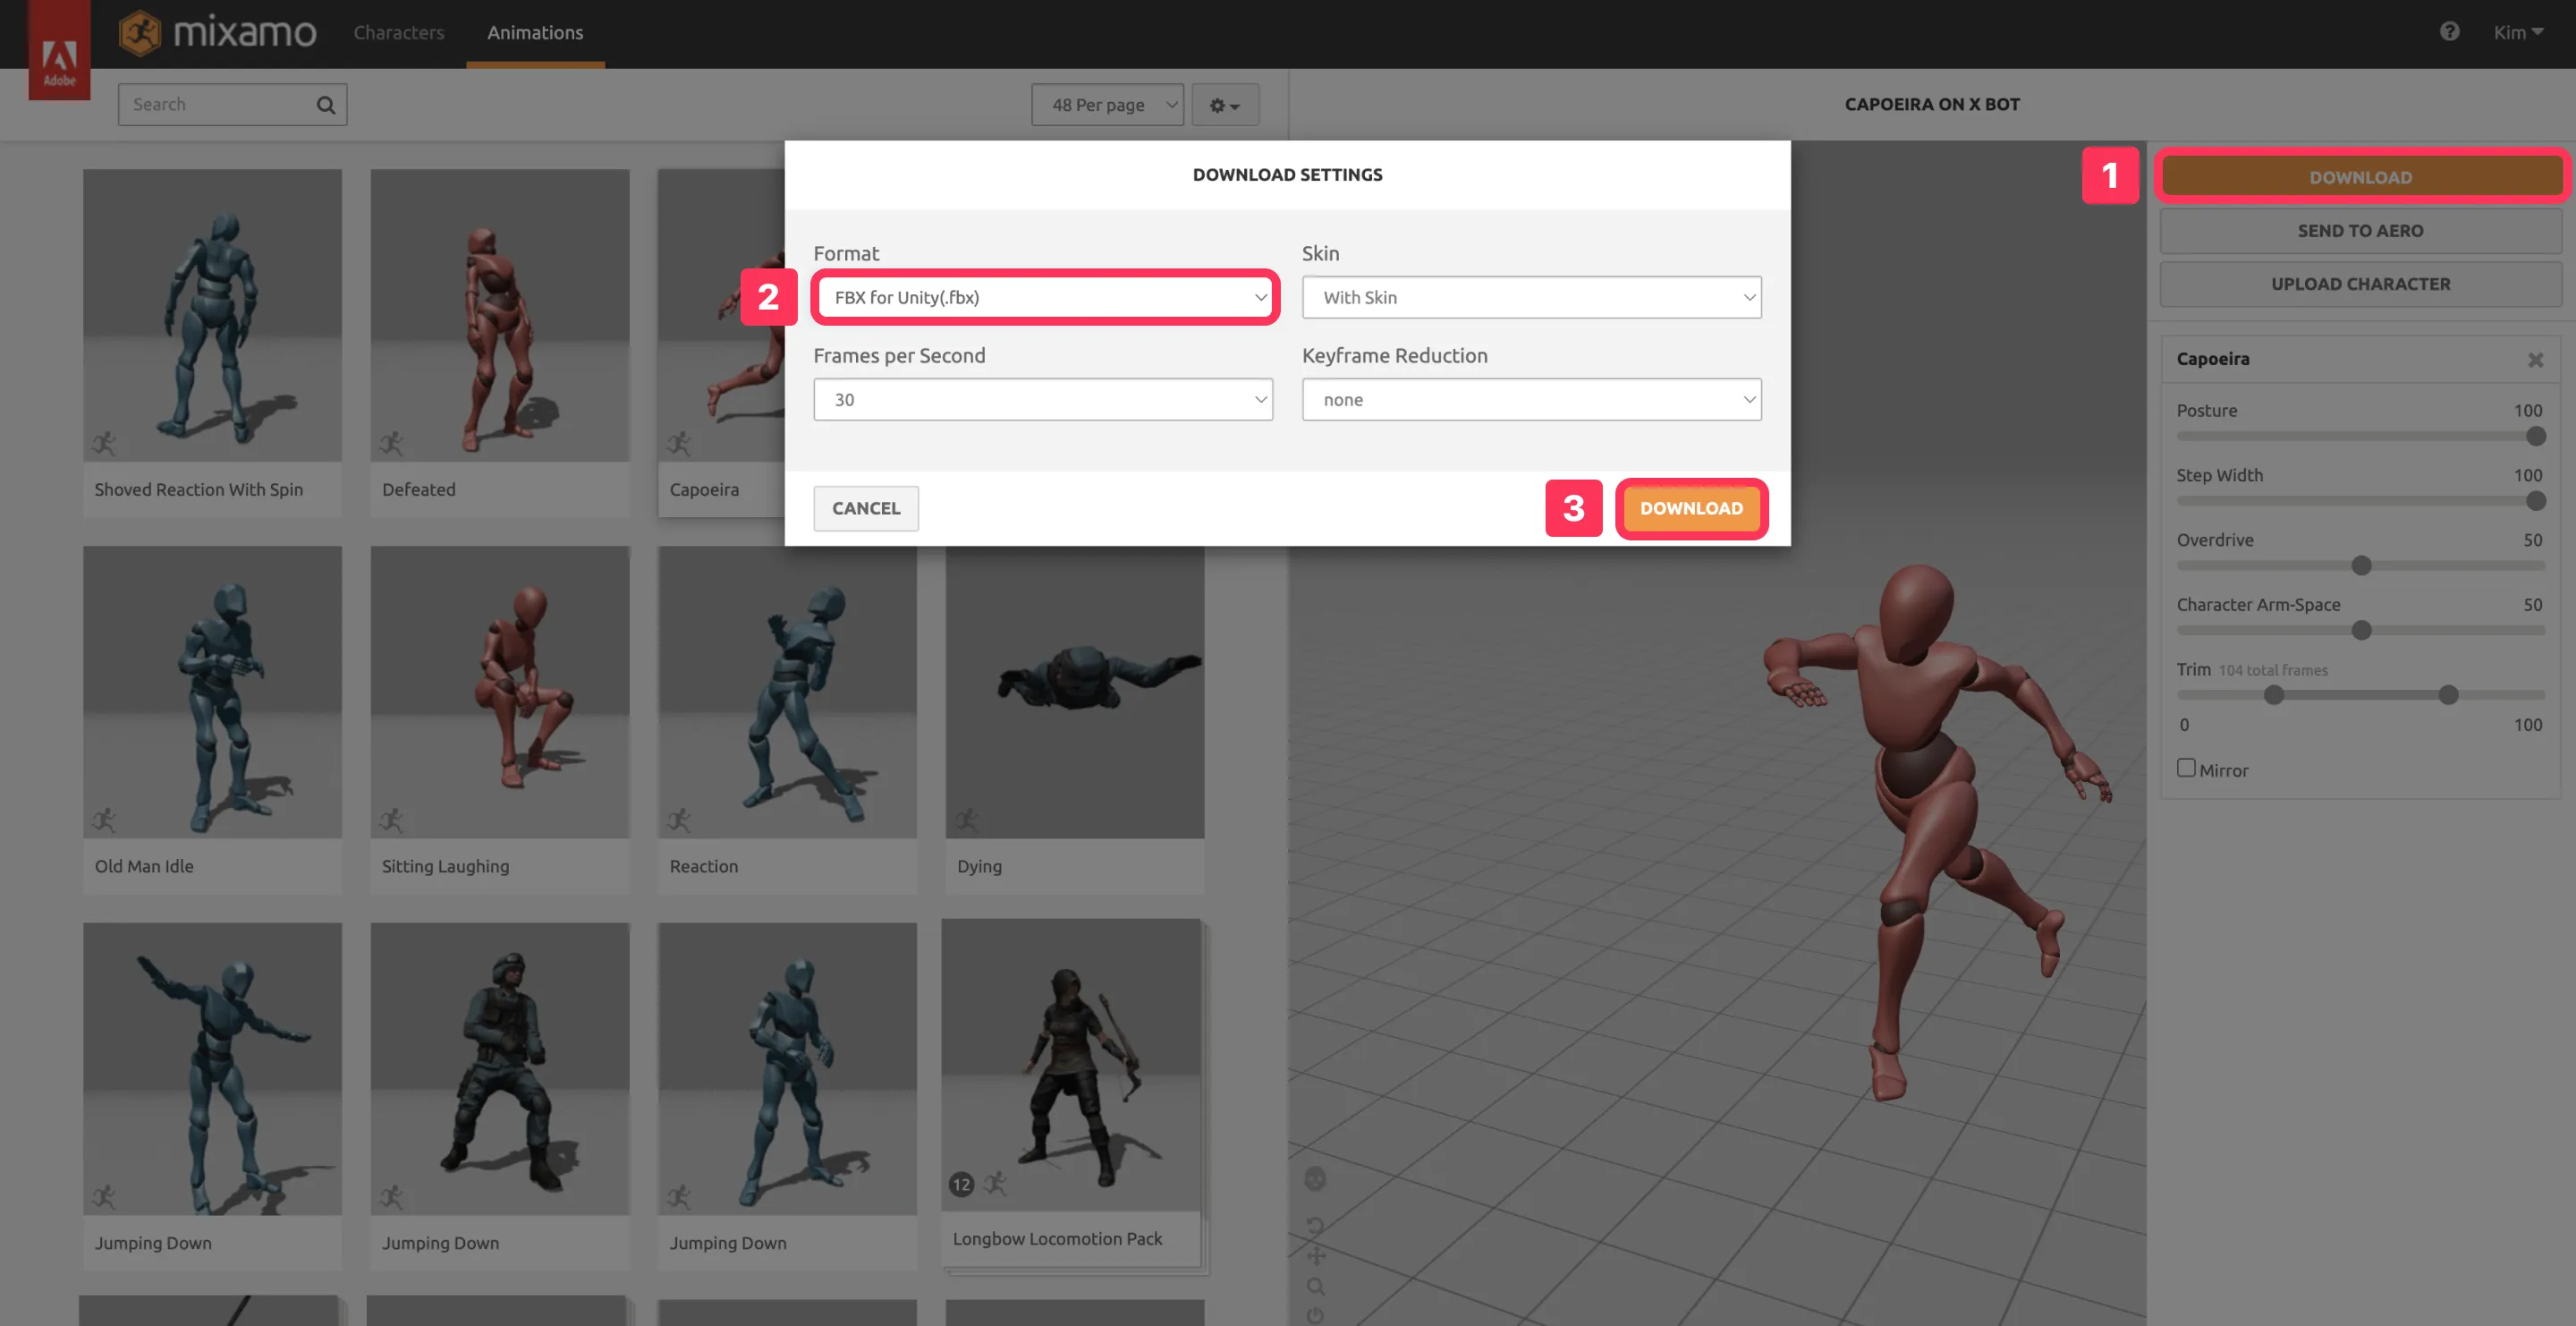
애니메이션을 다운로드하고 "FBX for Unity (.fbx)" 옵션을 선택하세요.
다운로드한 파일을 Unity 프로젝트 패널로 드래그 앤 드롭하세요.

리그 탭을 클릭하고 애니메이션 유형을 휴머노이드로 변경하세요.
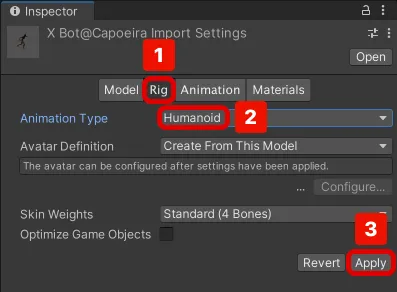
❗️ 주의
휴머노이드 설정이 없으면 ZEPETO 캐릭터와 호환되지 않습니다. 설정을 반드시 확인하세요.
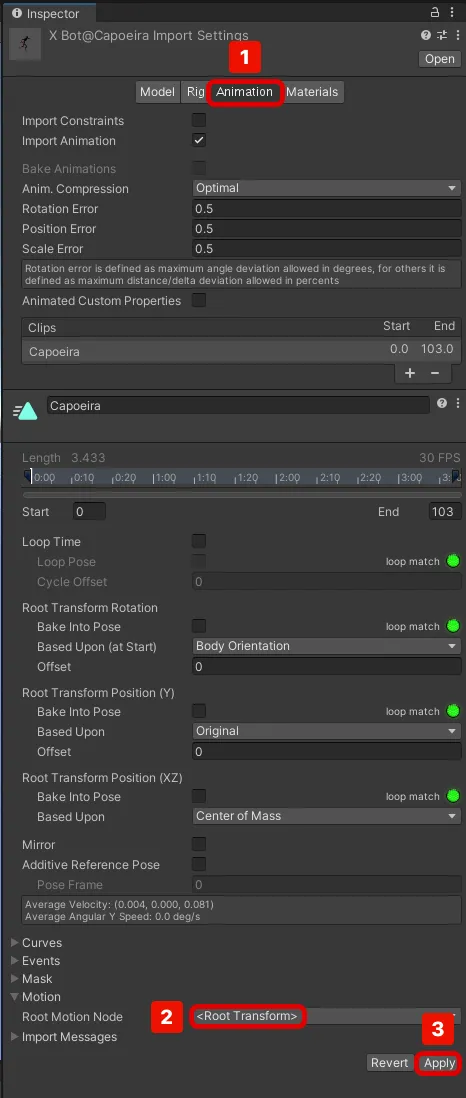
애니메이션 > 모션 > 루트 모션 노드 옵션을 <루트 변환>으로 변경하여 캐릭터의 애니메이션을 더 부드럽고 현실감 있게 만드세요.
ZepetoPlayers 컴포넌트 인스펙터에서 애니메이터 변수와 연결된 애니메이터 객체를 복제하세요.
- 파일 경로 : Packages/zepeto.character.controller/Runtime/_Resources/AnimatorController/ZepetoAnimatorV2.controller
- 애니메이터를 자산 폴더로 드래그하세요.
복사한 후 ZepetoAnimatorV2_Custom으로 이름을 변경하세요.
계층 구조 > ZEPETO > ZepetoPlayers를 클릭하여 생성하고, ZepetoPlayers 구성 요소의 애니메이션 컨트롤러 필드에 생성한 애니메이터의 복사본을 드래그합니다.
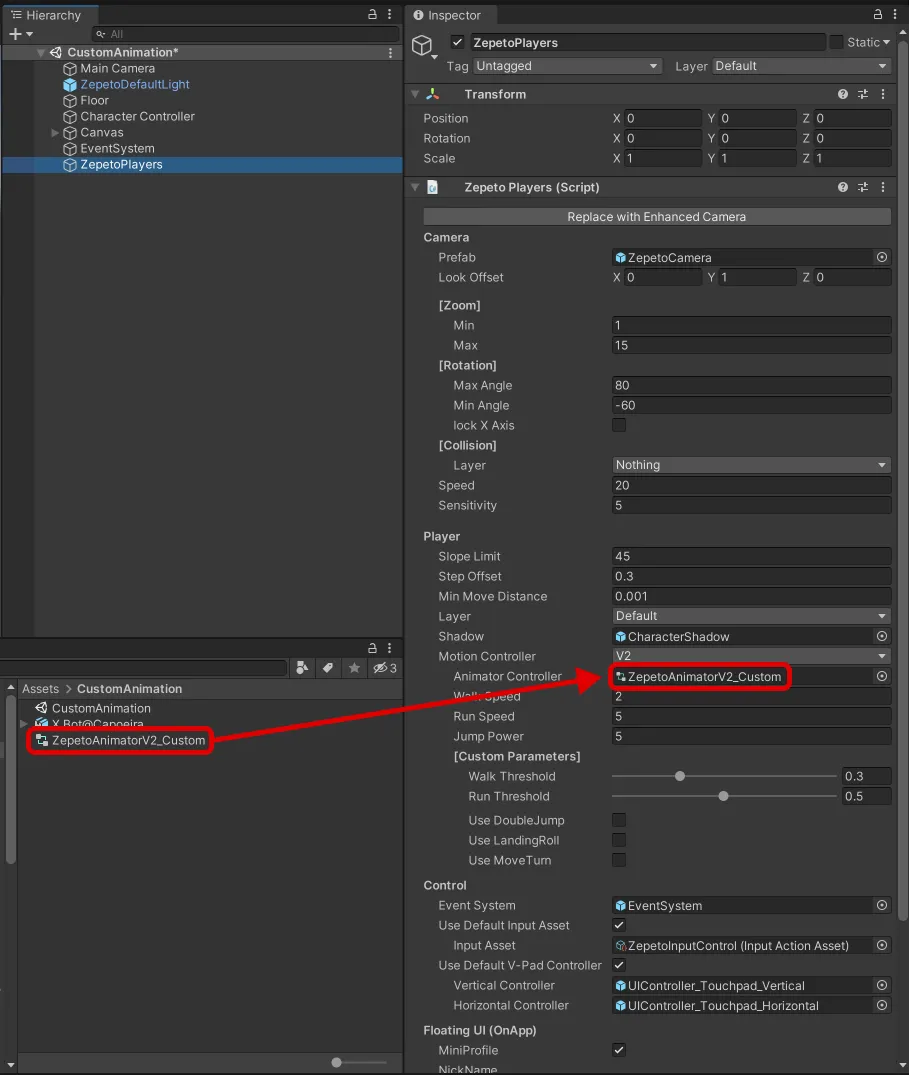
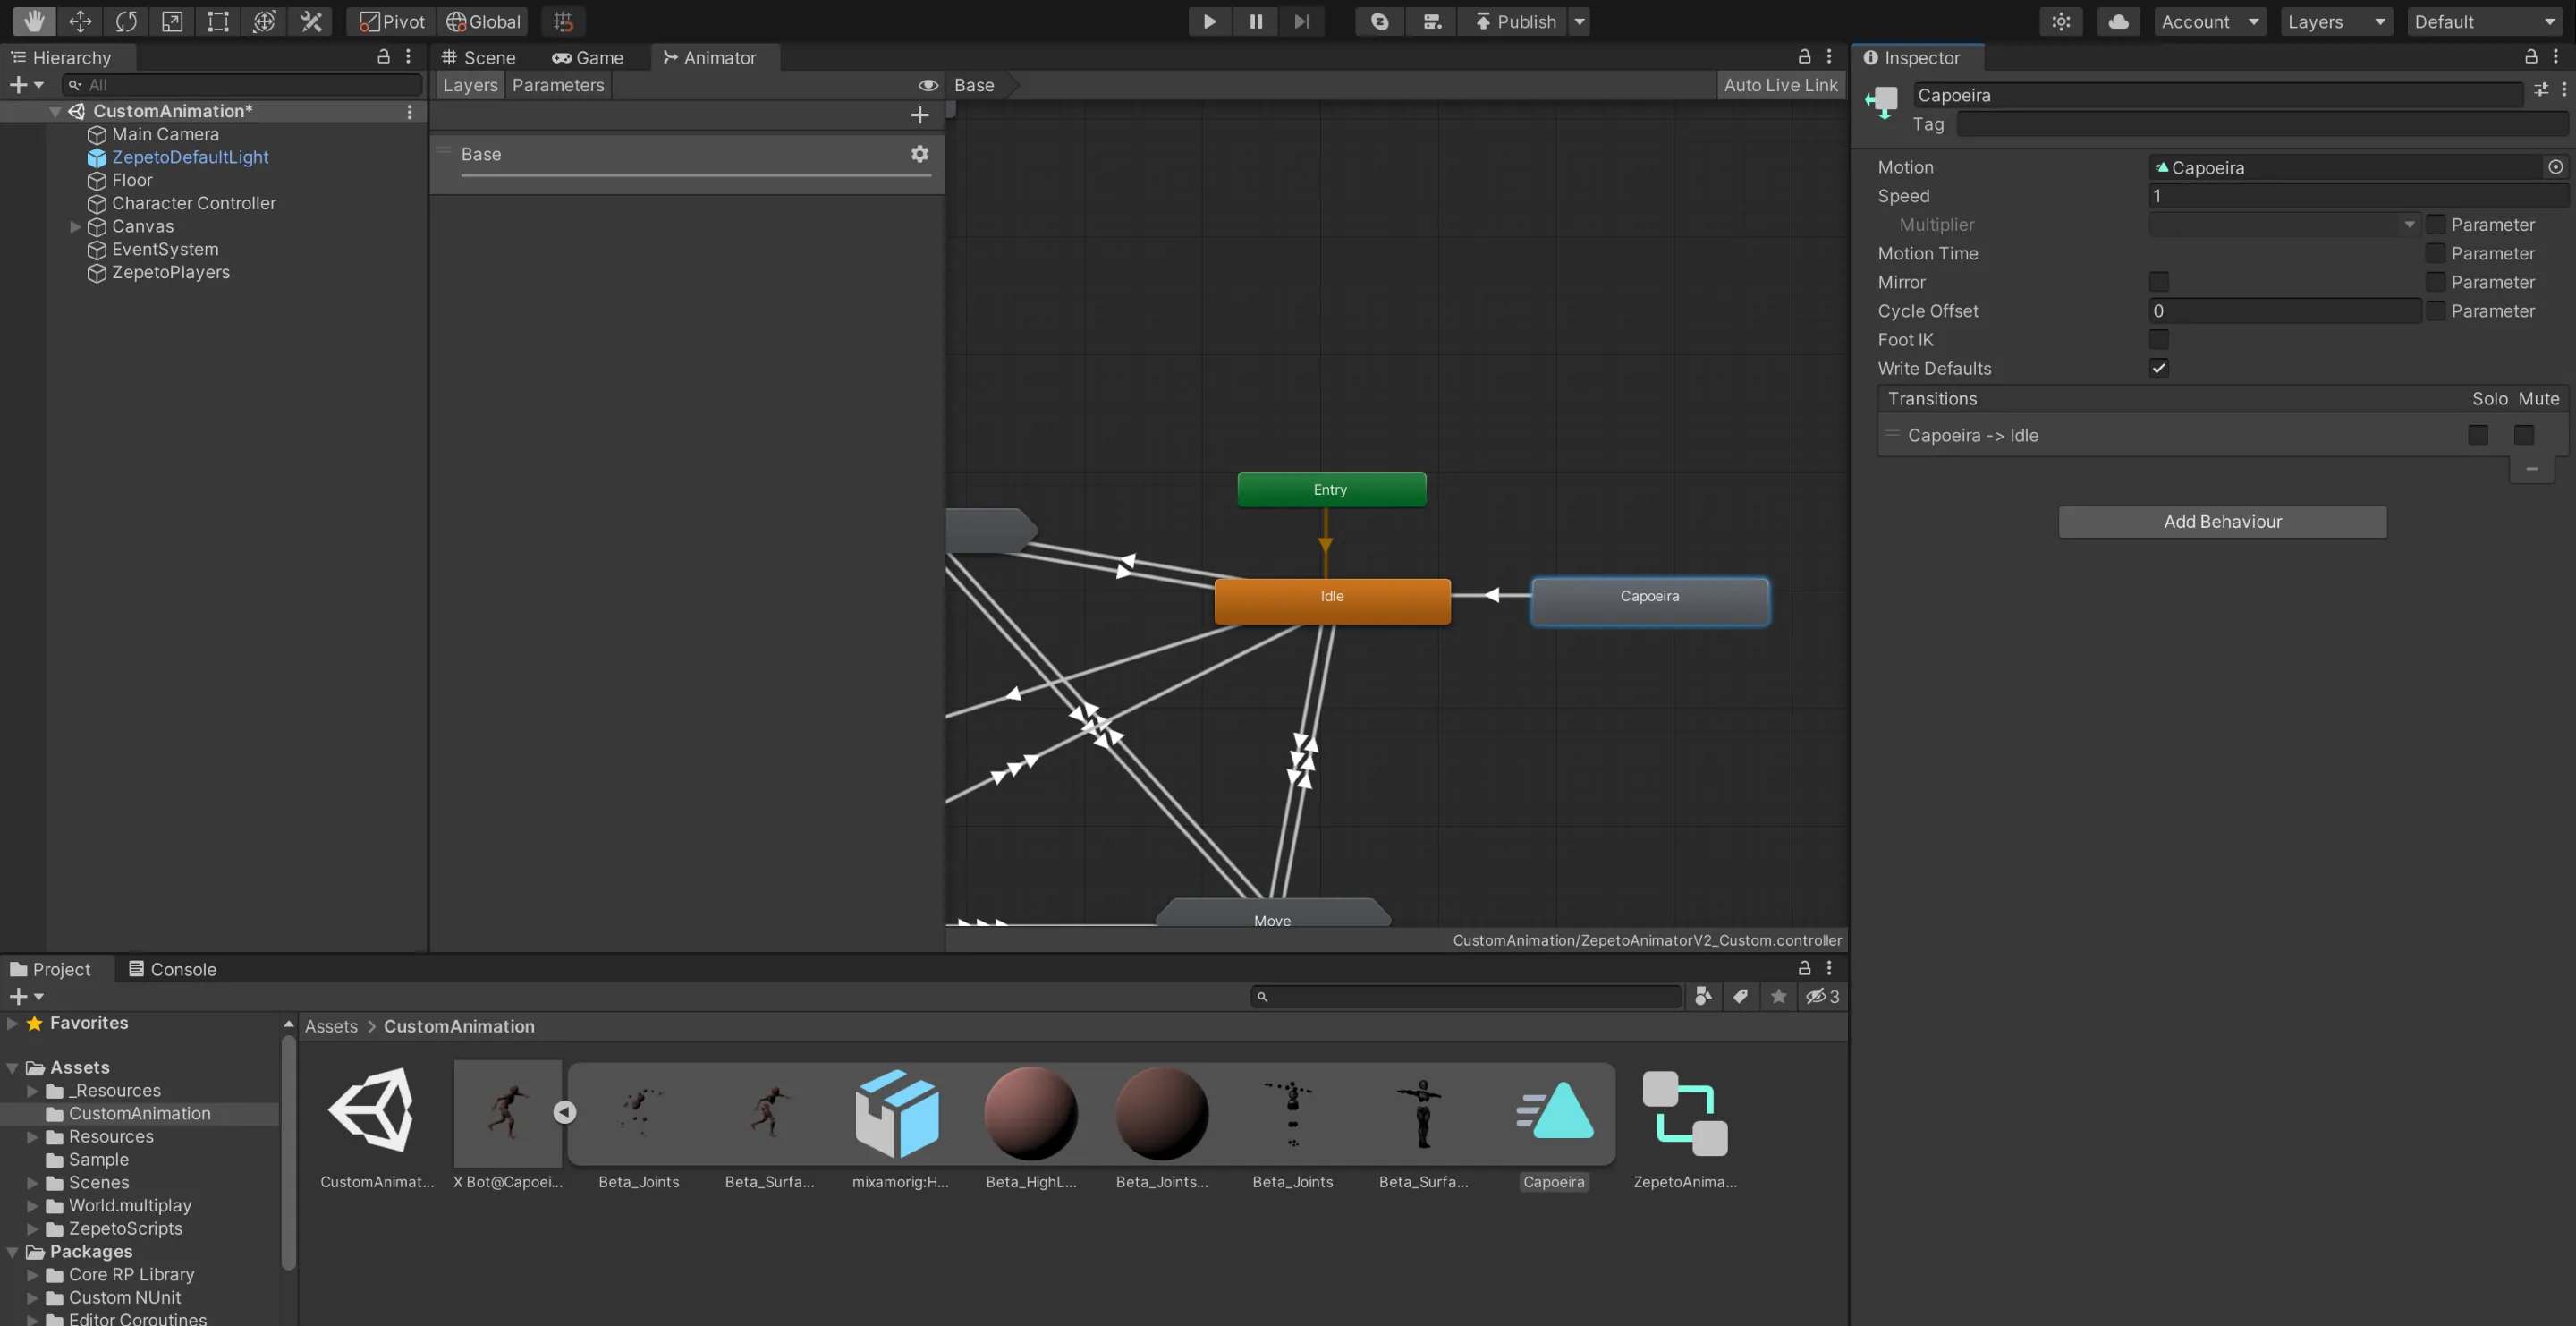
ZepetoAnimatorV2_Custom을 두 번 클릭하여 애니메이터 탭을 엽니다.
새 애니메이션을 애니메이터로 드래그 앤 드롭하여 애니메이션 상태를 생성합니다.
생성한 애니메이션 상태를 마우스 오른쪽 버튼으로 클릭한 다음, 전환 만들기를 클릭하여 대기 상태로 돌아가는 전환을 생성합니다.
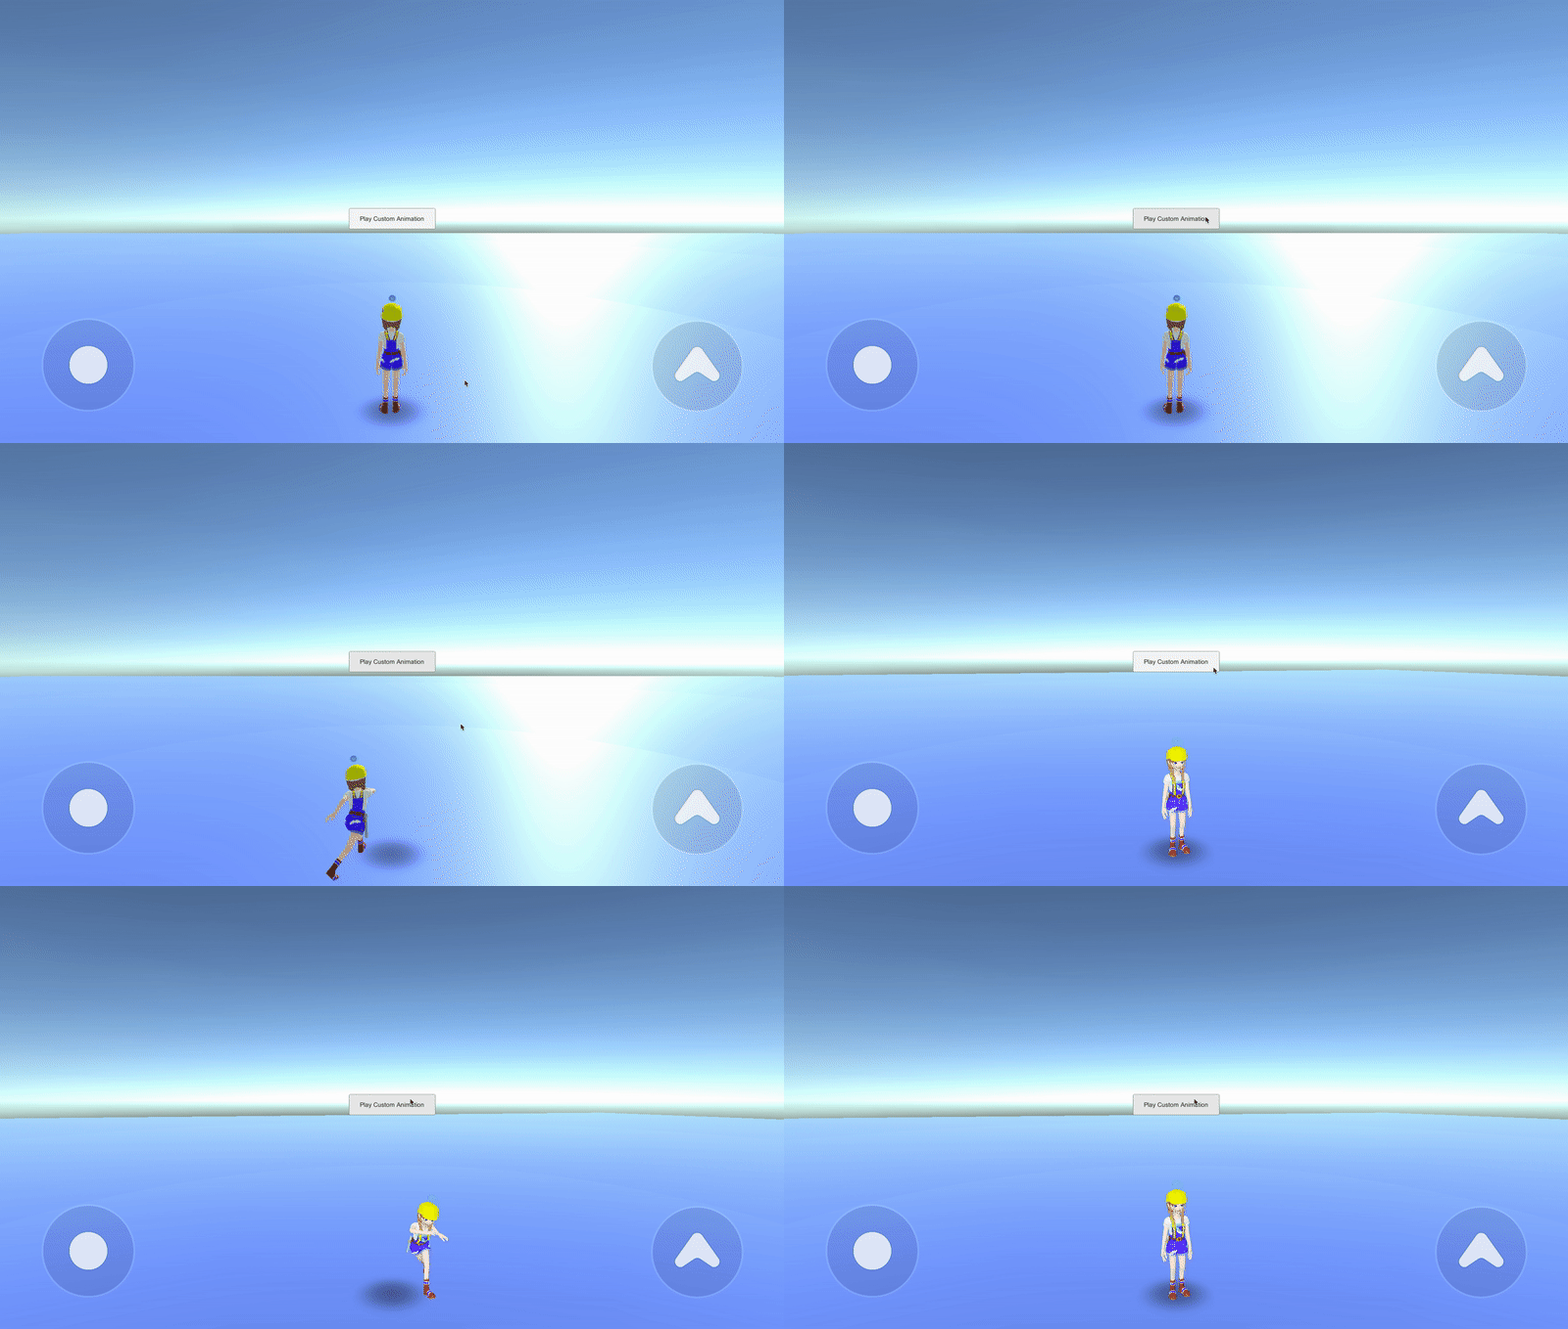
버튼을 클릭할 때 애니메이션을 재생하는 예제를 만들어 봅시다.
계층 추가 > UI > 버튼.
- 계층 구조 만들기 > 빈 객체 만들기 및 이름을 CharacterController로 바꾸기.
- 프로젝트 만들기 > 만들기 > ZEPETO > TypeScript 및 이름을 CharacterController로 바꾸기.
- 다음과 같이 샘플 스크립트 작성하기:
- 스크립트의 흐름은 다음과 같습니다:
- 시작()
- 클릭 시 애니메이션을 재생하는 playCustomAnimationButton에 리스너 추가.
- 로컬 플레이어를 생성하기 위해 ZepetoPlayers.instance.CreatePlayerWithUserId() 함수를 호출.
- 로컬 플레이어의 애니메이터 컴포넌트를 가져와 localPlayerAnimator 변수에 저장.
- 사용자 정의 애니메이션 클립으로 설정된 애니메이션 클립을 할당합니다.
버튼을 드래그하여 사용자 정의 애니메이션 버튼에 할당합니다.
6. 애니메이션을 재생하기 위해 버튼을 클릭합니다.
👍 ZEPETO 캐릭터가 아닌 사용자 정의 캐릭터를 사용하는 경우,
인간형 캐릭터인 경우 ZEPETO 애니메이션을 적용할 수 있습니다.


