업로드하기
👍 해당 가이드의 이해를 돕기 위해 페이지 하단에 영상이 첨부되어 있습니다. 가이드와 함께 영상을 참고하면 더 쉽게 따라할 수 있어요!
블렌더에서 Unity로 넘어가기 전에 가장 먼저 오브젝트, 마스크, 골조를 정리할 필요가 있습니다. 정리하는 순서는 아래와 같습니다.
- Creator Base Set 오브젝트 개체 속성을 변환합니다.
- 마스크를 풀어줍니다. (Unbind)
- Delete unnecessary bones.
- 마지막으로 모든 요소들을 평평한 계층 구조로 배열해야 합니다.
Creator Base Set 개체 속성을 살펴보면 Rotation 값이 완전히 0으로 처리되지 않았고, Scale 값도 1로 설정되어 있지 않음을 확인할 수 있습니다. 이것은 블렌더와 fbx 파일 간에 Scale 기준 및 월드 축 관련 차이가 있기 때문입니다.
- 블렌더는 크기 단위를 m로 사용하고, fbx cm를 사용합니다.
- 블렌더는 Z축이 위아래 방향을 가르키고, fbx는 Y축이 위아래 방향을 가르킵니다.
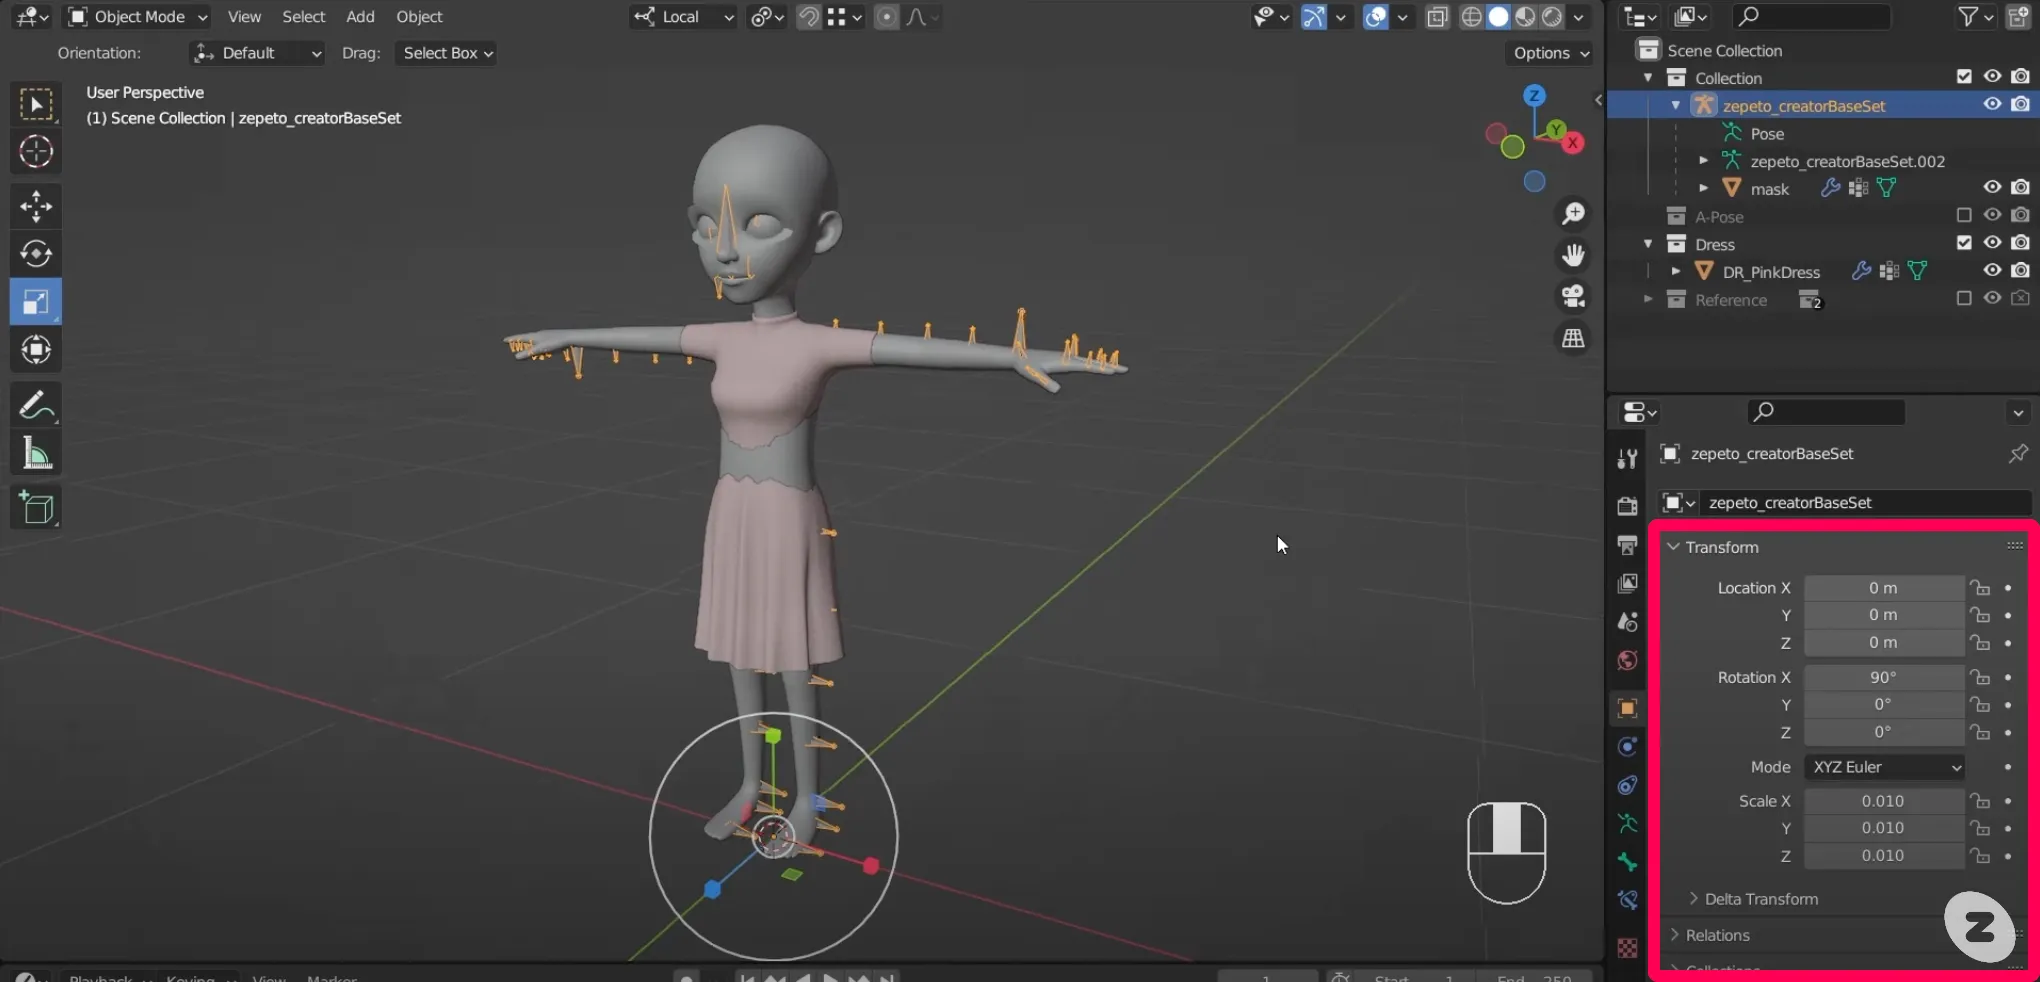
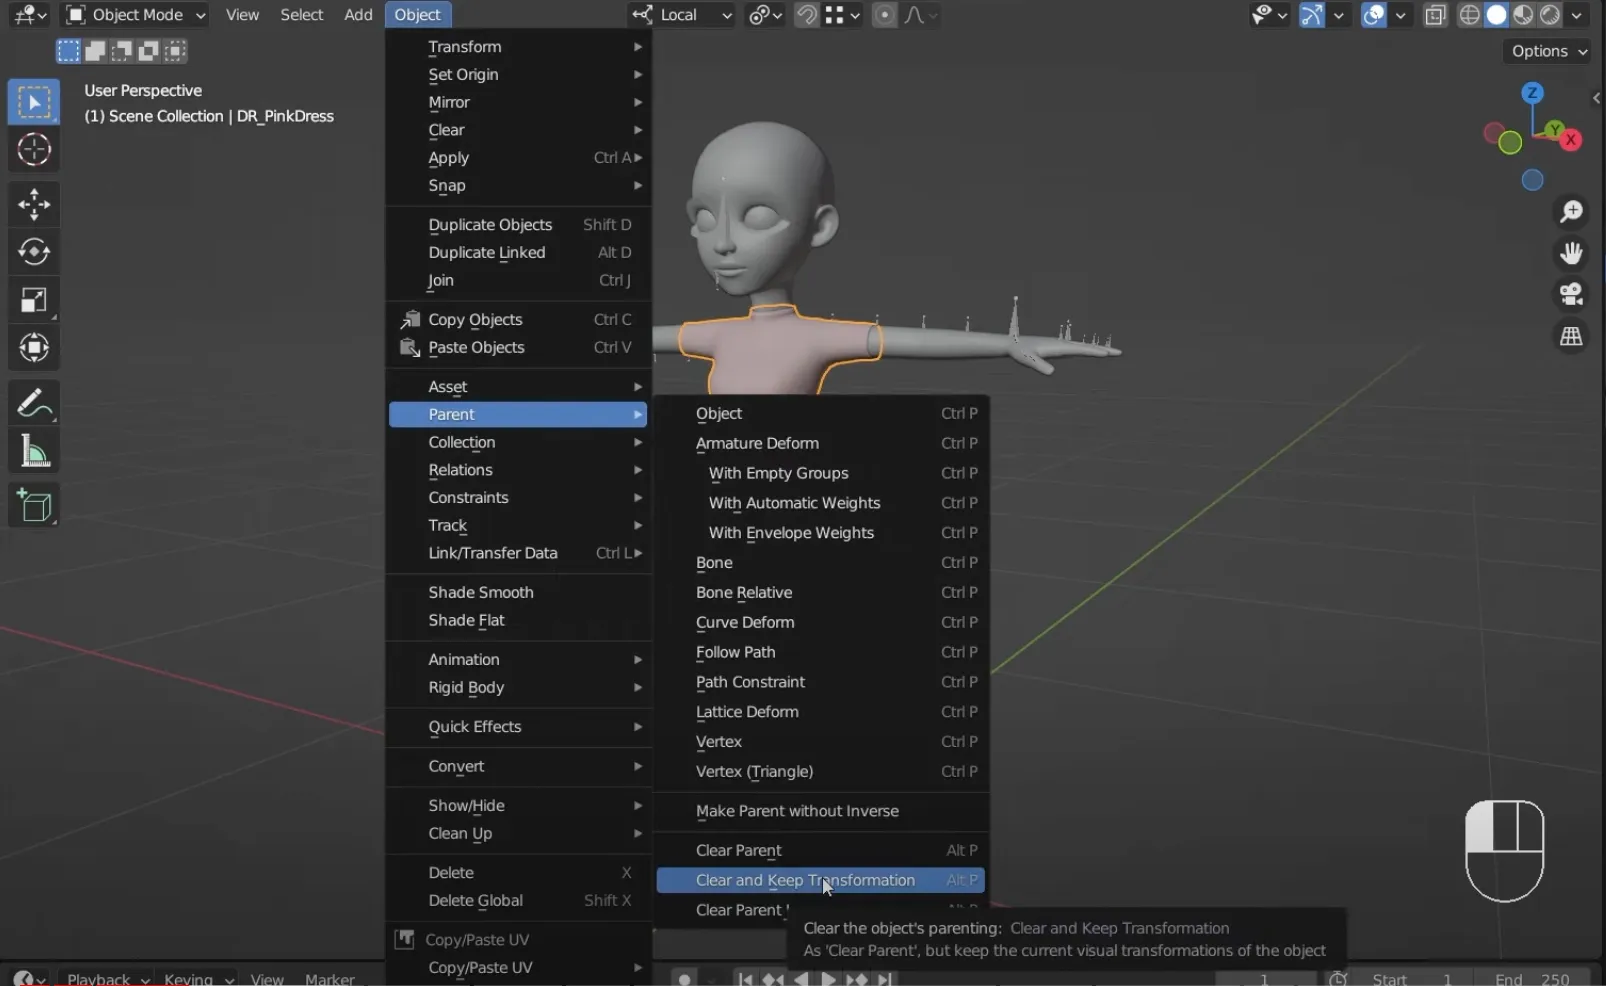
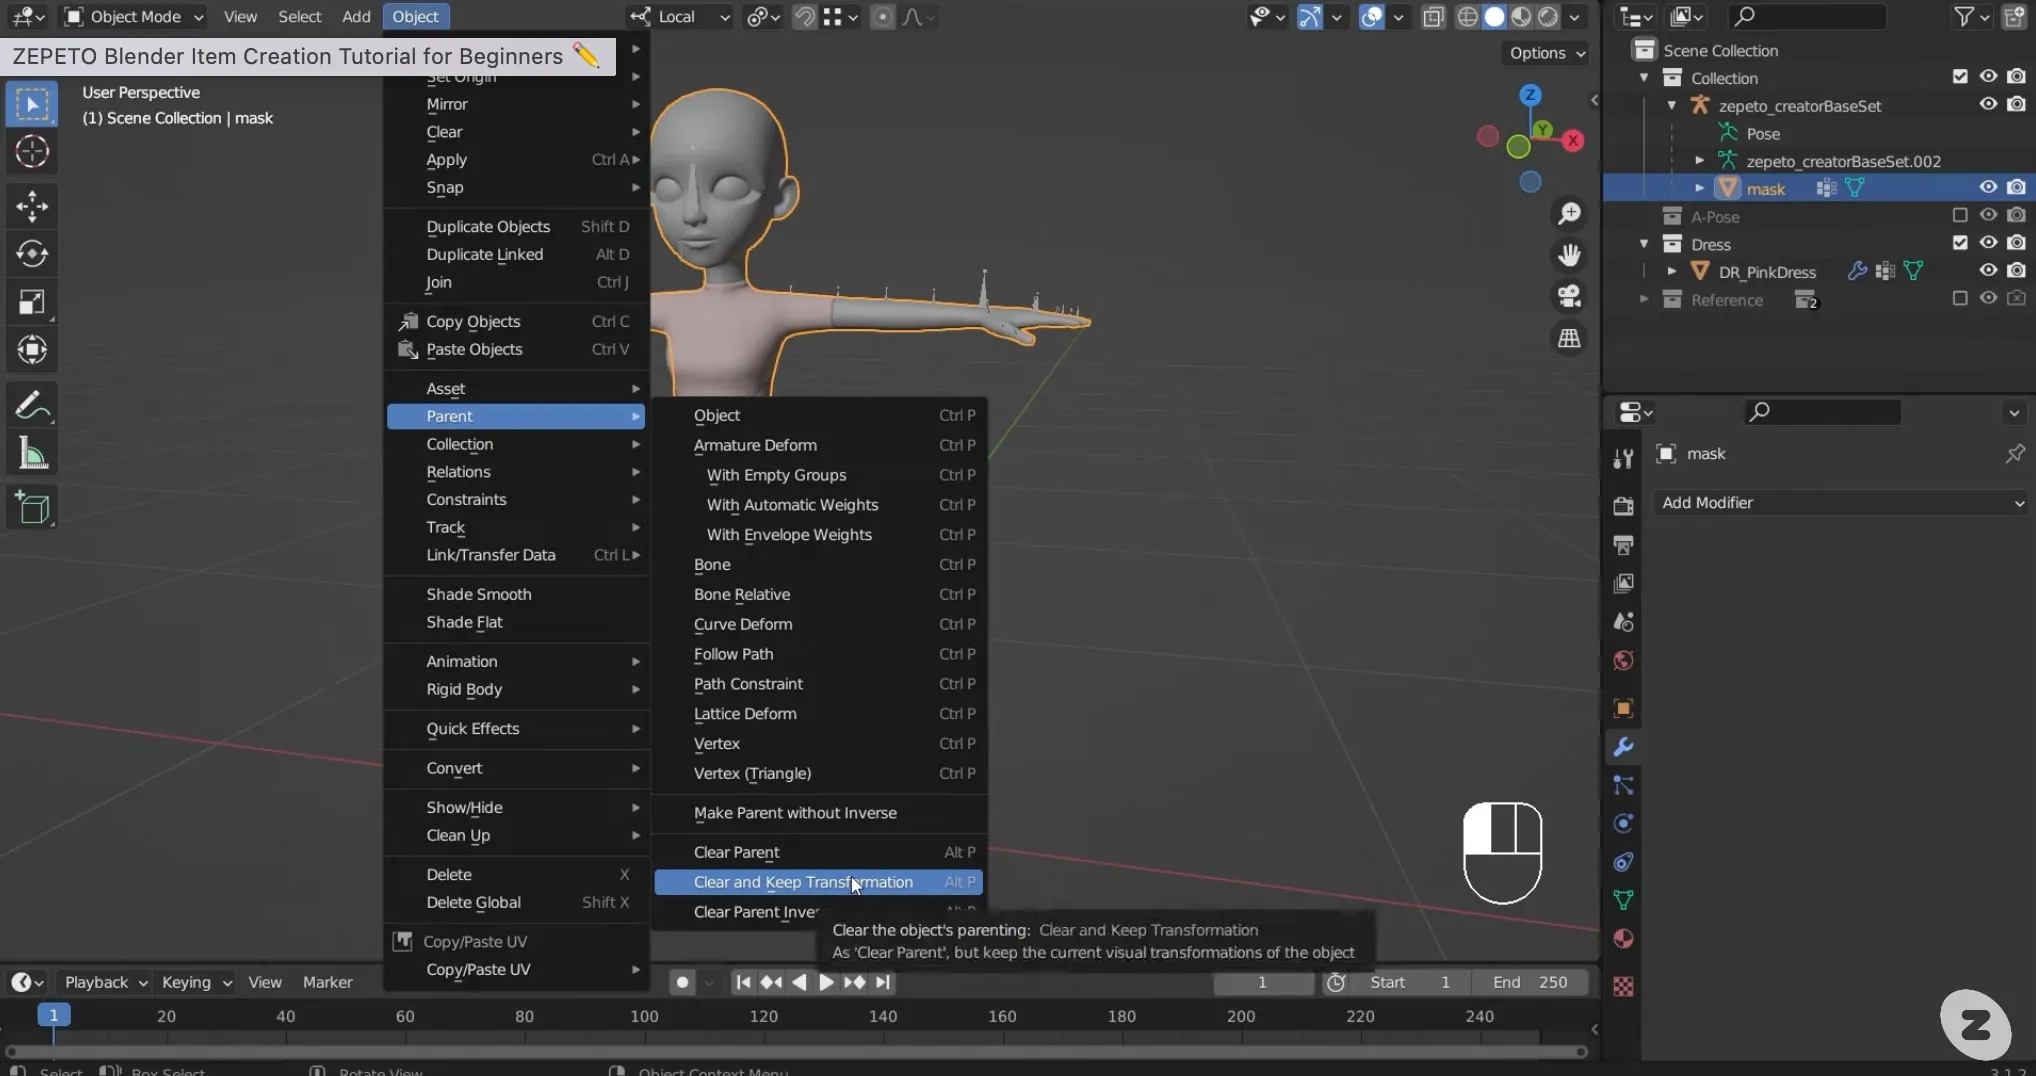
- 아이템 오브젝트가 선택된 상태에서 Object > Parent > Clear and Keep Transformation을 누릅니다. 해당 버튼을 누르면 기존에 적용된 설정값이 사라집니다.
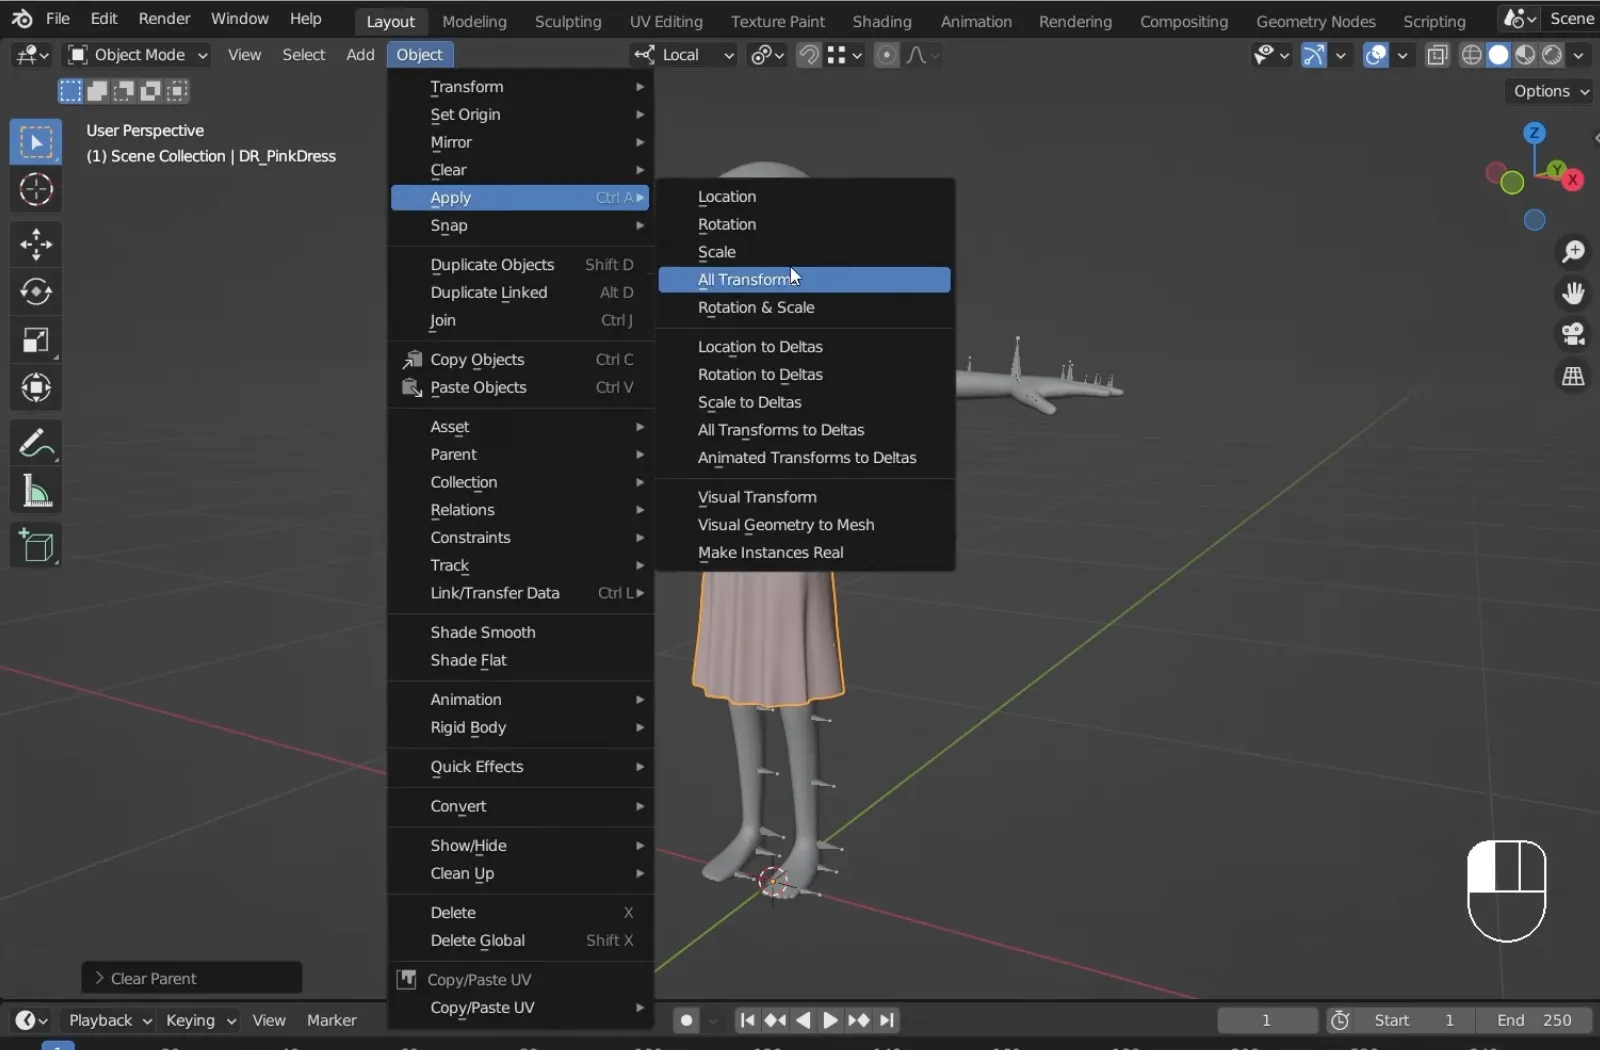
2. 다음은 Object > Apply > All Transforms를 눌러서 지금 상태를 기본값으로 지정해줍니다.
3. 뷰포트 오른쪽 상단에 있는 Options 메뉴에서 Origins를 선택합니다.
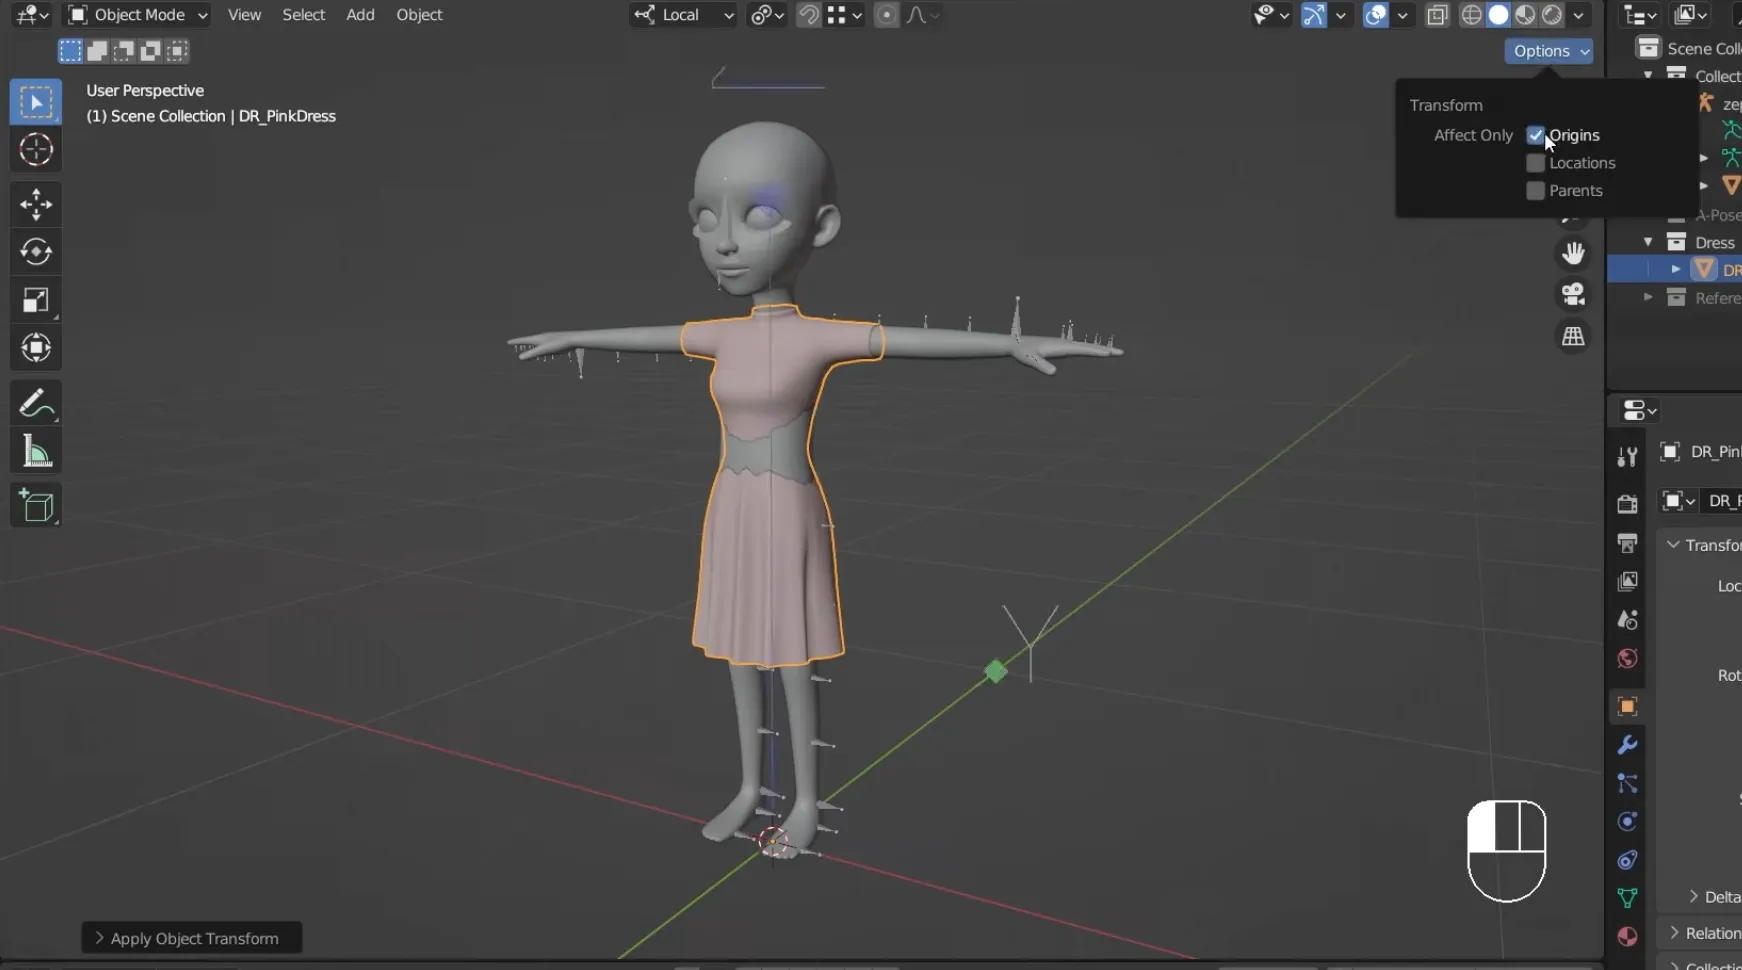
4. 크기를 조절하는 도구를 사용하여 0.01로 크기를 바꿔야 합니다. **Ctrl 키**를 사용하여 소수점 단위로 미세하게 조정합니다.
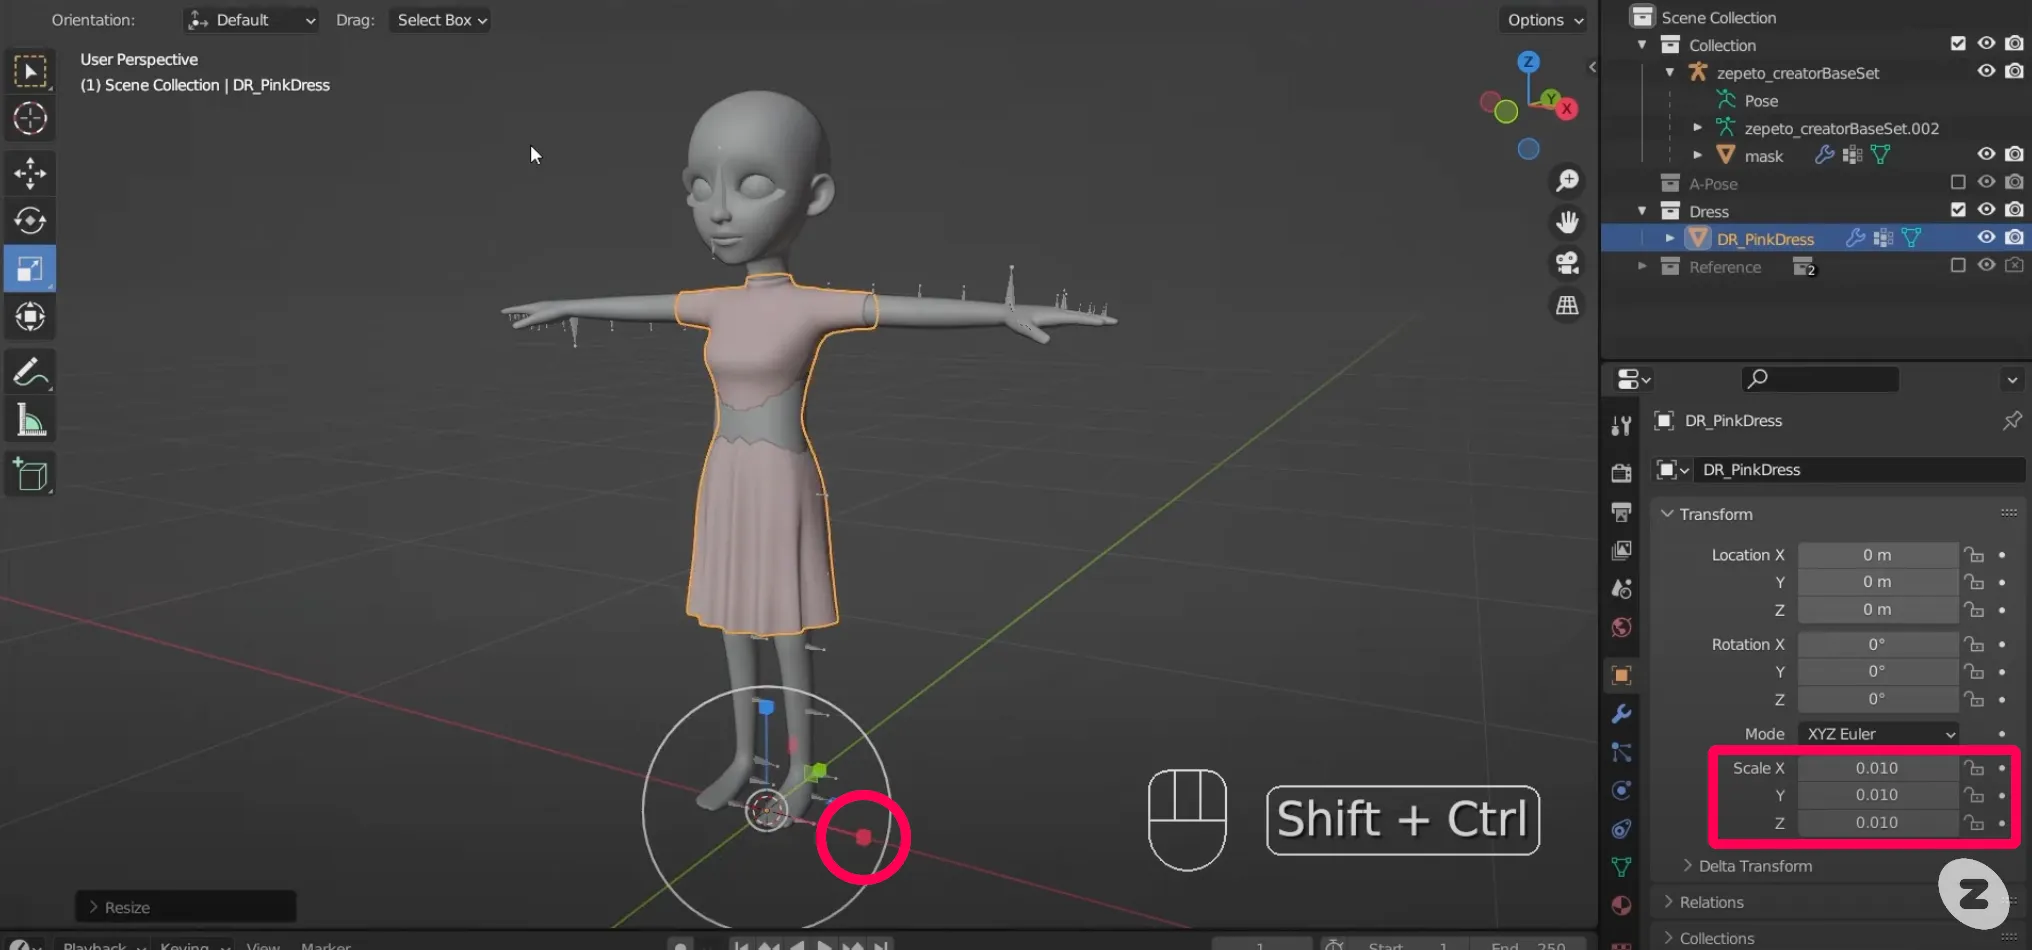
❗️ 주의사항 해당 수치는 Scale 도구만을 사용하여 변경할 수 있으며 직접 설정창에 입력하는 것은 불가능합니다.
5. 4번 과정과 동일하게 회전 툴을 사용하여 X축에서 90도로 회전합니다. 6. 뷰포트 오른쪽 상단에 있는 Options 메뉴에서 Origins를 선택 해제 합니다.
Unity에서 파일을 불러올 때 Unity는 자체적으로 마스크(mask)라는 이름이 정해진 메시 개체를 찾습니다. 이것을 찾지 못하면 변환하는 과정이 제대로 작동하지 않습니다.
- 마스크 오브젝트를 선택하고 모디파이어(modifier) 설정에서 기존에 있는 모디파이어를 찾아 x 버튼으로 삭제합니다.
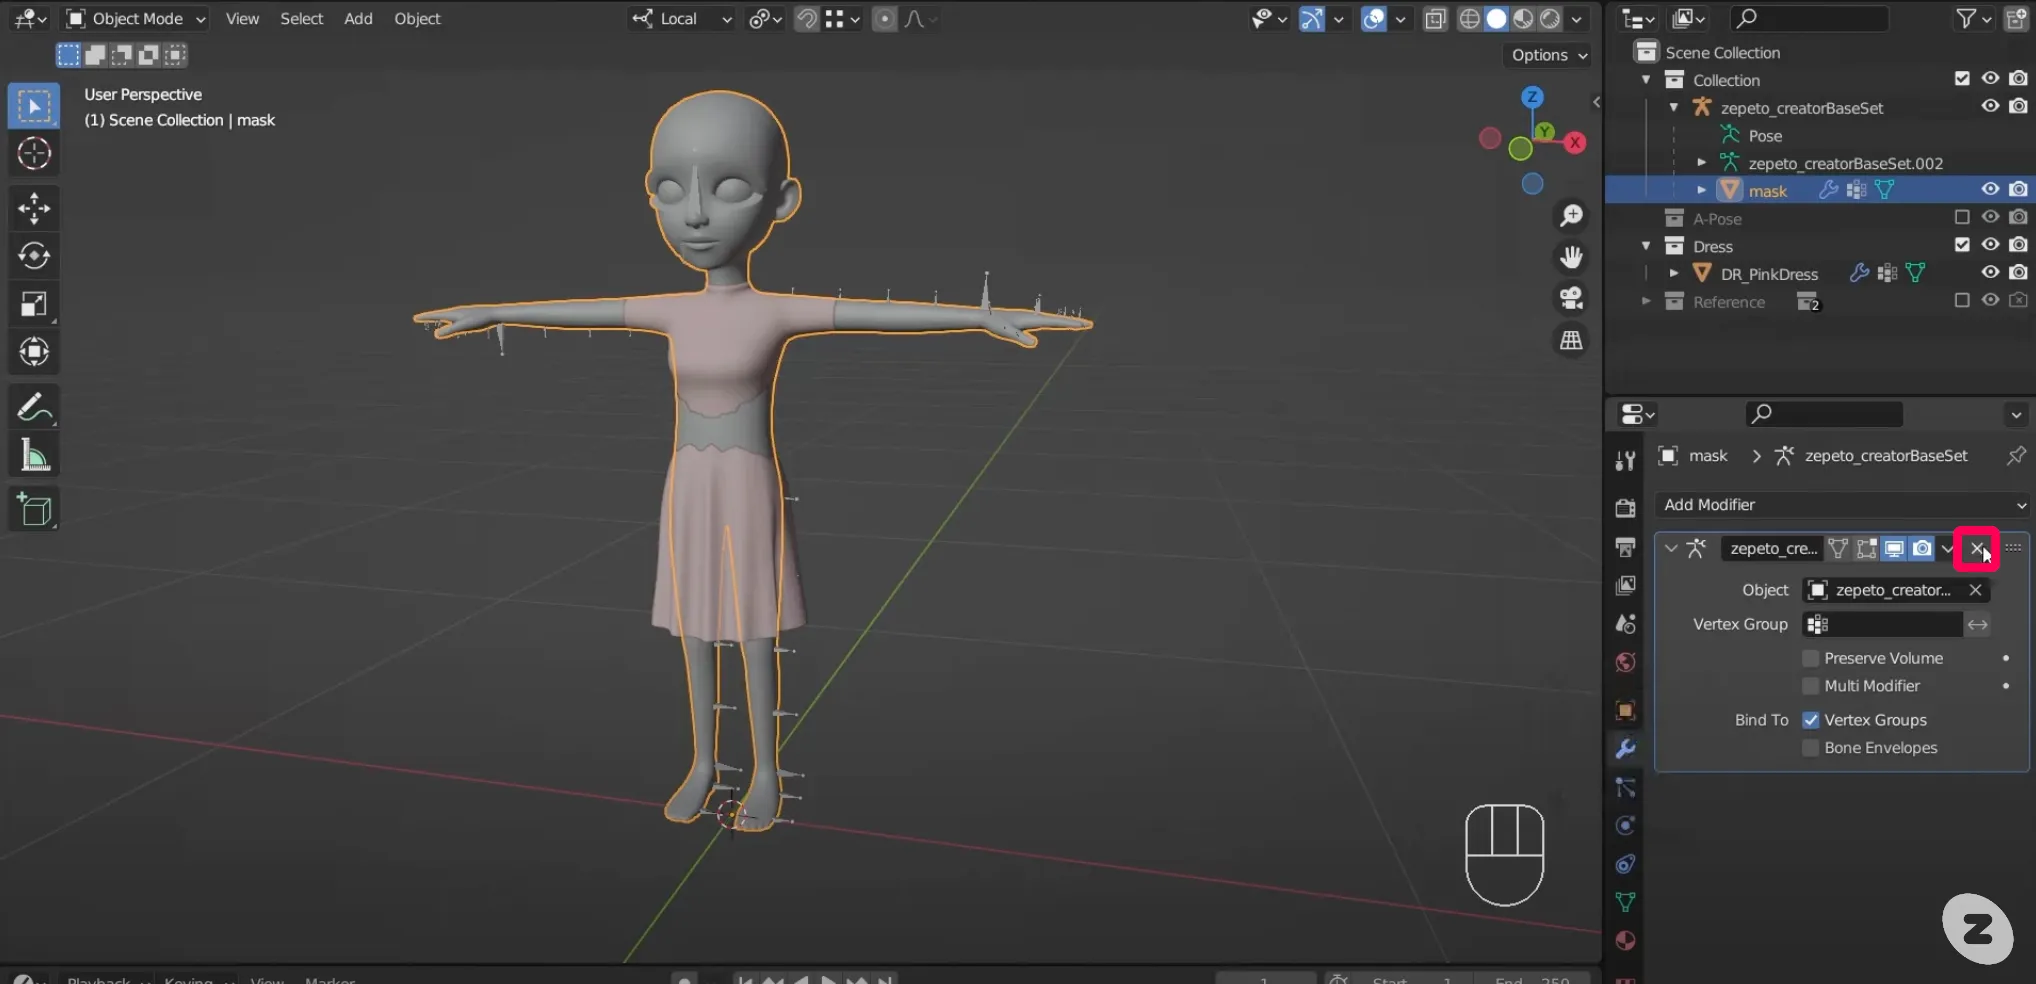
2. 마스크 오브젝트가 선택된 상태에서 Object > Parent > Clear and Keep Transformation을 누릅니다. 이렇게하면 마스크가 골조에서 분리되게 됩니다.
블렌더에서 fbx 파일 내보내기를 하면 모든 뼈에 웨이트 정보를 포함하게 됩니다. 이 과정에서 나타날 수 있는 용량 관련 문제를 피하기 위해 사용되지 않는 골격은 삭제합니다.
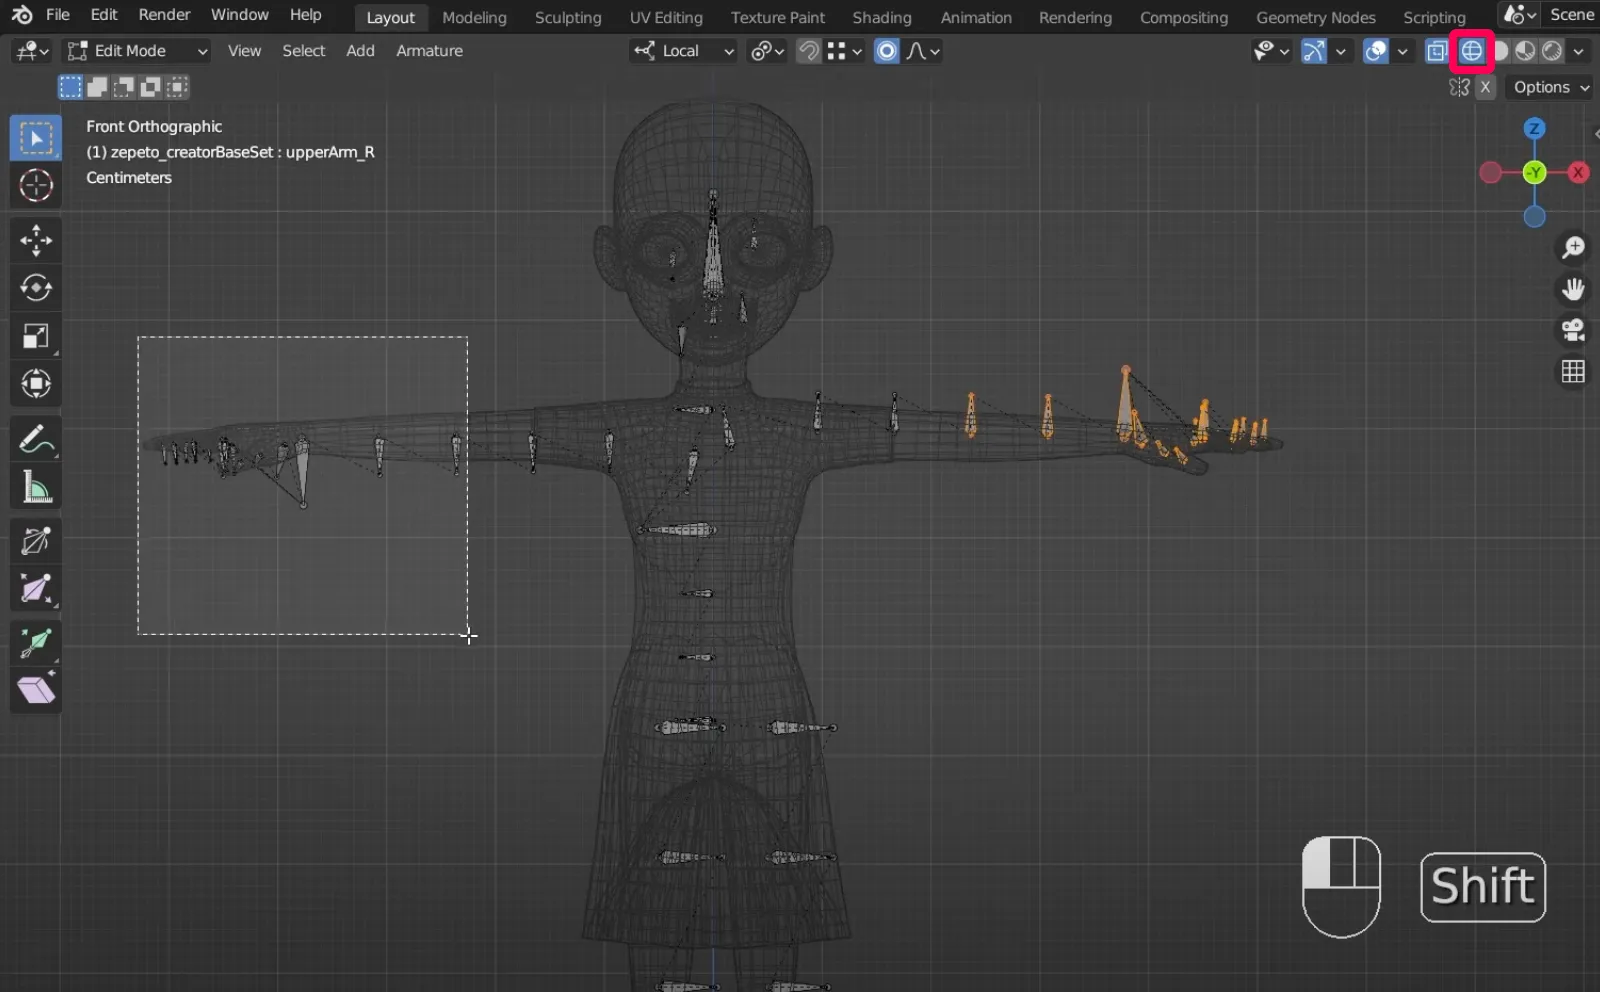
- Creator Base Set 골격을 선택하고 편집 모드로 들어갑니다.
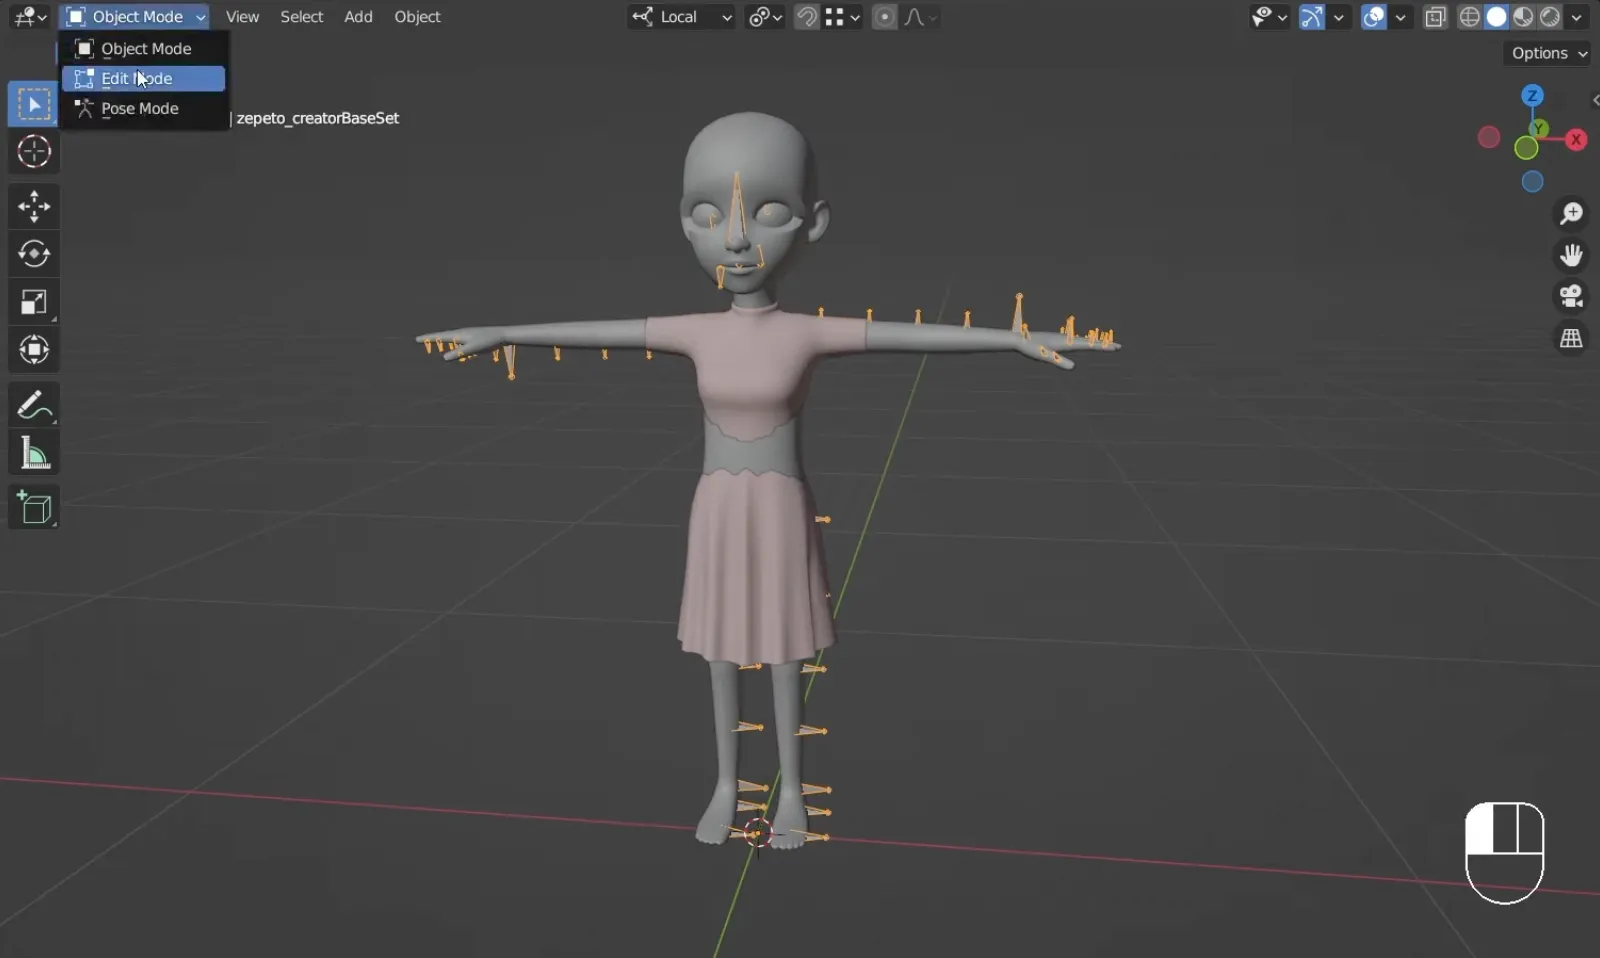
2. 와이어프레임 보기 모드로 전환하여 아이템에 사용 되지 않는 뼈는 삭제합니다.
fbx 파일로 내보내기 전에 내보내려는 3개의 개체가 서로 계층 구조를 갖고 있지 않은지 확인해야 합니다. 앞선 단계에서 마스크와 골격의 연결을 해제했지만 한번 더 확인하는 것이 좋습니다.
- 아이템 오브젝트를 선택하고 개체 속성에서 Relations를 찾아 Parent에 연결된 내용이 없는지를 확인합니다. 만약에 연결된 오브젝트가 있을 경우에는 Object > Parent > Clear and Keep Transformation를 눌러 연결을 해제합니다.
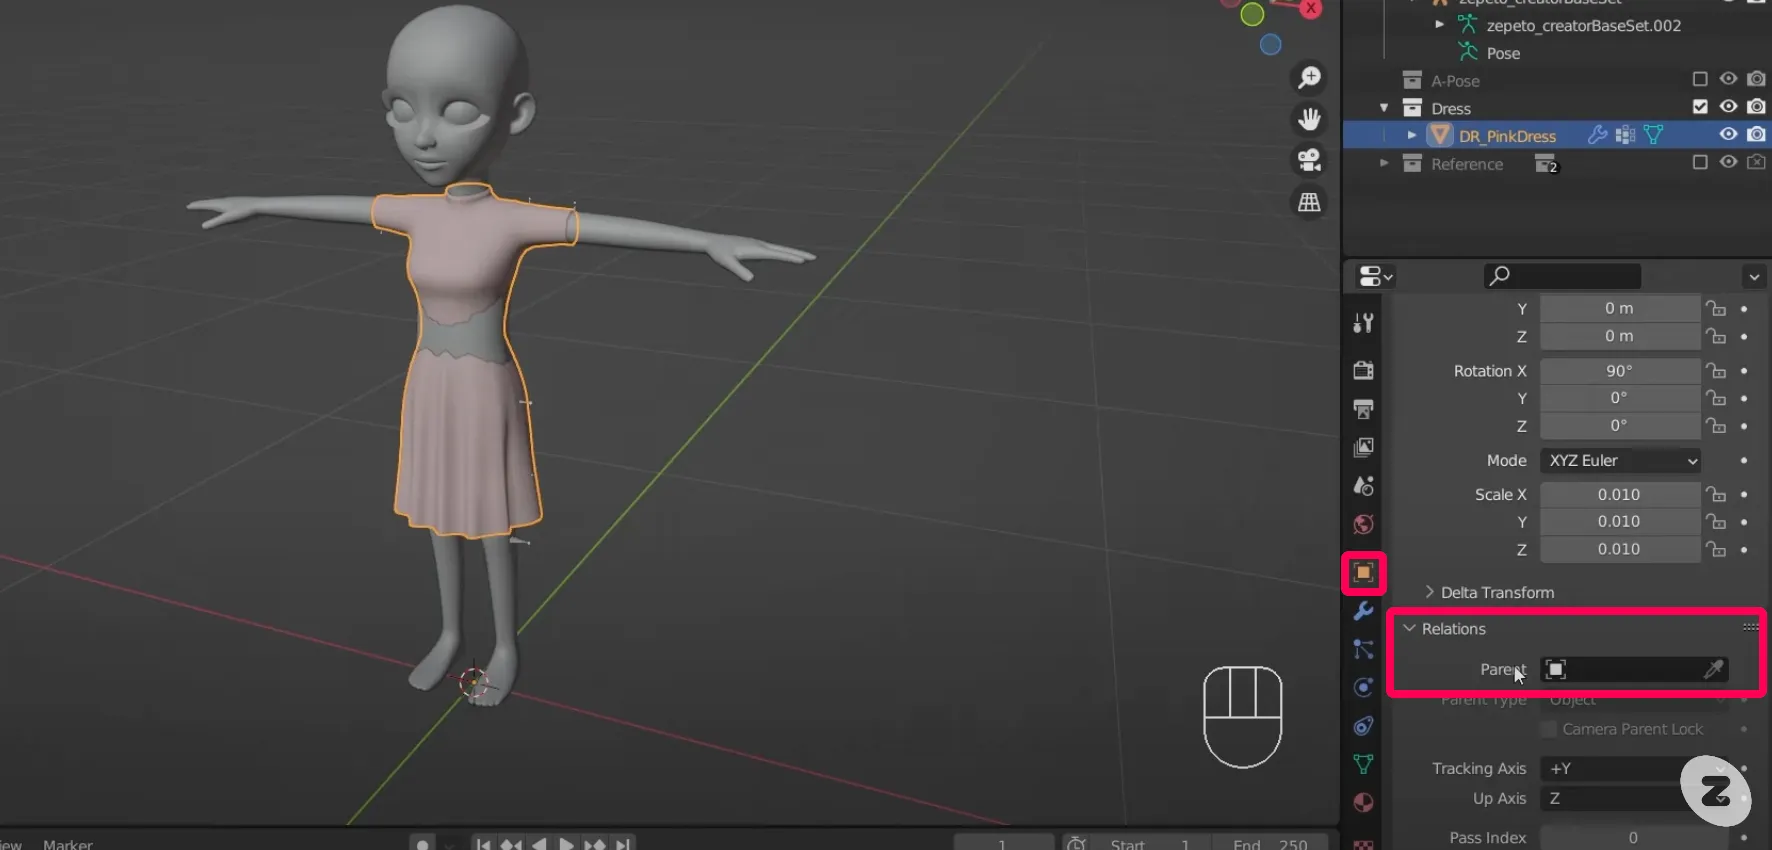
2. 마스크 오브젝트도 동일하게 진행합니다.
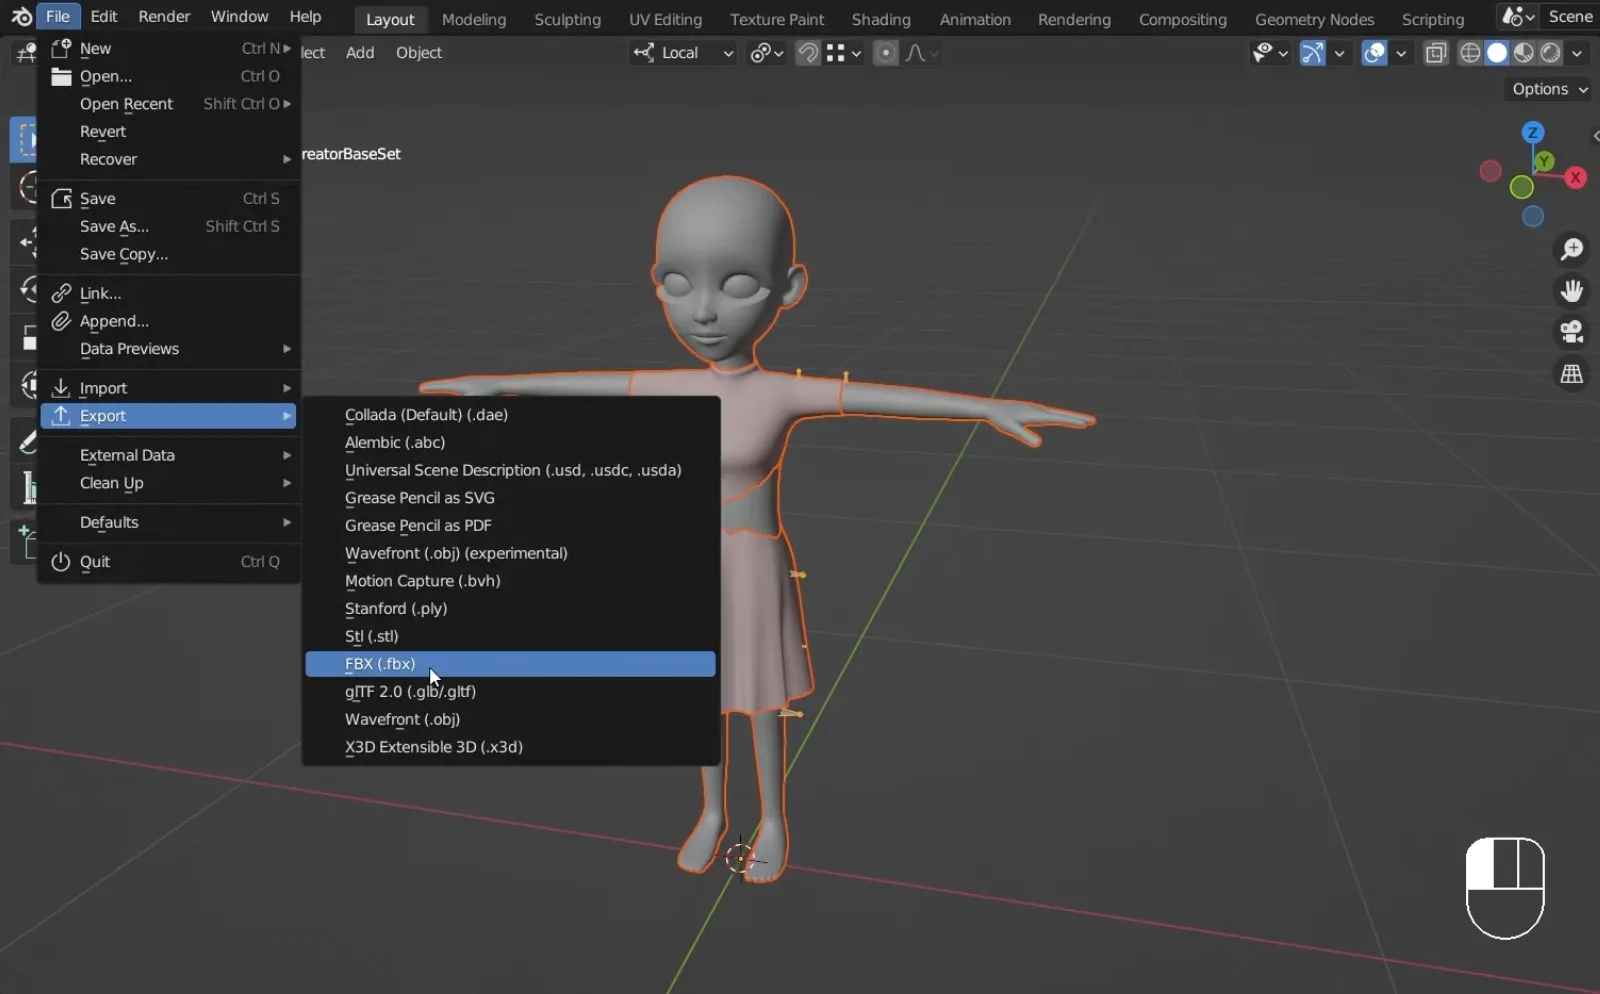
Unity에서 아이템을 불러오기 위해서는 아이템 오브젝트, 마스크 오브젝트, 골조 세 개체를 하나의 fbx 파일로 내보내기해야 합니다.
- 아이템 오브젝트, 마스크 오브젝트, 골조를 선택한 다음 File > Export > FBX를 선택합니다.
2. 팝업된 창에서 Selected Objects 체크 박스를 선택하여 선택된 개체만 추출되도록 합니다.
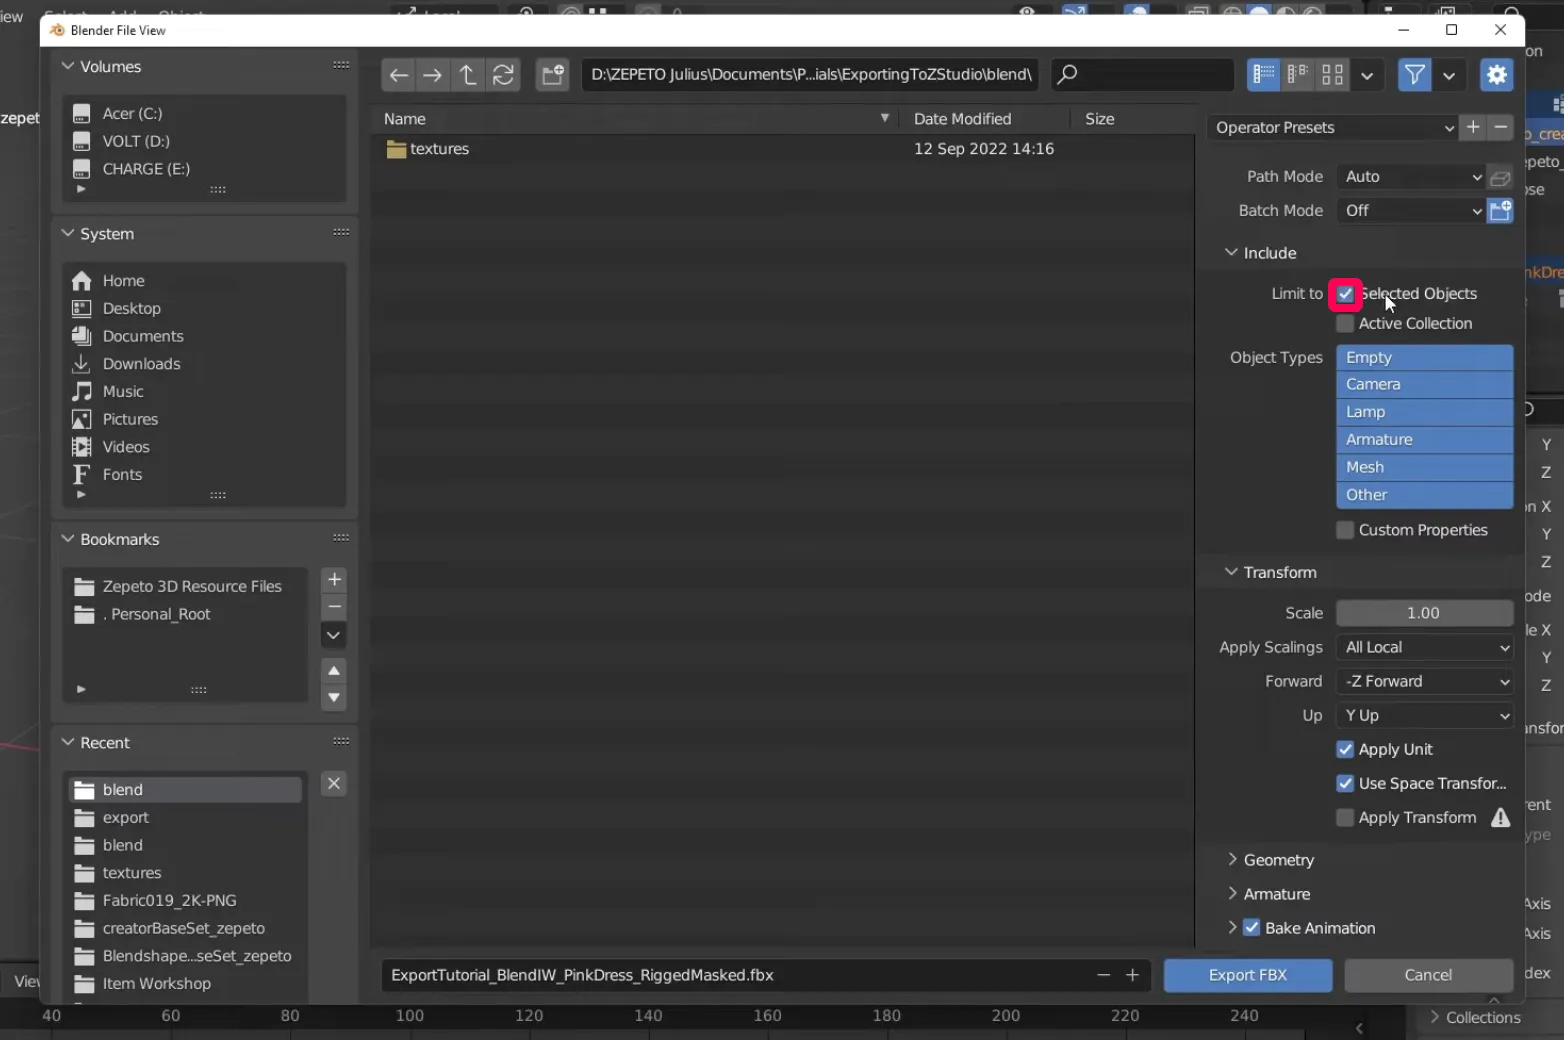
3. 하단의 Armature 탭에서 Add Leaf Bones와 Bake Animation 옵션을 해제합니다.
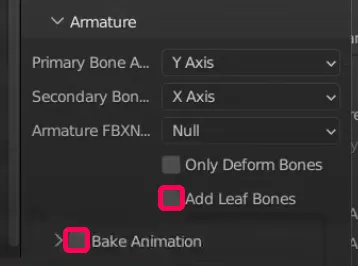
4. 이름을 지정한 후 Export 버튼을 누릅니다.
❗️ 주의사항 최신 Zepeto Unity Project 파일과 Unity 2020.3.9이 설치되어 있는지 확인합니다.
- Unity 허브를 열고 Open을 누릅니다.
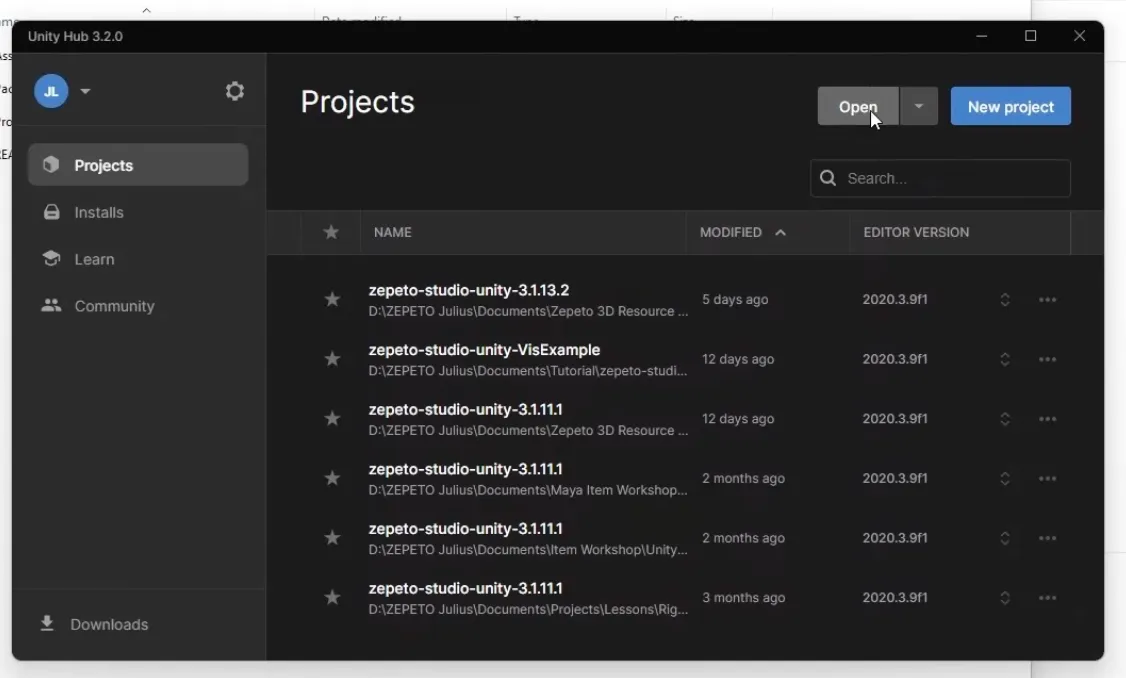
2. Zepeto Unity Project 파일을 열어줍니다. 이때 폴더를 선택해서 폴더에 포함된 파일 전체가 열리도록 합니다.
- Unity를 열어보면 가운데에는 씬 뷰가 있습니다. 여러 편집을 진행하는 공간입니다.
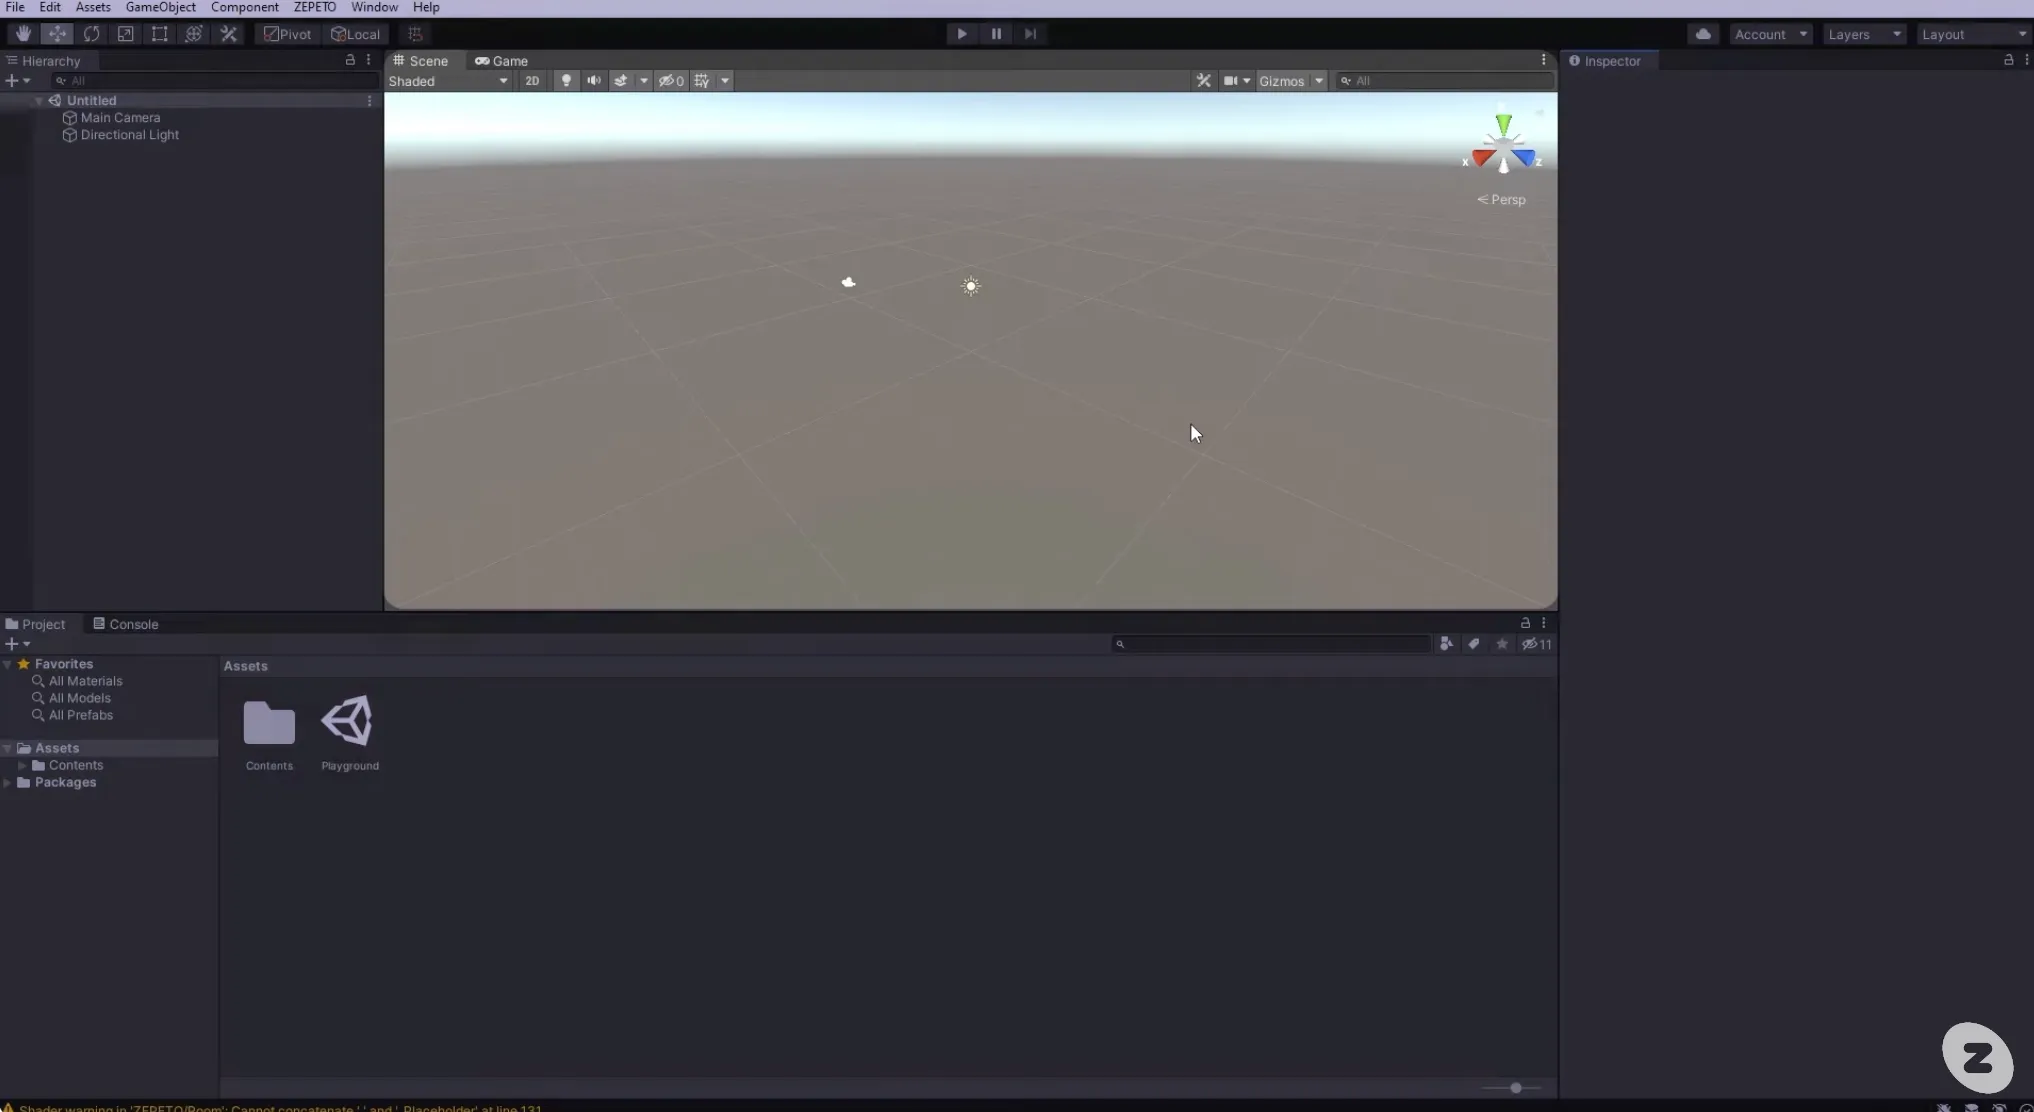
- 왼쪽에는 파일의 계층 구조를 볼 수 있습니다. 이곳에서 씬에 포함된 모든 개체를 확인할 수 있습니다.
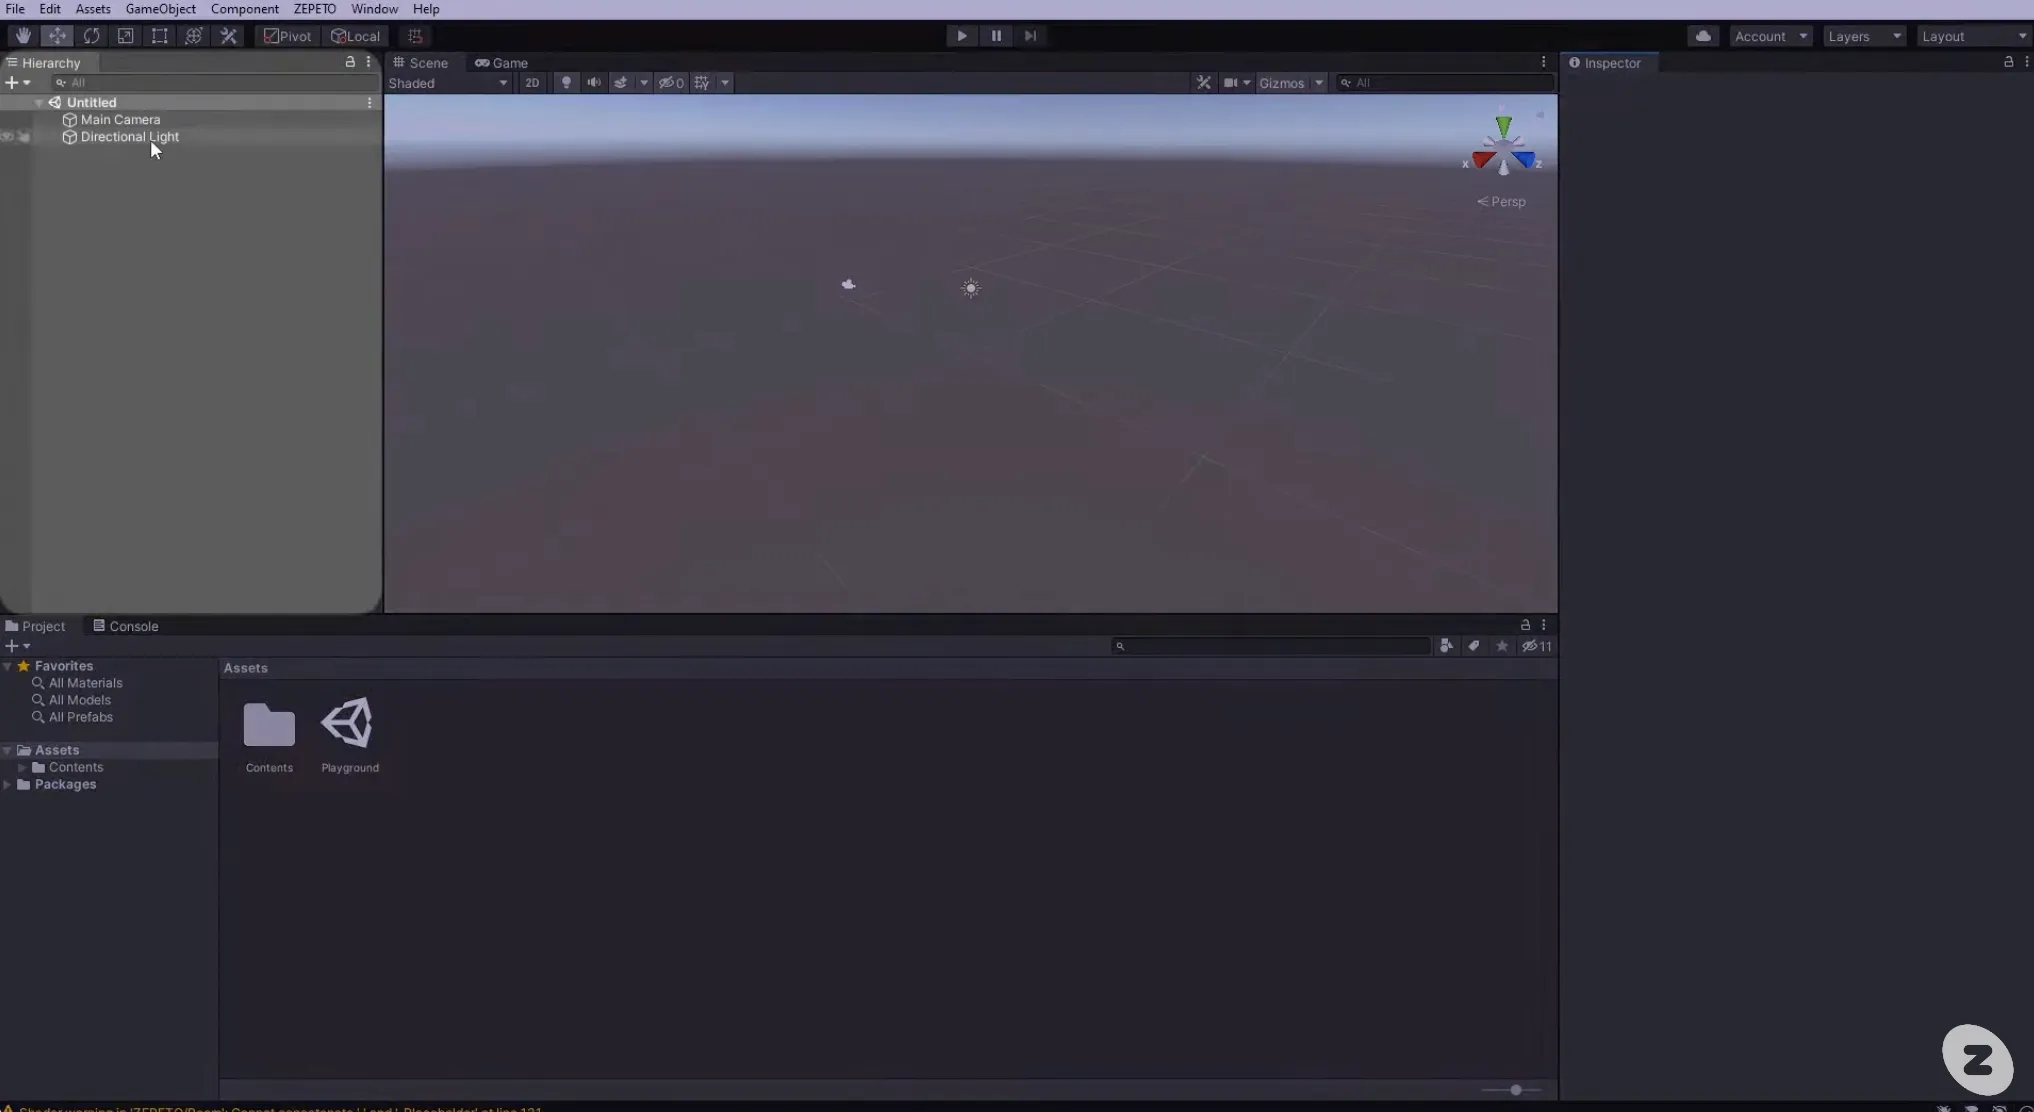
- 왼쪽 하단에는 프로젝트 도구 모음이 있습니다. 이곳에서 프로젝트 파일에 포함된 모든 개체를 확인할 수 있습니다.
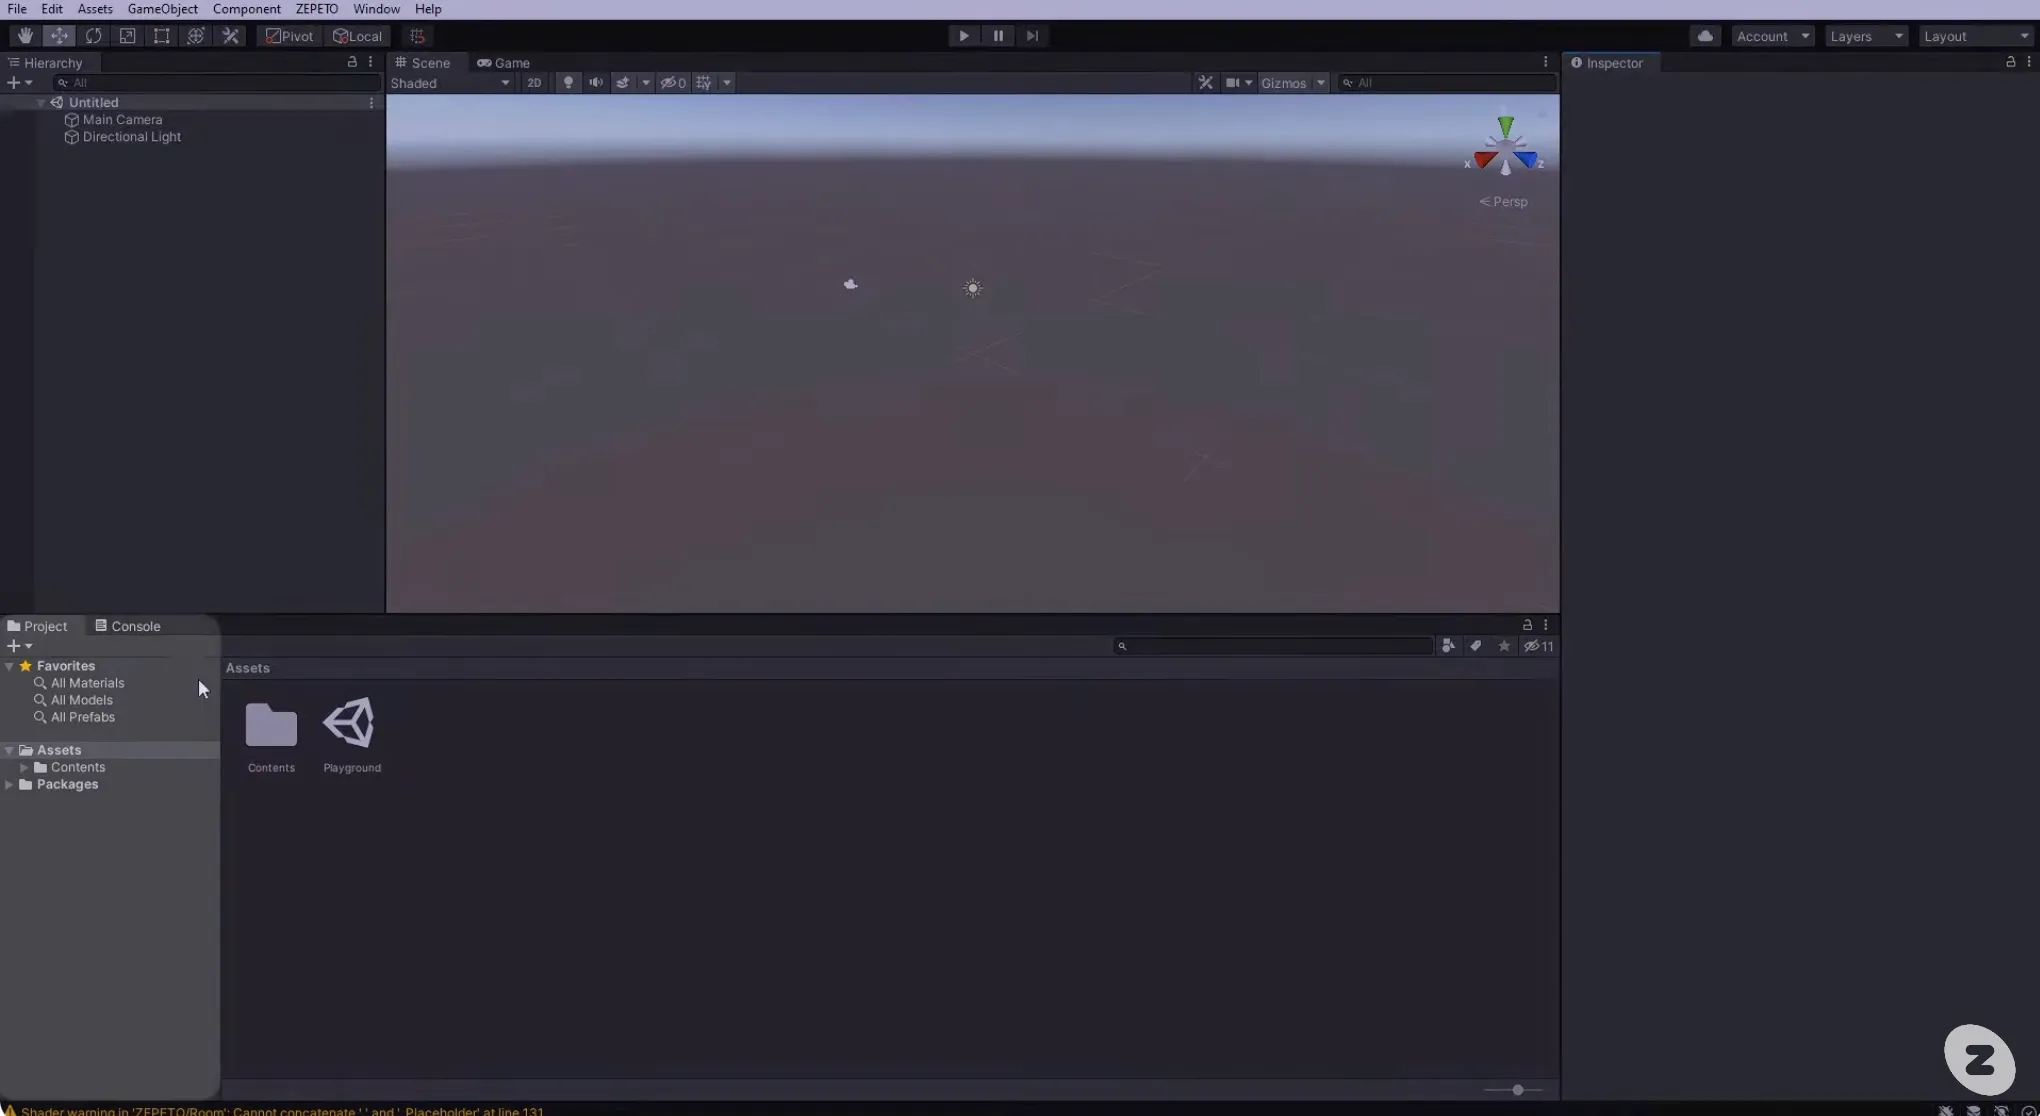
- 오른쪽에는 인스펙터(Inspector) 패널이 있습니다. 선택한 개체의 속성을 확인할 수 있습니다.
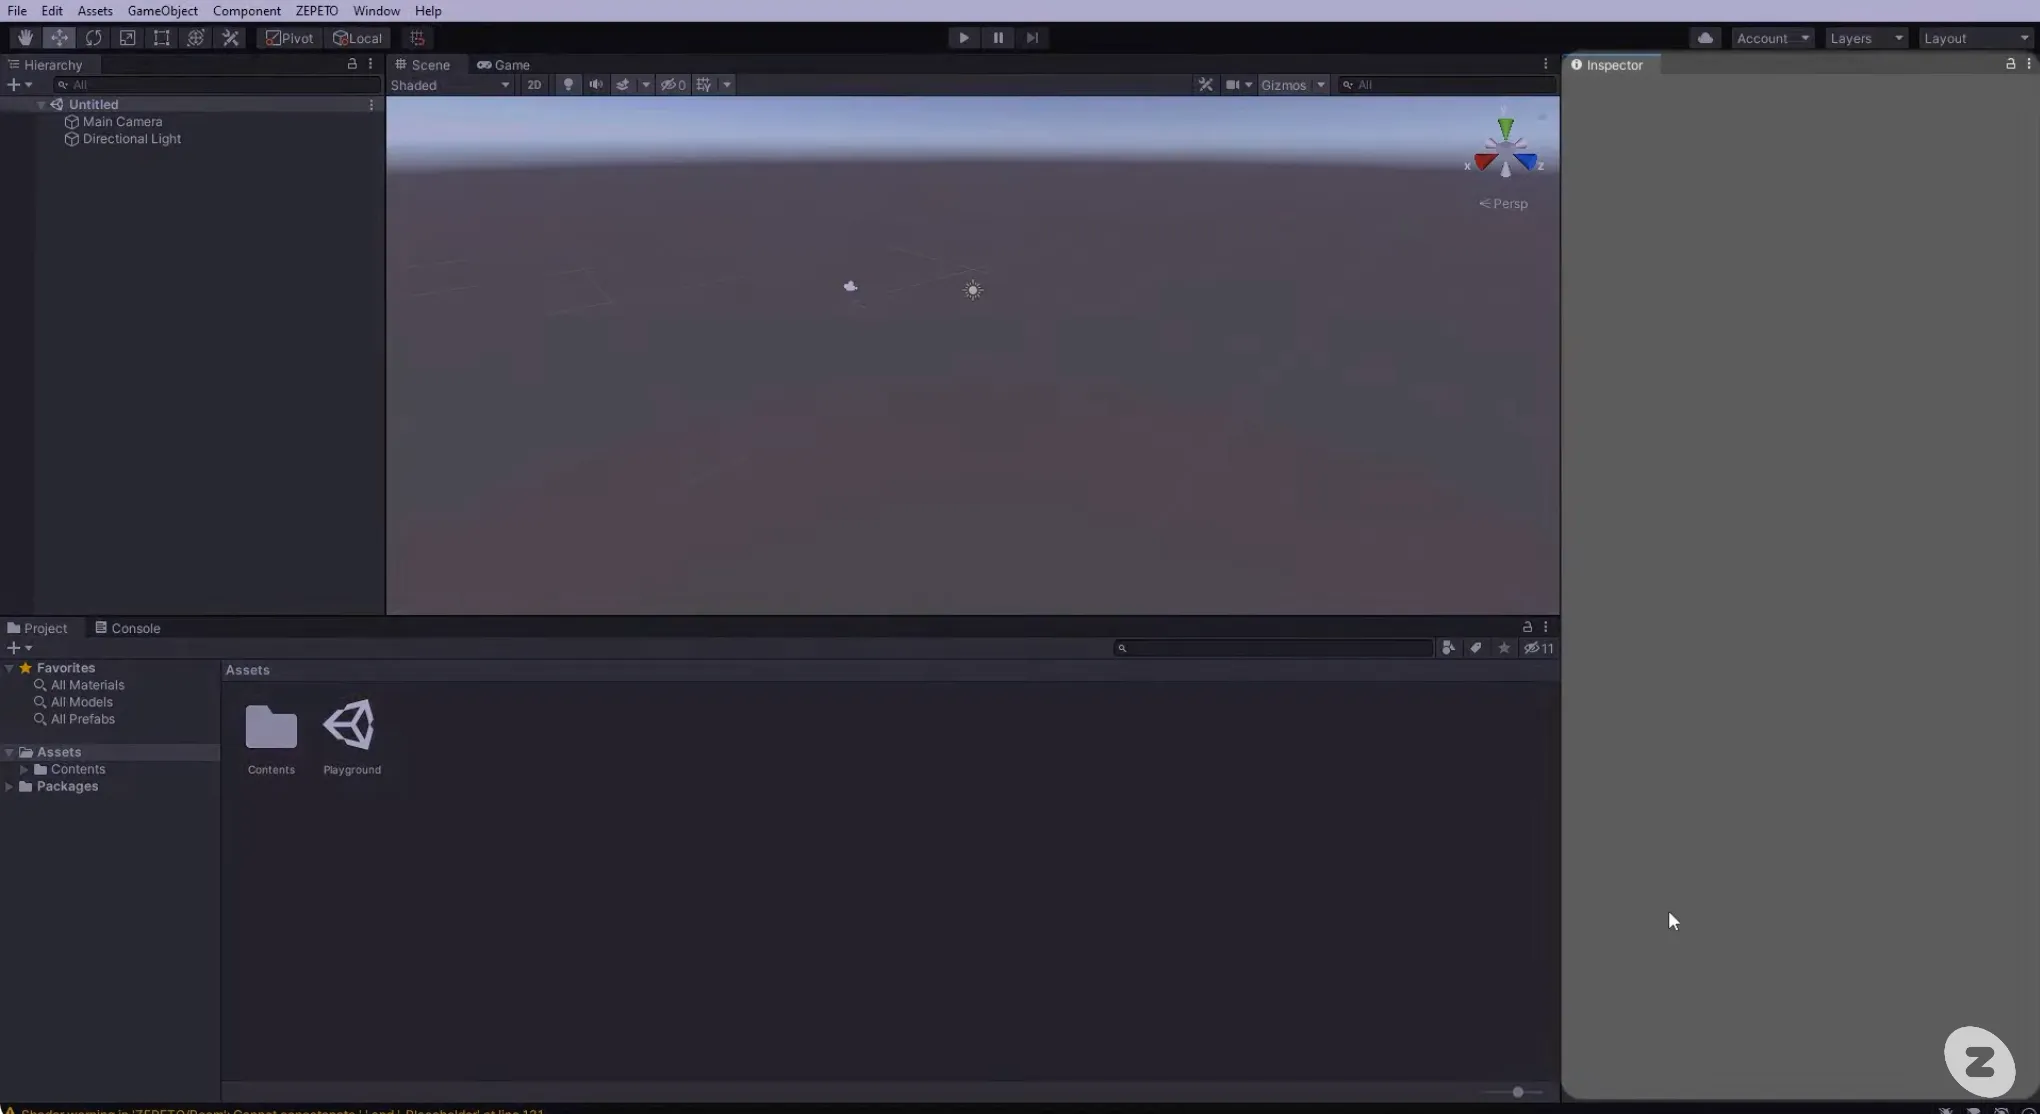
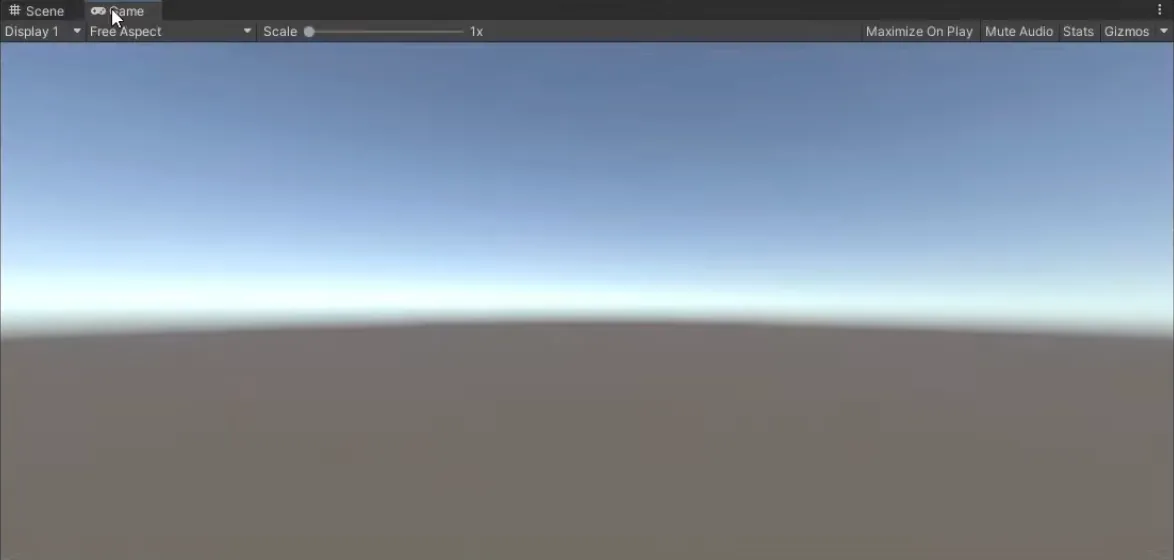
- 씬뷰 상단에는 Game 탭이 있습니다. 게임 탭에서는 게임 카메라에 맞춰 오브젝트를 확인하고 테스트할 수 있습니다.
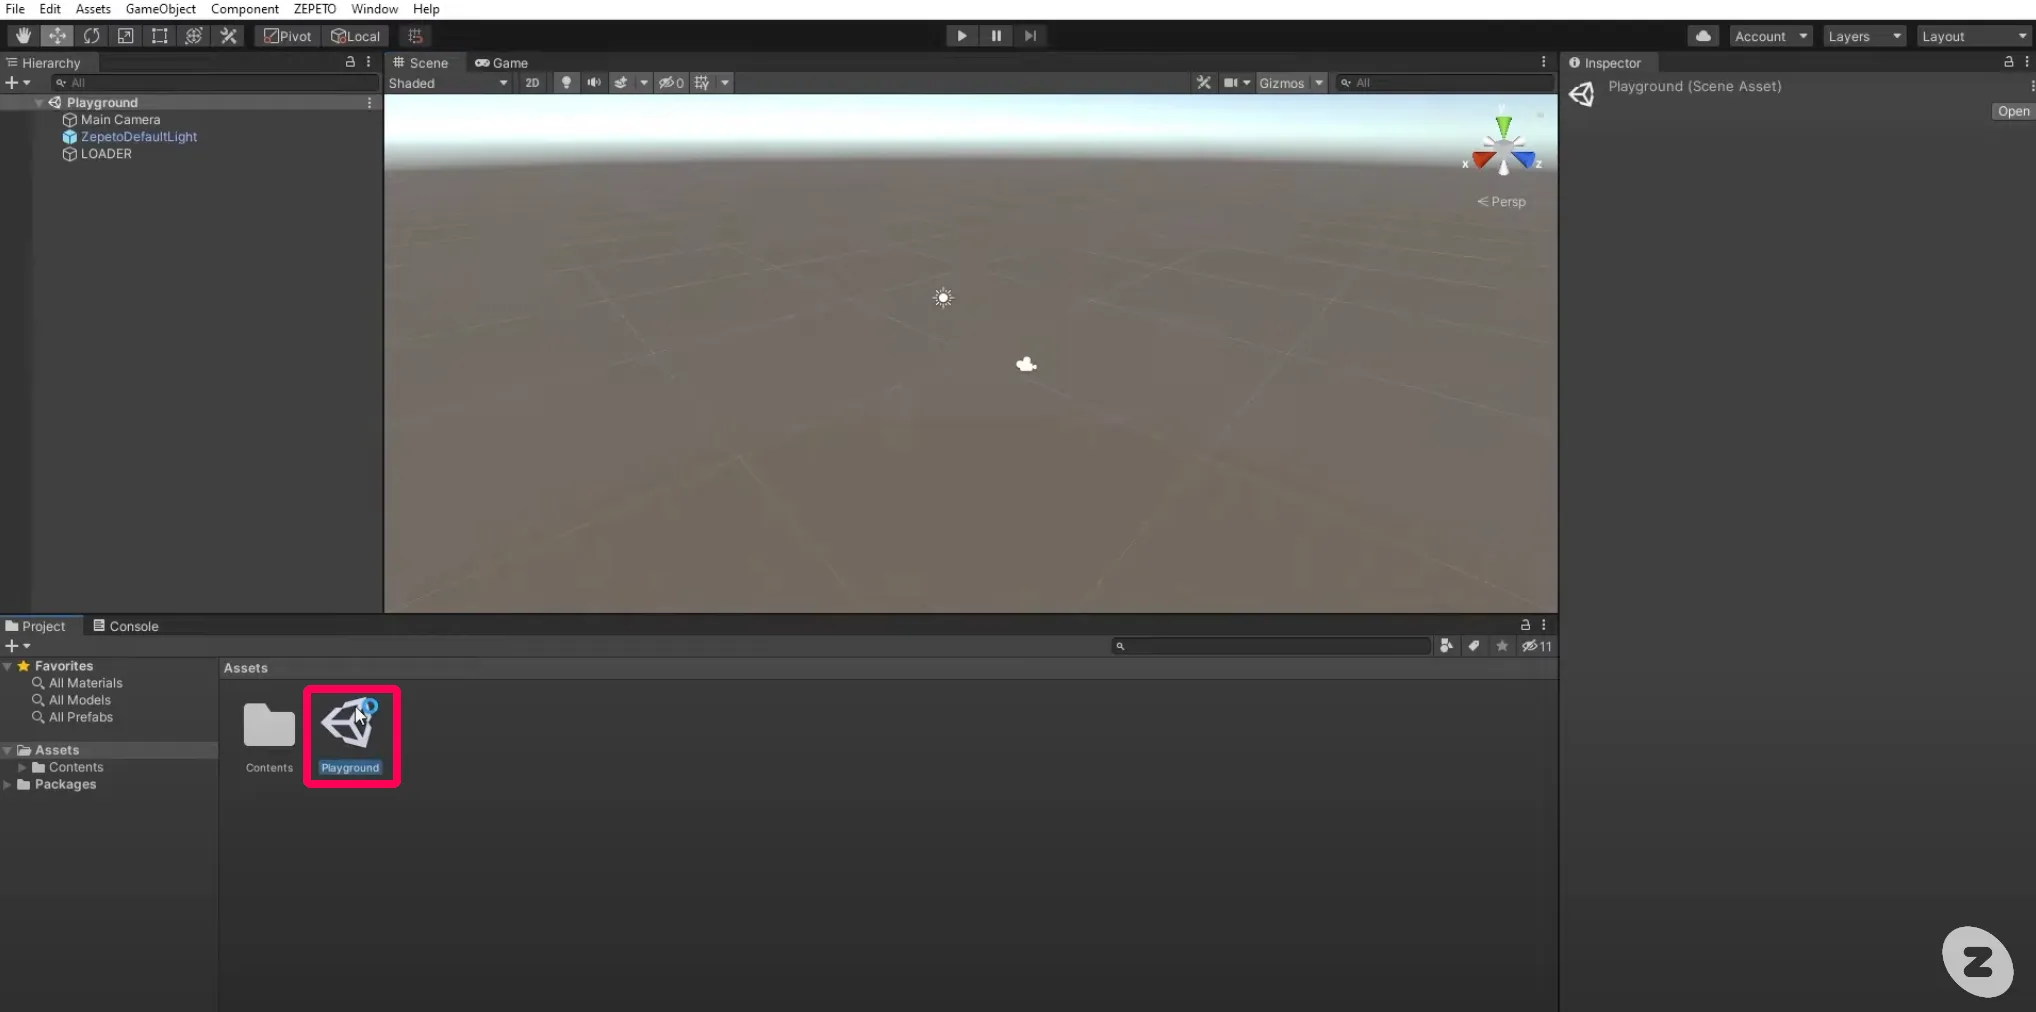
- 우선 아래 프로젝트 패널에서 Playground를 찾아 두번 클릭하여 열어줍니다.
2. 파일창을 열어 앞서 블렌더에서 추출한 fbx 파일을 찾아 프로젝트 패널로 드래그합니다.
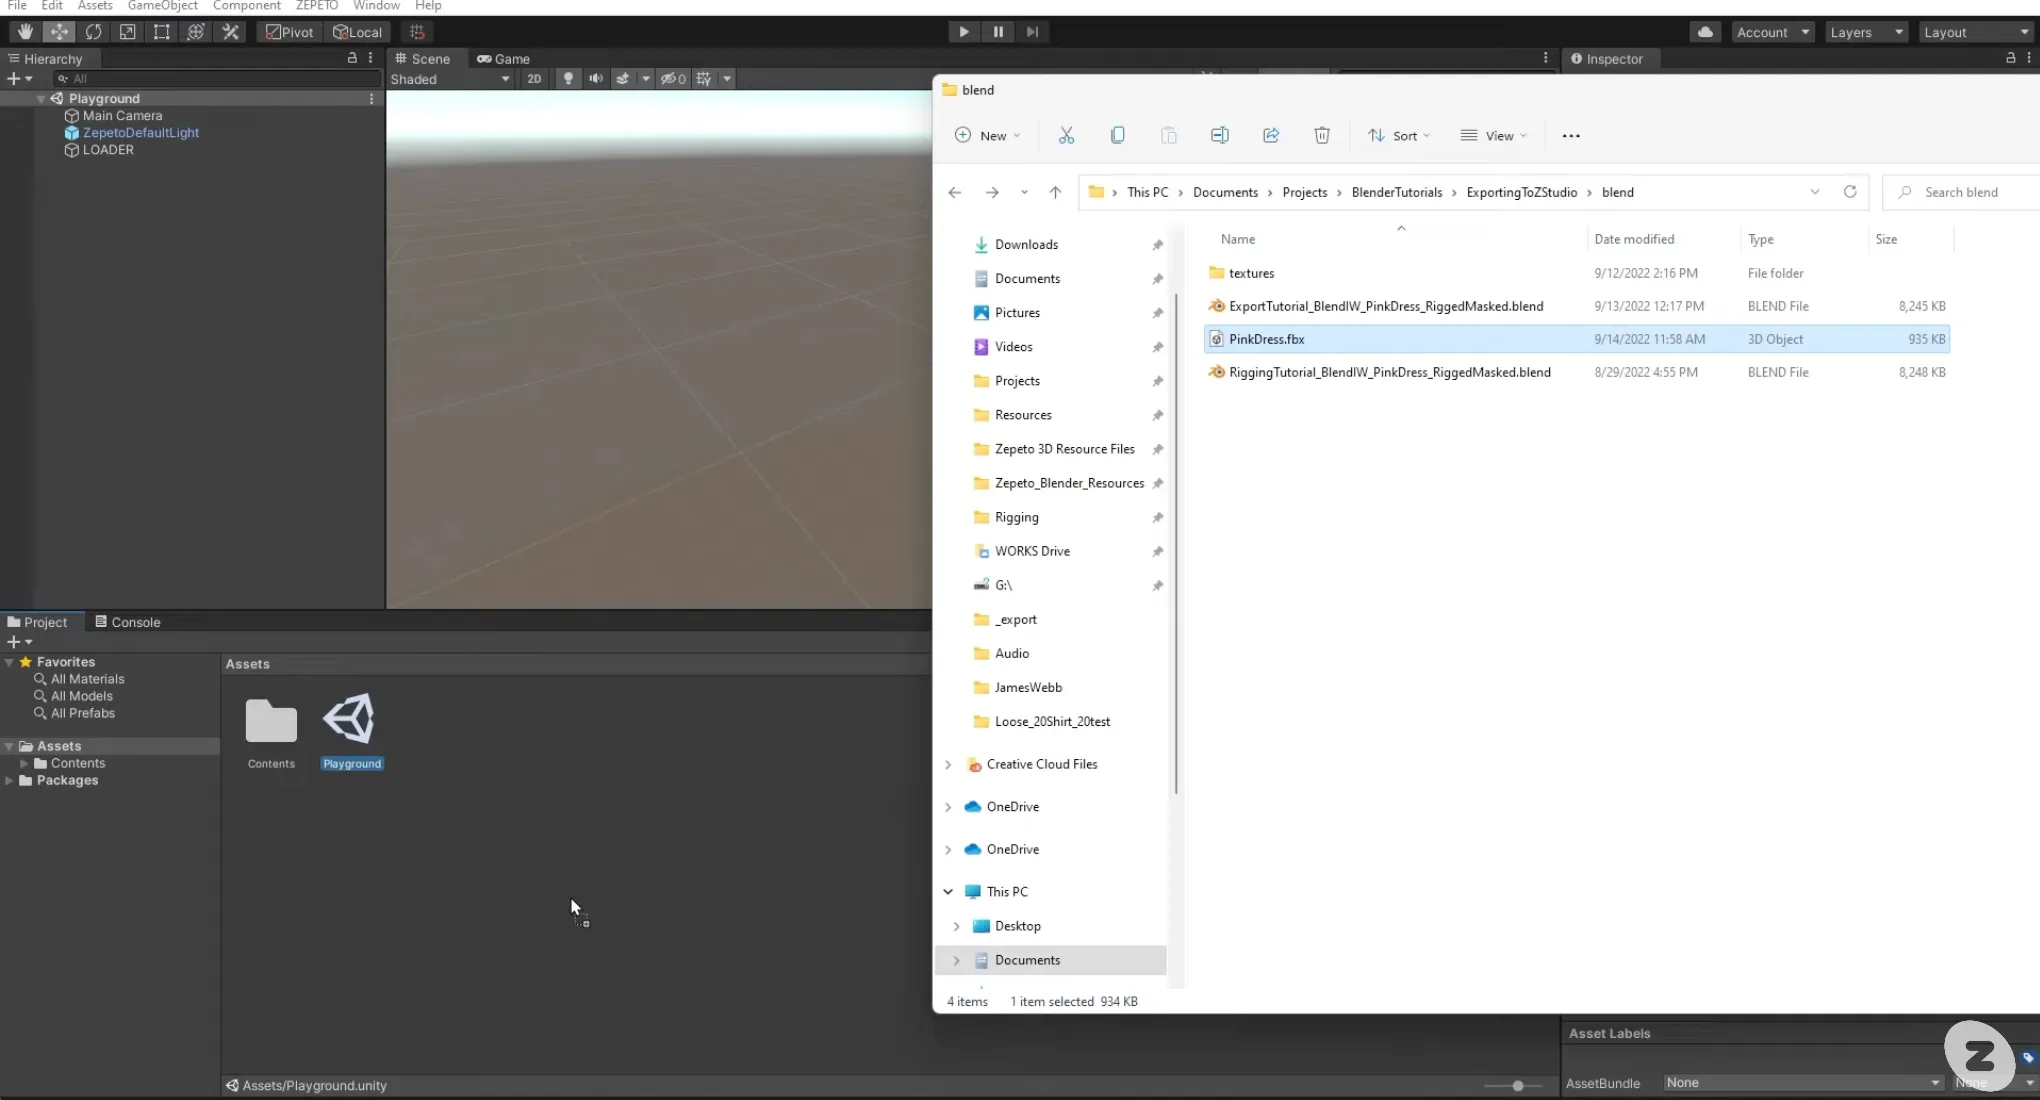
3. 프로젝트 패널 내 + > Folder 버튼을 눌러 새로운 폴더를 만듭니다. 폴더 이름을 아이템 이름으로 지정합니다.
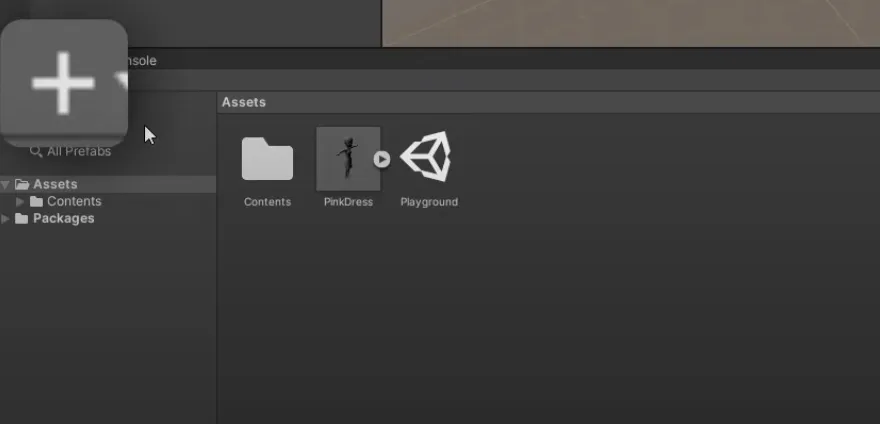
4. fbx 파일을 드래그하여 새로 만든 폴더에 넣고 폴더를 더블클릭하여 열어줍니다.
- fbx 파일을 가져올 때와 마찬가지로 앞서 작업한 텍스처 파일이 있는 폴더를 열어 Unity 내 프로젝트 패널로 드래그 합니다.
- 프로젝트 패널 내 + > Material 버튼을 눌러 새로운 머테리얼을 만듭니다. 머테리얼 이름을 아이템 이름으로 지정합니다.
- Unity 기본 머테리얼을 제페토에서 사용하는 쉐이더로 변경해야 합니다. 제페토의 아이템은 제페토 앱에서 잘 작동할 수 있도록 제작된 특수 쉐이더 입니다.
- 이 쉐이더는 ZEPETO라는 이름으로 제작되어 있으며 Zepeto Unity Project 파일에 포함되어 있습니다.
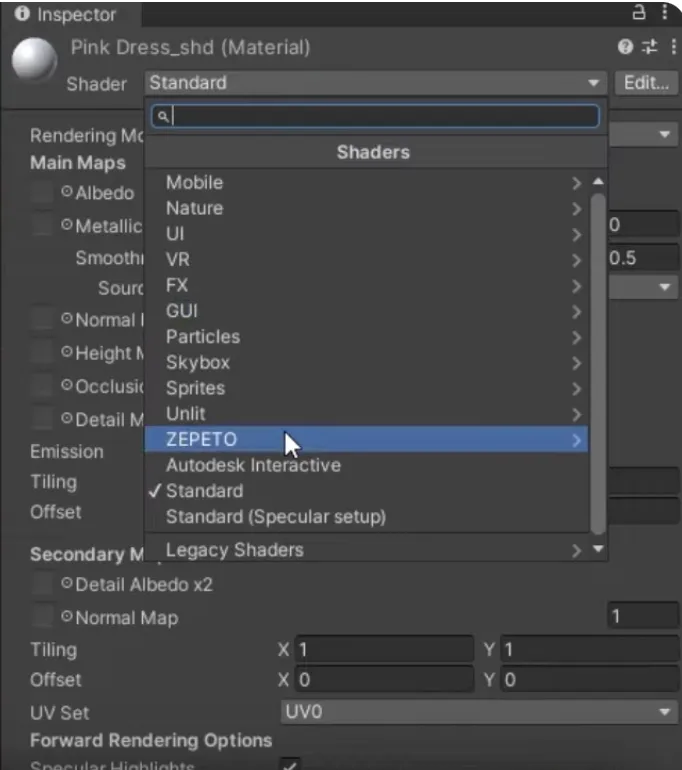
4. ZEPETO 쉐이더 그룹안에서 필요한 유형의 쉐이더를 선택합니다.
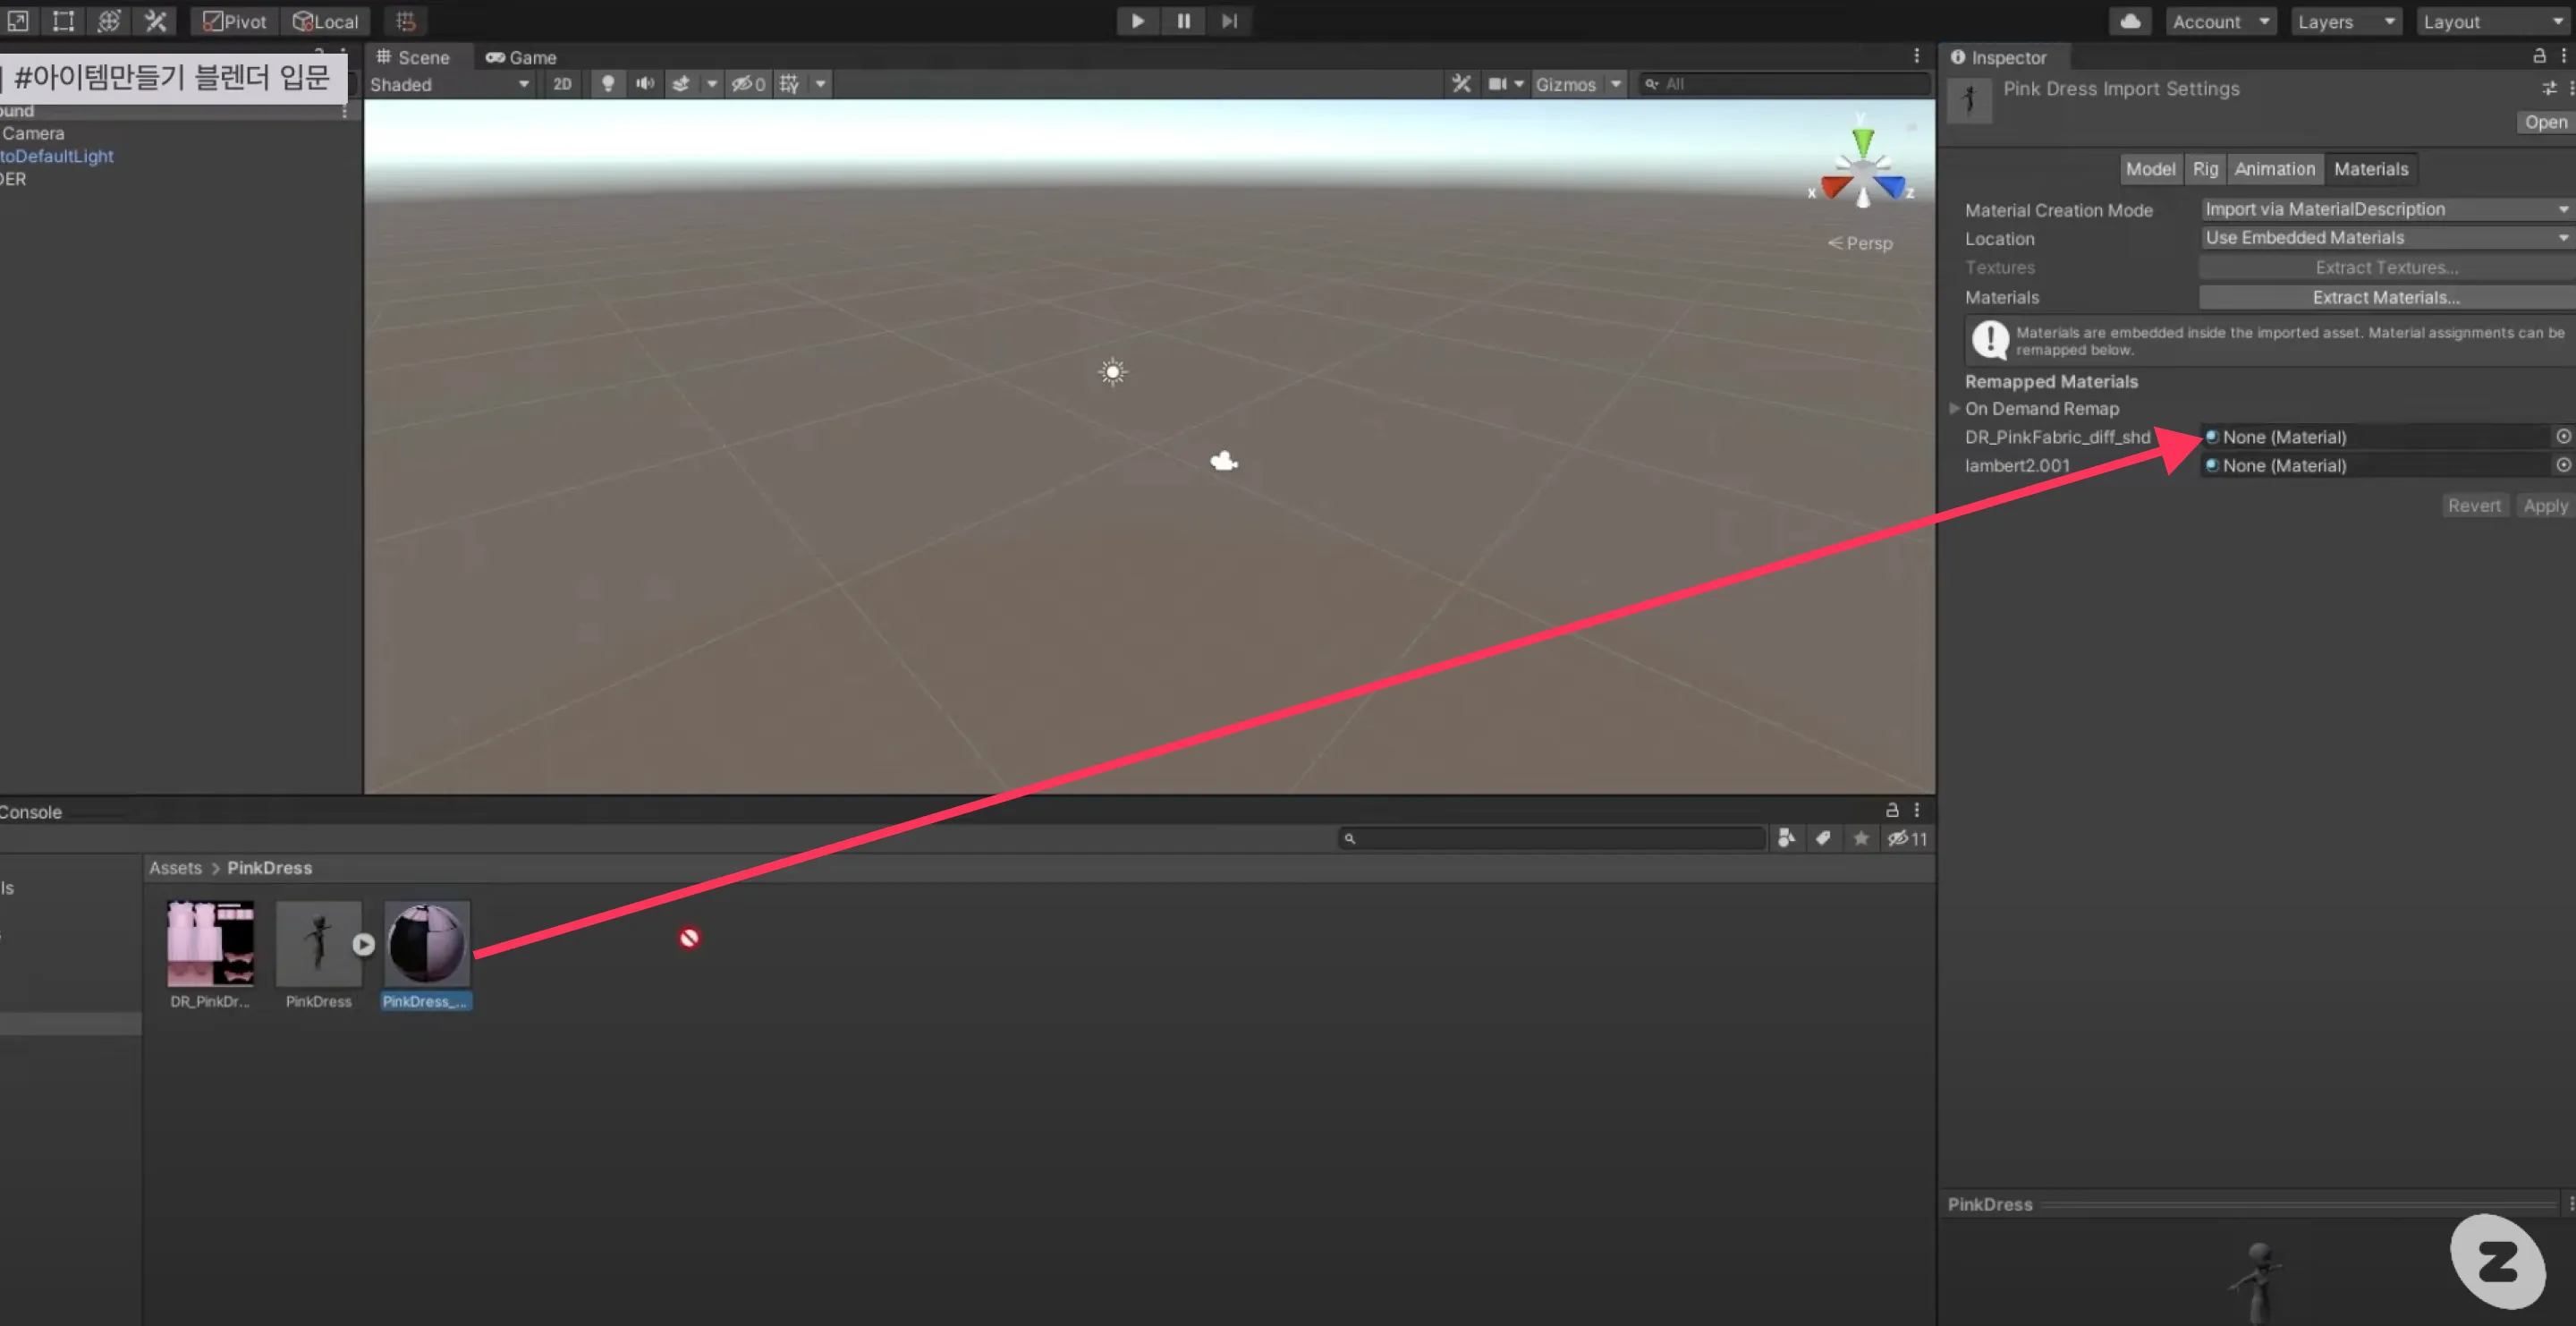
- 아이템을 선택하고 인스펙터 패널을 확인합니다. 프로젝트 패널에 있는 머테리얼을 드래그해서 연결시킨 뒤 하단 Apply를 눌러 적용합니다.
- fbx 파일을 선택하고 마우스 오른쪽 버튼을 누릅니다. Zepeto Studio > Convert to ZEPETO style을 선택합니다.
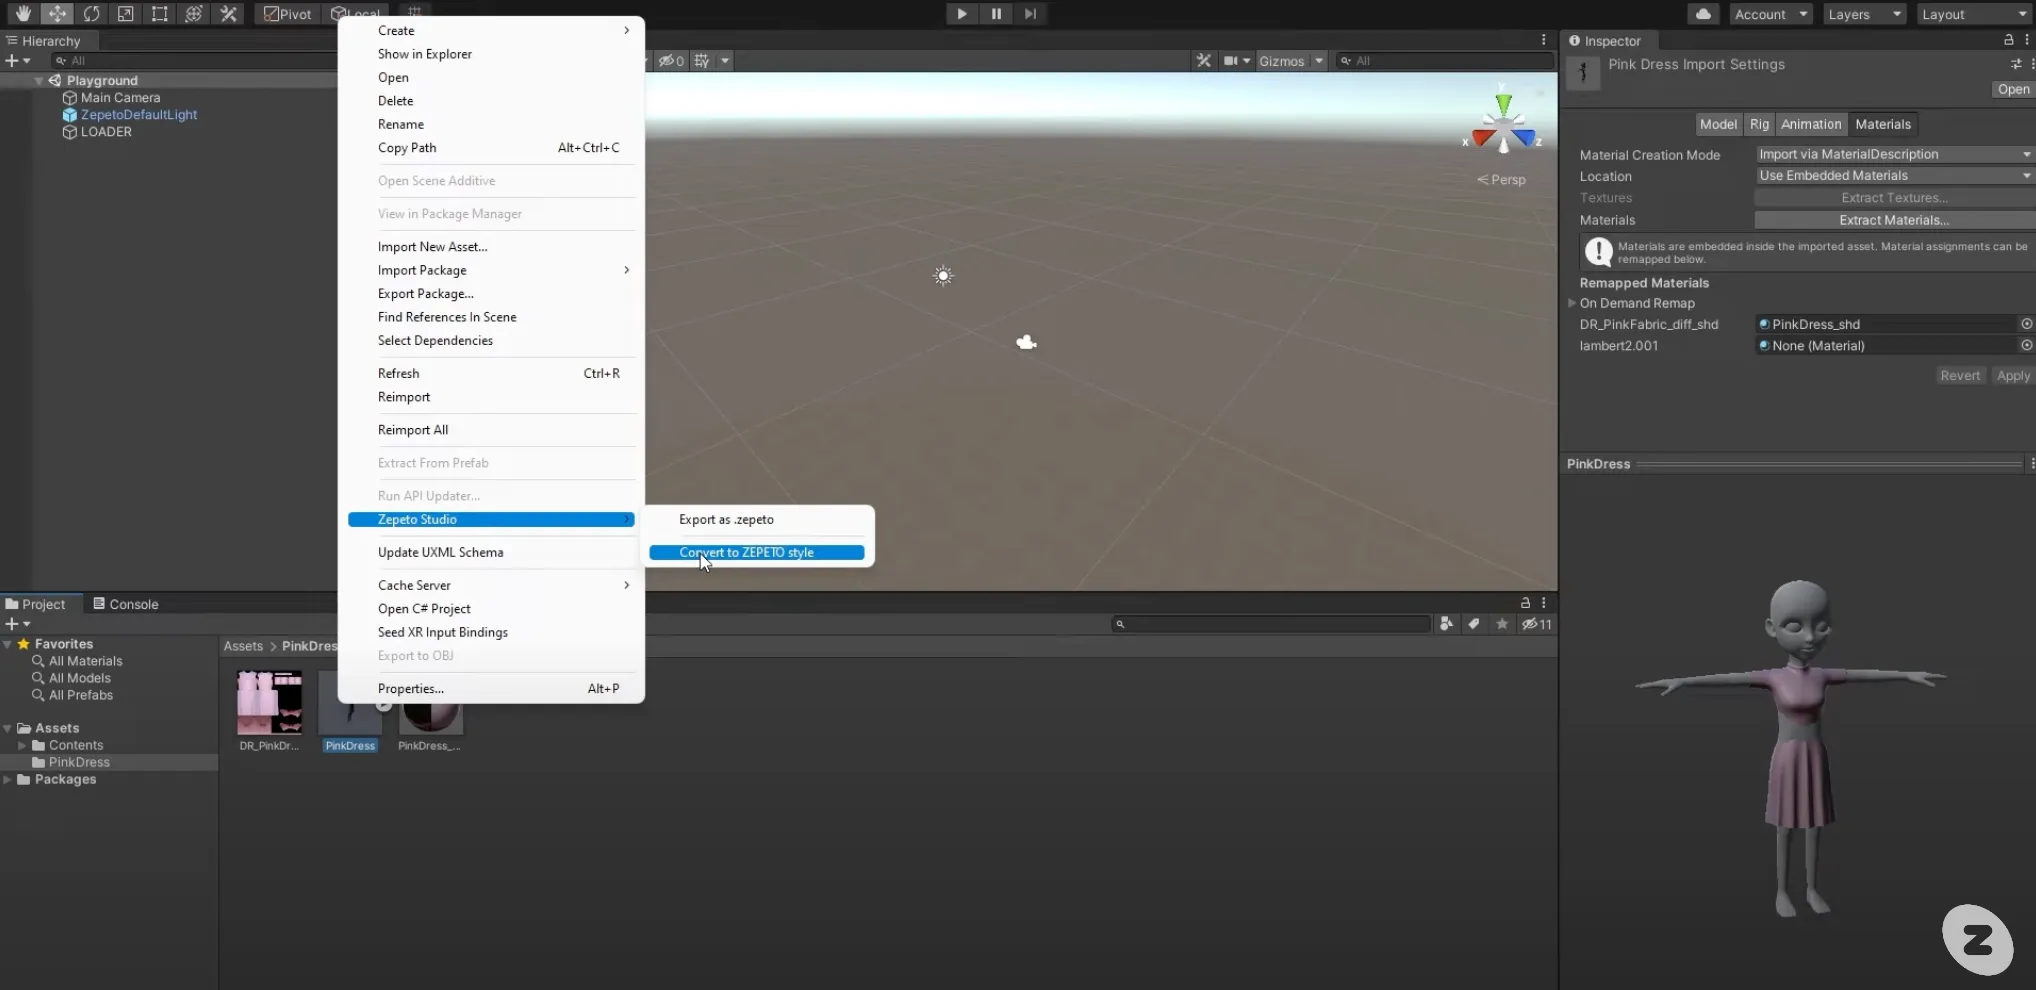
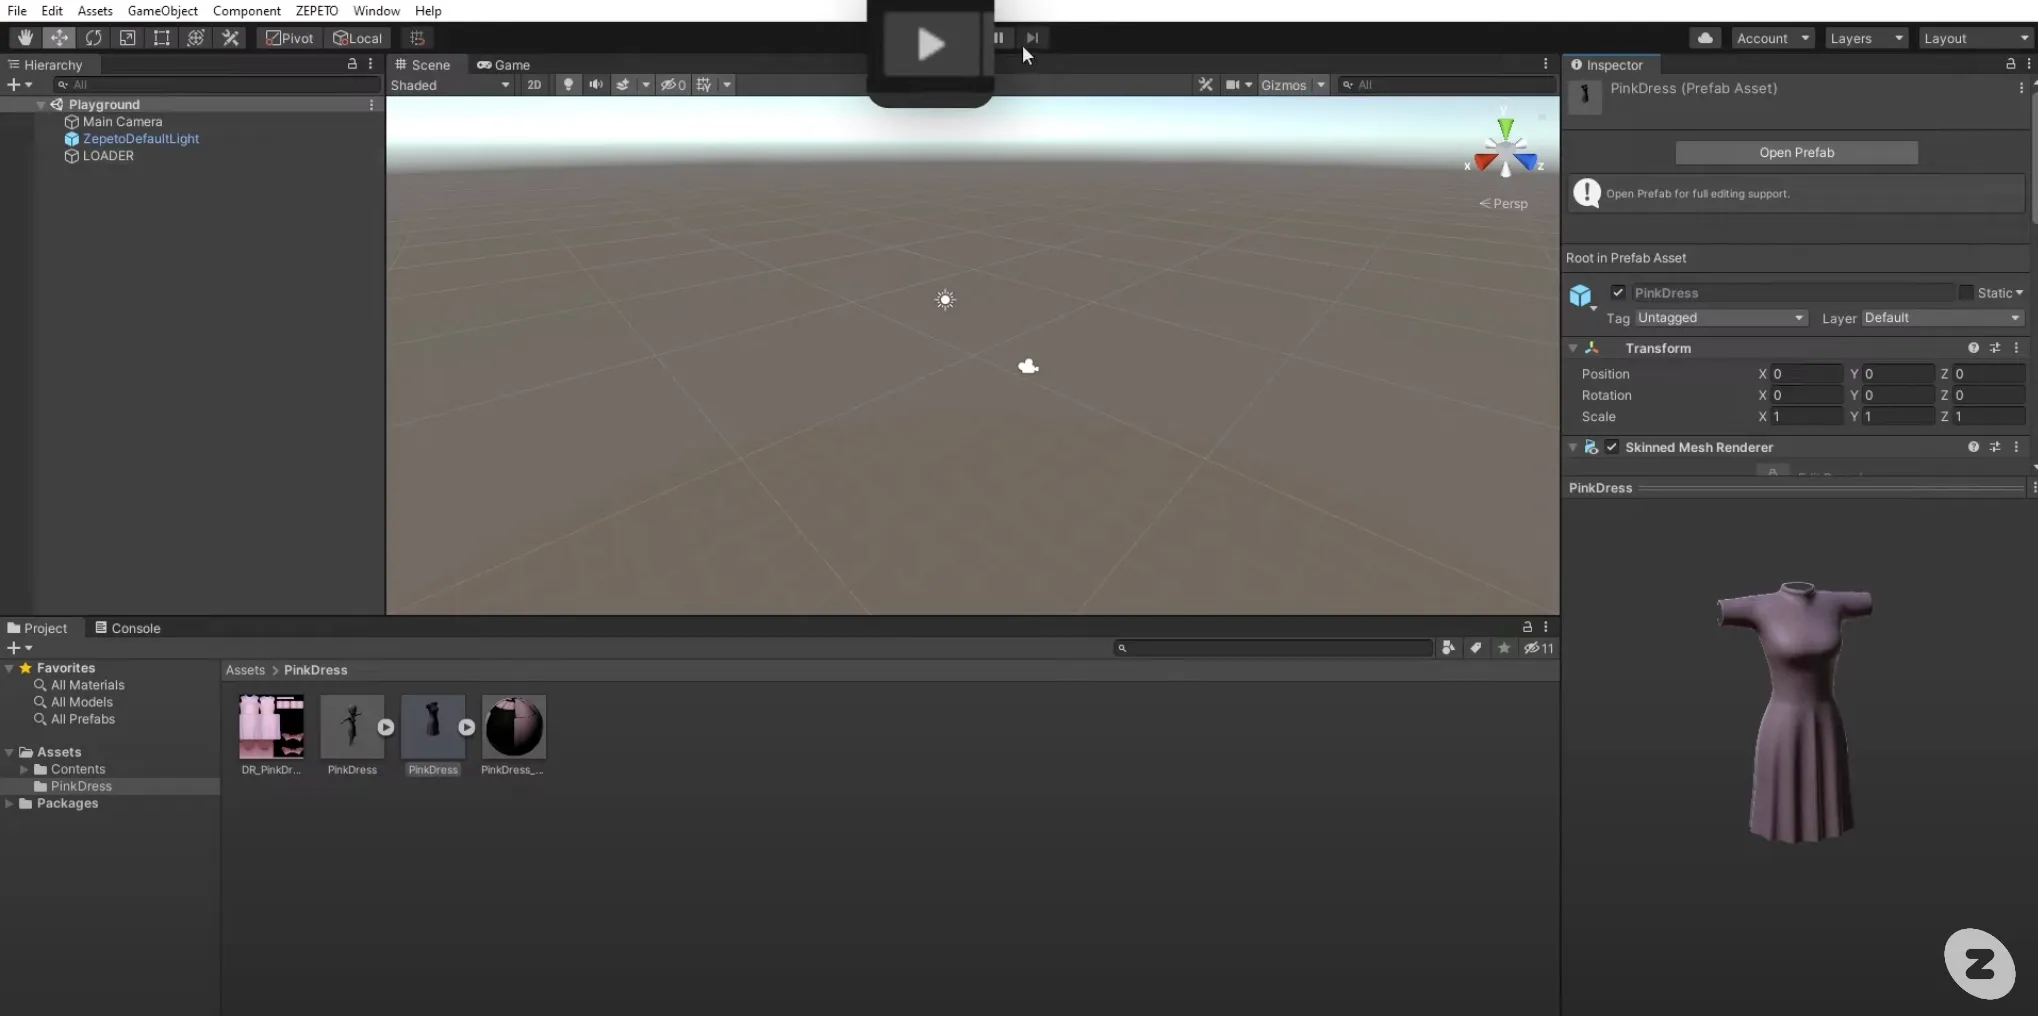
2. 1번 과정을 거치면 제작한 아이템과 동일한 파일이 생성됩니다. Unity에서는 이것을 Prefab이라고 부릅니다.
❗️ 주의사항 Prefab이 생성되지 않으면 Unity에서 내보내기 한 아이템에 문제가 발생할 수 있습니다. 만약 아이템 이름이 mask인 경우에도 문제가 발생할 수 있으니 이전 단계에서 이름을 확인하고 변경해야 합니다.
아이템 Prefab이 생성되고 나면 아이템을 테스트할 수 있습니다.
- Unity에서 Playground 가 열린 상태에서 상단의 재생 버튼을 누릅니다.
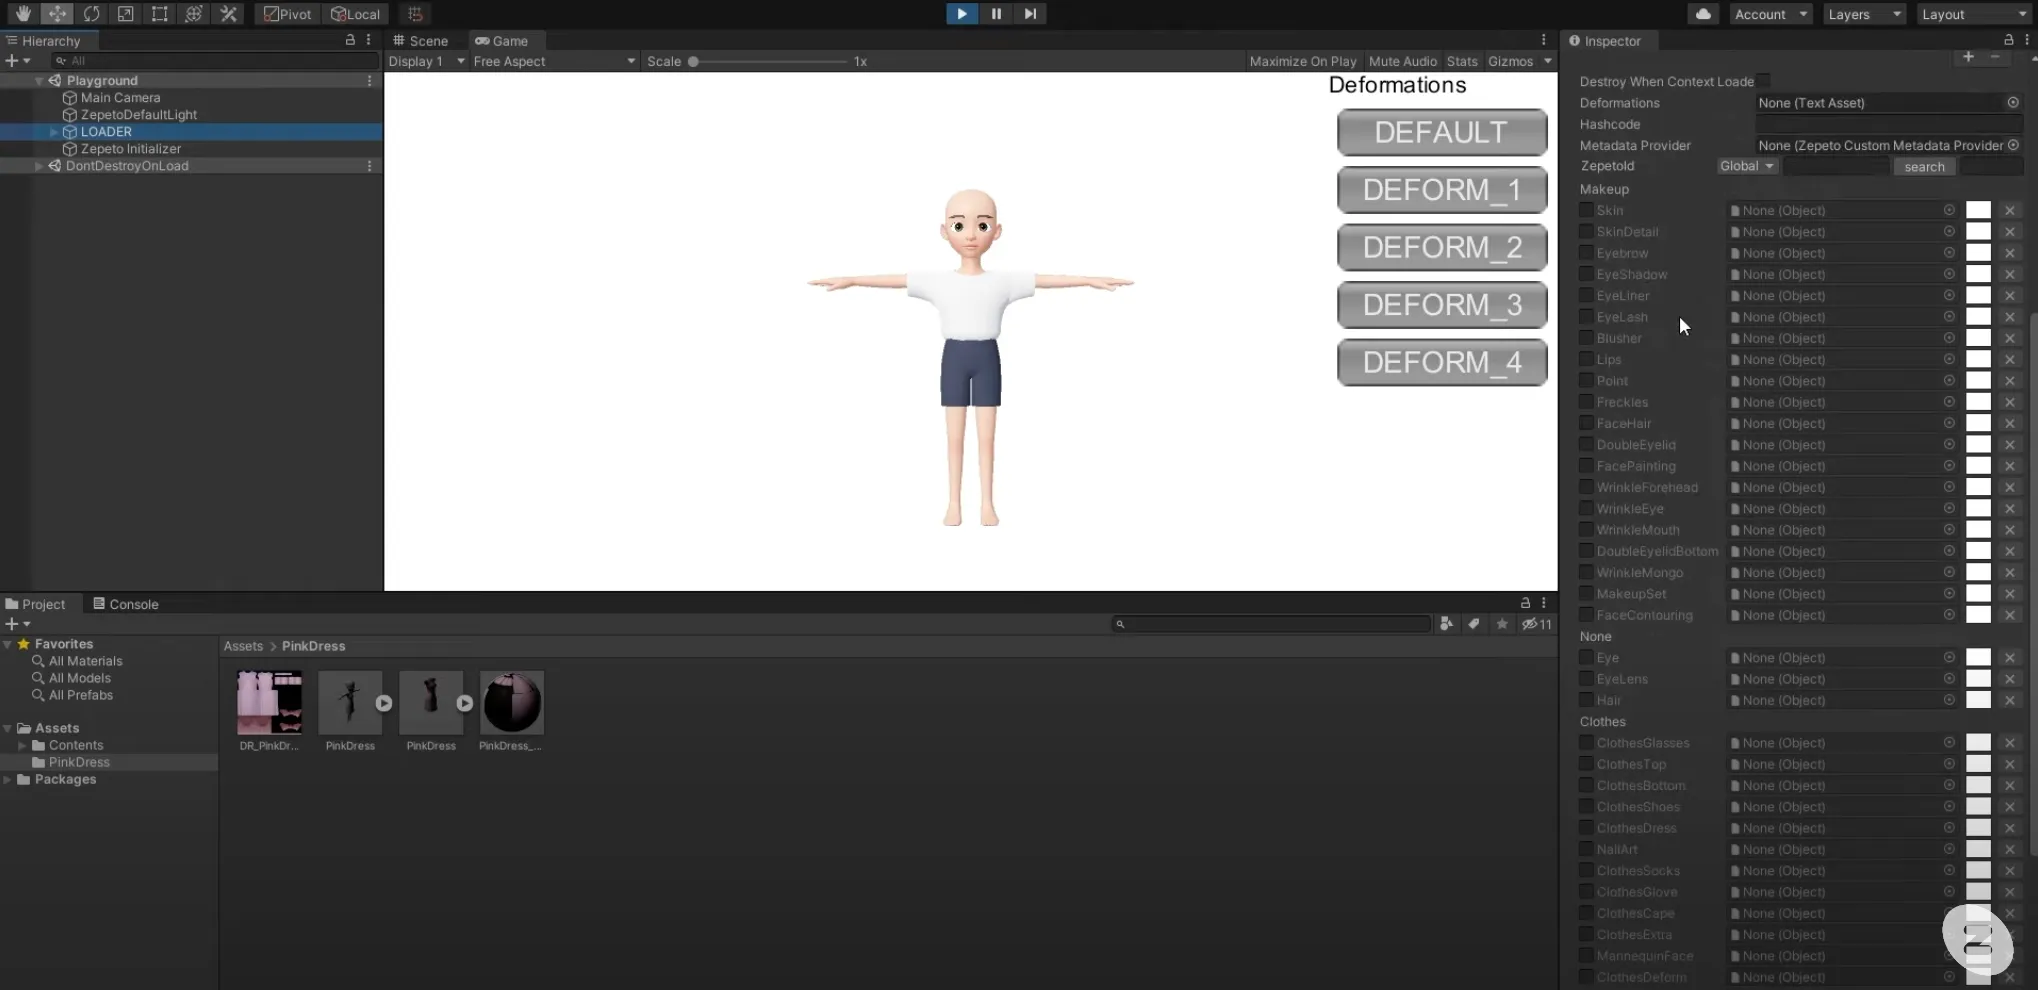
2. 화면이 전환되고 중앙에 제페토 아바타가 있는 것을 볼 수 있습니다. 우측의 계층 구조 패널에서 Loader를 선택하면 인스펙터 패널에 제페토에서 제공하는 다양한 아이템 카테고리 목록을 확인할 수 있습니다. 제작한 아이템의 카테고리를 선택하고 체크합니다.
3. 하단 프로젝트 패널에서 prefab을 드래그하여 인스펙터 패널의 카테고리 옆 박스에 끌어다 놓습니다.
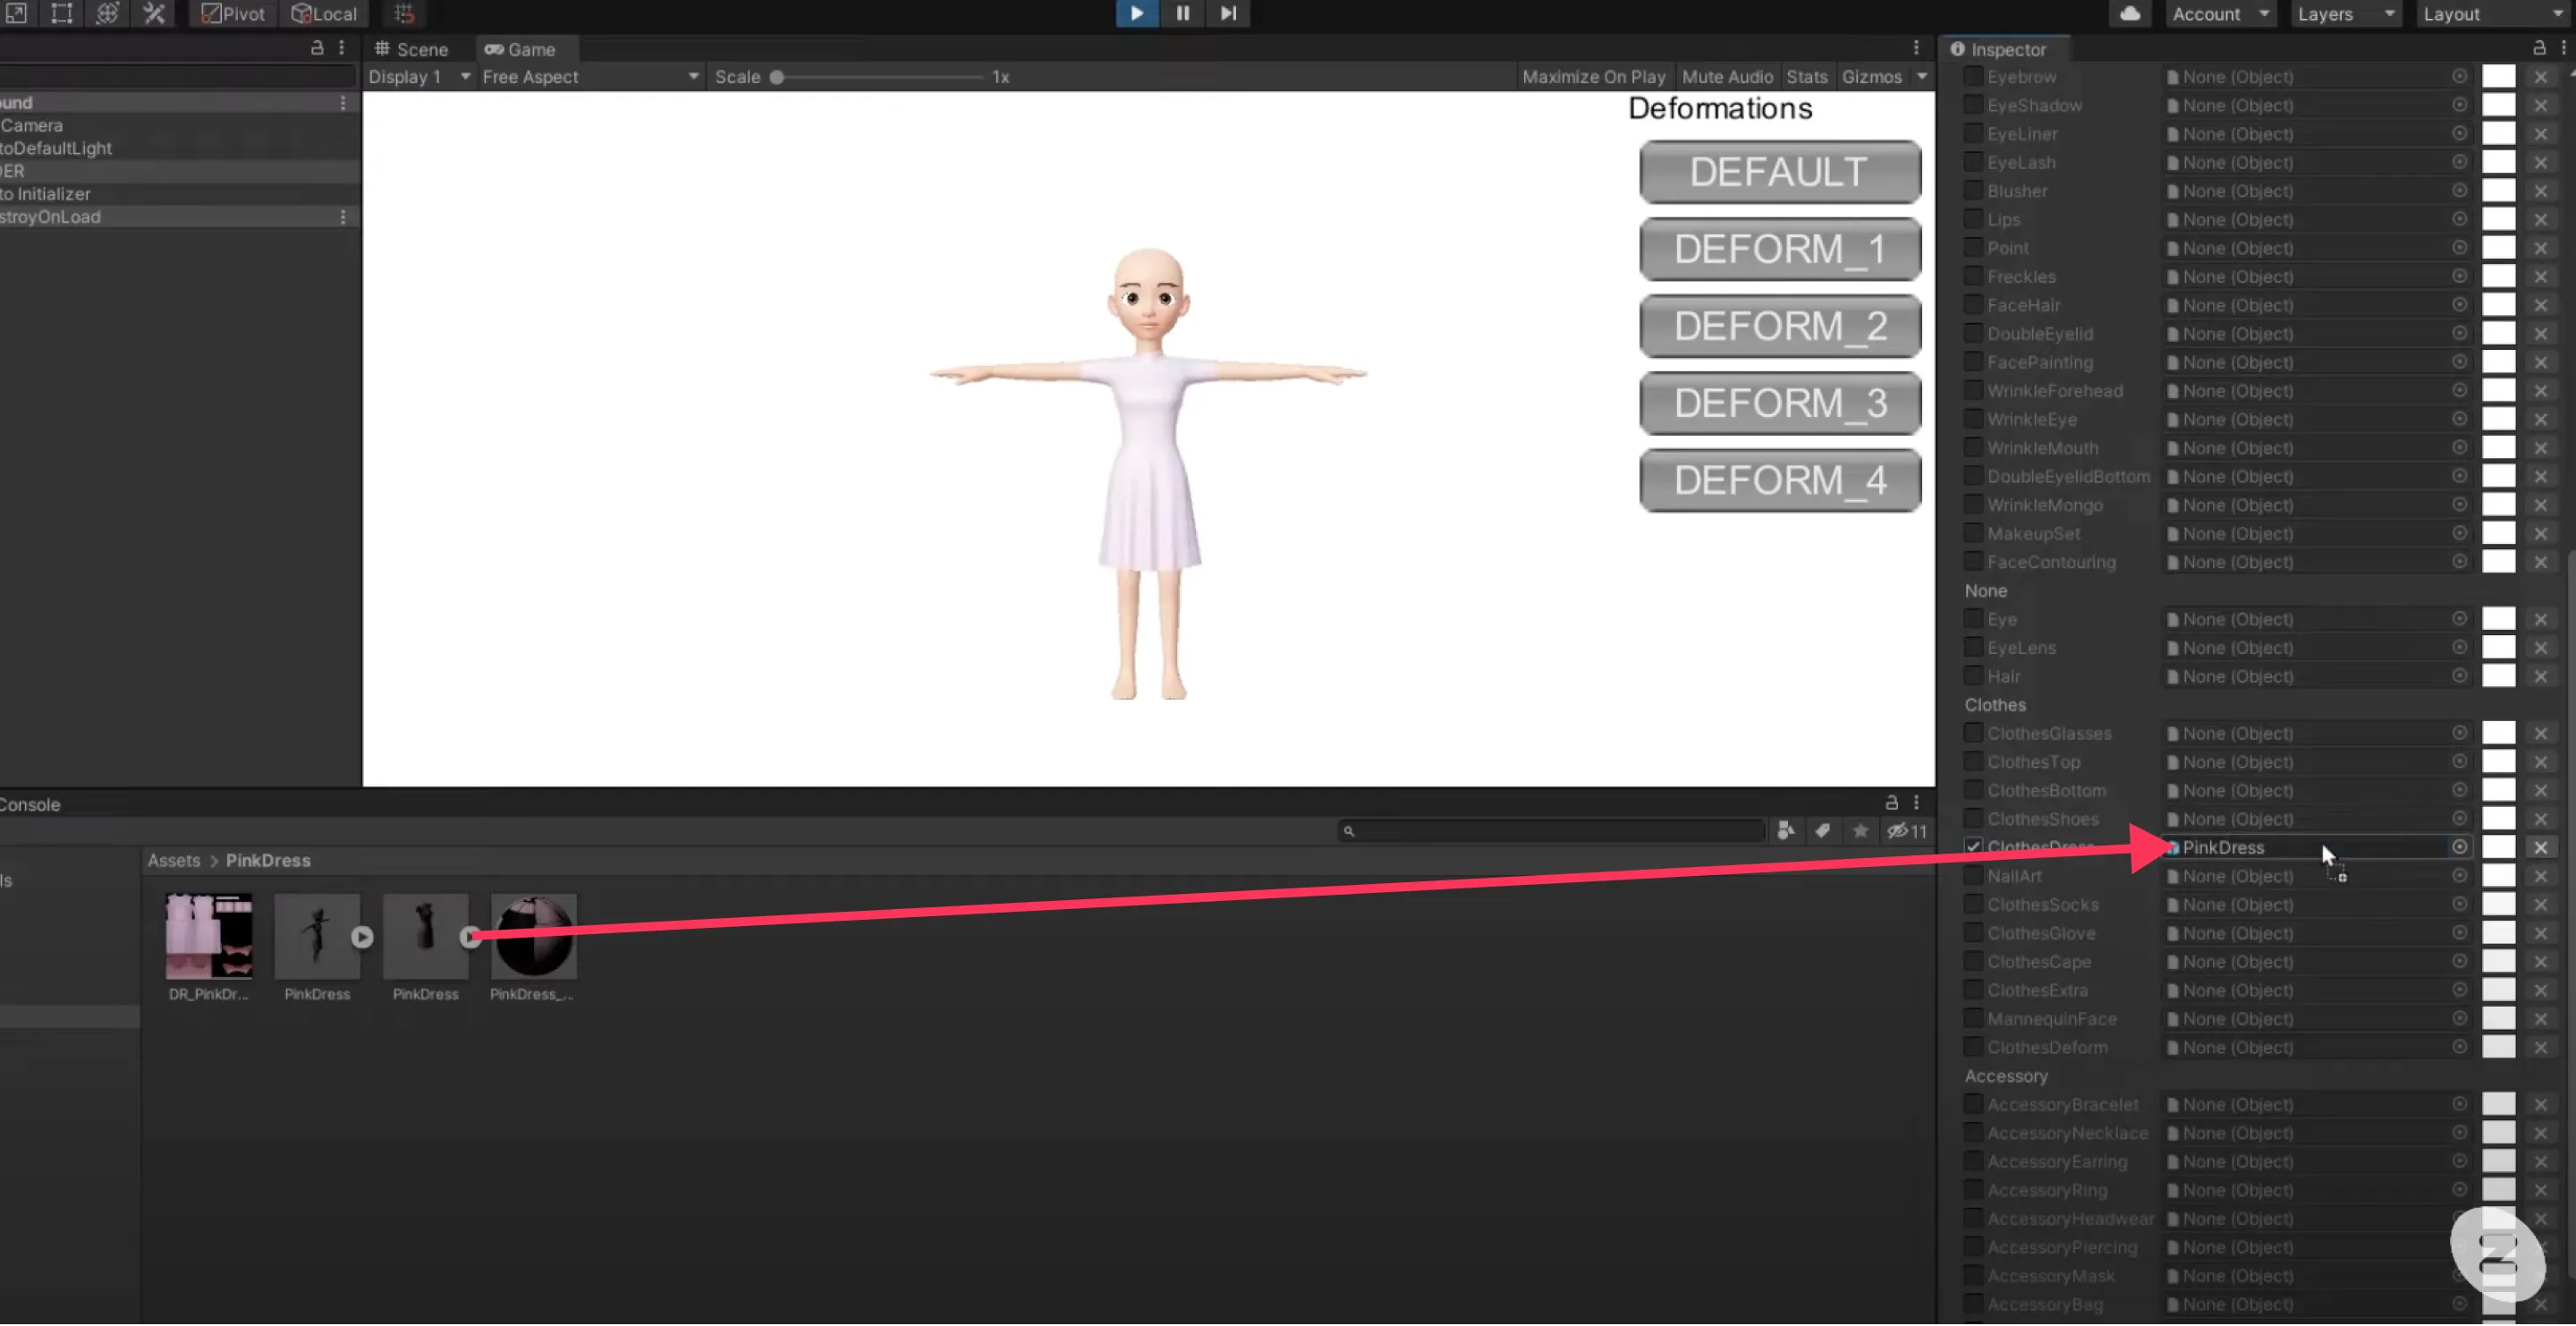
4. 포즈를 변형할 수 있는 Deform 버튼을 활용해 다양한 포즈에서 아이템을 테스트합니다.
❗️ 주의사항 이 과정에서 아이템이 잘못 만들어진 부분을 발견했다면 블렌더로 돌아가서 수정해야 합니다.
아이템을 테스트 완료했다면 .zepeto 파일로 내보내야 합니다.
- 먼저 내보내기 과정은 플레이 모드에서 작동되지 않으므로 상단의 재생 버튼을 눌러 플레이 모드에서 나갑니다.
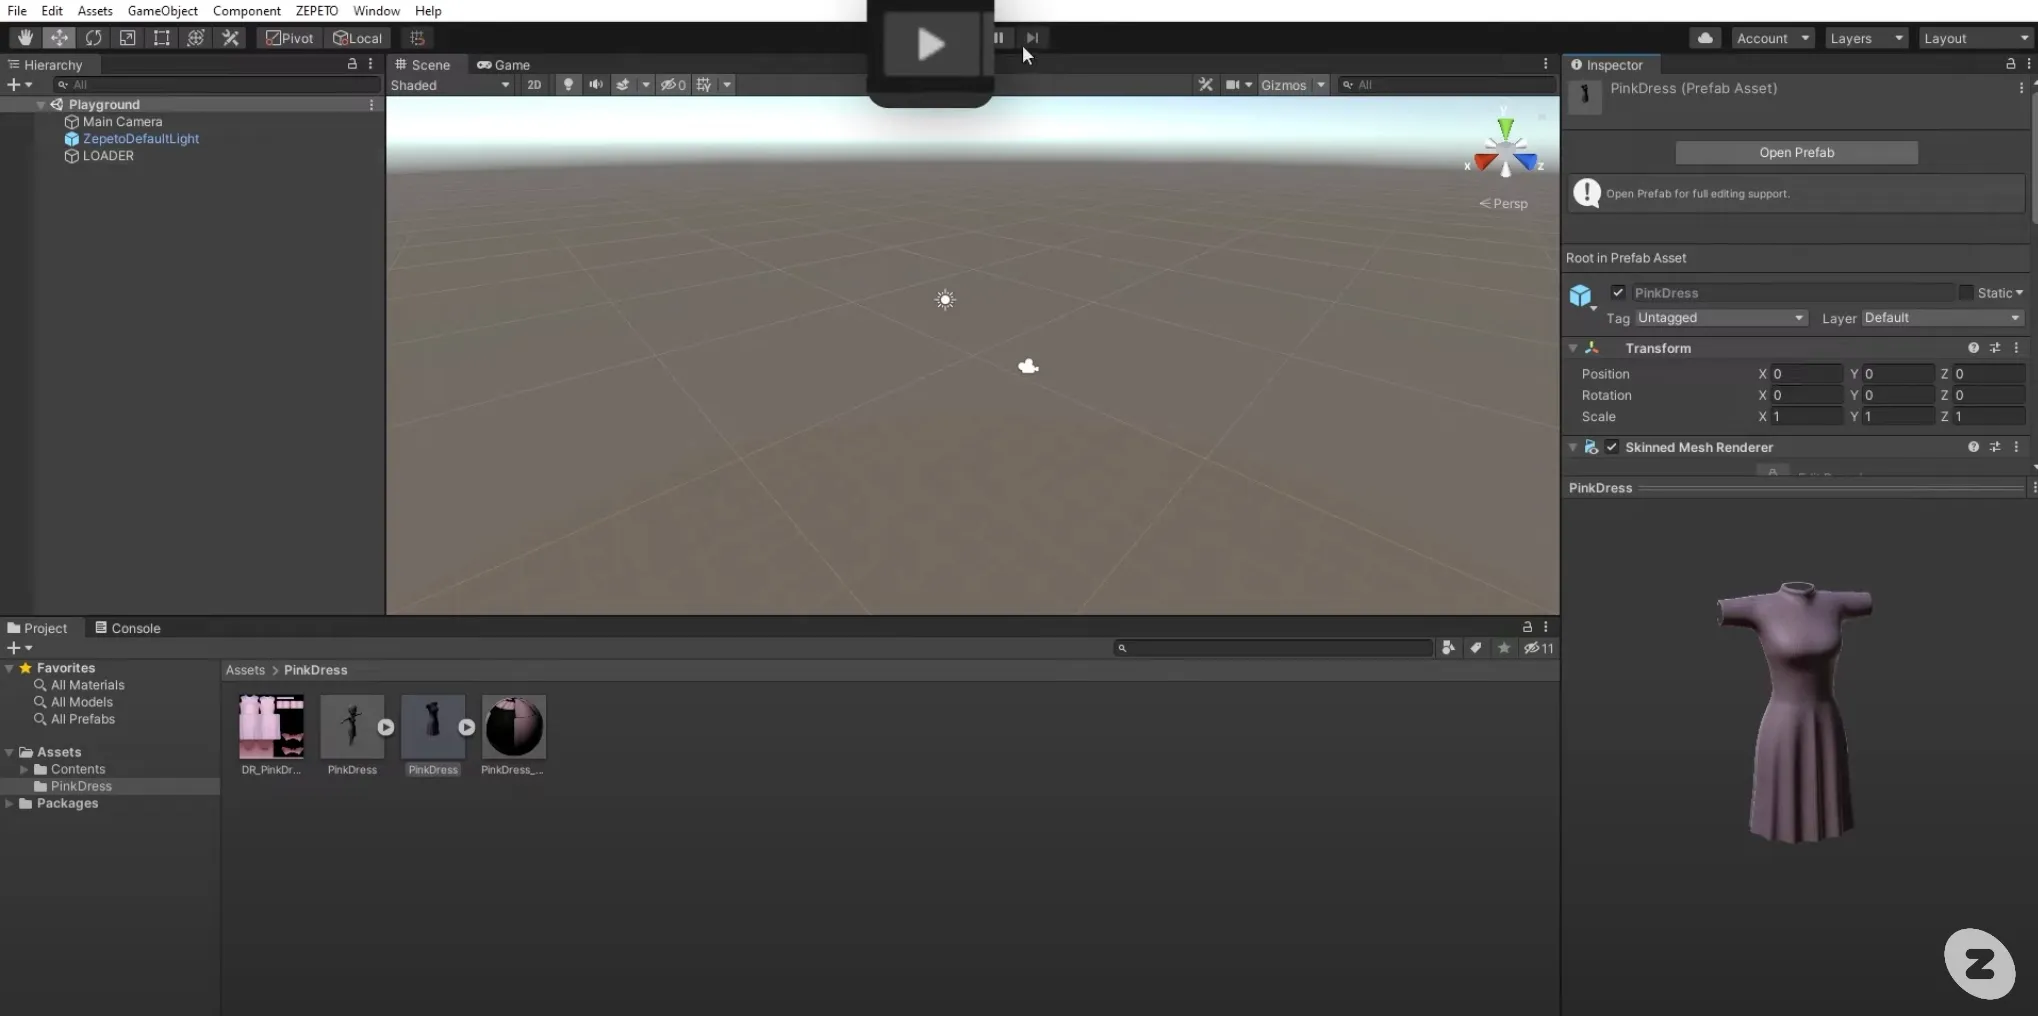
2. 아이템의 prefab을 선택하고 마우스 오른쪽 버튼을 누른 뒤 Zepeto Studio > Exprot as .zepeto를 선택합니다.
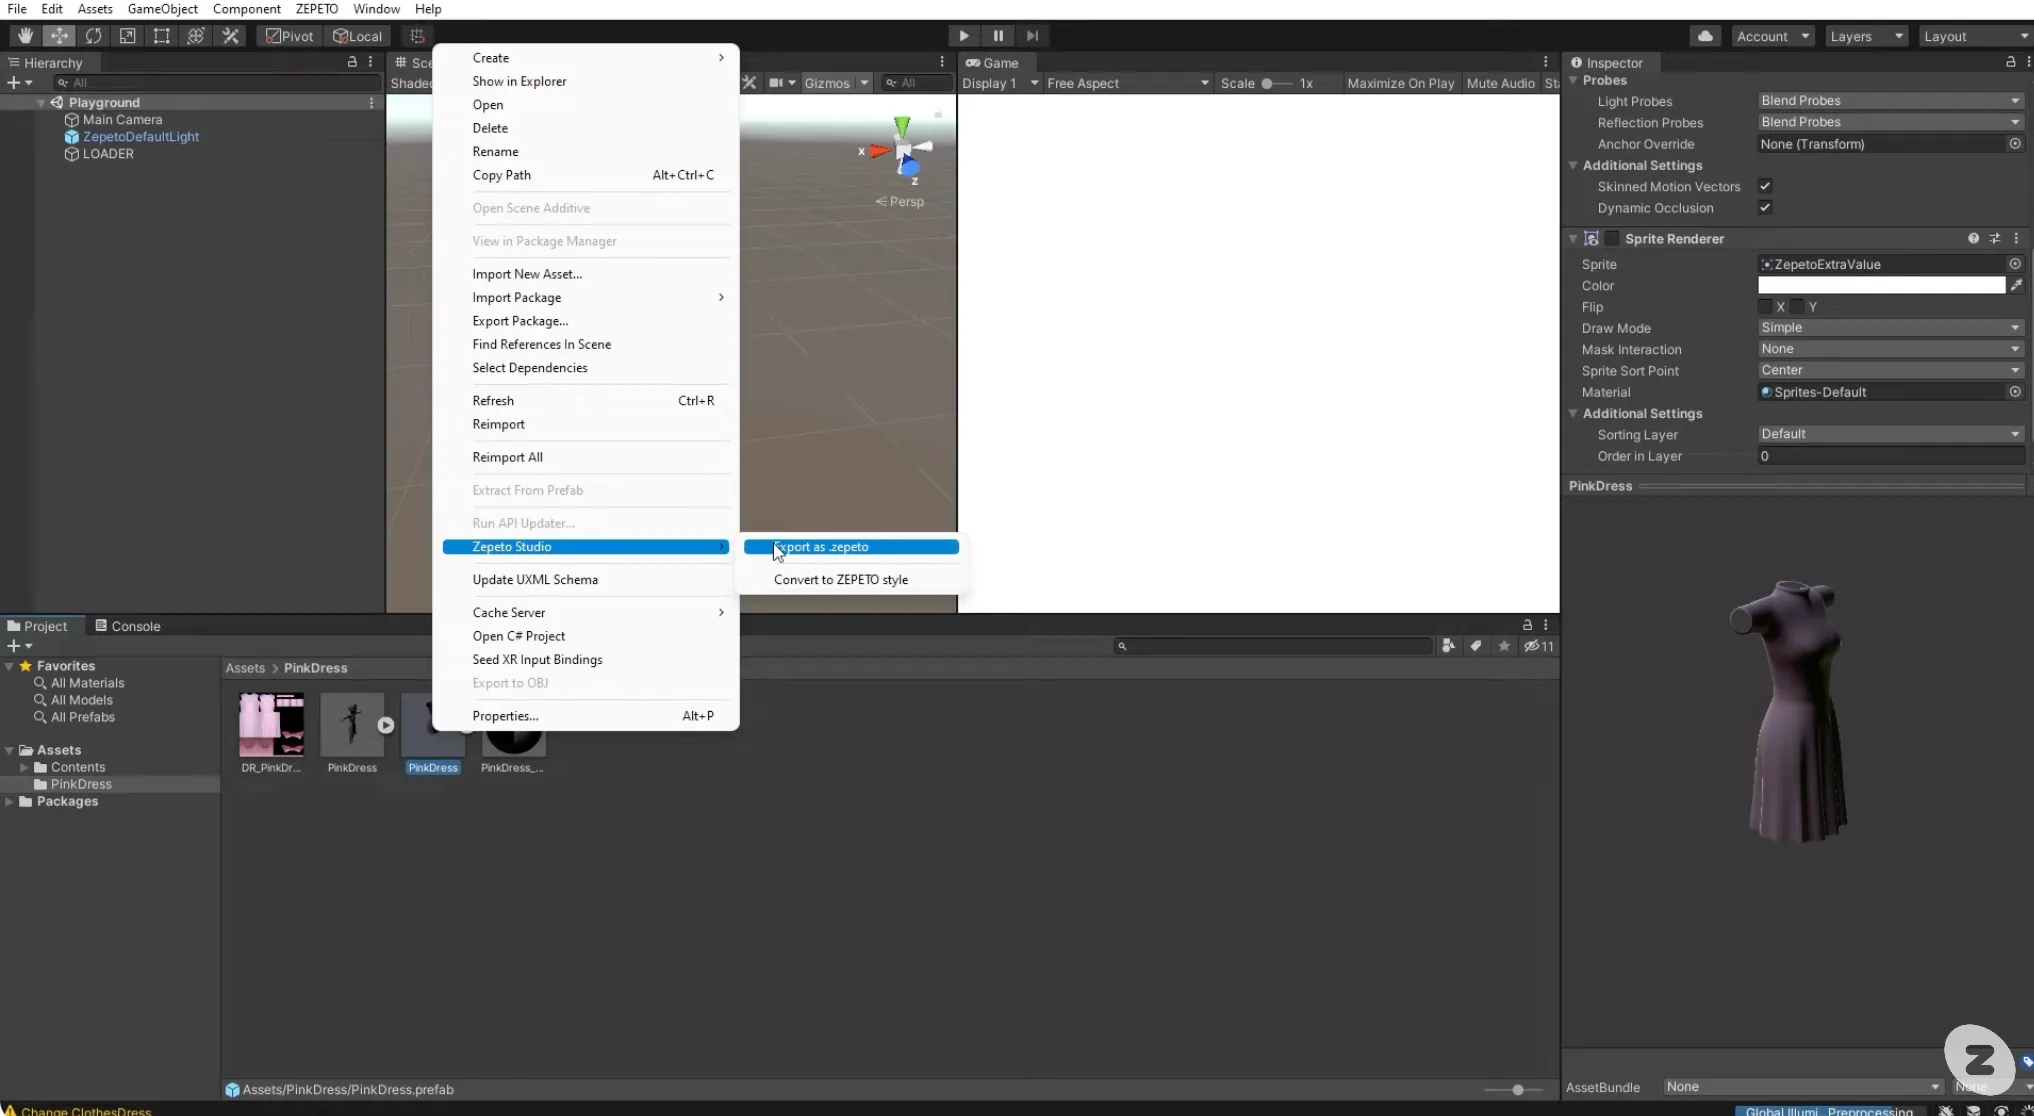
축하합니다! 드디어 제페토 스튜디오에 업로드 할 수 있는 .zepeto 파일이 만들어졌습니다.
📘 다음 가이드를 참고하여 주세요 [상세 정보 입력하기]

