スクリーンショット
ZepetoWorldContent APIの画像関連機能を使用して、ワールド内で画像を保存または共有し、フィードに画像を投稿できます。
ZepetoWorldContent APIは、以下の画像関連機能を提供します。
API | 説明 |
|---|---|
ZepetoWorldContent.SaveToCameraRoll(rt: UnityEngine.RenderTexture, result: System.Action$1) | 画像をフォトライブラリに保存します。 |
ZepetoWorldContent.SaveToCameraRoll(texture: UnityEngine.Texture2D, result: System.Action$1) | 画像をフォトライブラリに保存します。 |
ZepetoWorldContent.Share(rt: UnityEngine.RenderTexture, result: System.Action$1) | 画像を外部アプリに共有します。 |
ZepetoWorldContent.Share(texture: UnityEngine.Texture2D, result: System.Action$1) | 画像を外部アプリに共有します。 |
ZepetoWorldContent.CreateFeed(rt: UnityEngine.RenderTexture, contents: string, result: System.Action$1) | 画像をフィードにアップロードします。投稿の内容は第二引数で指定できます。ワールドタグは自動的に適用され、フィードに投稿されます。 |
ZepetoWorldContent.CreateFeed(texture: UnityEngine.Texture2D, contents: string, $result: System.Action$1) | 画像をフィードにアップロードします。投稿の内容は第二引数で指定できます。ワールドタグは自動的に適用され、フィードに投稿されます。 |
以下は、ZepetoWorldContent内で画像機能を呼び出す例です。
以下は、RenderTextureを使用したZepetoWorldContentのスクリーンショットモードの関数を使用した例コードです。
- Unityエディタモードではチェックできませんが、アプリでプレイしているときにチェックできます。
サンプルプロジェクトはGithubからダウンロードできます。
📘 公式スクリーンショットサンプル
👍 スクリーンショットサンプルの説明
- これは、ZepetoWorldContent APIの画像関連機能を使用したスクリーンショットのサンプルプロジェクトです。
- プロジェクトを実行する前にZEPETOログインを行う必要があります。
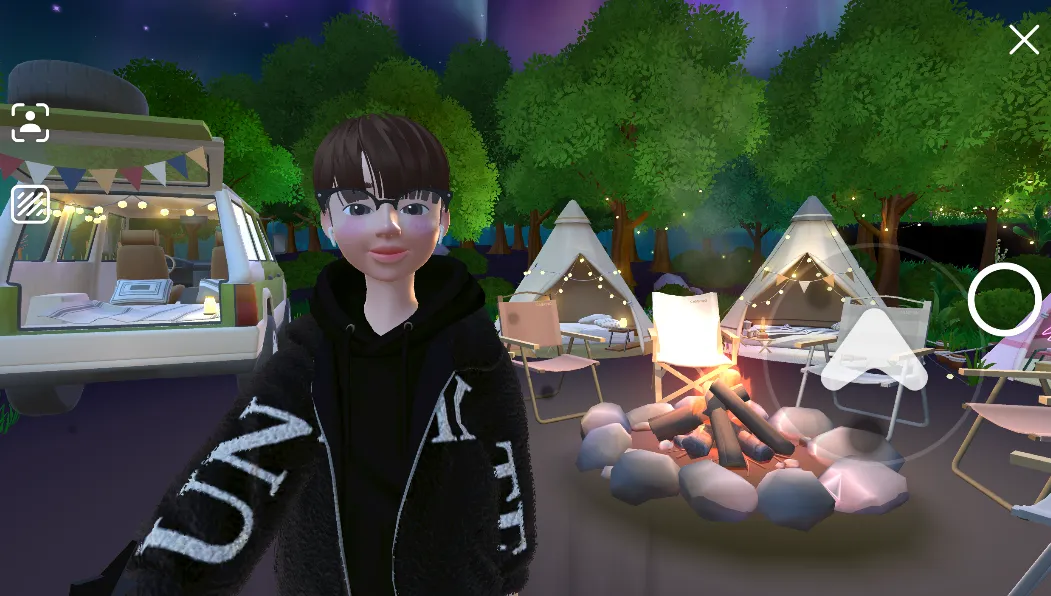
- セルフィーモードとZepetoCameraモードで構成され、RenderTextureを介して画像を保存または共有し、画像を使用してフィードを作成します。
既存プロジェクトに適用する際は、以下のガイドラインに従うことをお勧めします。
- Zepeto.Worldのバージョンは1.21.14以上である必要があります。
- 1.21.14以上のWorldのバージョンで進めると、ZepetoWorldContent関数を通常通り使用できます。バージョンの更新はWindow - PackageManager - Zepeto.Worldで行えます。
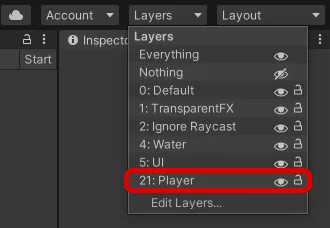
- サンプルプロジェクトのレイヤー21はプレイヤーとして指定されています。
- 既存のプロジェクトに適用する際にカスタムレイヤー21を使用している場合は、ZepetoScreenShotModule.tsのplayerLayerの値を修正してください。
- ZepetoPlayersはシーン内に存在する必要があります。
- プレイヤー生成コードは別々に記述する必要があります。
- プロジェクト内のPlayerCreator.tsファイルを参照してください。
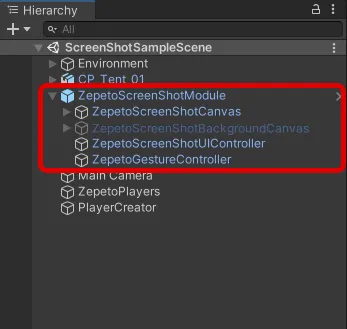
- ZepetoScreenShotModuleをシーンに挿入する必要があります。
- IKPassが有効なAnimatorを使用する必要があります。
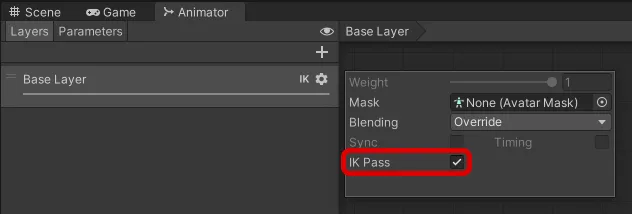
👍 IKPass
- 既存のZepetoAnimatorを使用する場合
- ZepetoPlayersからZepetoAnimatorファイルをローカル環境のAssets/...パスにドラッグし、対応するアセットをコピーします。
- コピーしたZepetoAnimatorのIKPassを有効にし、ZepetoPlayersのAnimator Controllerを対応するAnimatorに置き換えます。
- カスタムAnimatorを使用する場合
- 現在使用しているAnimatorのIKPassを有効にします。
- 回転方向は水平に基づいてサポートされています。
- ZepetoWorldSettingでの向きを水平に設定します。
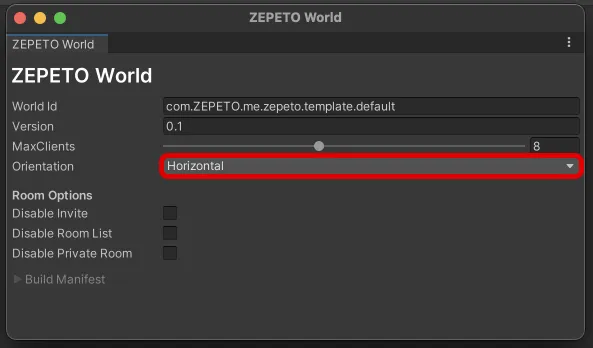
- カメラ設定について
- ZepetoCameraモードのカメラ設定は、ZepetoPlayers - Cameraの設定を変更します。
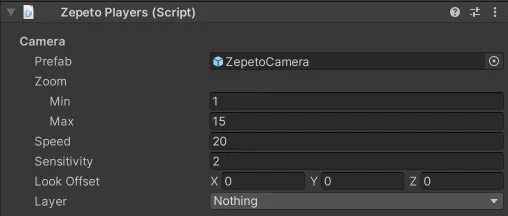
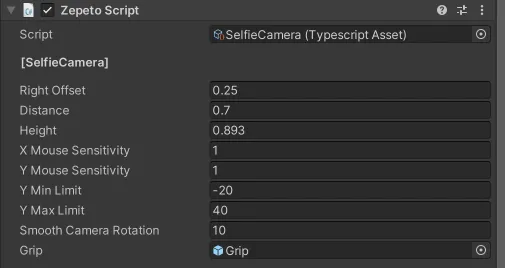
- セルフィーカメラモードのカメラ設定は、Resources - Selfie Camera prefabのSelfie Camera.tsの設定値を変更します。
