
Modeling Applications
To help you understand the guide, a video is attached at the bottom of the page.
Watching the video along with the guide will make it easier for you to follow along!
Mesh Topology
In order to create items, you need to take a close look at the mesh topology.
- Topology - the way the parts are connected or arranged.
In 3D modeling programs, topology refers to how vertices, edges, and faces are arranged.
Even the parts you can't see are taken into account, which is why it's important to pay close attention to topology when modeling an item.
Here's what makes a good topology.
- Faces should be appropriately sized and distributed throughout the object.
- Faces and edges should be organized in a way that flows naturally with the shape of the object.
- Avoid clustering too many edges in one place.
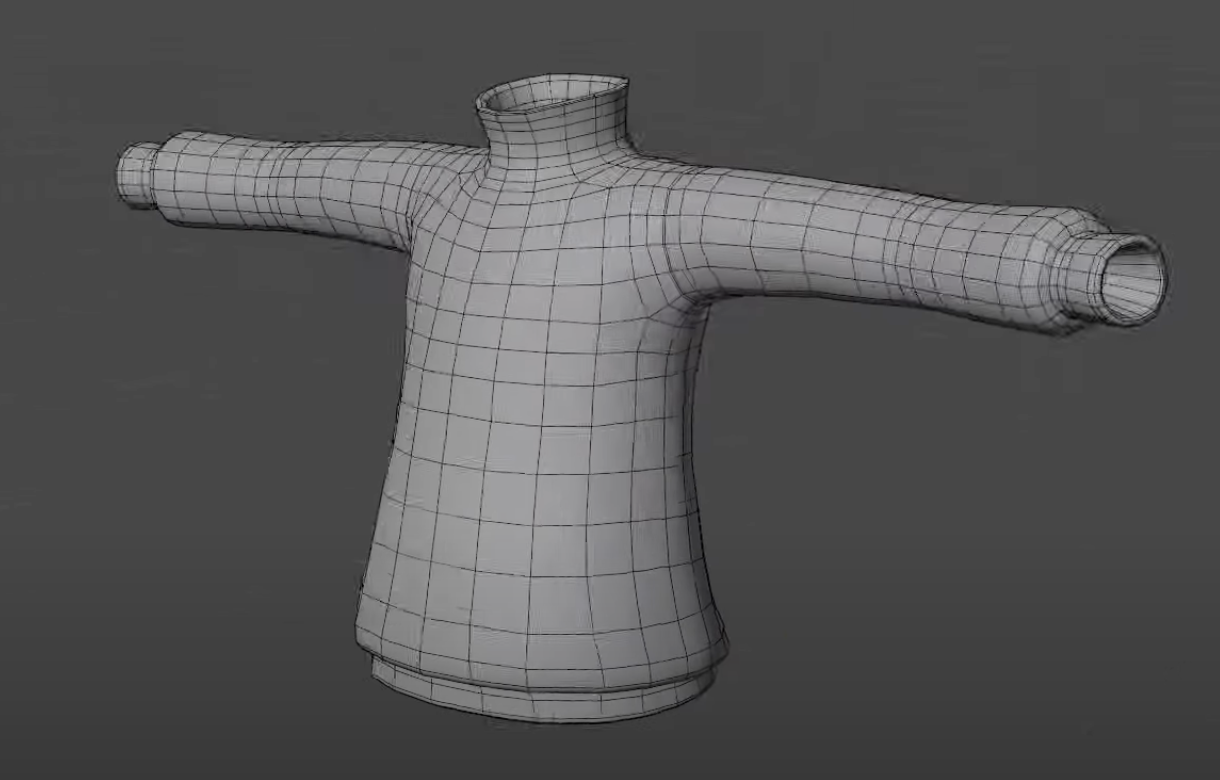
If you need a topology reference, see the [Studio-provided Samples] and the mask object (mask) in the [creatorBaseSet_ZEPETO.zip file]. Take a cue from how objects are formed by the flow of their components and create your own.
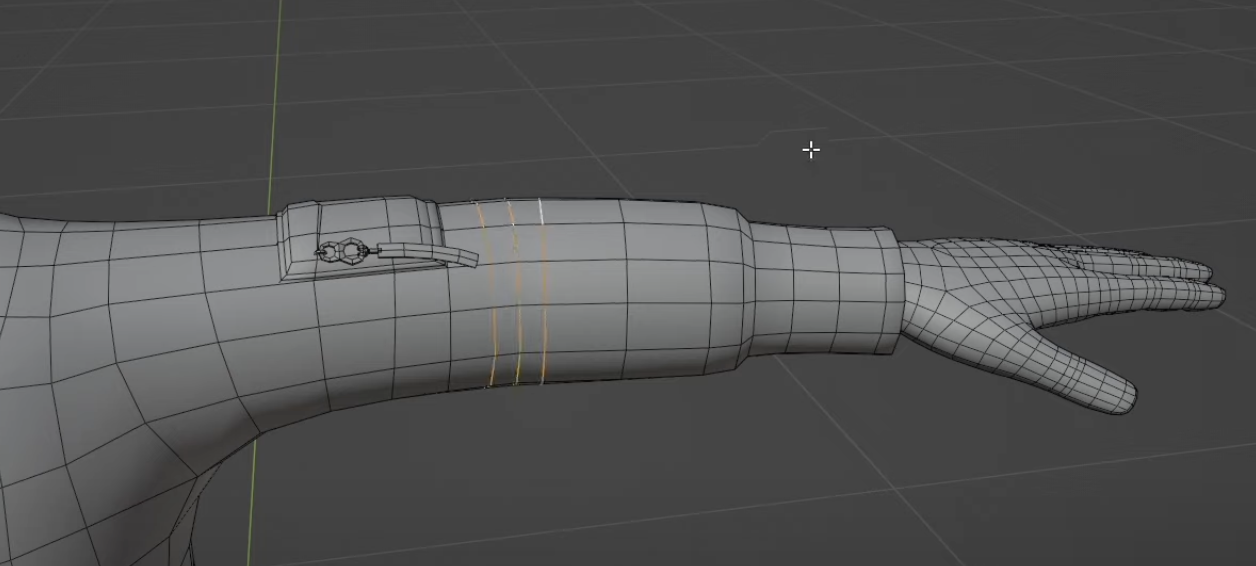
Joint Bands
It is also important to model your mesh to bend appropriately. As the avatar moves, the points on the mesh move in line with an invisible internal skeleton, so how many vertices you use determines how precisely your item can bend. If it is a part of the avatar that bends a lot, make sure to place your joint seams closely together to smooth out the bends.
If you look at the avatar's mesh in the creatorBaseSet file, you'll notice that the three edge loops at the elbows, knees, and shoulders are tightly spaced to help the mesh retain its volume as the joints move.
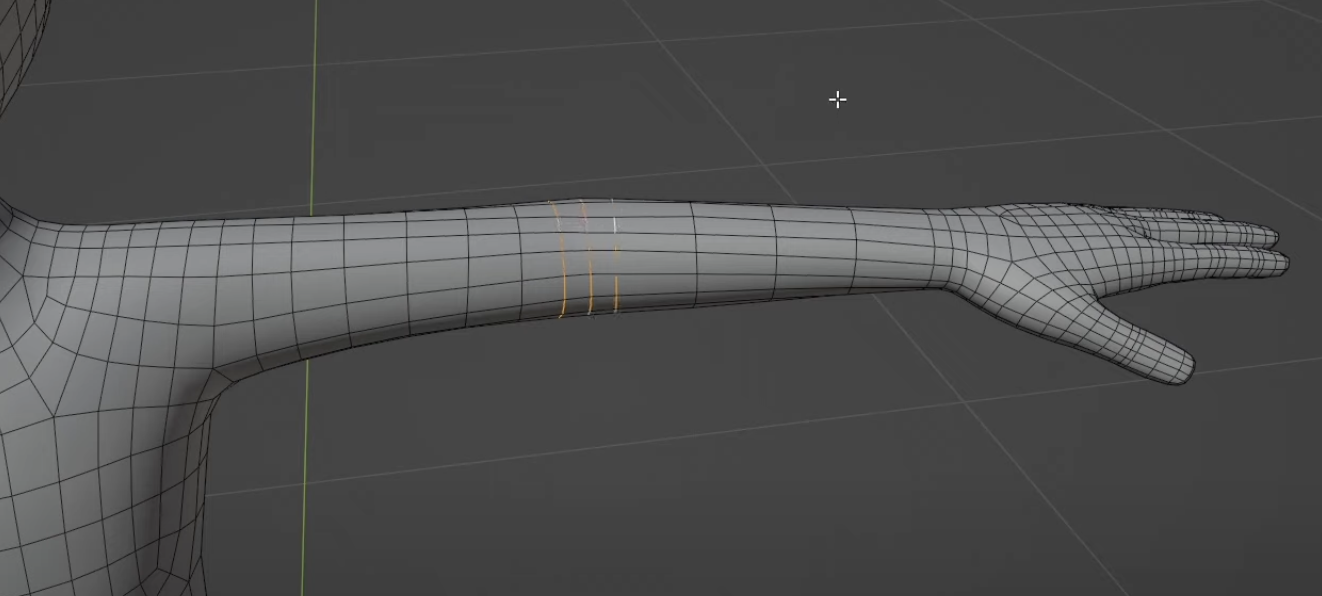
When you create an outfit for this avatar, you will need to similarly set up seams in the joints of the avatar.
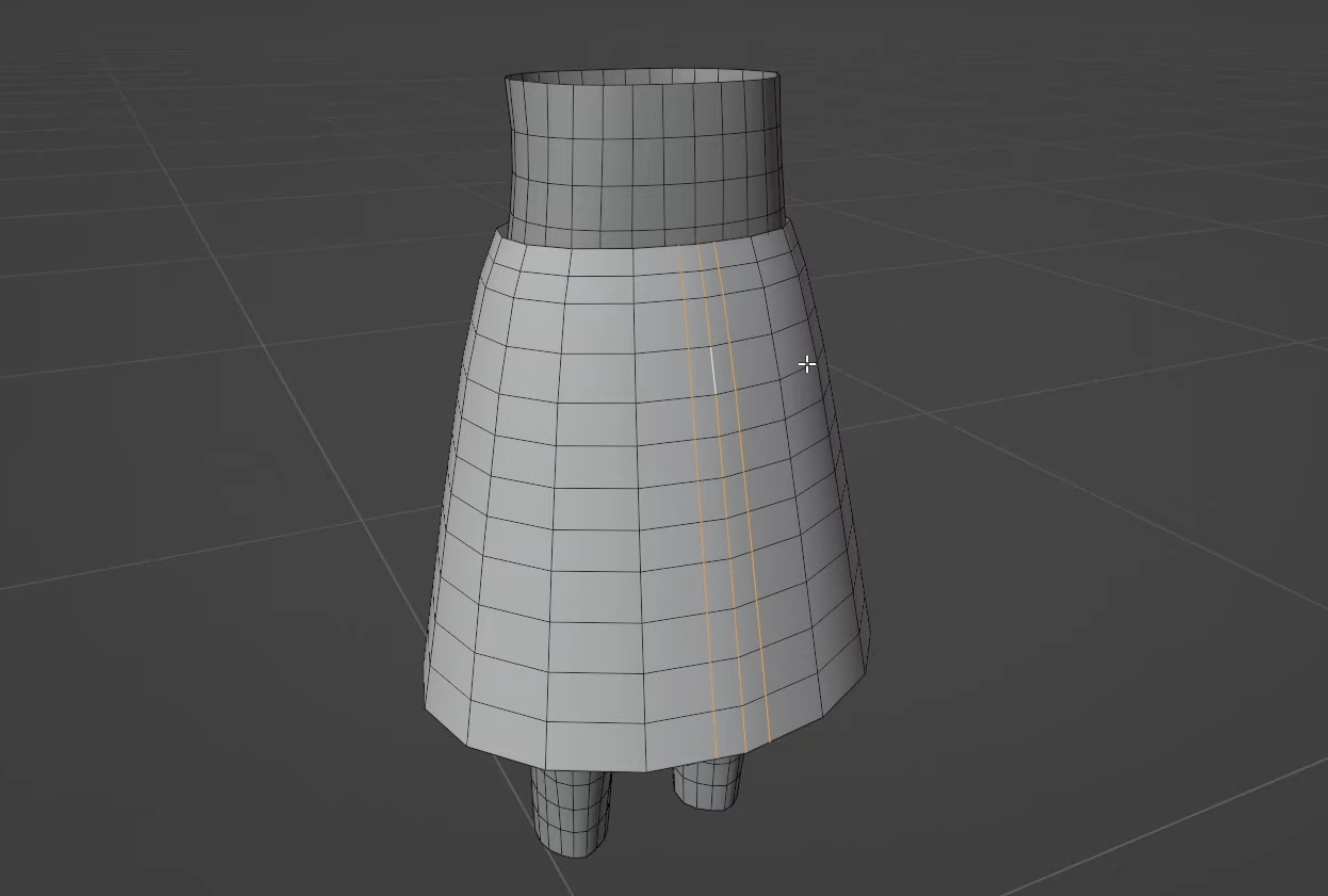
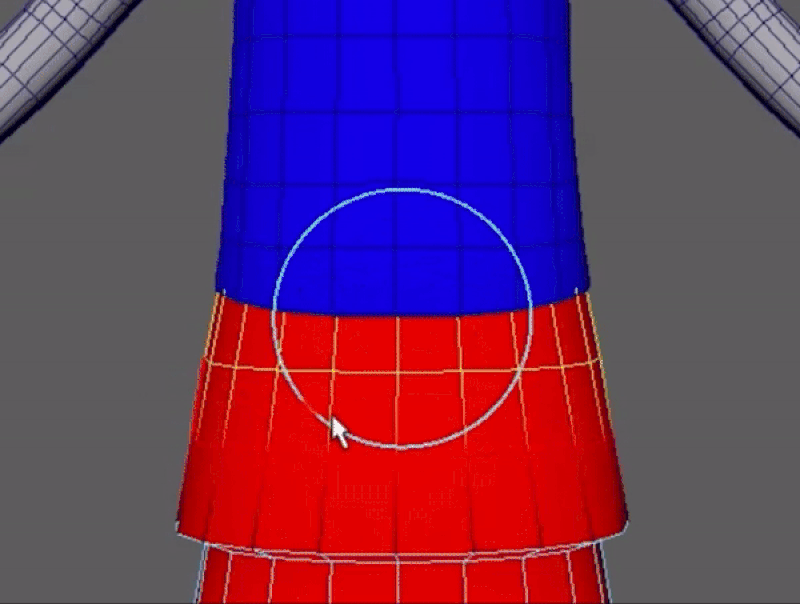
Creating a Skirt
Similar to joints, when creating a skirt, a lack of detail can lead to awkward movement. The solution to this is to add geometry detail to the space between the legs.
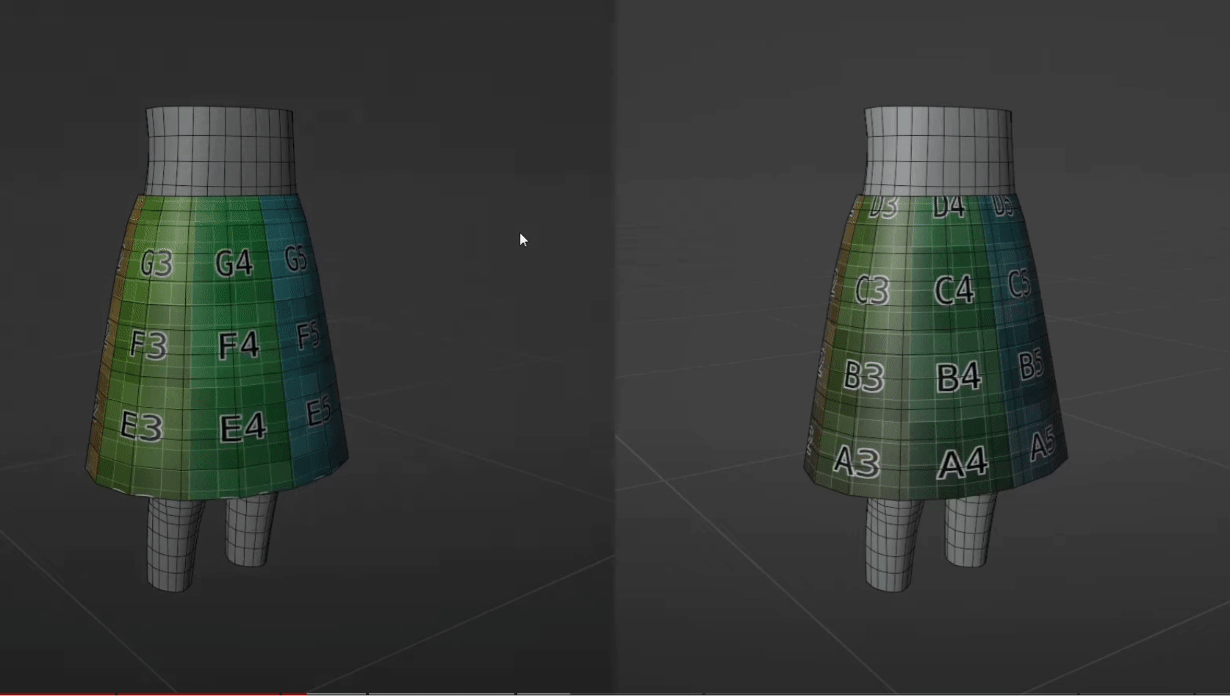
Usually, adding a hole or incision on one edge of the skirt in the middle will allow it to stretch out smoothly enough. The solution will vary from item to item, so experiment with varying the density of your loop cut.
Polycount, Triangle Count
While modeling, keep track of how many triangles your object consists of. In order to upload your object to ZEPETO Studio, you must adhere to the maximum polygon count guidelines.
The maximum polygon count for each item category can be found in the [Item Guidelines] guide document.
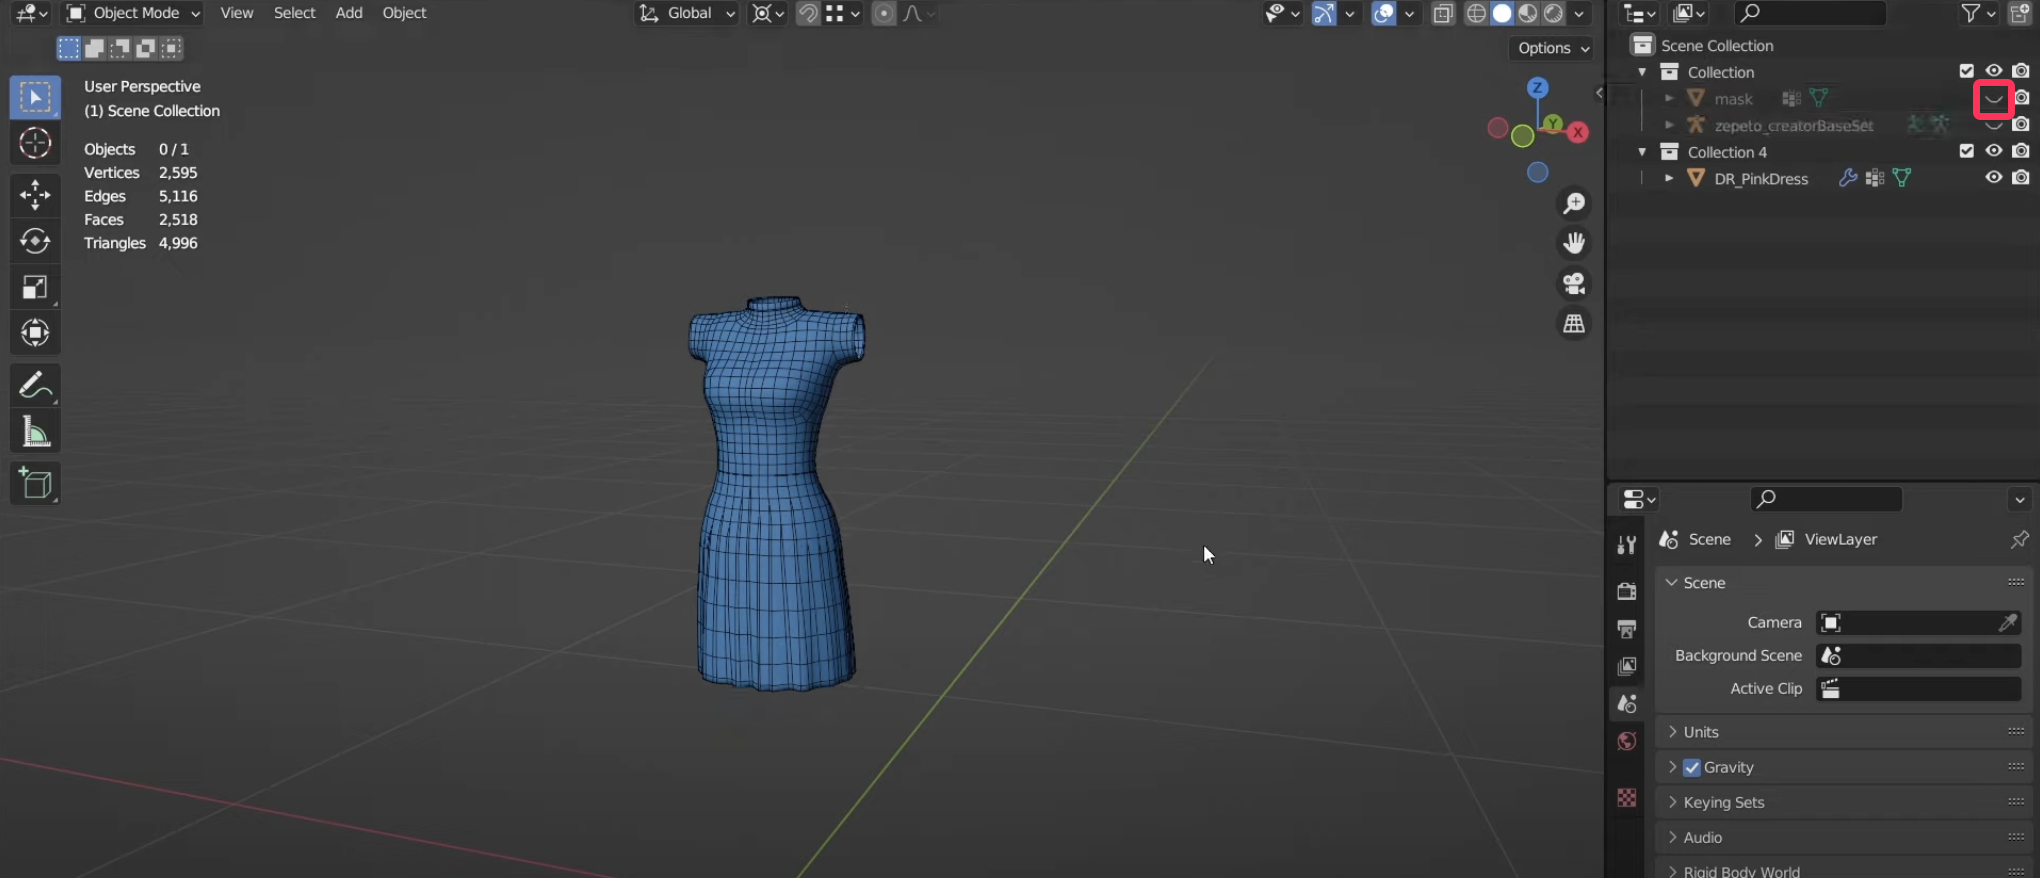
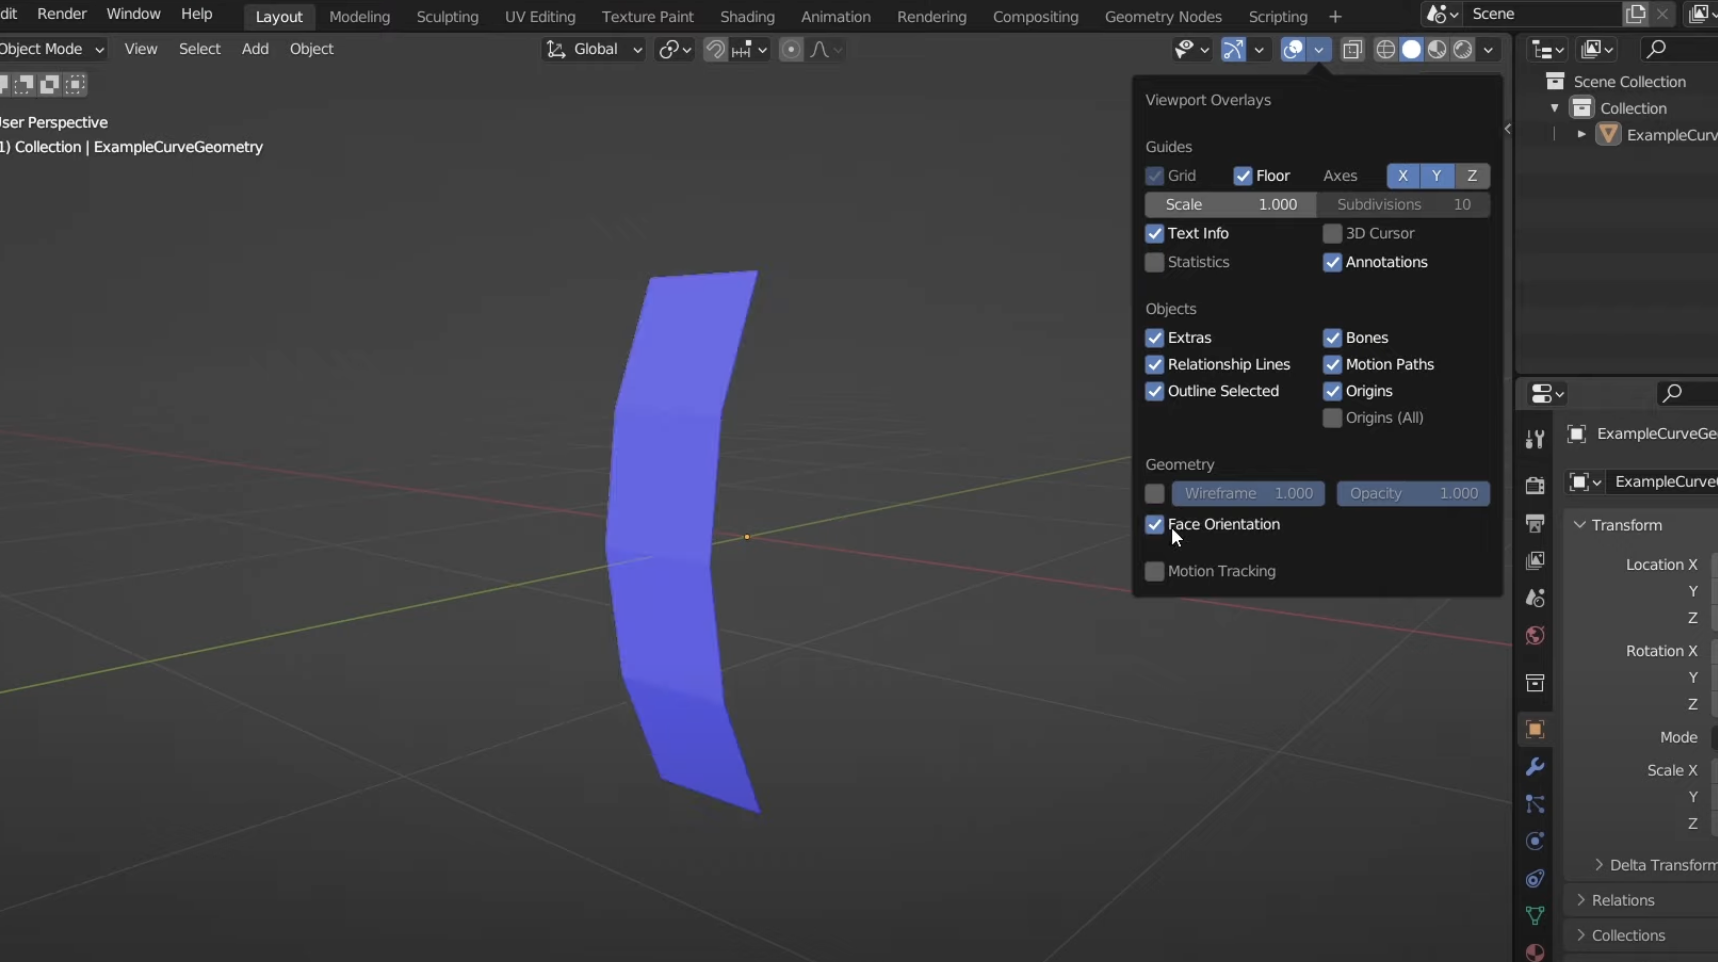
To check the number of triangles in Blender, go to the Viewport Overlays menu and select Statistics.
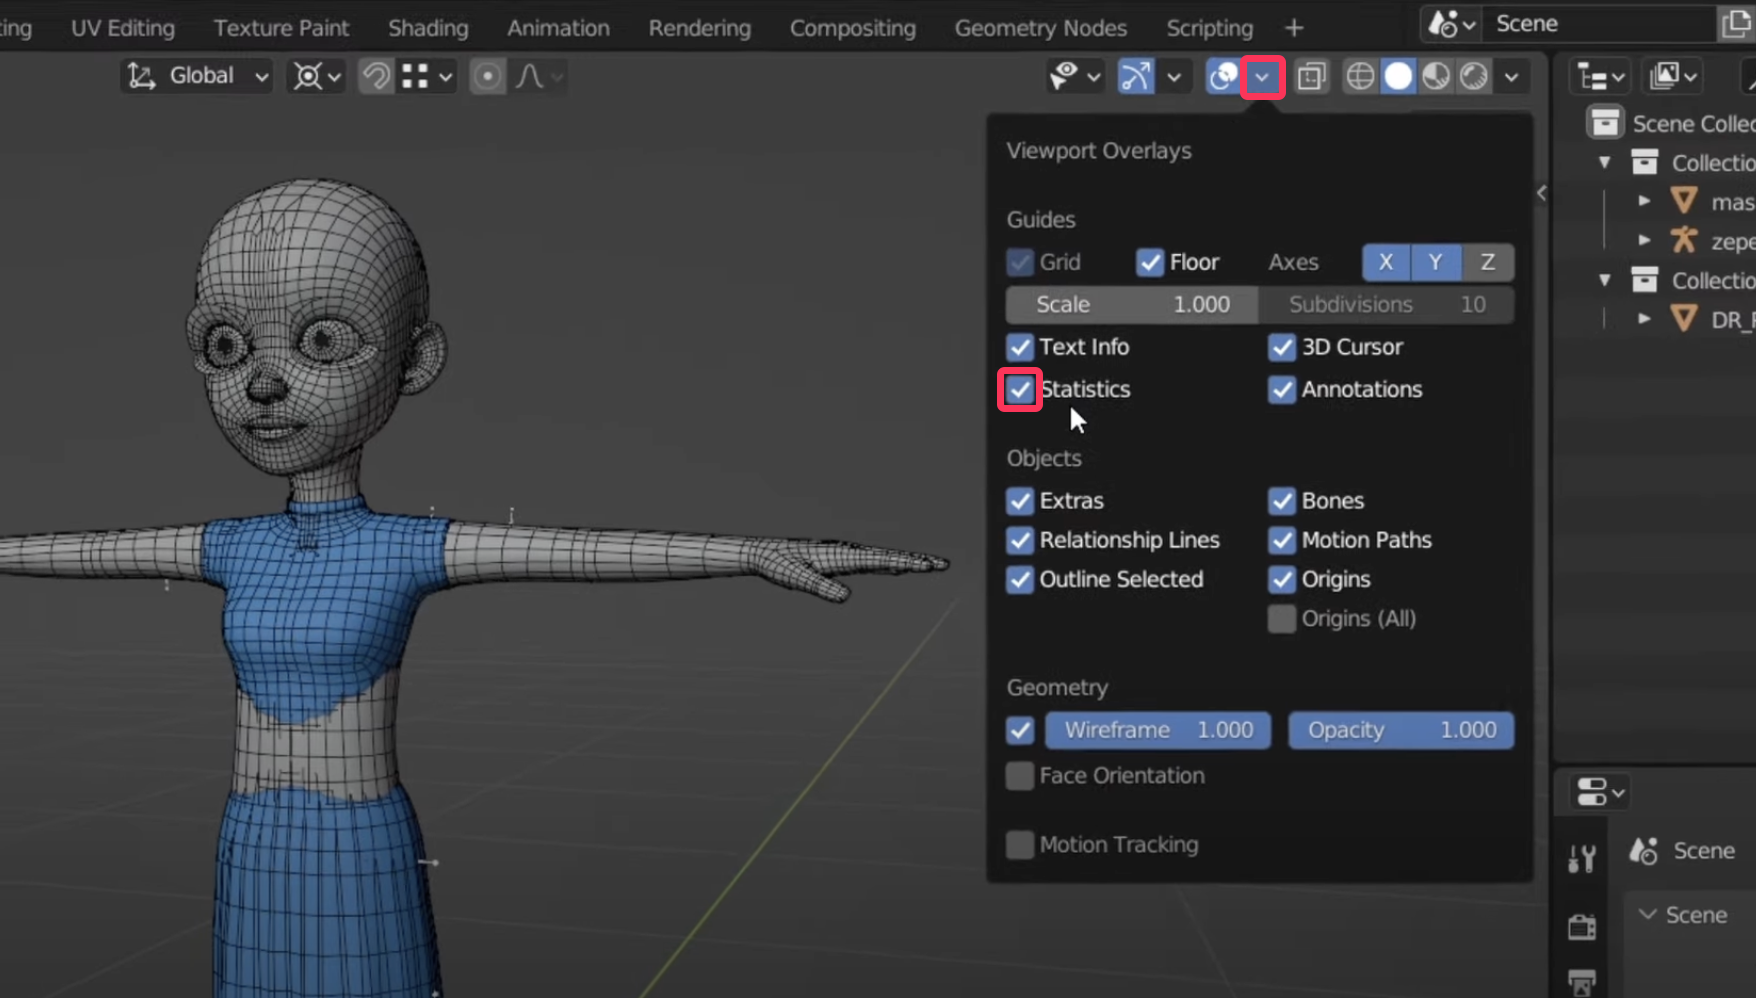
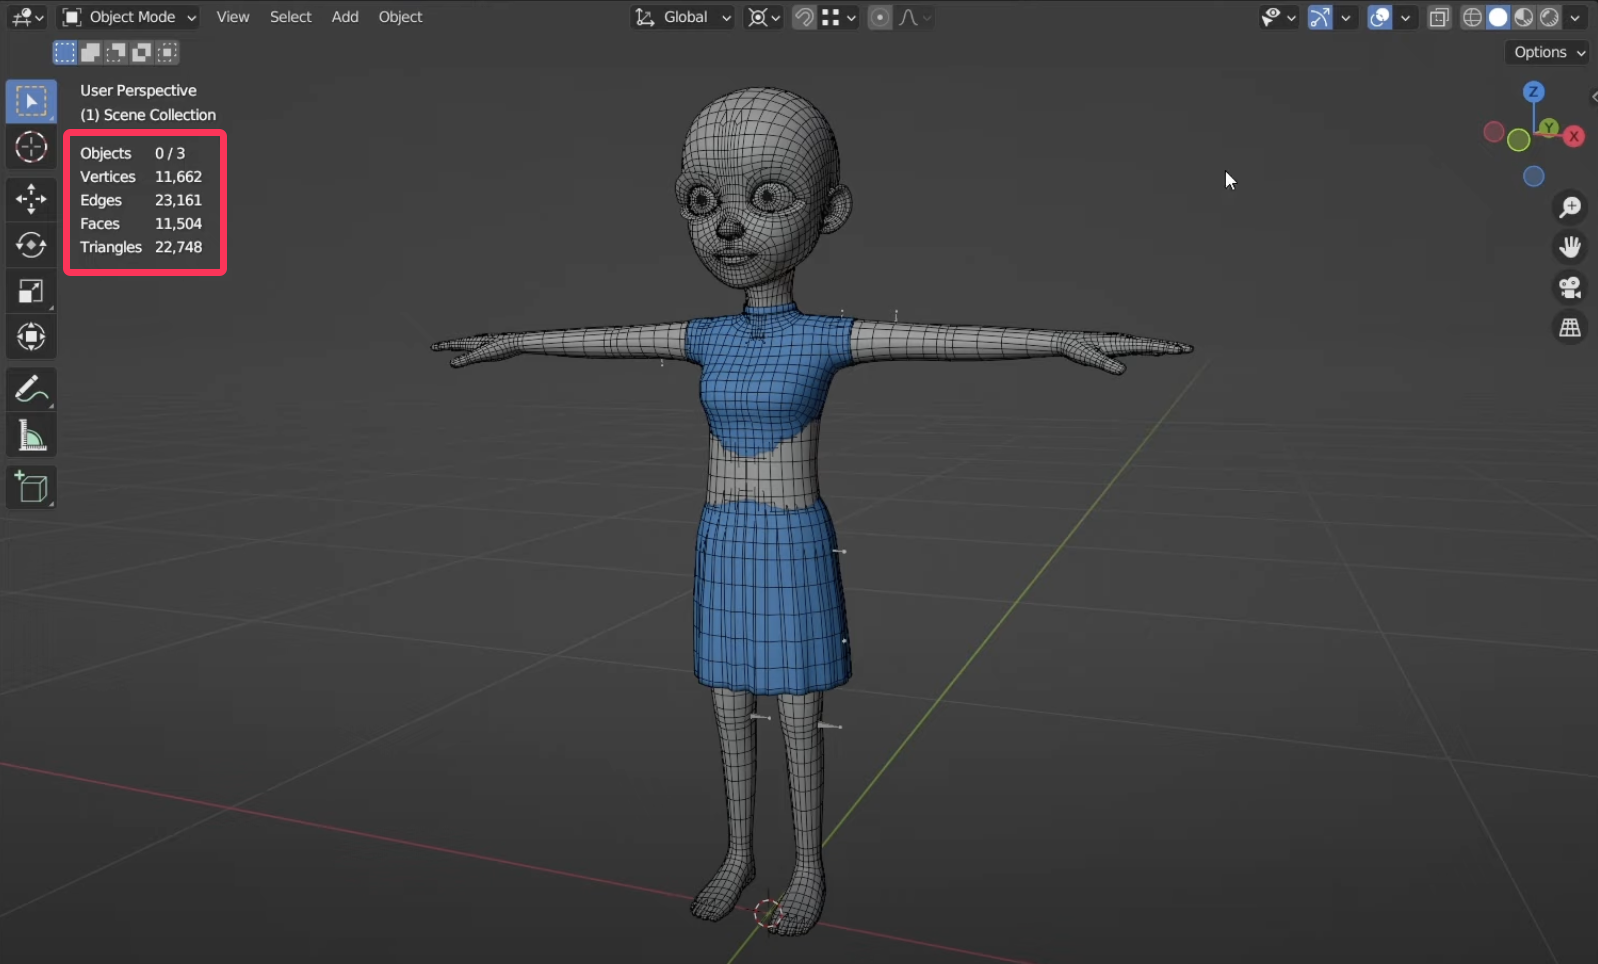
This will count the number of polygons of all objects visible on the screen, so if you only want to check the polygon count of the item you created, you will need to do so with other items, including masks, obscured.
Face Orientation
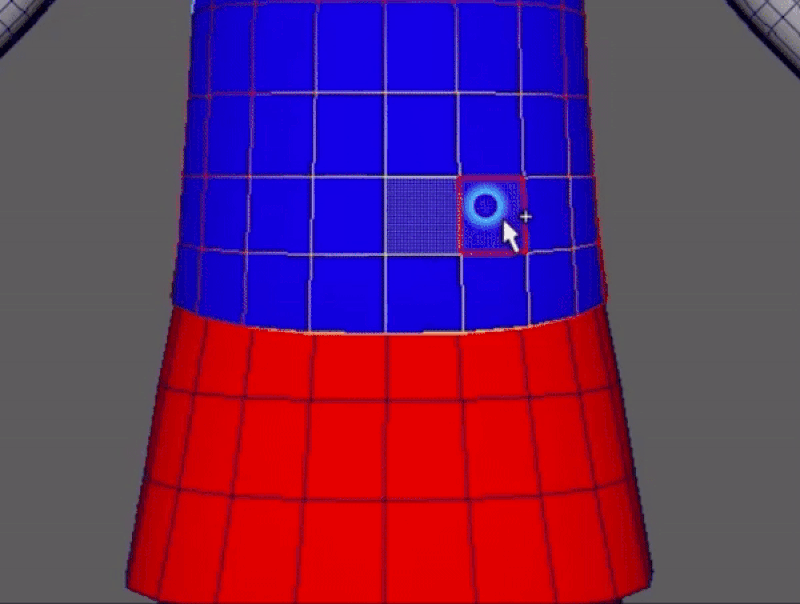
In 3D software, faces have a direction: one side of the face is encoded as outside and the other side as inside. In Unity and the ZEPETO app, the inside of a face is represented as invisible, while in Blender, both the inside and outside are represented.
In this case, you can orient the faces using the Overlay UI settings in Blender to quickly implement only the faces you want to see. With Face Orientation enabled, the outside is colored blue and the inside is colored red.
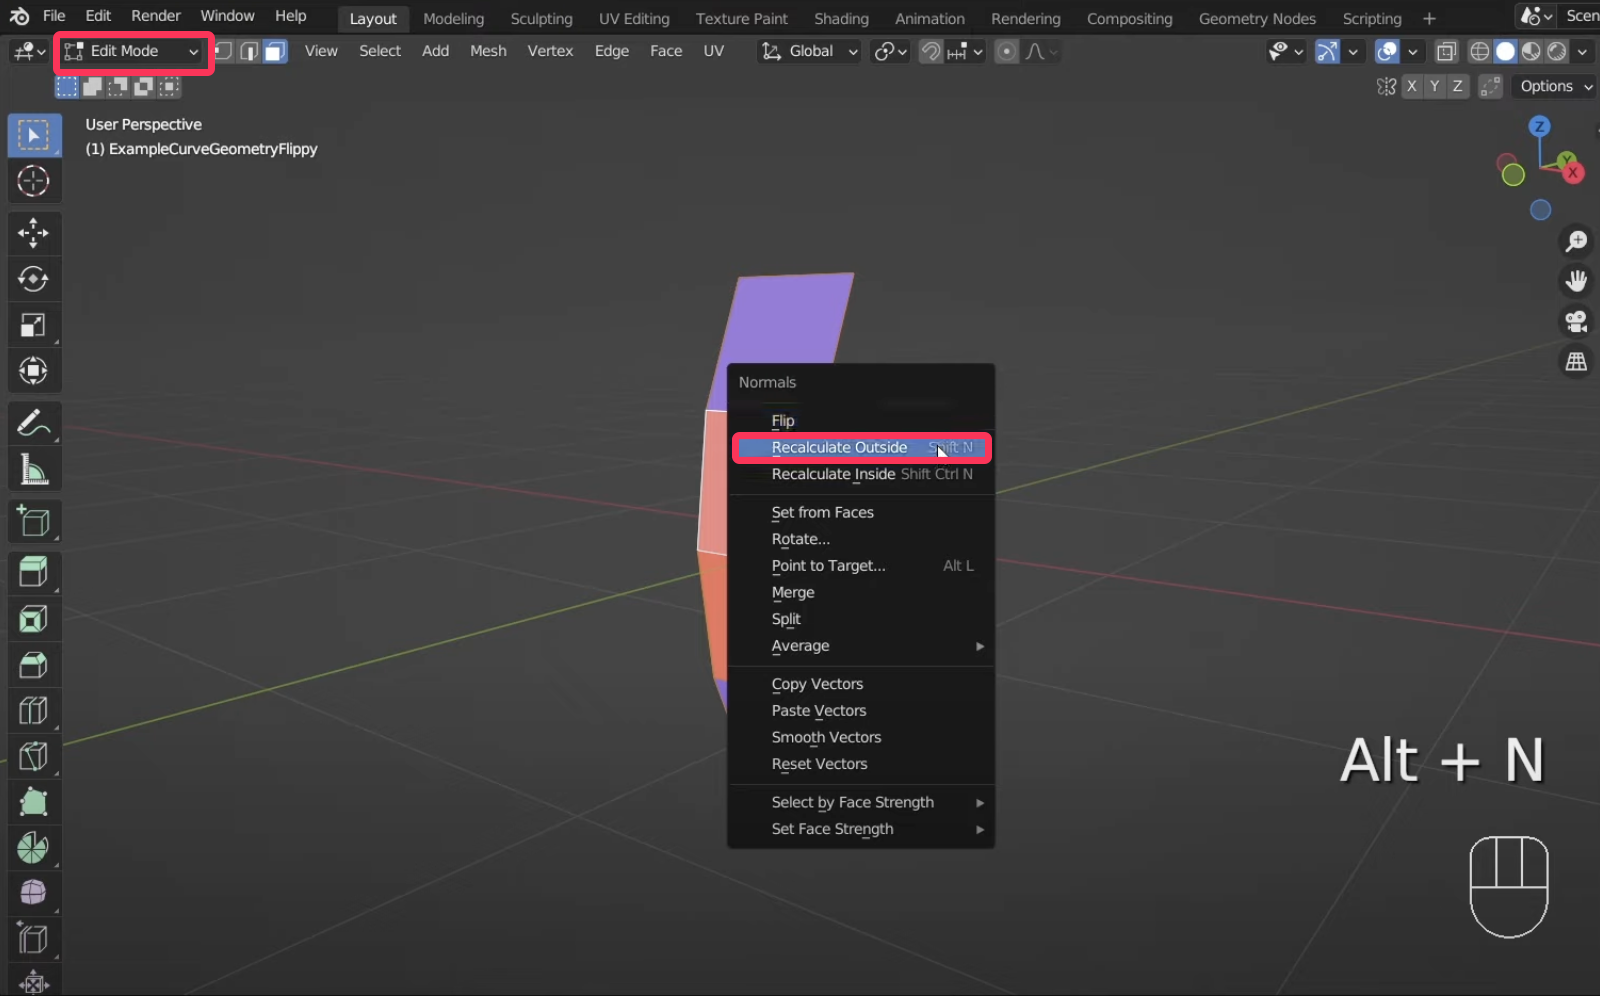
Even if your mesh is visually continuous, each face can be oriented differently. You need to check and correct the orientation of the faces with Face Orientation.
- With all faces selected, choose Edit Mode > Mesh > Normals > Recalculate Outside, or choose Edit Mode >hotkey Alt + N > Recalculate Outside, and Blender will calculate the flipped faces and orient them the same as the rest of the mesh.
- If that doesn't work, you can use the top menu, Flip, to manually flip the selected faces one by one.
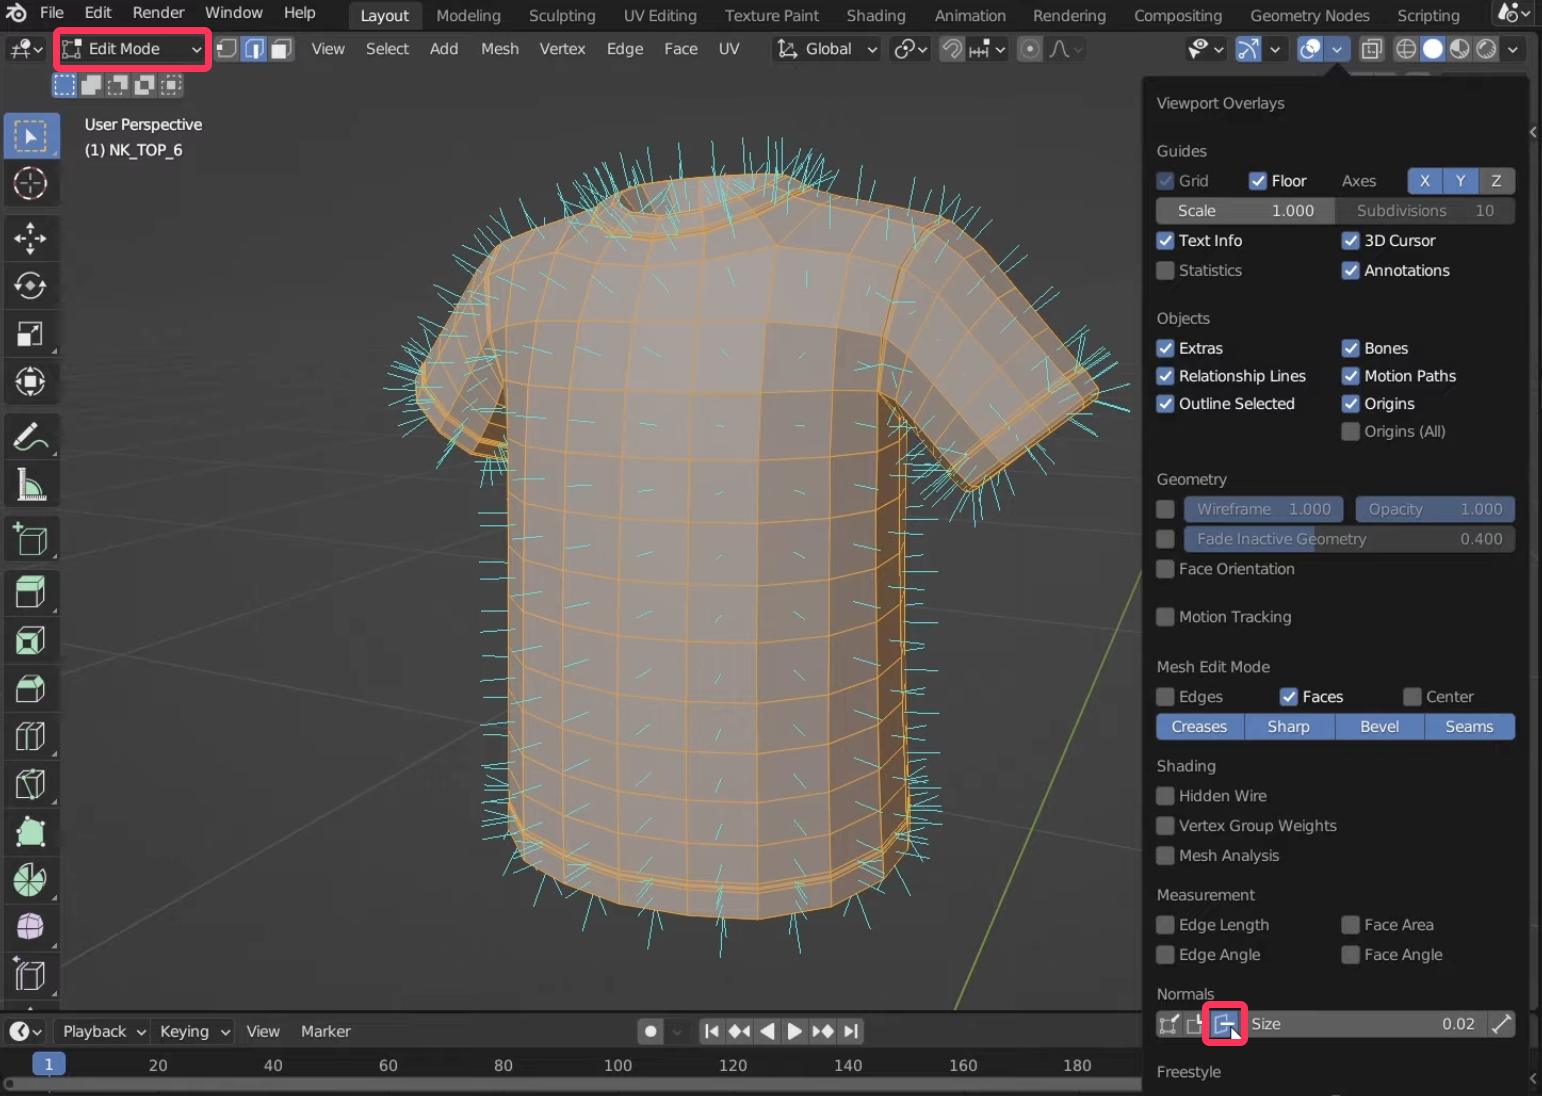
Normal
In addition to faces, edges and vertices also have an orientation. This directionality is called a normal. Normals define the direction in which faces, edges and vertices point outward.
To visualize this orientation, change the visualization settings in the Overlay menu.
- The extruded line below shows the normal direction of the mesh. In 3D software, normals show how the mesh is affected by light.
By editing the normals, you can smooth or sharpen the lines, or change the faces to be curved or flat.
First of all, the sharpness of the lines. Earlier in the [Modeling Basics]guide, we used Normals > Auto Smooth to control the sharpness of lines. With Auto Smooth applied, you can use the Edit Normals feature to adjust the detail.
- Select the lines you want to sharpen and press Edge > Mark Sharp.

- If you turn off the overlay at this point, you can temporarily see how the line was applied.
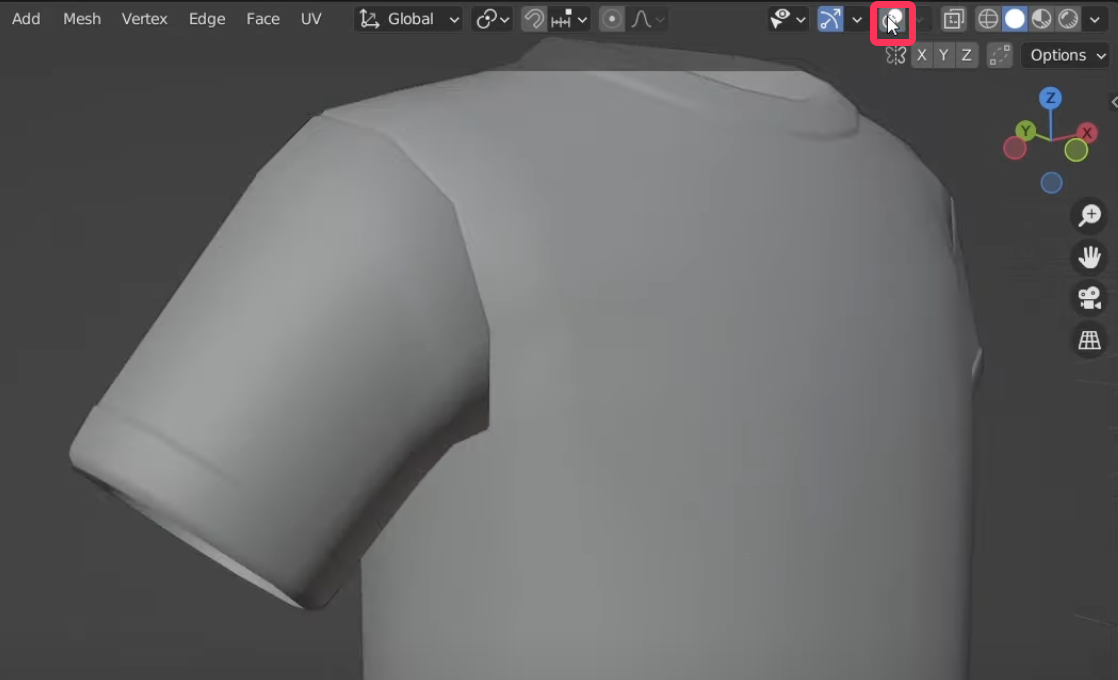
- Note that sharpened lines only appear when Normals > Auto Smooth is turned on in the object's properties.
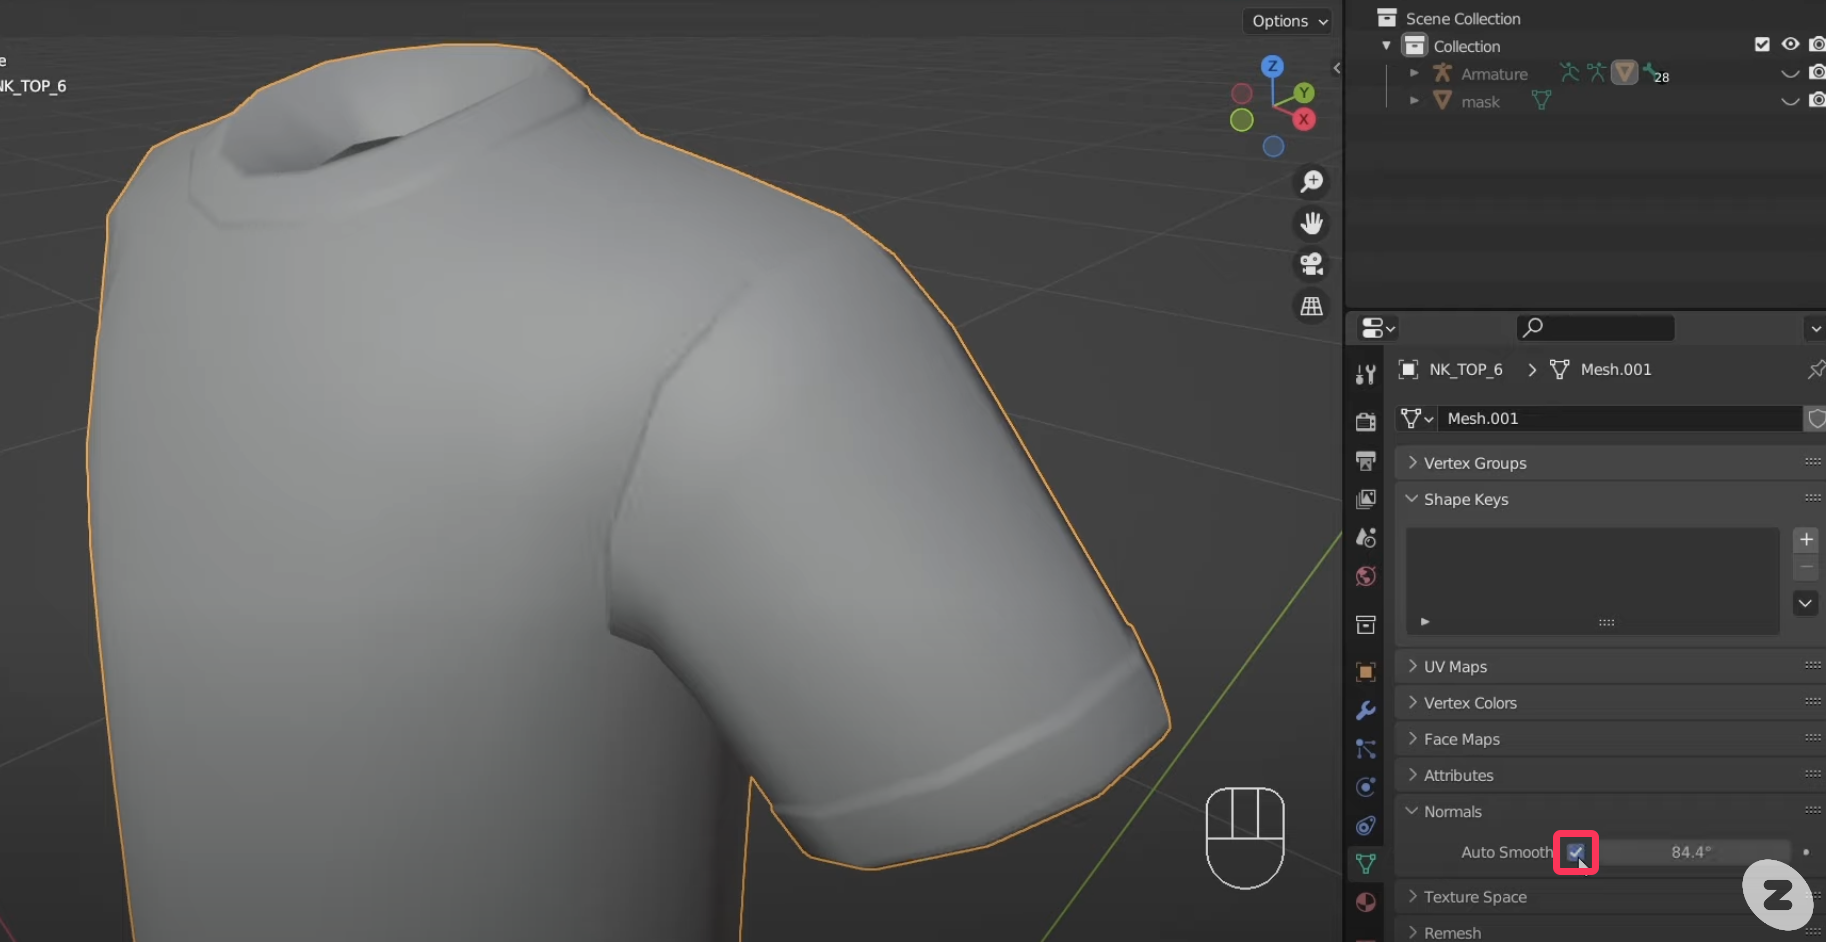
Try using sharp lines to detail the wrinkles or edges on clothes!
Next up are mesh normals. Mesh normals affect how a mesh catches light. You can manually adjust the normal properties by selecting the mesh and then using the various normal editing features in the Normal menu.
- The example image below shows a specific mesh selection and then choosing Mesh > Normals > Rotate.
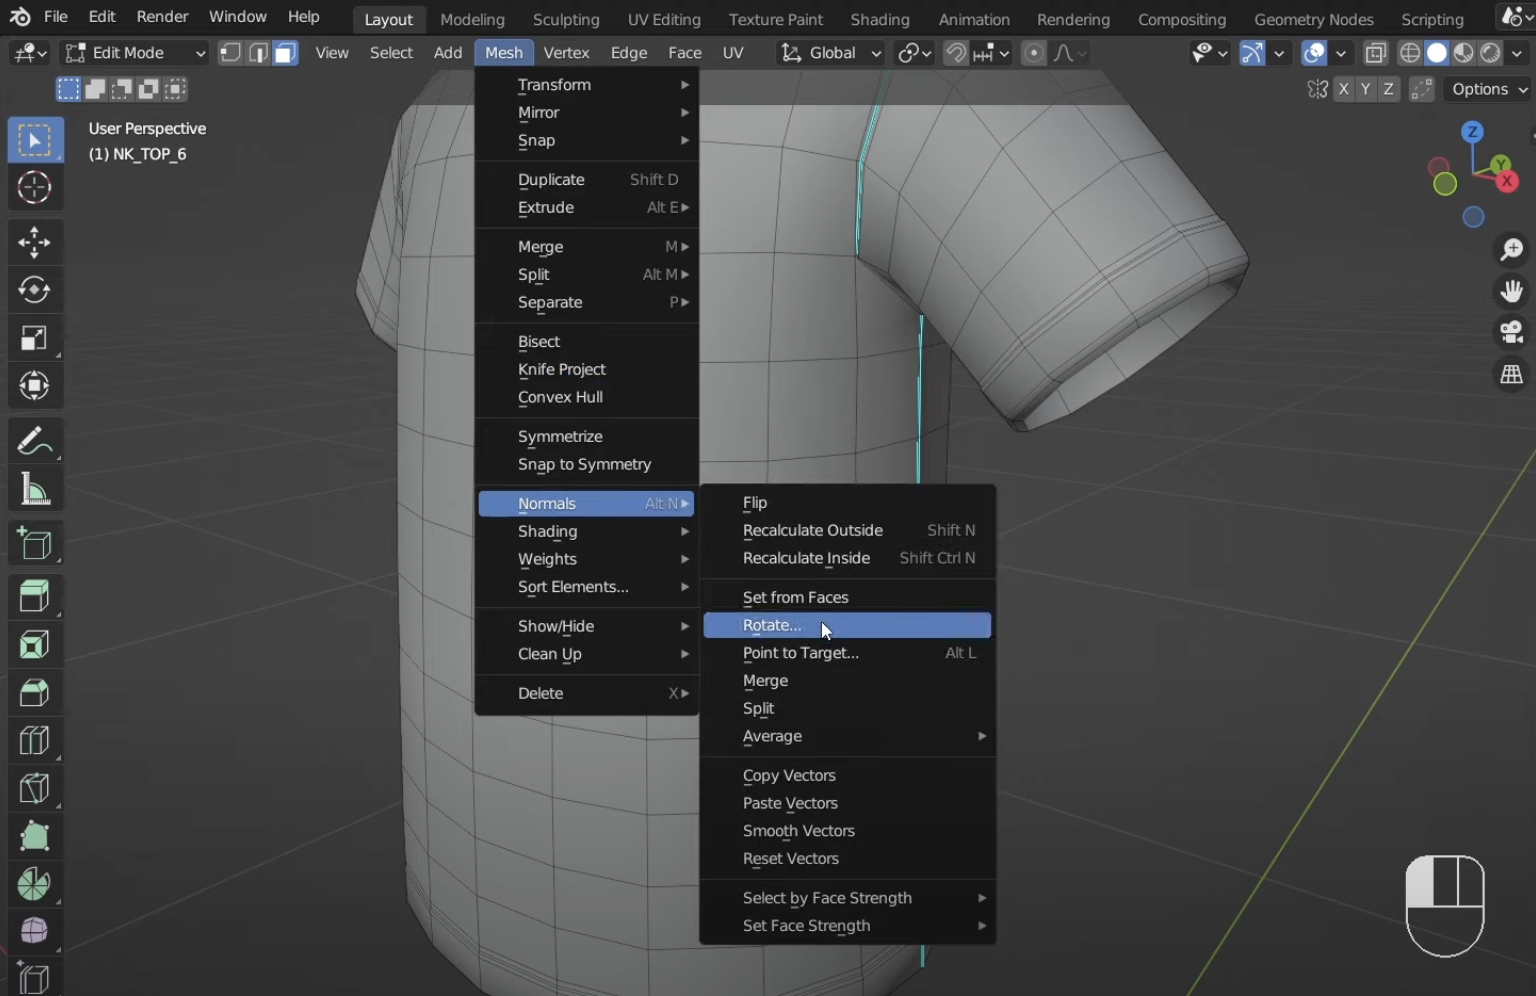
- We rotated the orientation of the mesh with Rotate. Because normals reflect the appearance of mesh components, changing information like orientation can change how light affects those components.
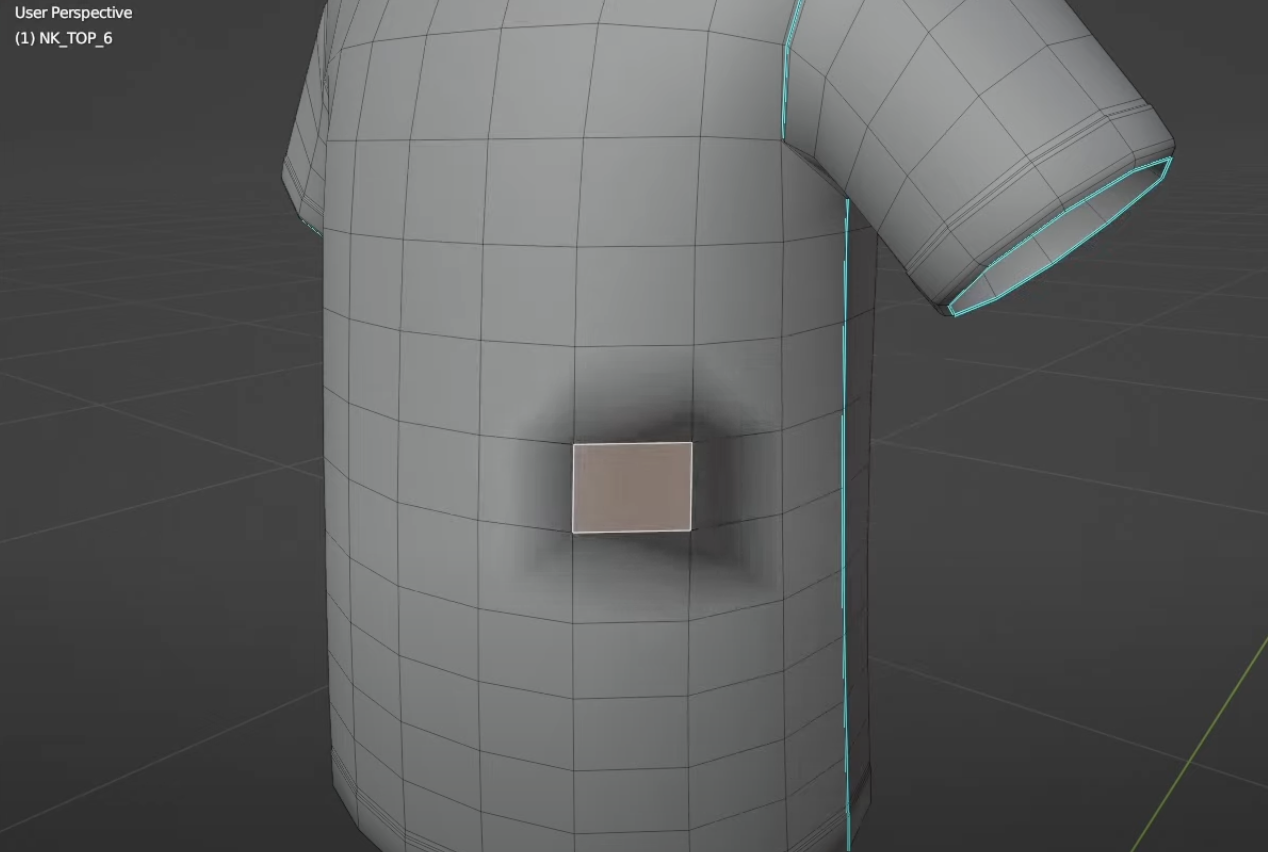
Editing the mesh in this way can also add additional detail.
Normals can also be applied to the texture of an item. The orientation of a Face is encoded as adding texture to the inside of the face that adds additional detail. These are called normal maps and are used when working with the texture of an object.
Top and Bottom Guides
When creating a top or bottom, use the Top and Bottom Modeling Guide Dummy (TOP_BTM_Dummy) file in [Preparing 3D Modeling].This file contains basic guidelines that can be applied to various top and bottom
- When modeling tops, make sure that your object does not exceed the guidelines in the form of a red skirt.
- When modeling bottoms, make sure that your object does not exceed the blue guidelines for tops.
It's okay to go outside the boundary of these guidelines when creating a single outfit.
Shoes
When creating shoes, use the Shoe Modeling Guide (SH_Guide) file in [Preparing 3D Modeling], which contains guidelines for ensuring that shoes and socks do not overlap.
Warning
This guide file is not rigged, so you may need to do some temporary rigging to make the guide file work for shoes that require rigging adjustments.
Updated 4 months ago