Uploading
To help you understand the guide, a video is attached at the bottom of the page.
Watching the video along with the guide will make it easier for you to follow along!
Before moving from Blender to Unity, the first thing you need to do is clean up your objects, masks, and armature. Here's how to organize them.
- Convert the object properties of the Creator Base Set object.
- Unbind any masks.
- Delete unnecessary bones.
- Finally, you need to arrange all the elements in a flat hierarchy.
STEP 1 : Set up the Transform
If you look at the Creator Base Set object properties, you'll notice that the Rotation value is not completely zeroed out, and the Scale value is not set to 1. This is because there are differences between Blender and the FBX file regarding the Scale reference and the world axis.
- Blender uses a size unit of M, while FBX uses CM.
- Blender uses the Z-axis to point up and down, while fbx uses the Y-axis to point up and down.
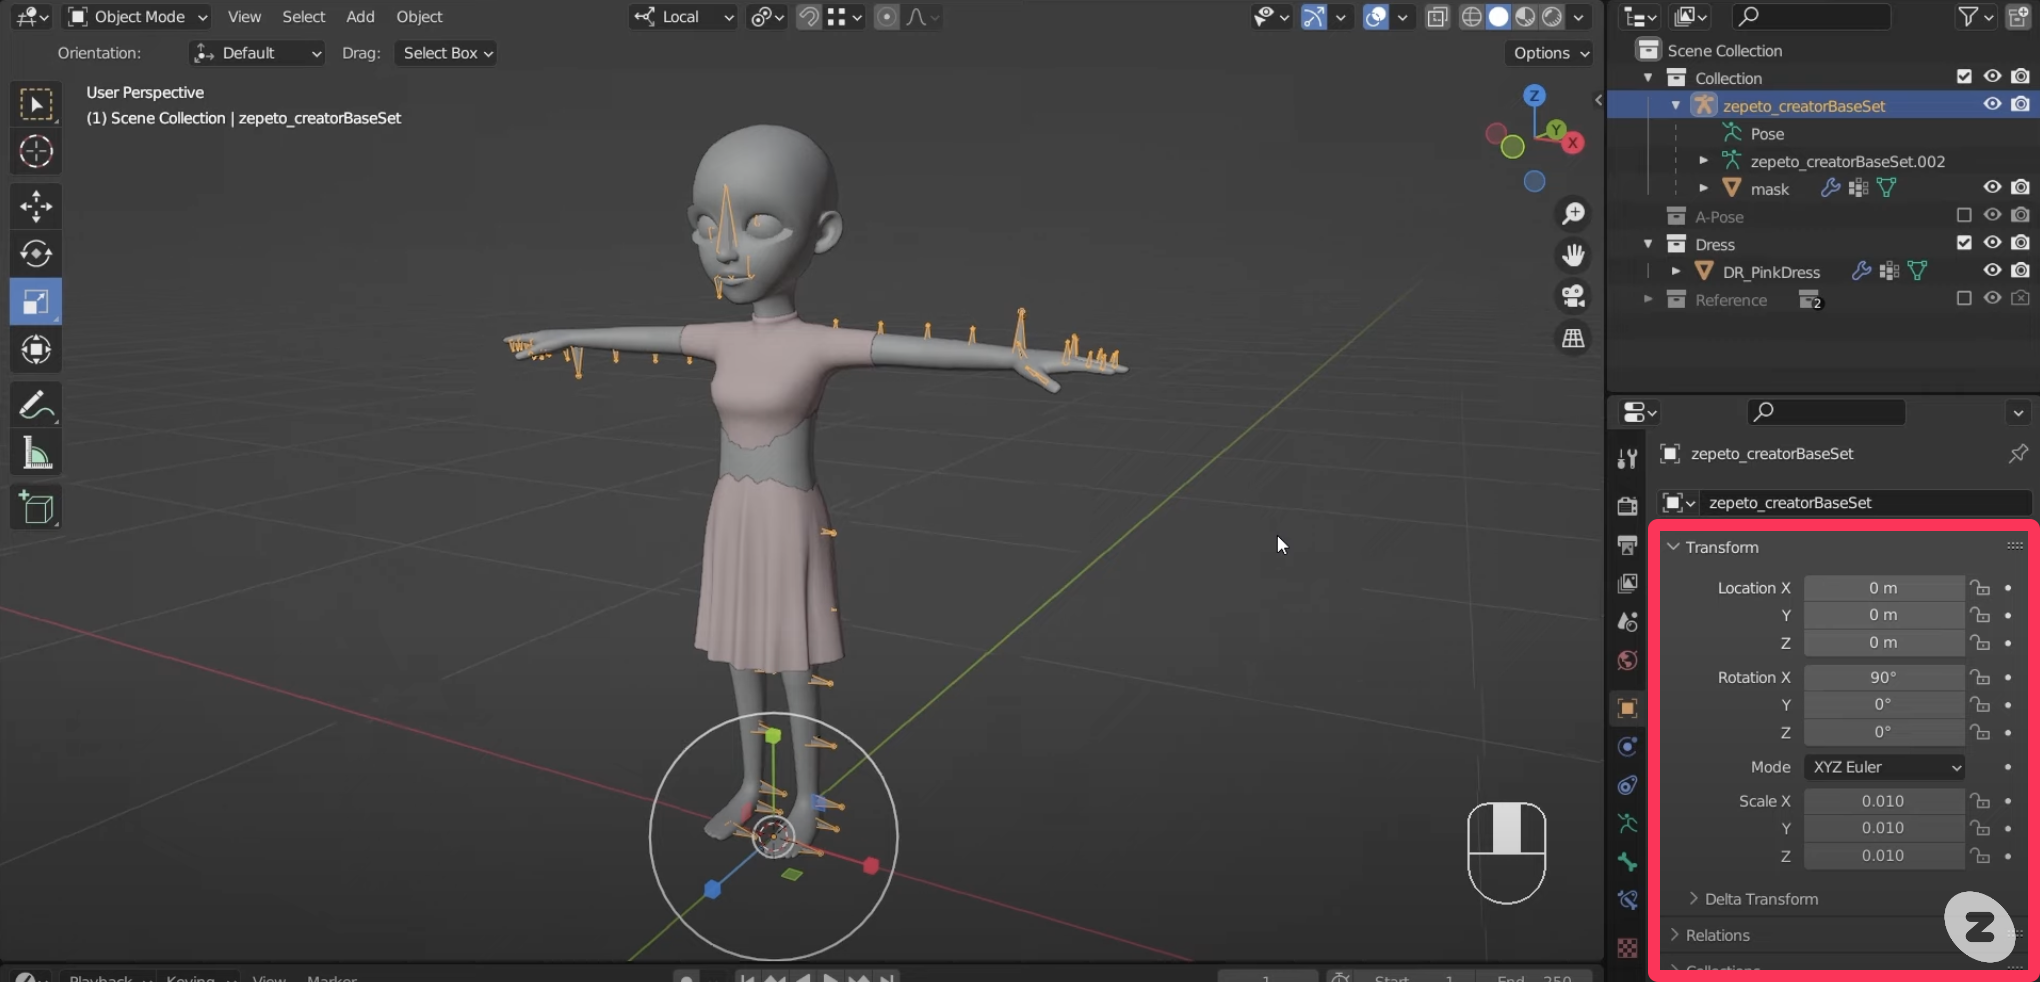
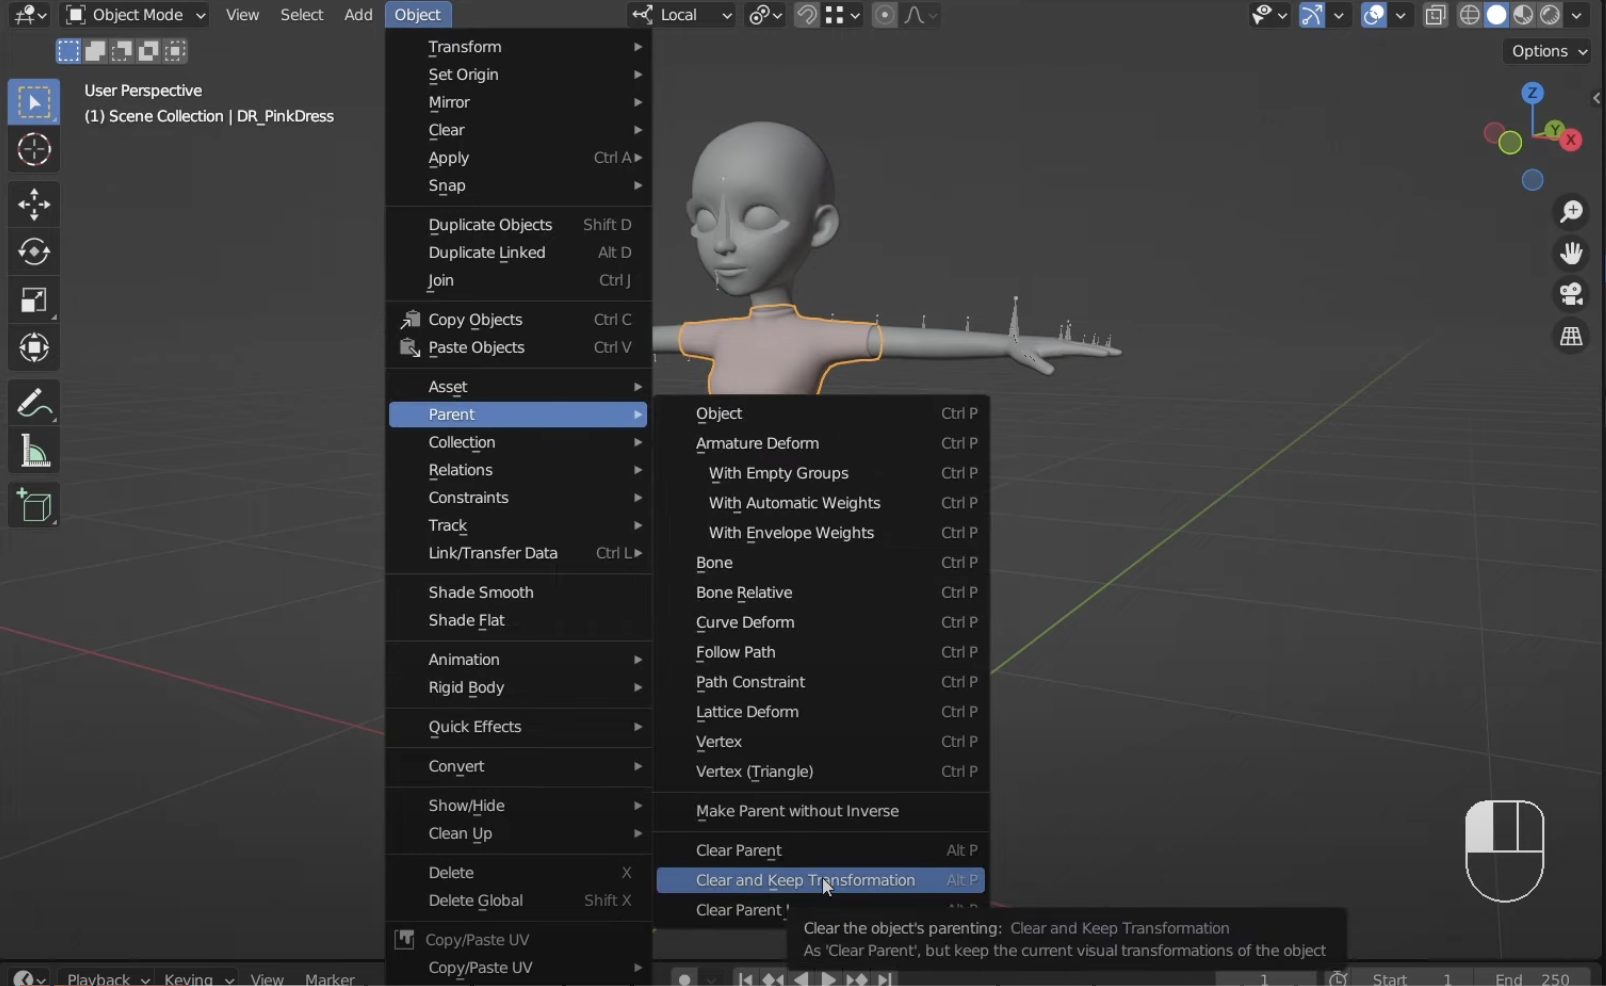
- With the Item object selected, click Object > Parent > Clear and Keep Transformation. This will remove any previously applied settings.
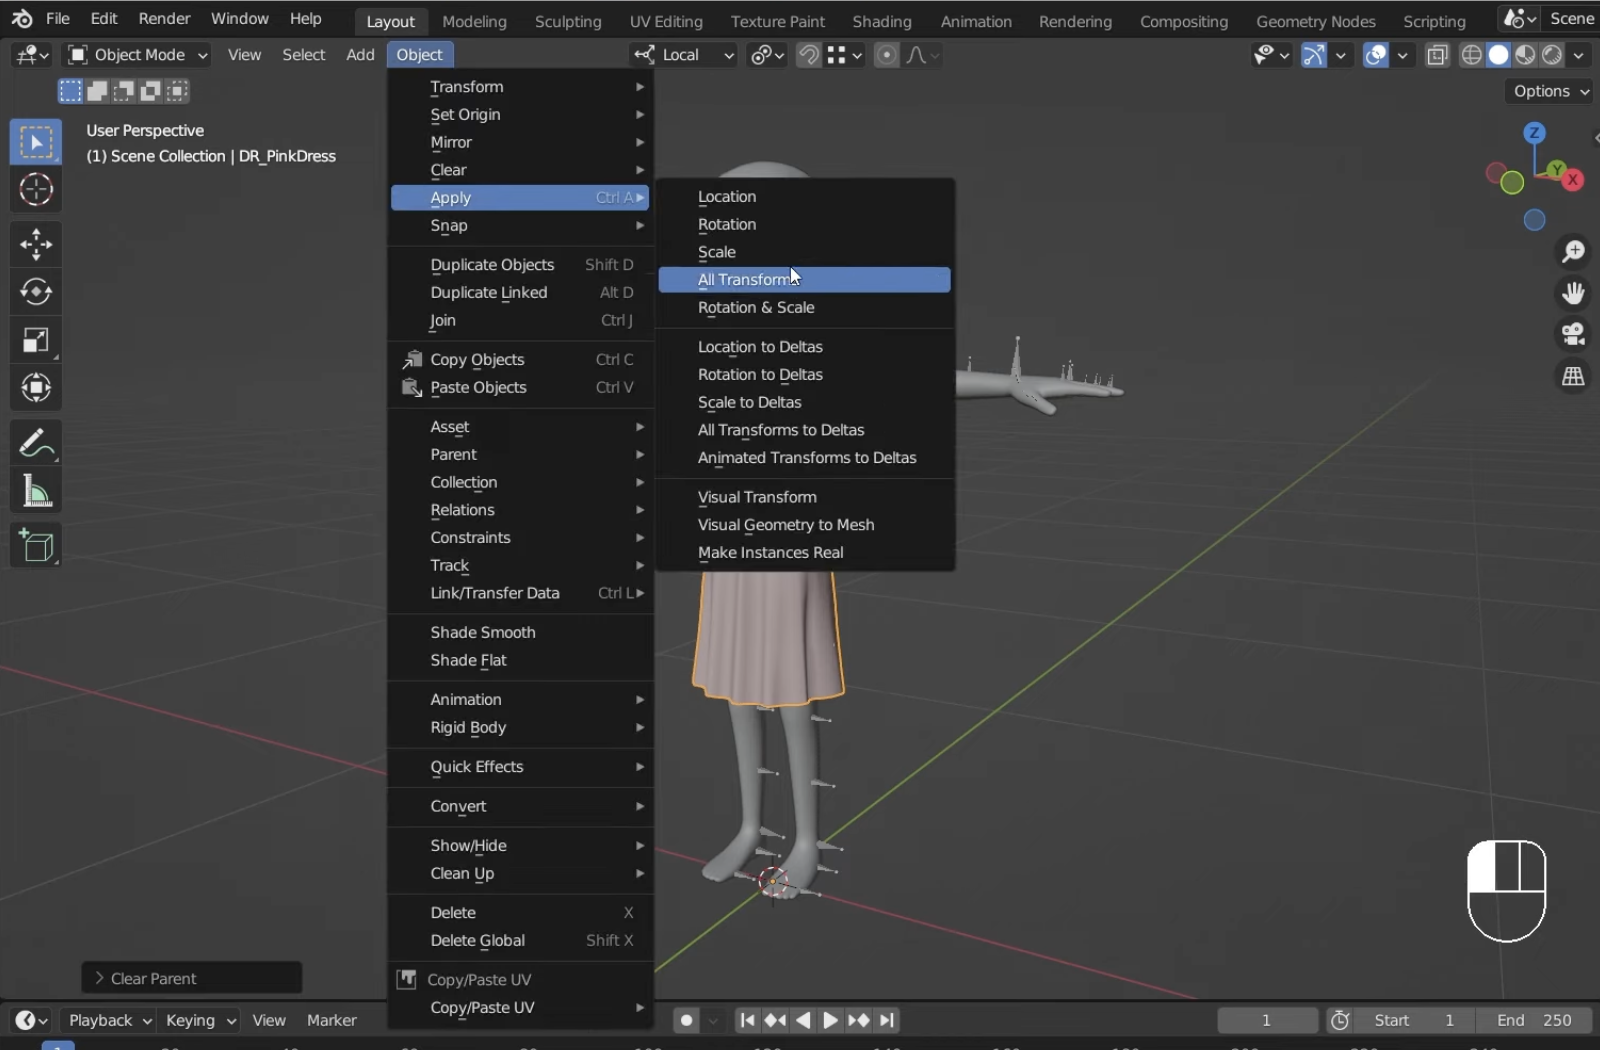
- Next, click Object > Apply > All Transforms to make the current state the default.
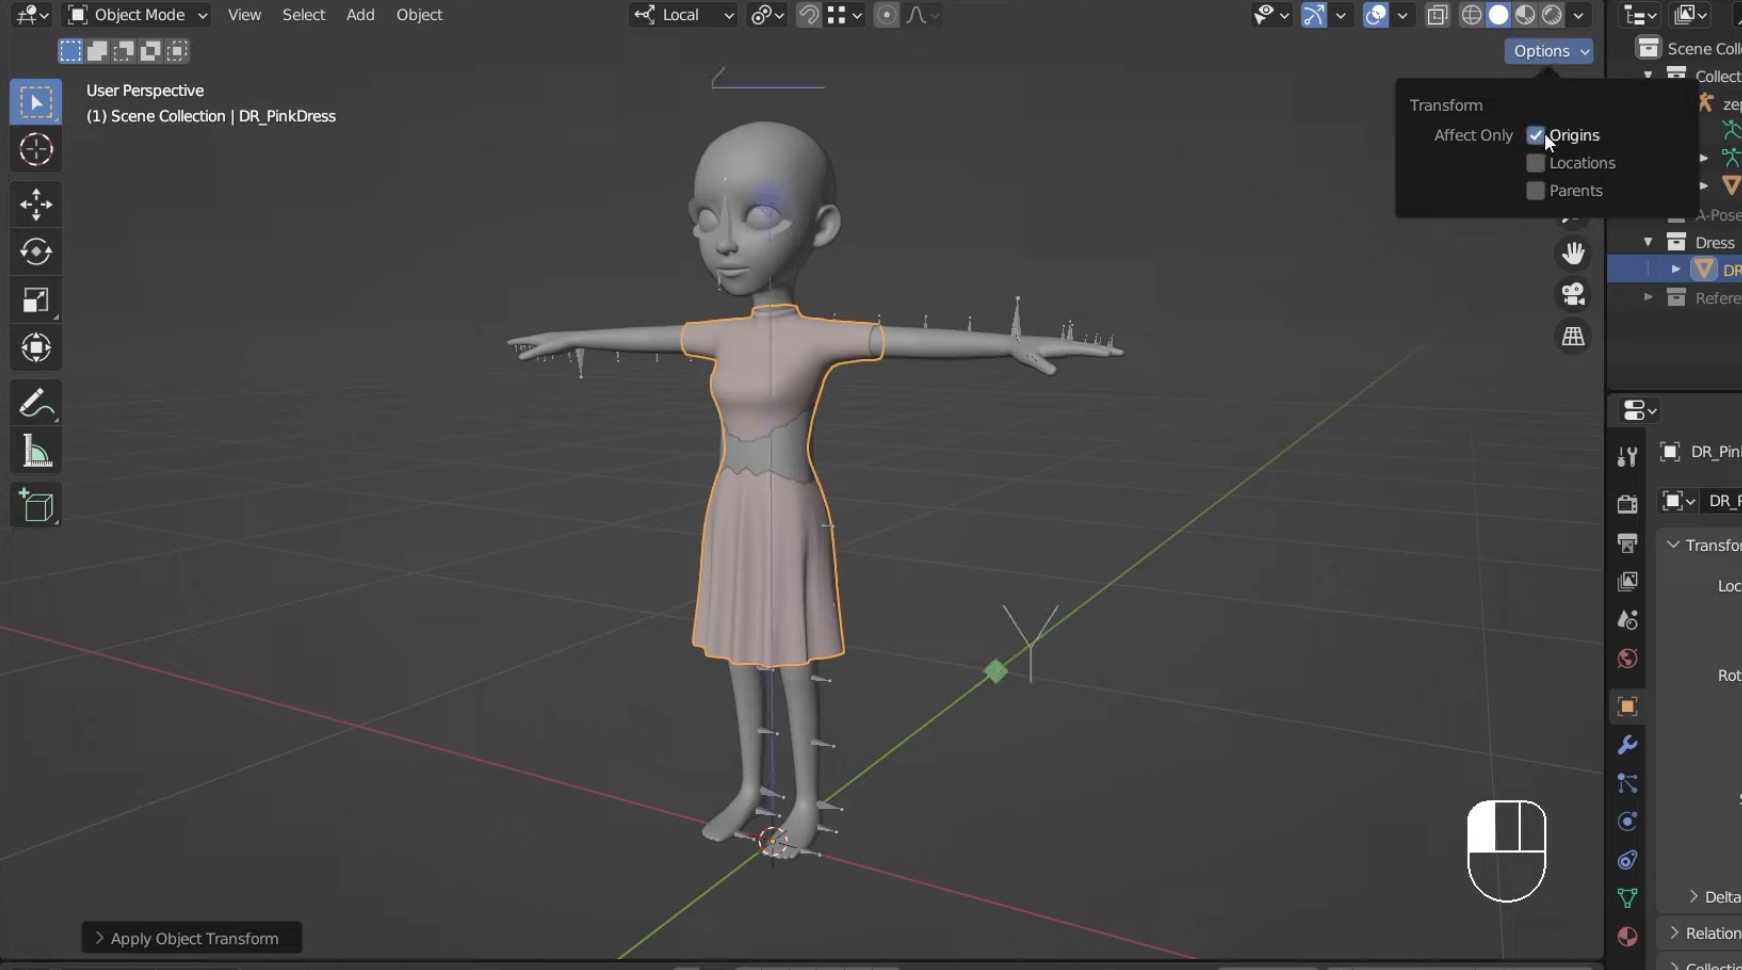
- Select Origins from the Options menu in the top right corner of the viewport.
- We need to use the Scale tool to change the size to 0.01. Use the Ctrl key to fine-tune to decimal places.
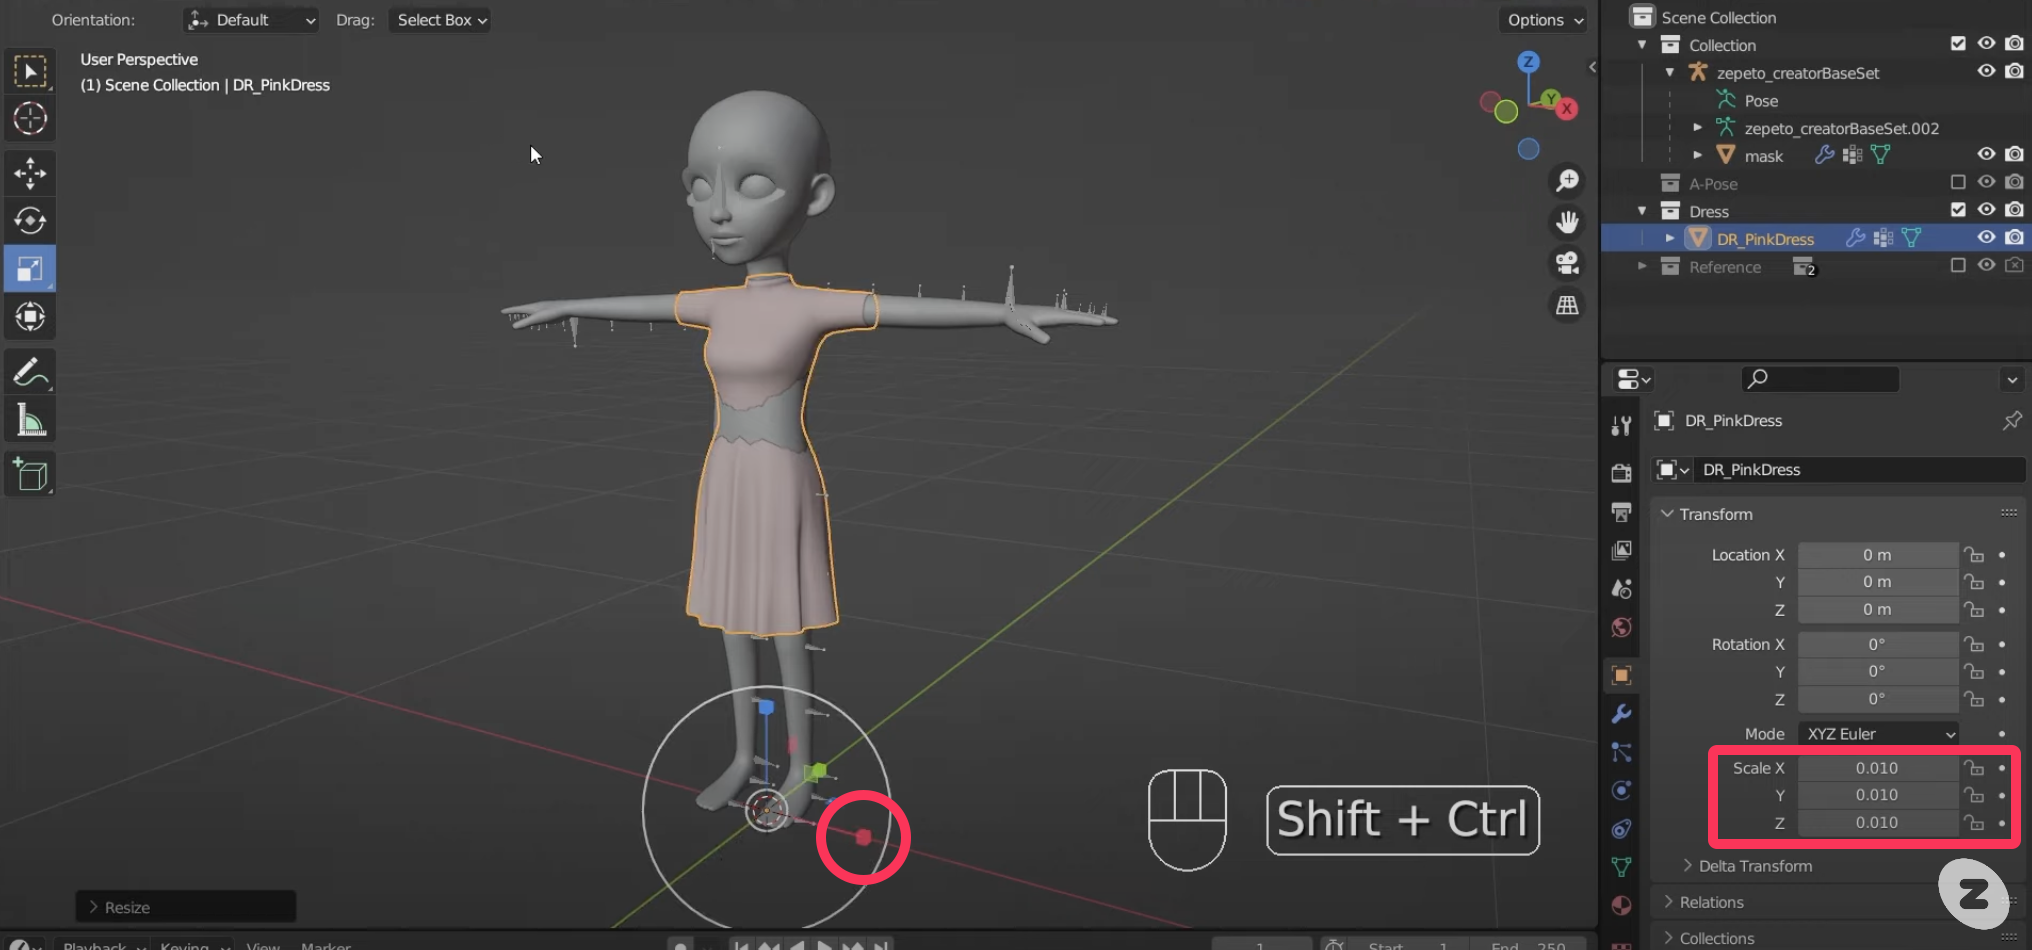
Caution
This number can only be changed using the Scale tool and cannot be entered directly into the settings window.
- Use the Rotate tool to rotate 90 degrees on the X-axis, the same as in step 4.
- Uncheck Origins from the Options menu in the top right corner of the viewport.
STEP 2 : Isolate the mask
When Unity imports a file, it looks for a mesh object that is named mask. If it doesn't find it, the conversion process won't work properly.
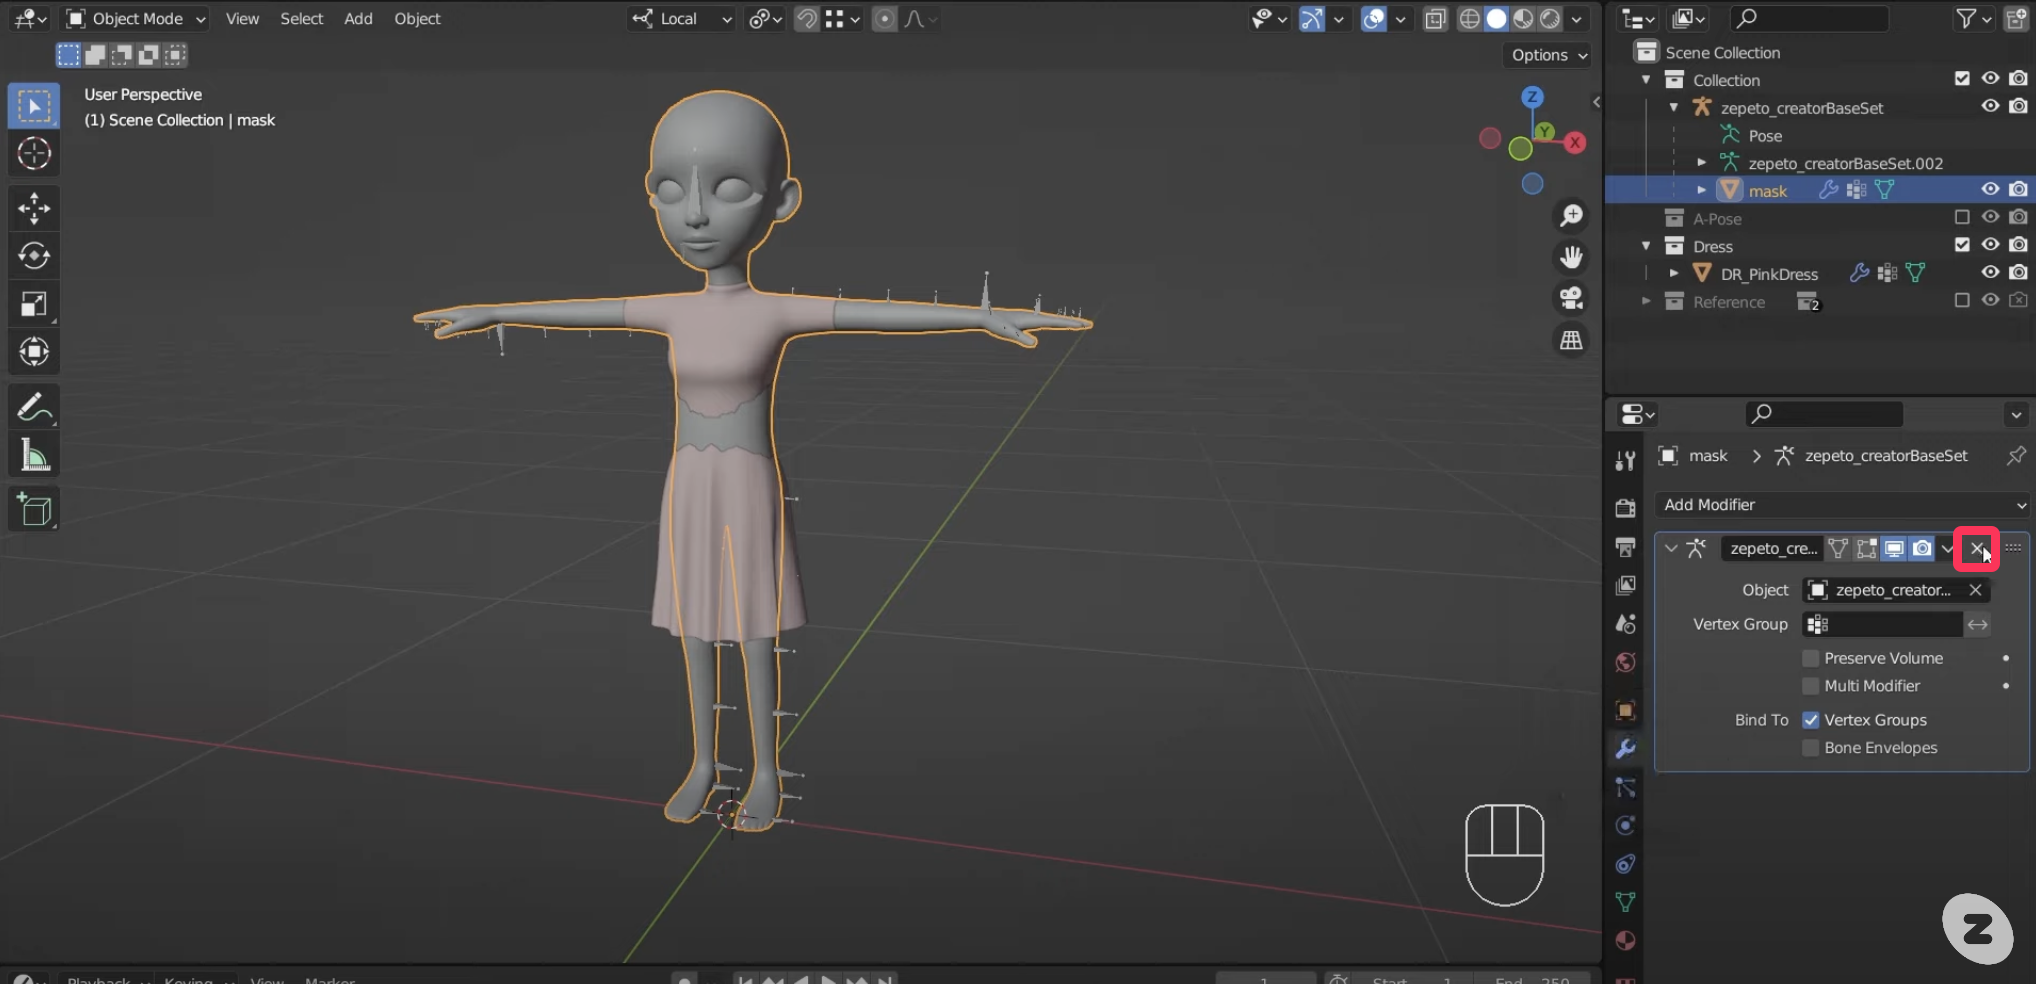
- Select the mask object and in the Modifier settings, find the existing modifier and delete it with the X button.
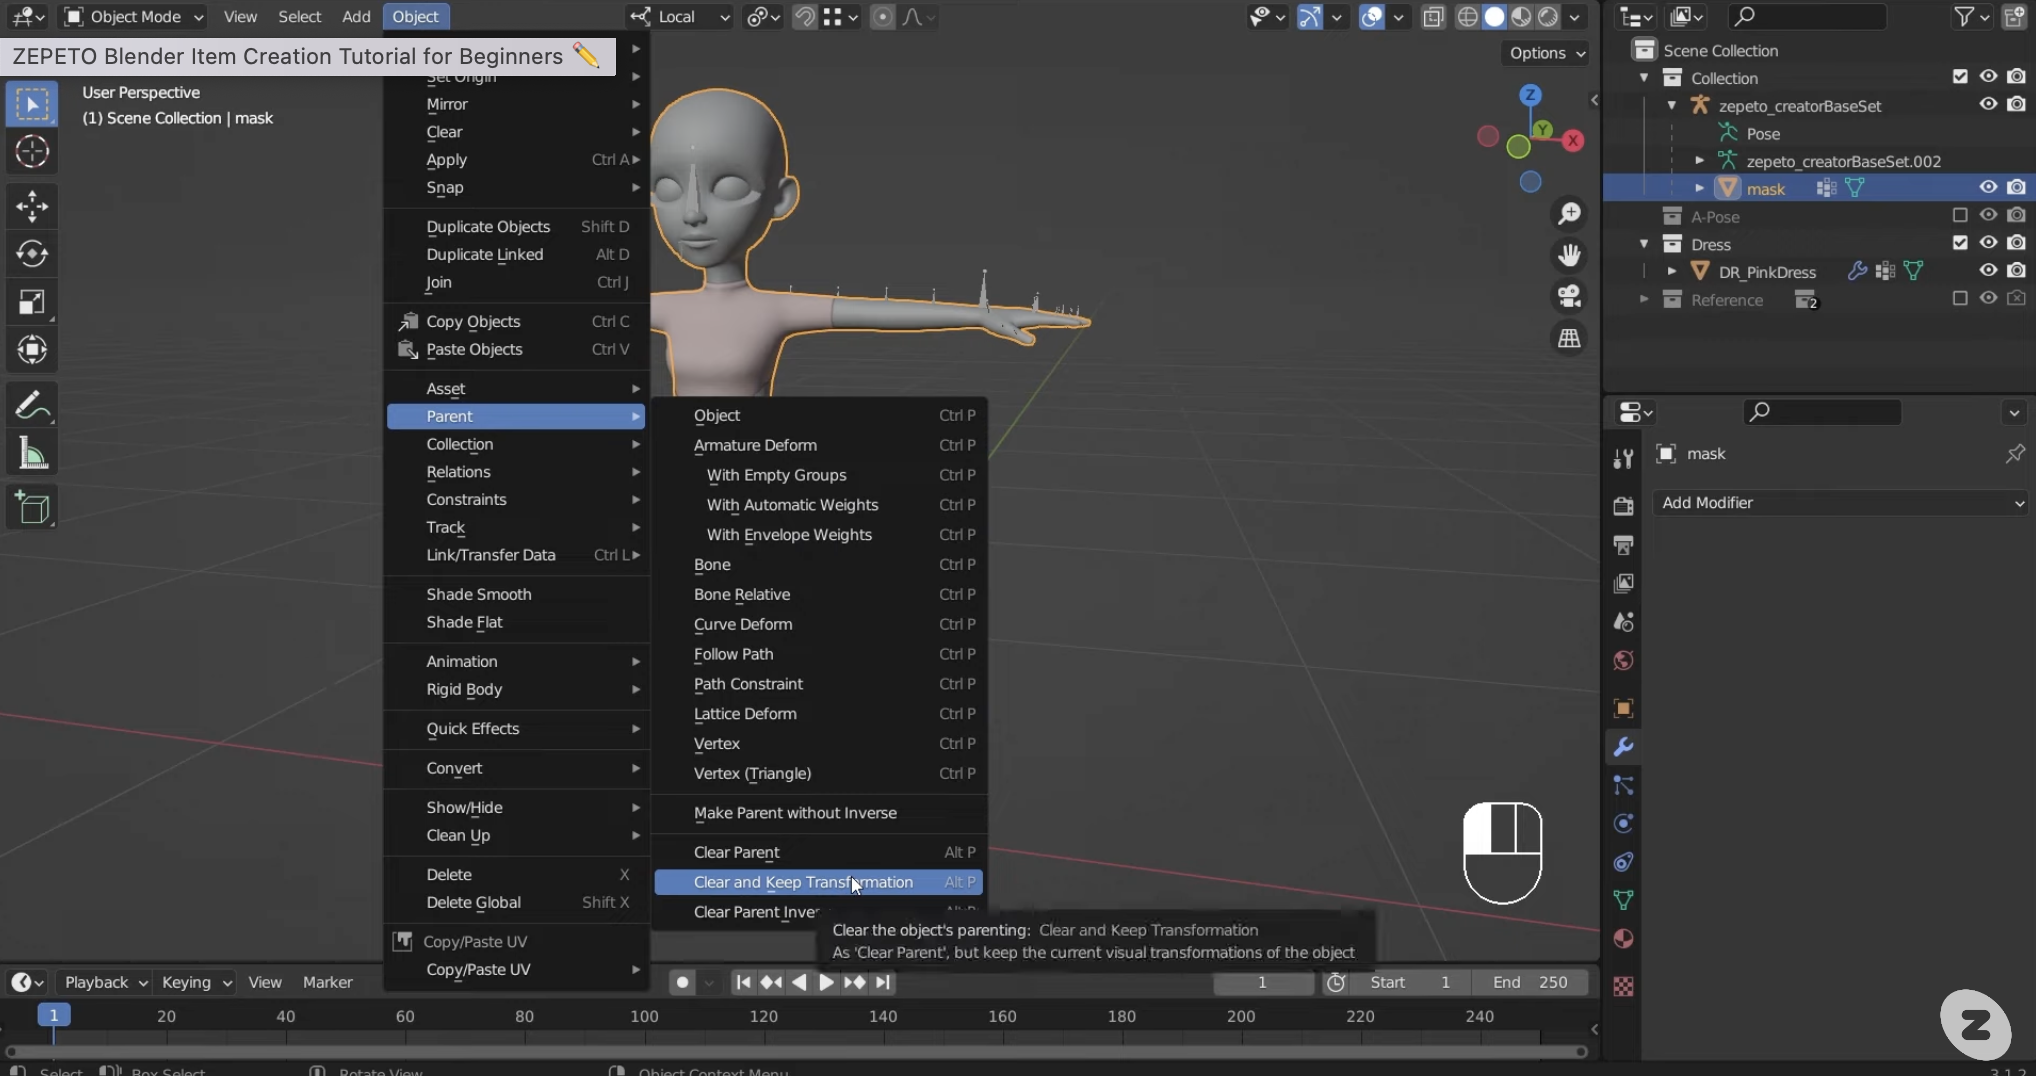
- With the mask object selected, press Object > Parent > Clear and Keep Transformation. This will separate the mask from the armature.
STEP 3 : Delete the unnecessary armature
When you export the FBX file from Blender, all bones will include weight information. To avoid any capacity issues that may appear during this process, delete any unused skeletons.
- Select the Creator Base Set skeleton and enter Edit mode.
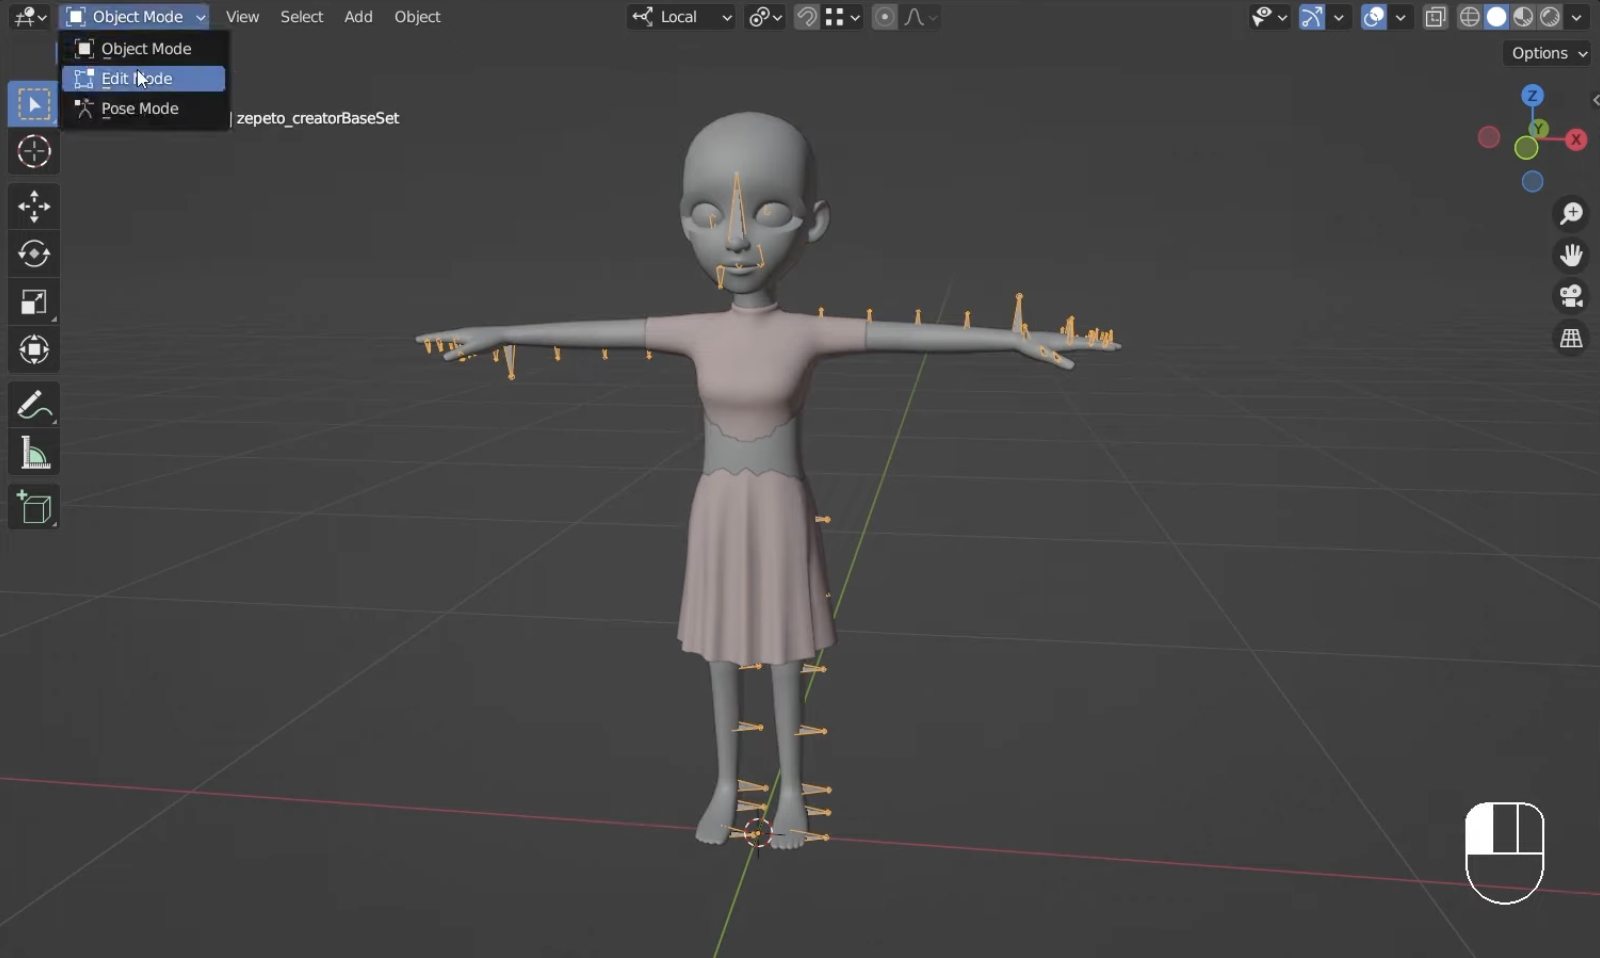
- Switch to Wireframe View mode and delete any bones that are not being used for the item.
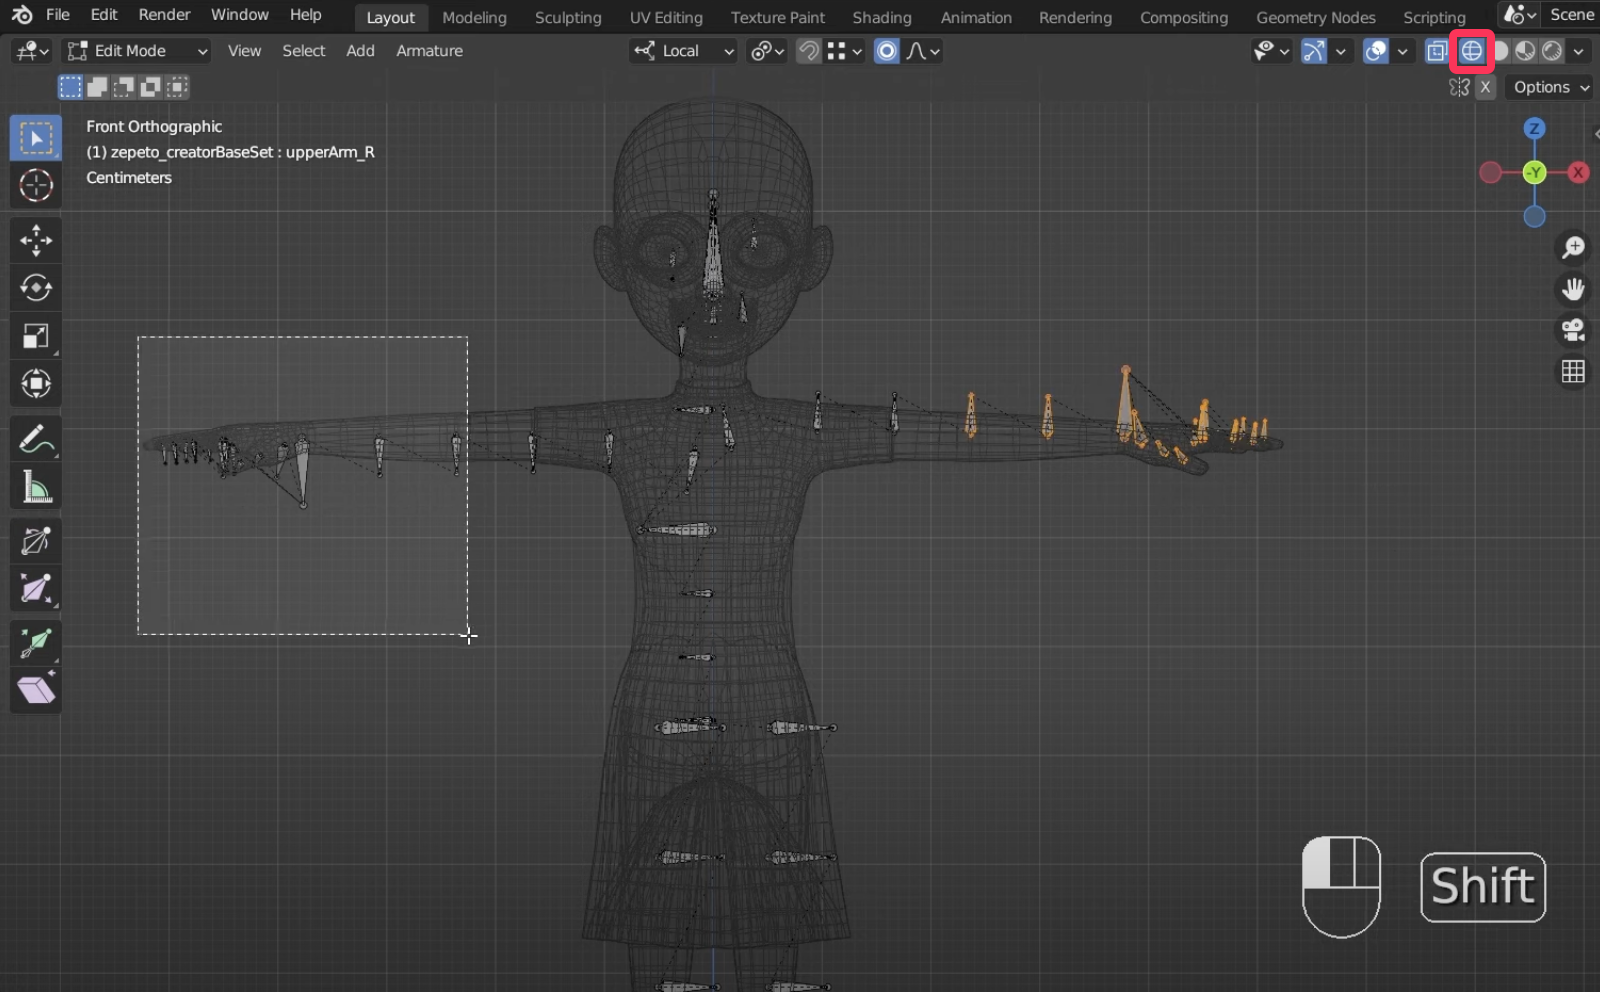
STEP 4 : Turn off the hierarchy
Before exporting to an FBX file, we need to make sure that the 3 objects we are exporting do not have any hierarchy between them. We unlinked the mask and skeleton in the previous step, but it's a good idea to double check.
- Select the Item object and look for Relations in the object properties to make sure that nothing is connected to the Parent. If it is, click Object > Parent > Clear and Keep Transformation to disconnect it.
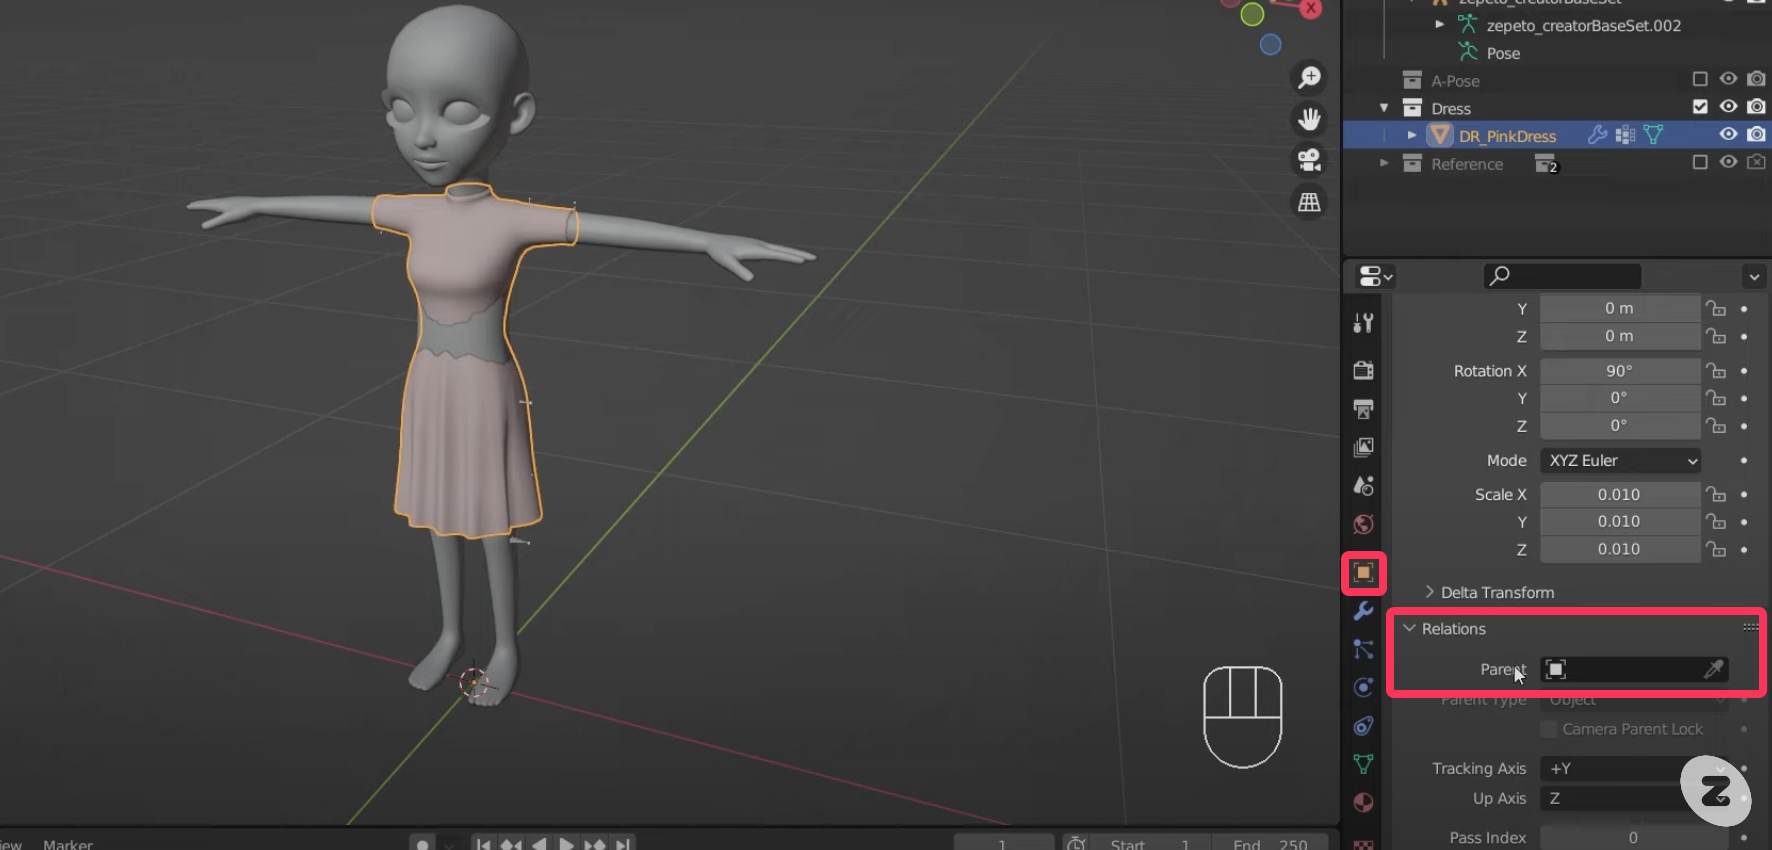
- Do the same for the Mask object.
STEP 5 : Export to FBX
In order to import the item in Unity, you will need to export the three objects - the Item Object, Mask Object, and Armature - into a single FBX file.
- Select the Item Object, Mask Object, and Armature, and then select File > Export > FBX.
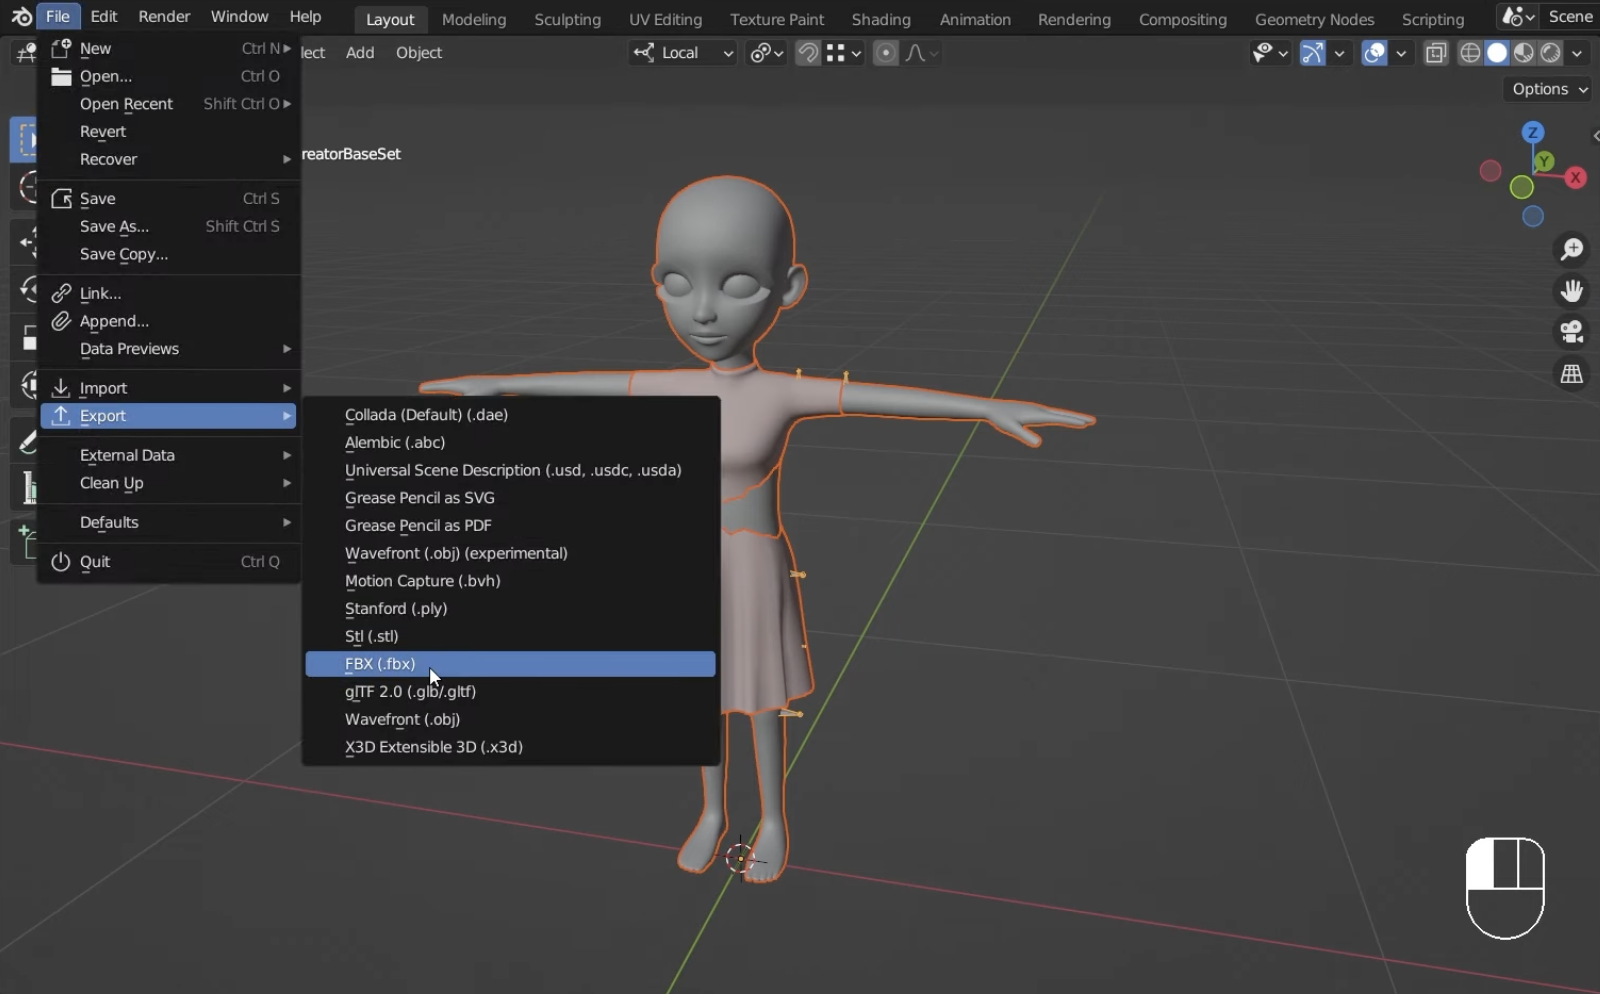
- In the window that pops up, check the Selected Objects checkbox to ensure that only the selected objects are extracted.
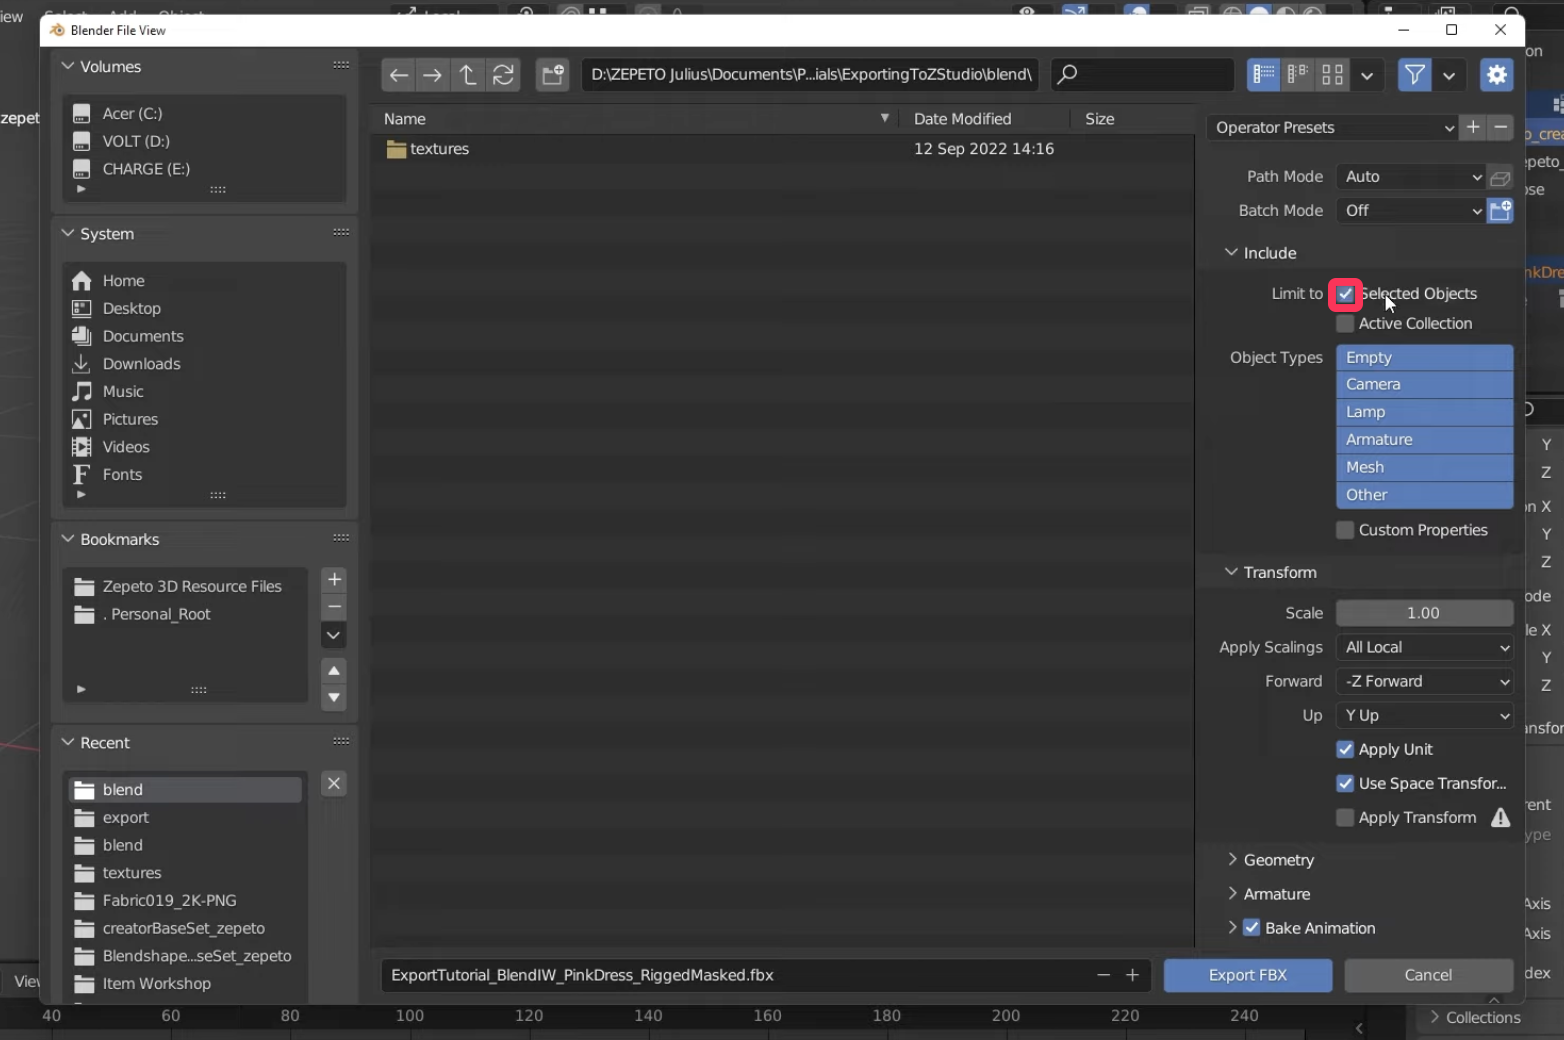
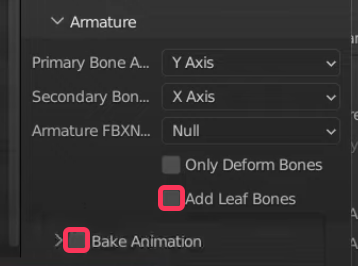
- On the Armature tab at the bottom, turn off the Add Leaf Bones and Bake Animation options.
- Give it a name and click the Export button.
ZEPETO Studio Unity Project
Caution
Make sure you have the latest Zepeto Unity Project file and Unity 2020.3.9 installed.
- Open the Unity Hub and click Open.
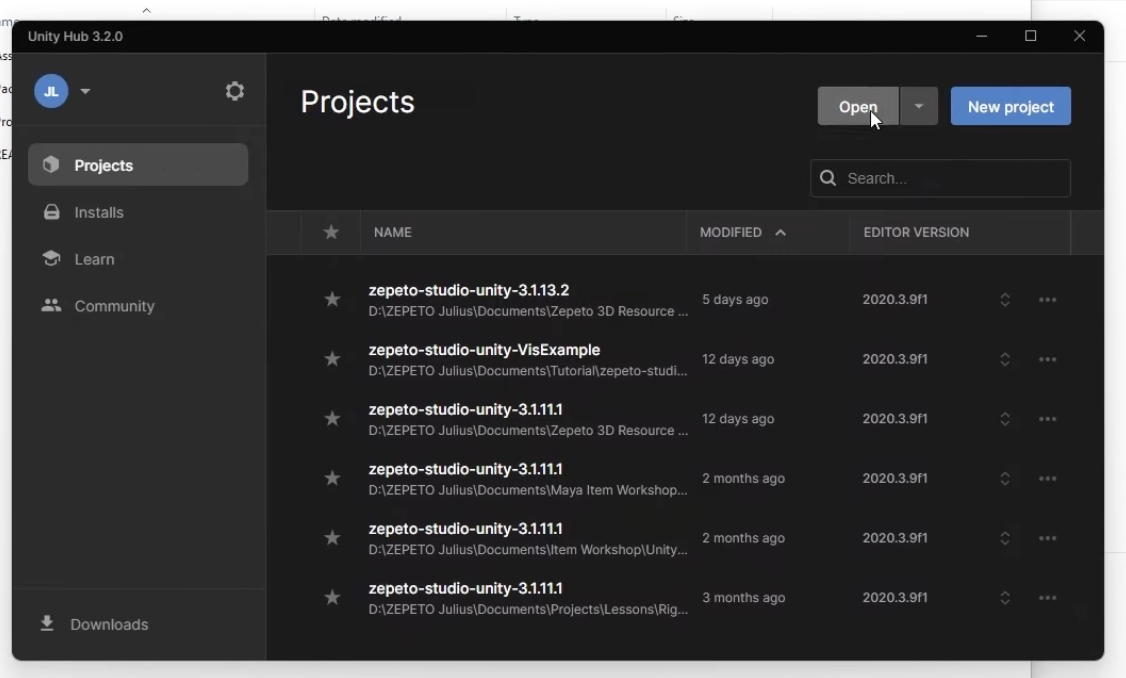
- Open the Zepeto Unity Project file. At this point, select the folder to open all the files it contains.
Unity in a nutshell
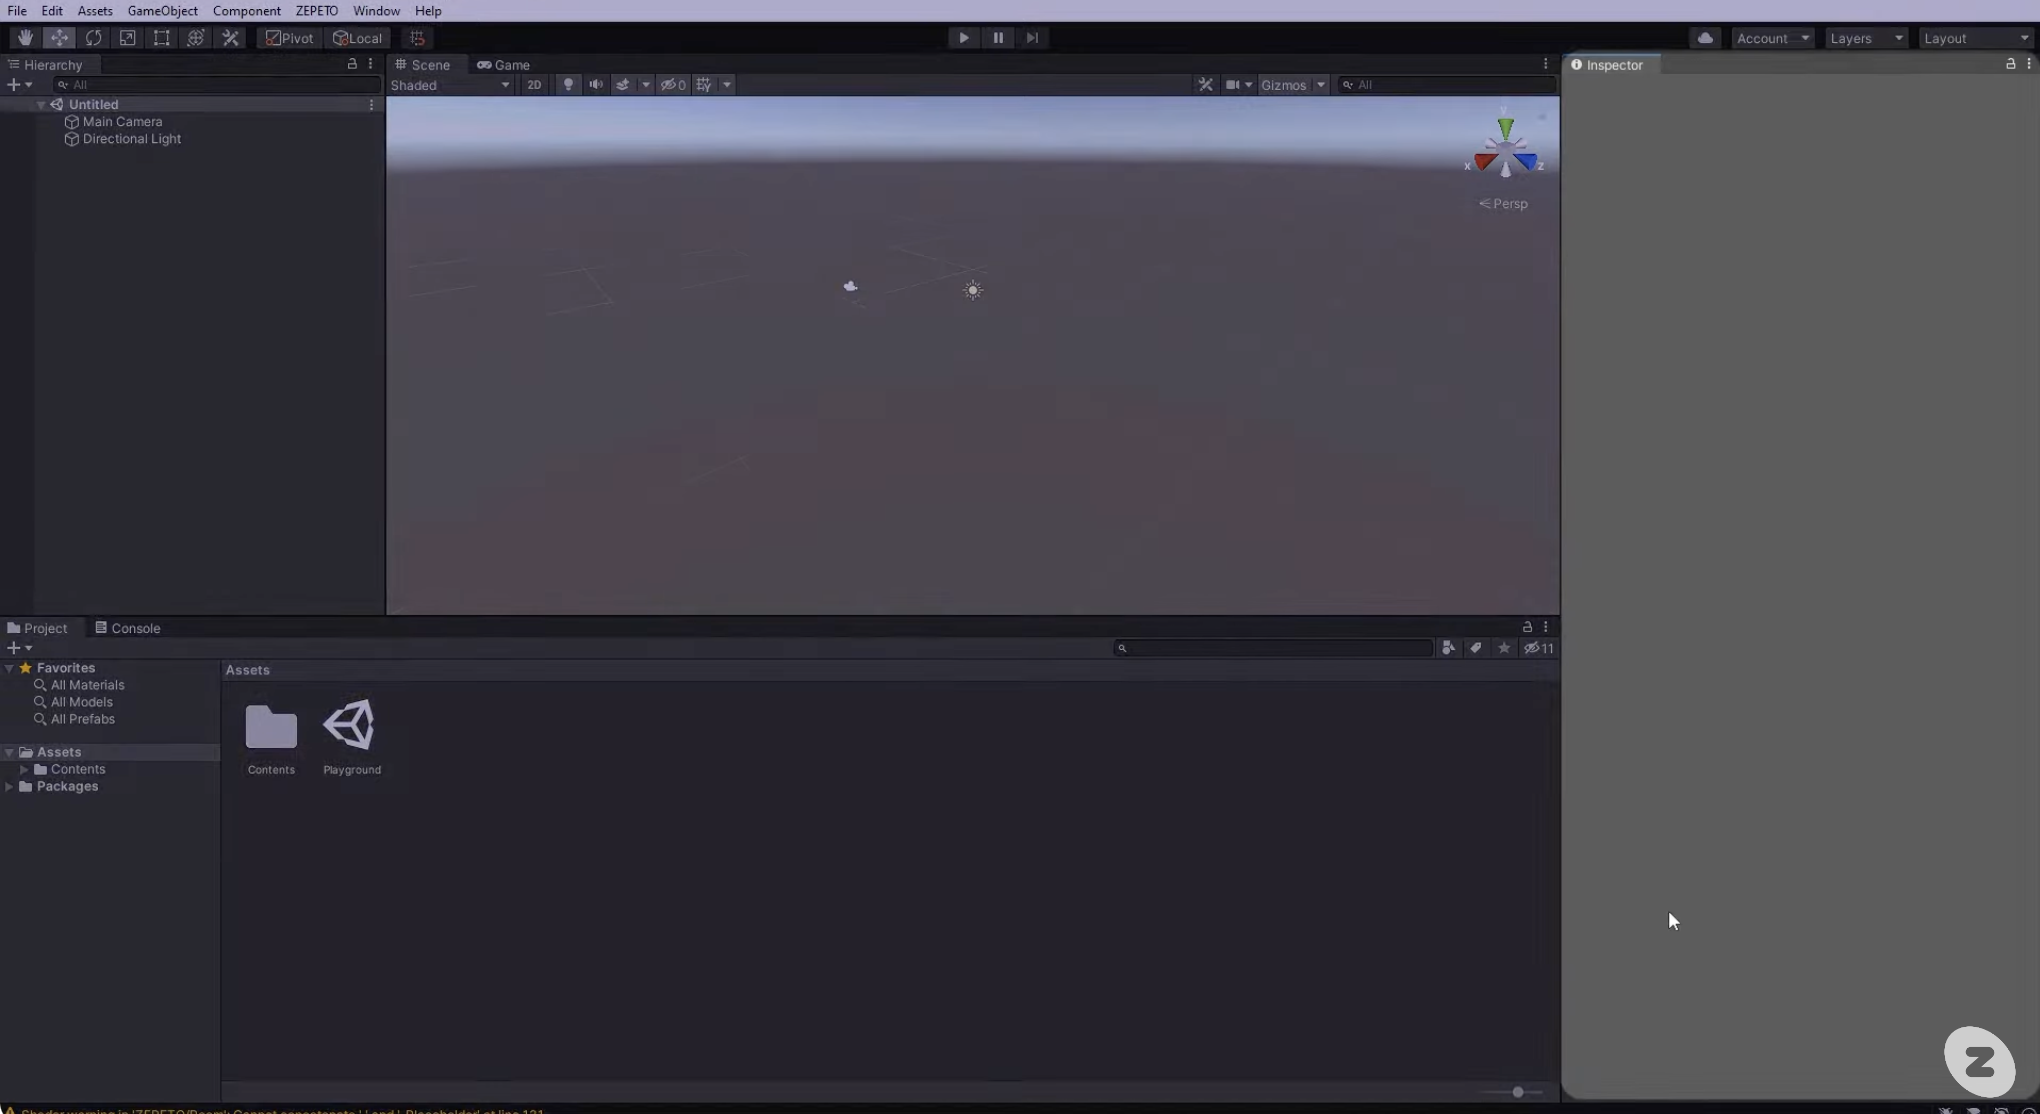
- When you open Unity, you'll see the Scene View in the center. This is where you'll be doing most of your editing.
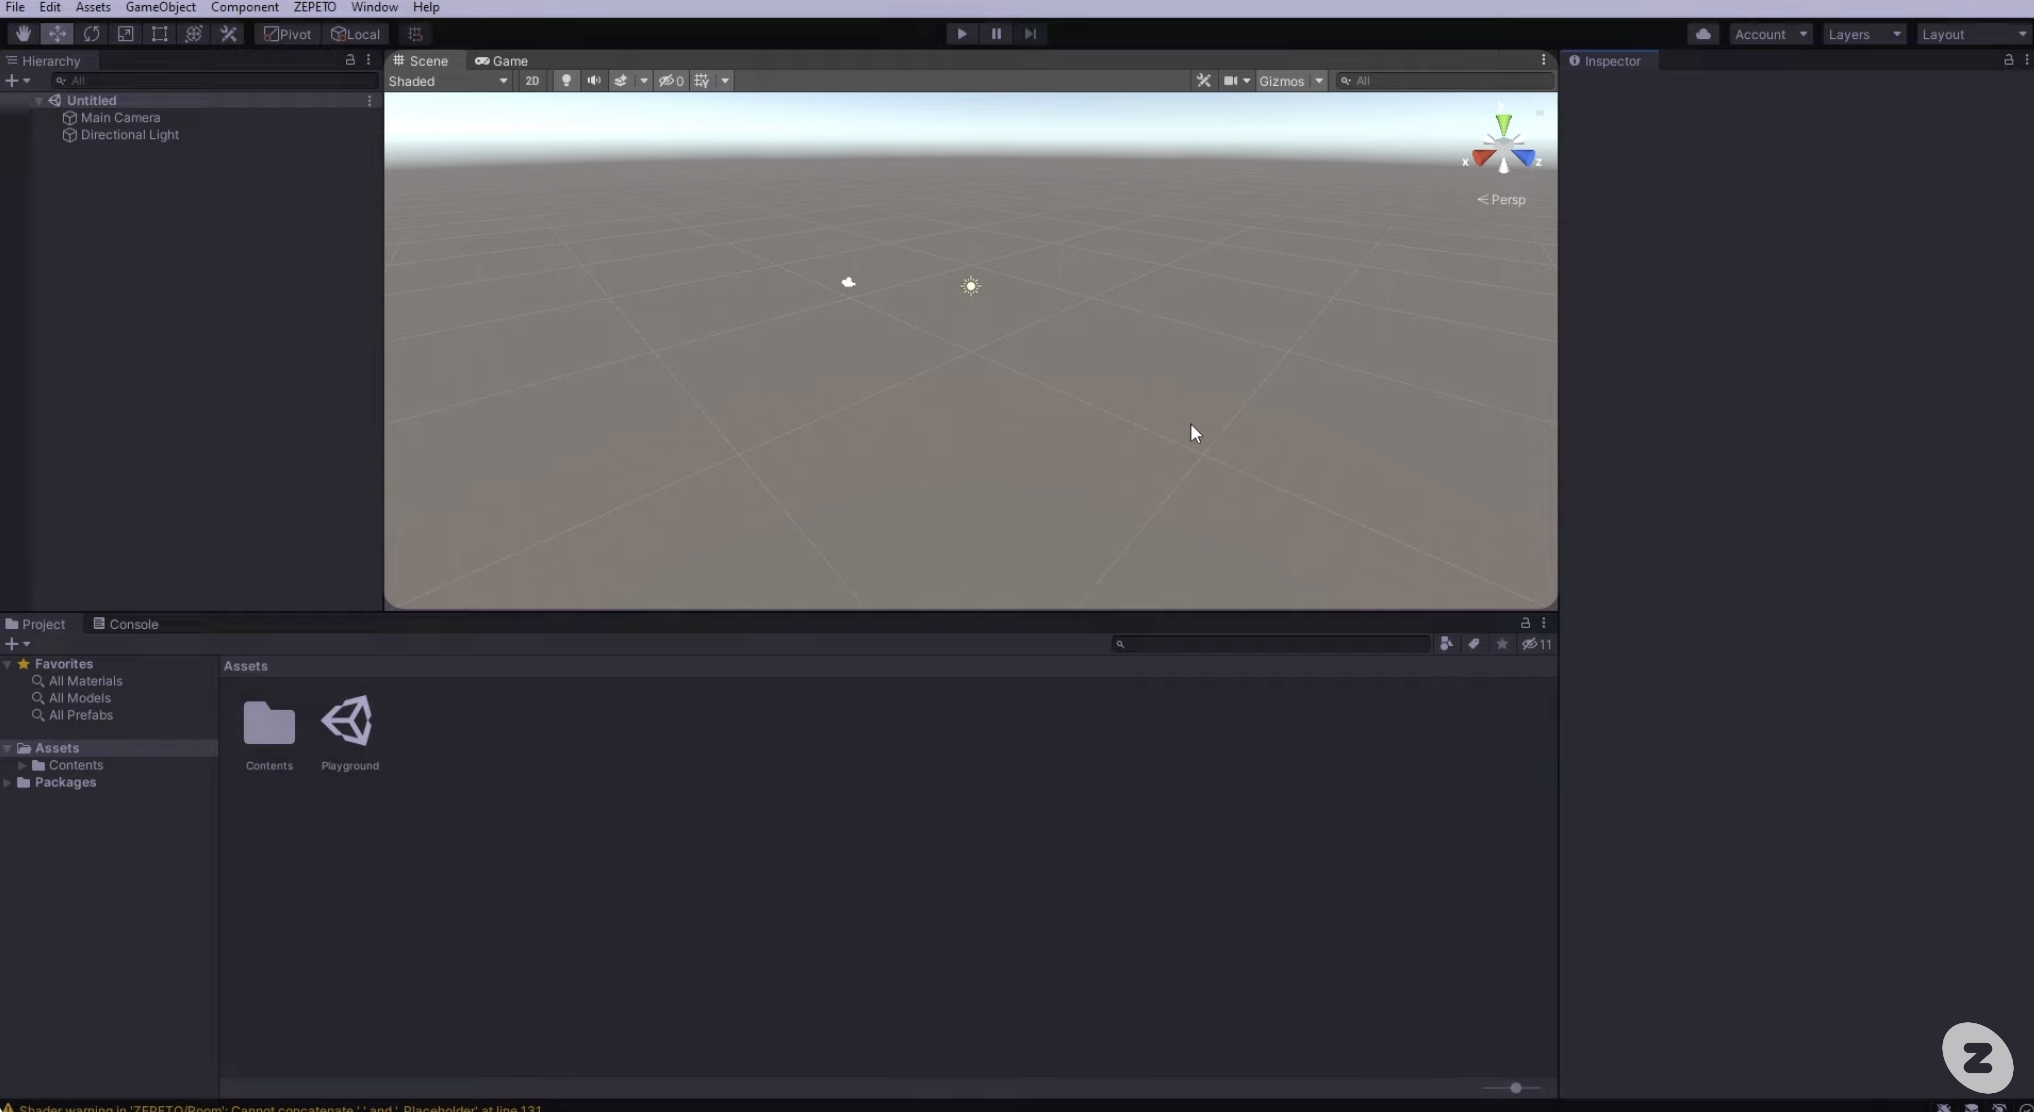
- On the left, you can see the hierarchy of your files. This is where you can see all the objects included in your scene.
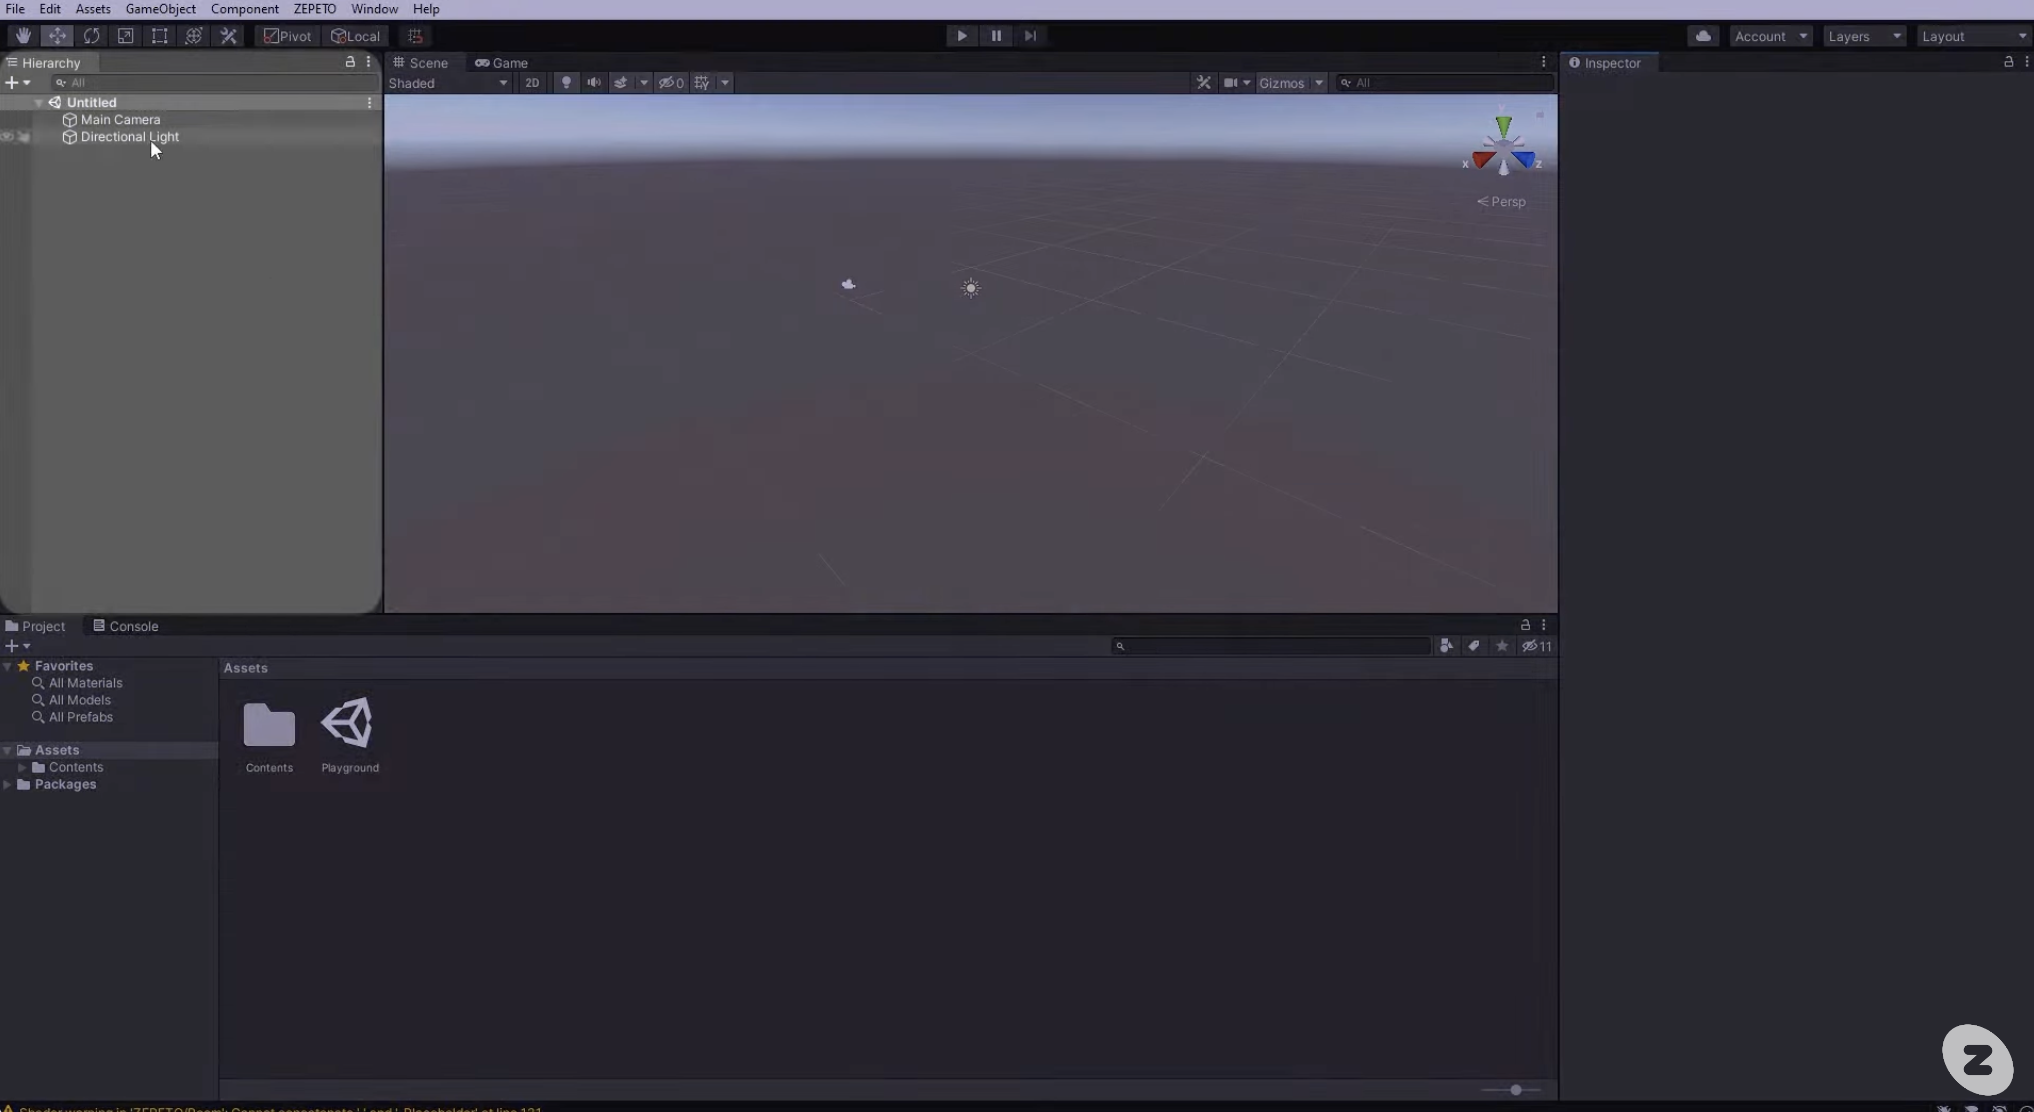
- On the bottom left is the Project toolbar. This is where you can see all the objects contained in your project file.
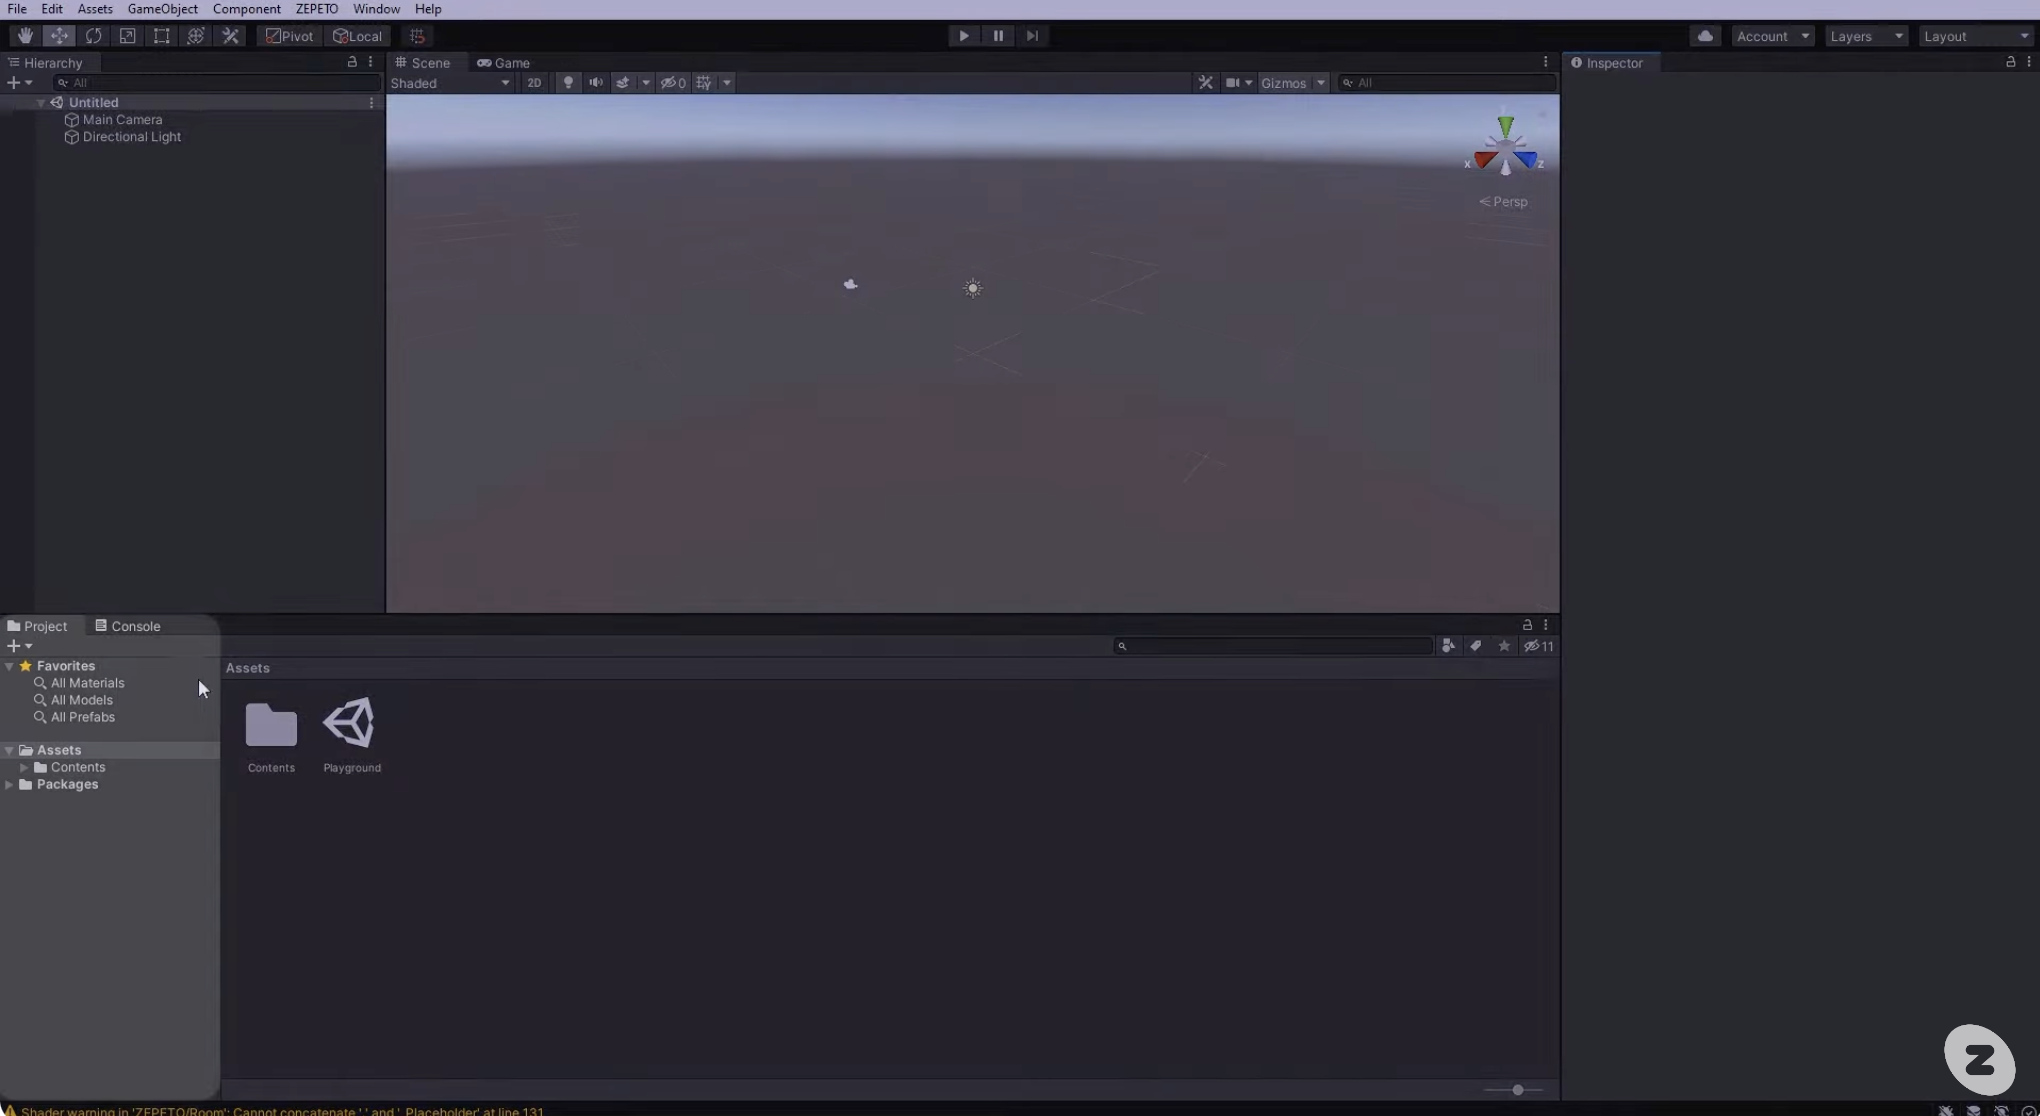
- On the right is the Inspector panel. This is where you can view the properties of the selected objects.
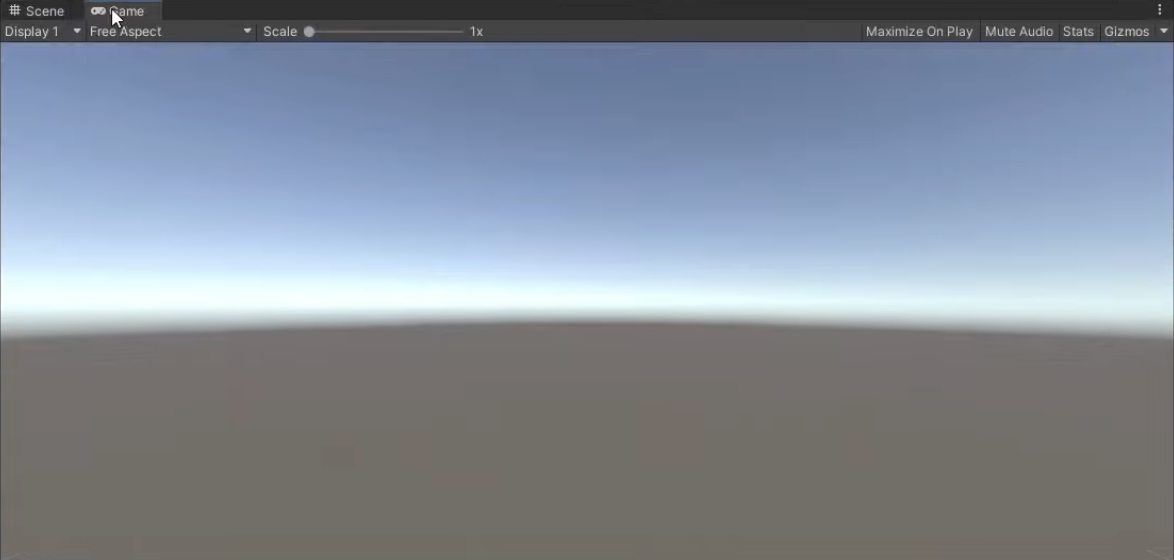
- At the top of the scene view is the Game tab. The Game tab allows you to view and test your objects in line with the game camera.
STEP 6: Import the FBX
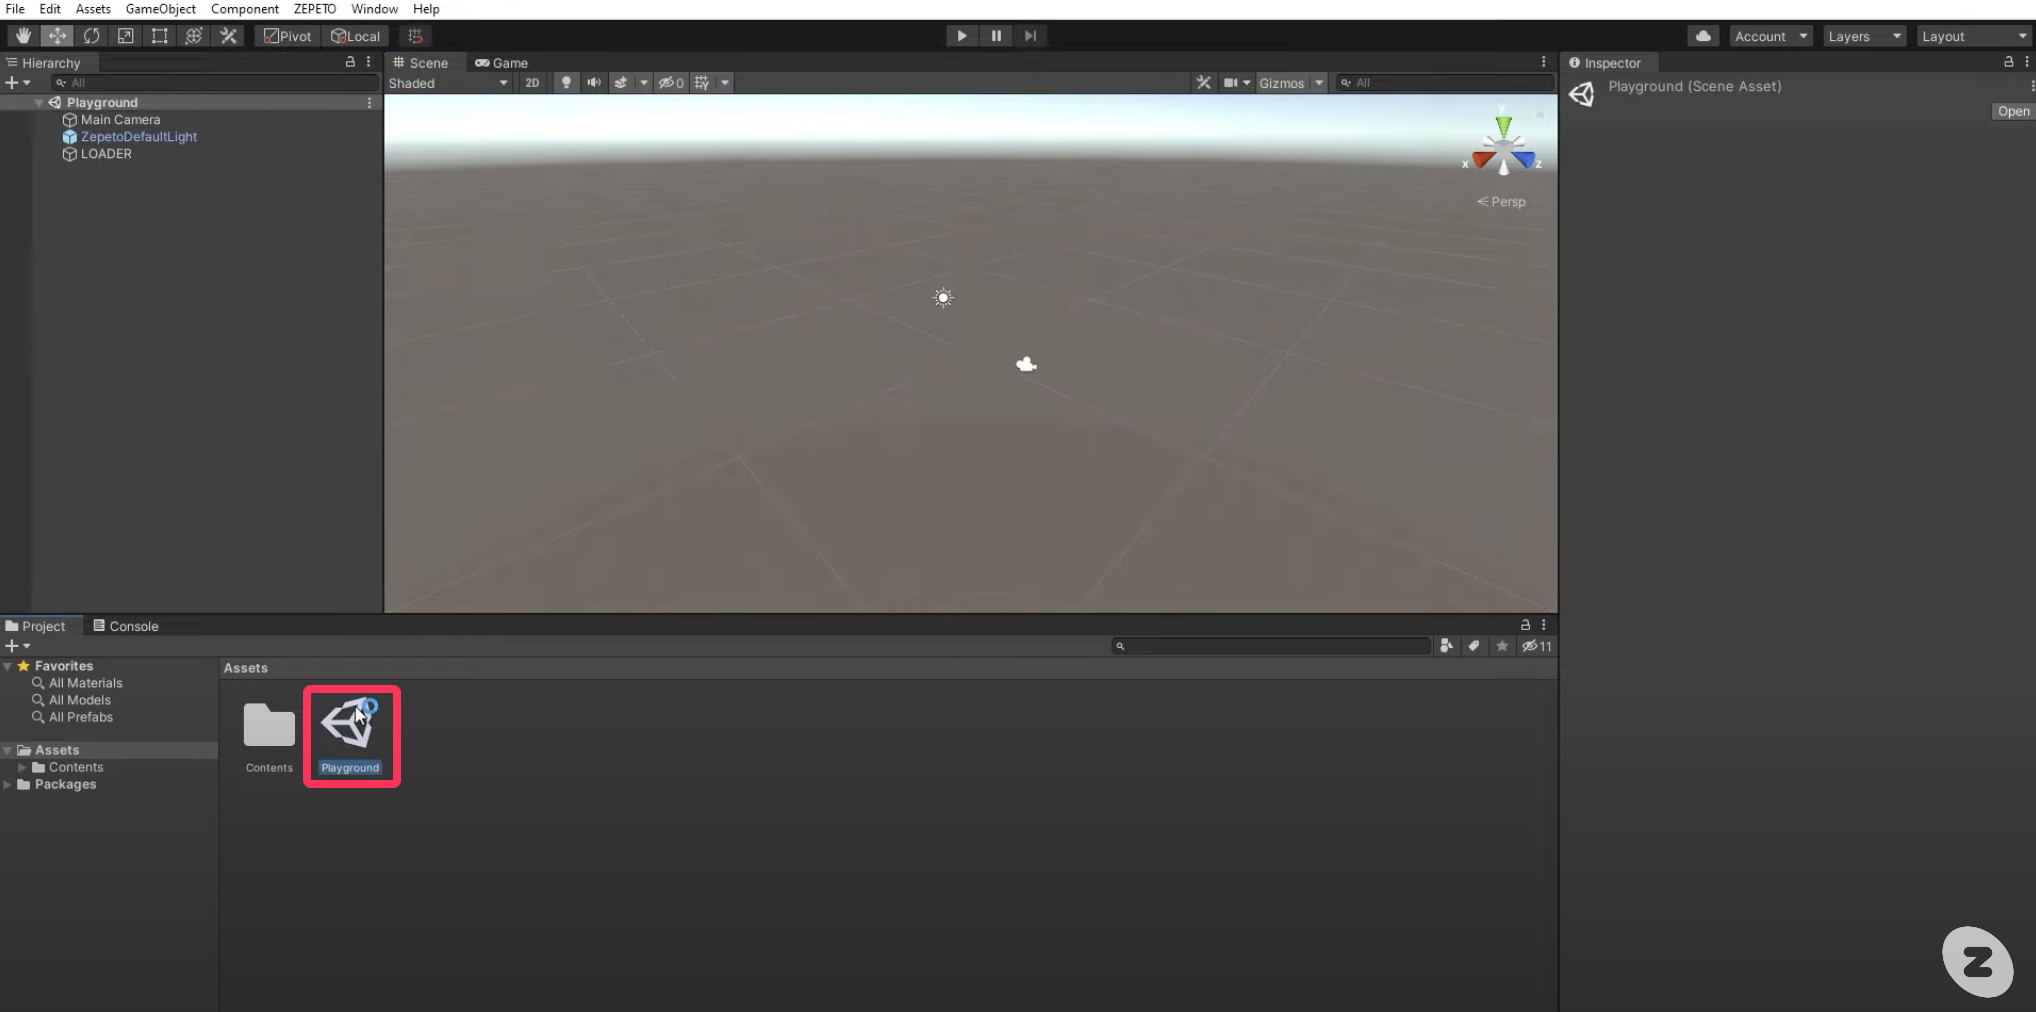
- First, locate the Playground in the Project panel below and double-click it to open it.
- Open the File Window to locate the FBX file we extracted from Blender earlier and drag it into the Project panel.
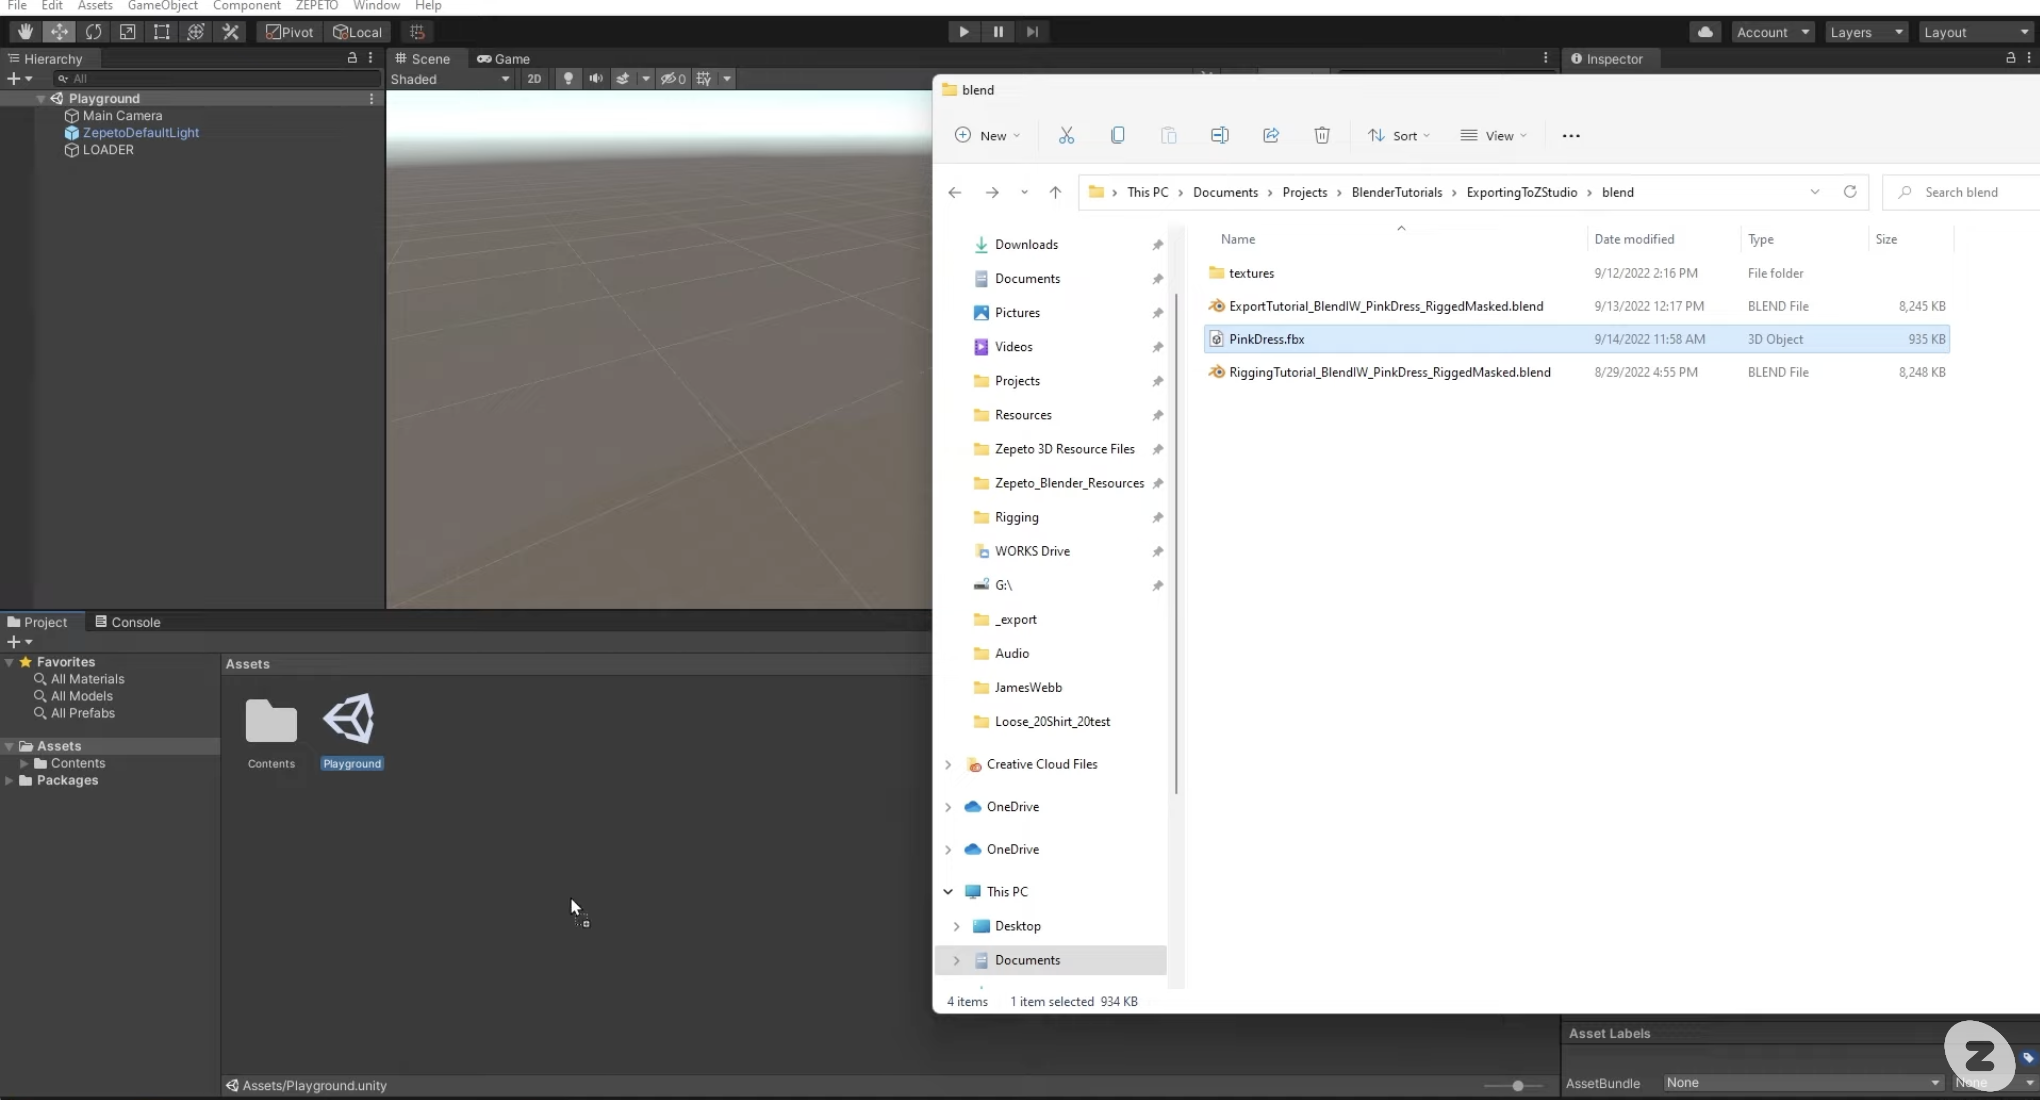
- Inside the Project panel, click on the + > Folder button to create a new folder. Name the folder as the name of the item.
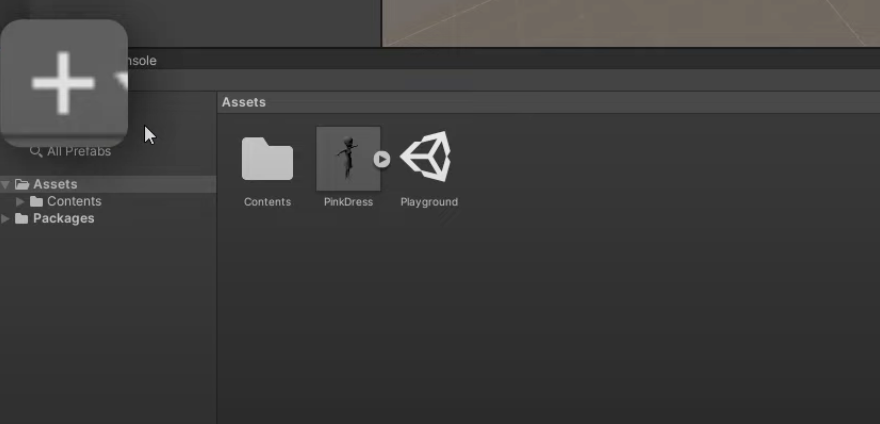
- Drag the FBX file into the newly created folder and double-click the folder to open it.
STEP 7 : Import Textures and Create a Material
- As with importing the FBX file, open the folder containing the texture file you worked with earlier and drag it to the Project panel inside Unity.
- Inside the Project panel, click on the + > Material button to create a new Material. Name the Material the same as the name of your item.
- You will need to change the Unity default Material to the shader used by ZEPETO. ZEPETO's items are specialized shaders made to work well in the ZEPETO app.
- These shaders are named ZEPETO and are included in the Zepeto Unity Project file.
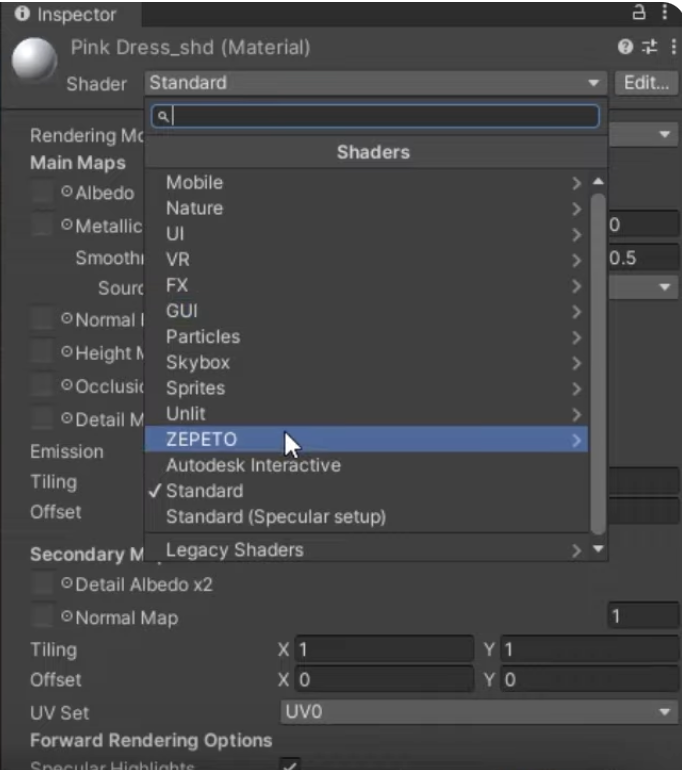
- Inside the ZEPETO shader group, select the type of shader you need..
STEP 8 : Assign a Material to an Item
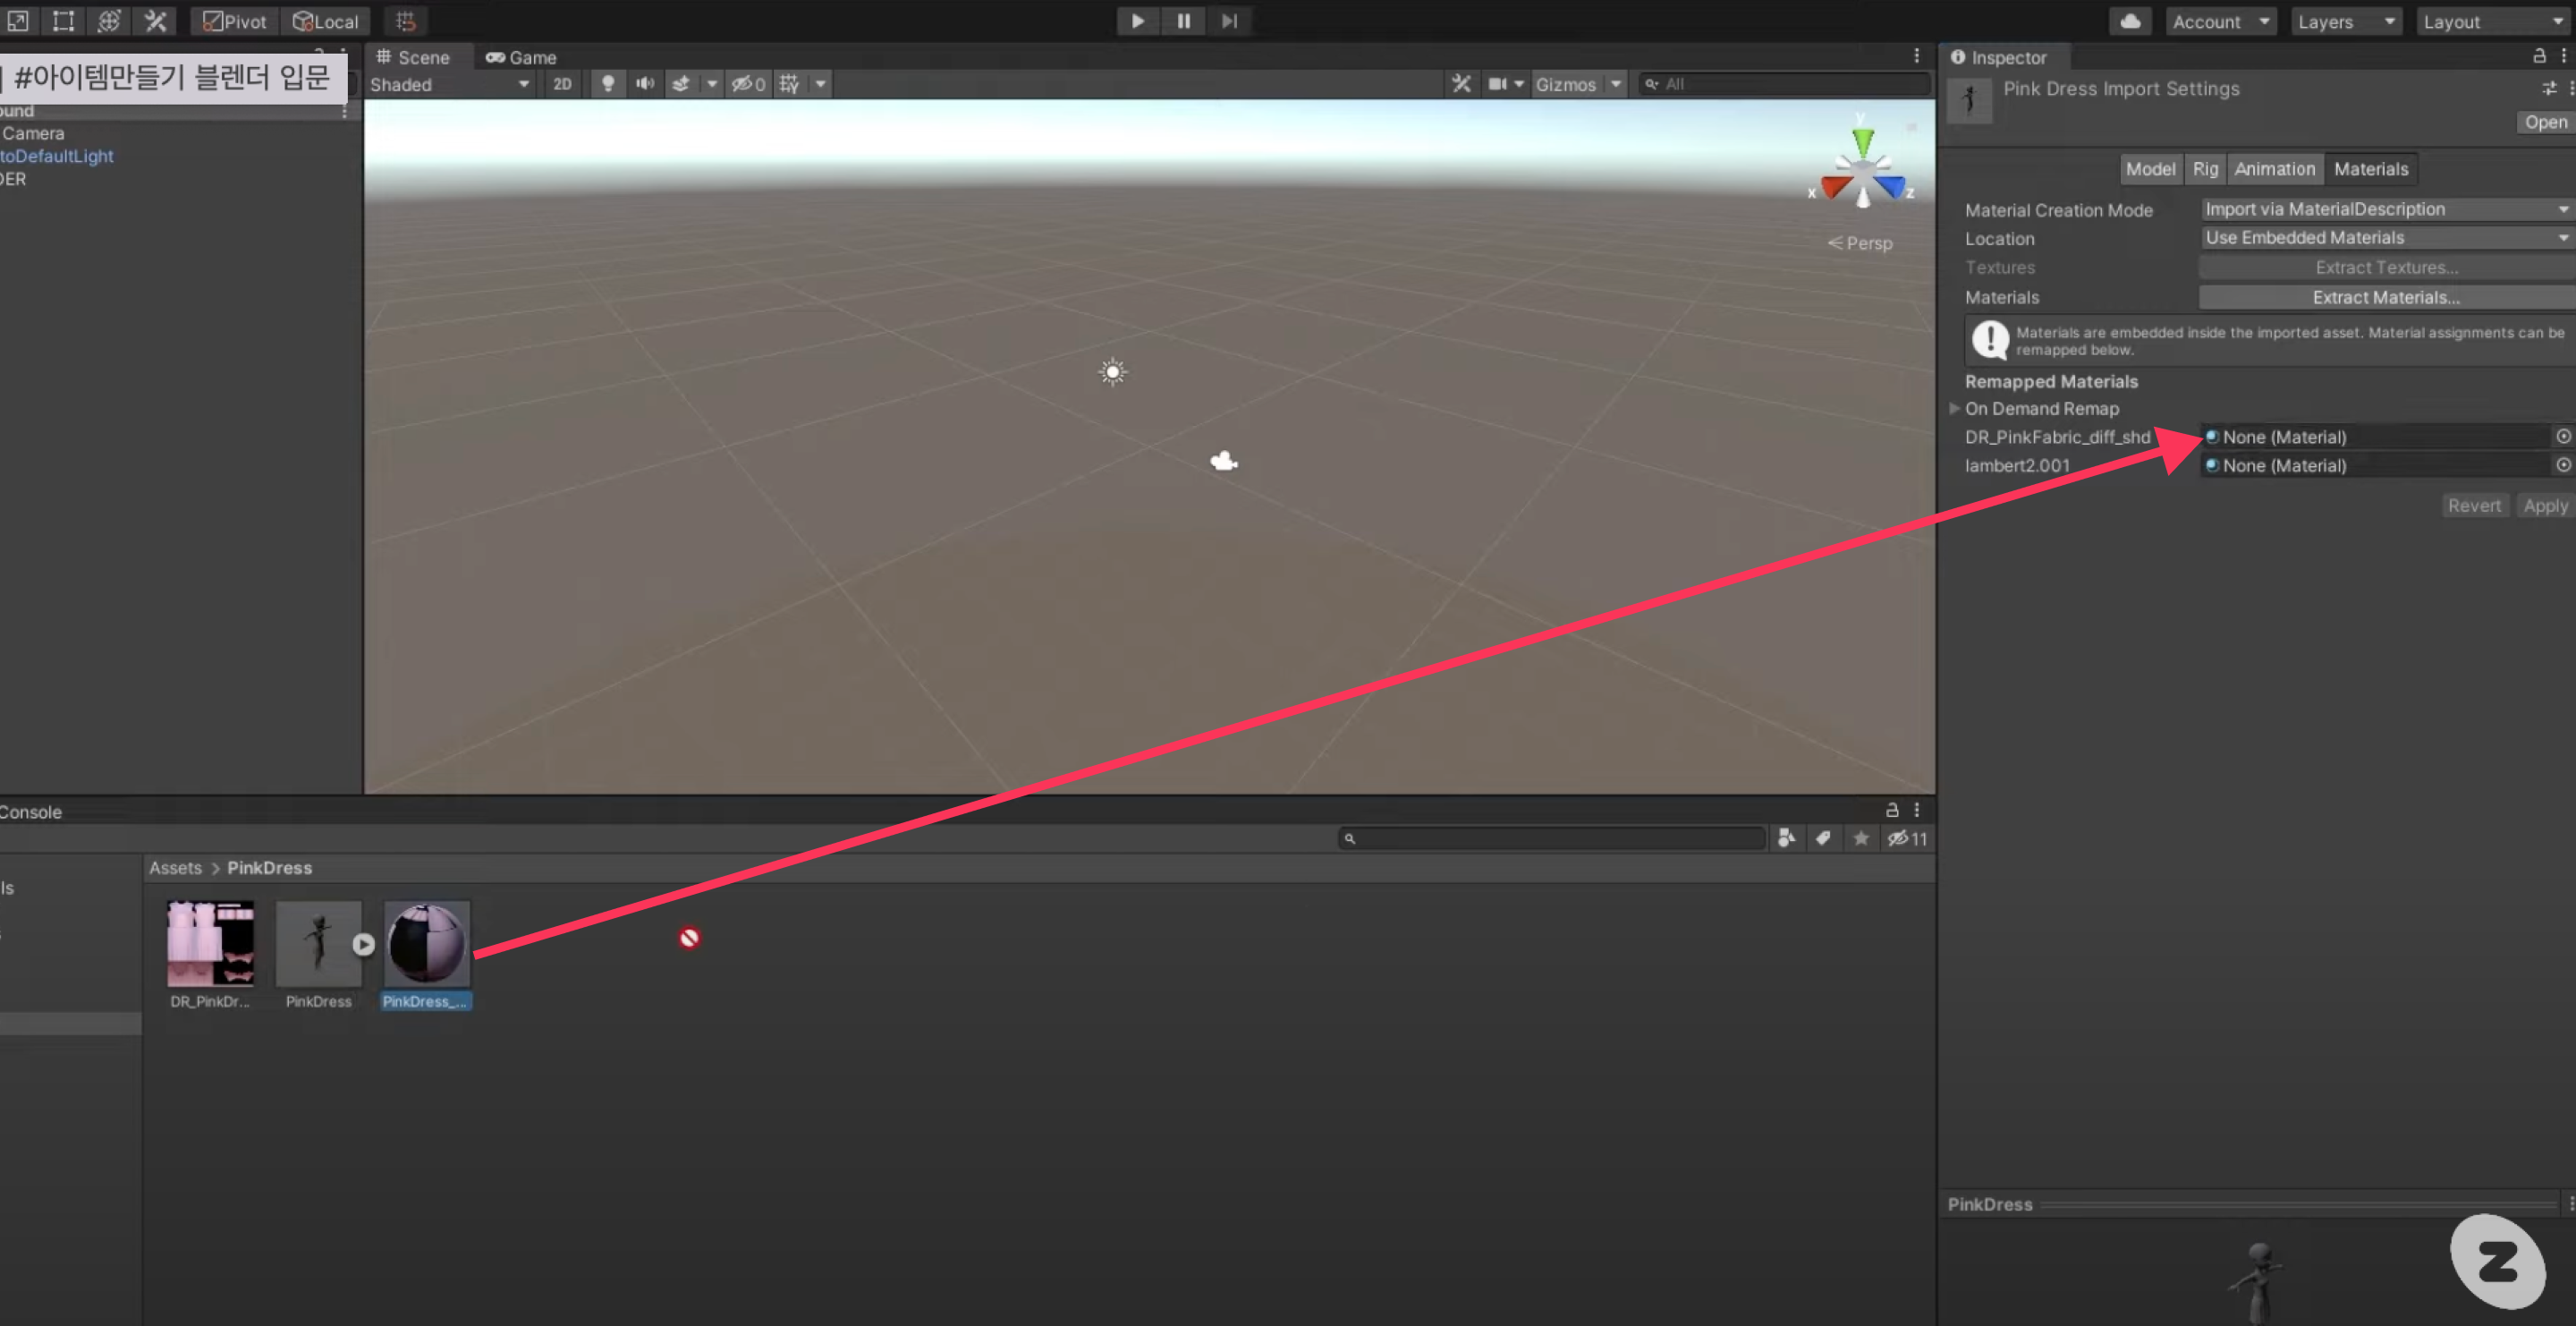
- Select your Item and view the Inspector panel. Drag the Material in the Project panel to connect it and click Apply at the bottom to apply them.
STEP 9 :Convert to ZEPETO Style
- Select your FBX file and right-click. Select Zepeto Studio > Convert to ZEPETO style.
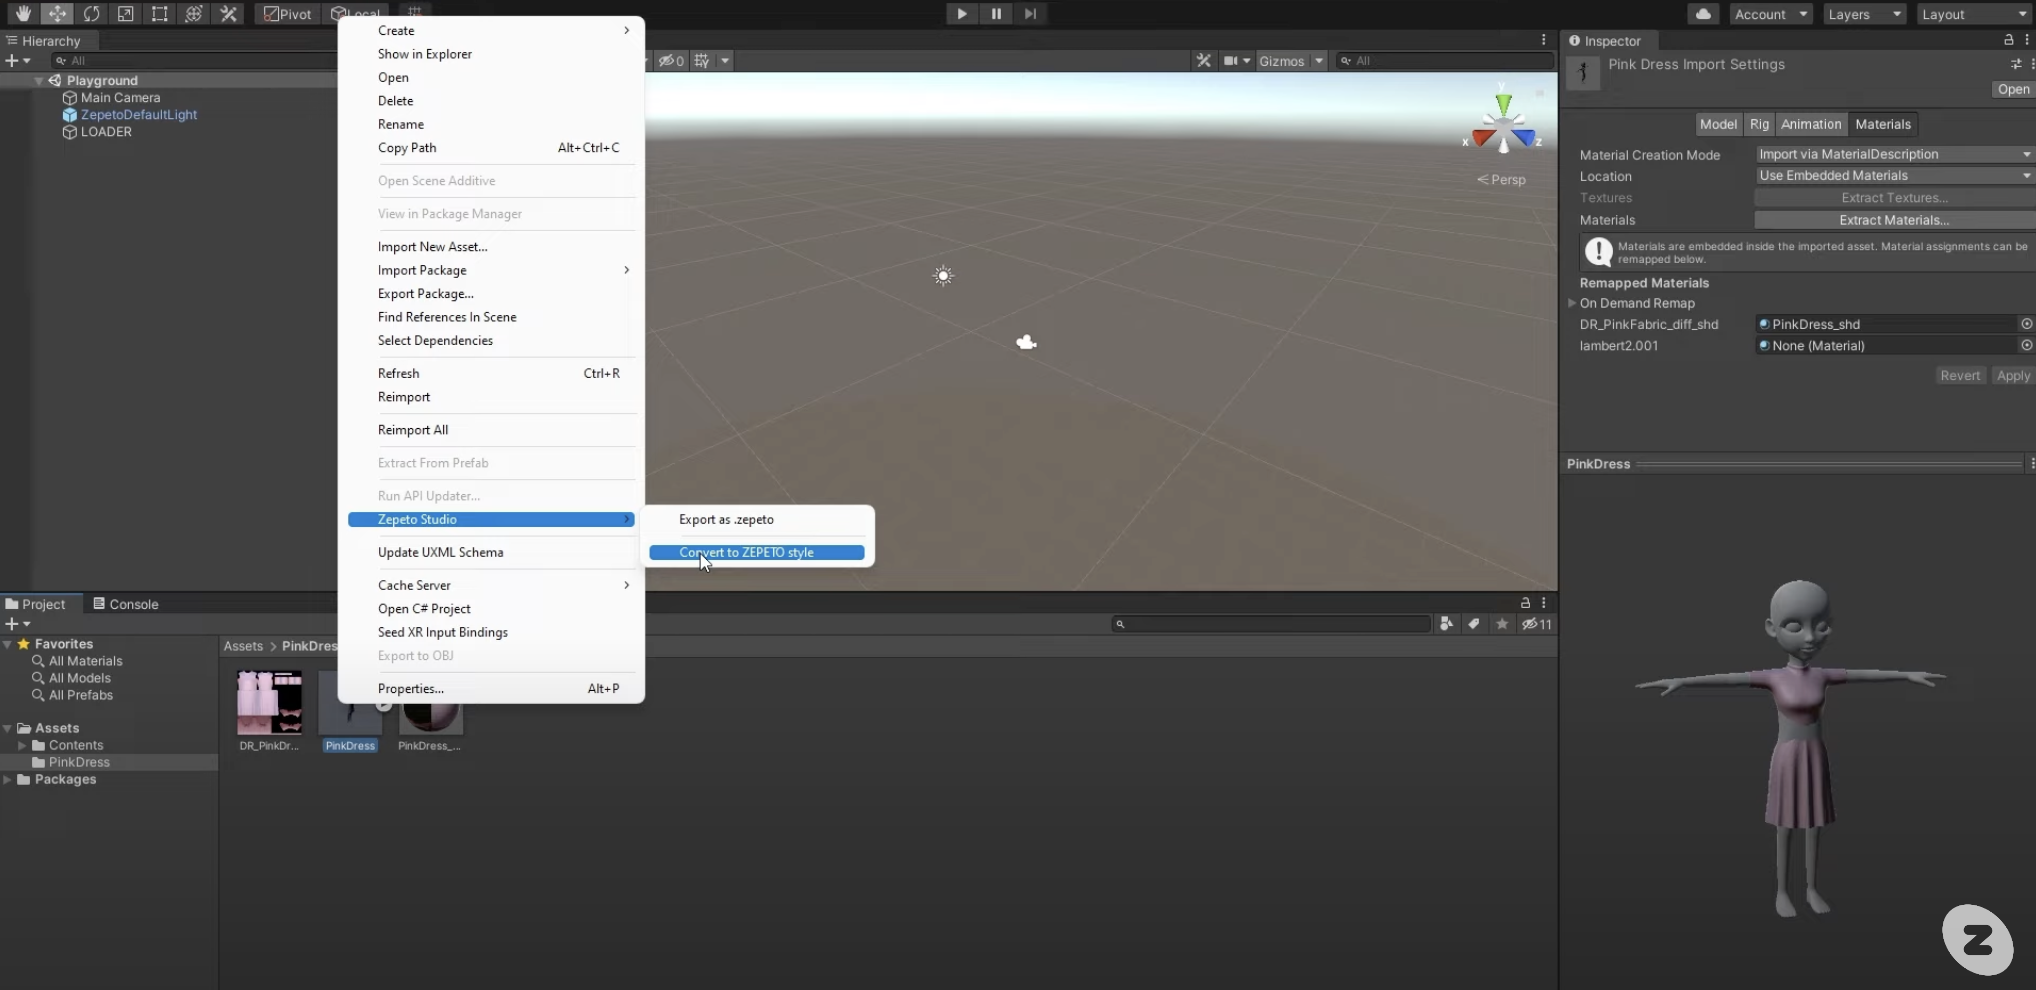
- Step 1 will create a file identical to the item you created. In Unity, this is called a Prefab.
Caution
If the Prefab is not generated, Unity may have problems with the exported item. It can also cause problems if the item is named mask, so make sure to check and change the name in the previous step.
STEP 10 : Test the item
Once your Item Prefab is created, you can test your item.
- With the Playground open in Unity, click the Play button at the top.
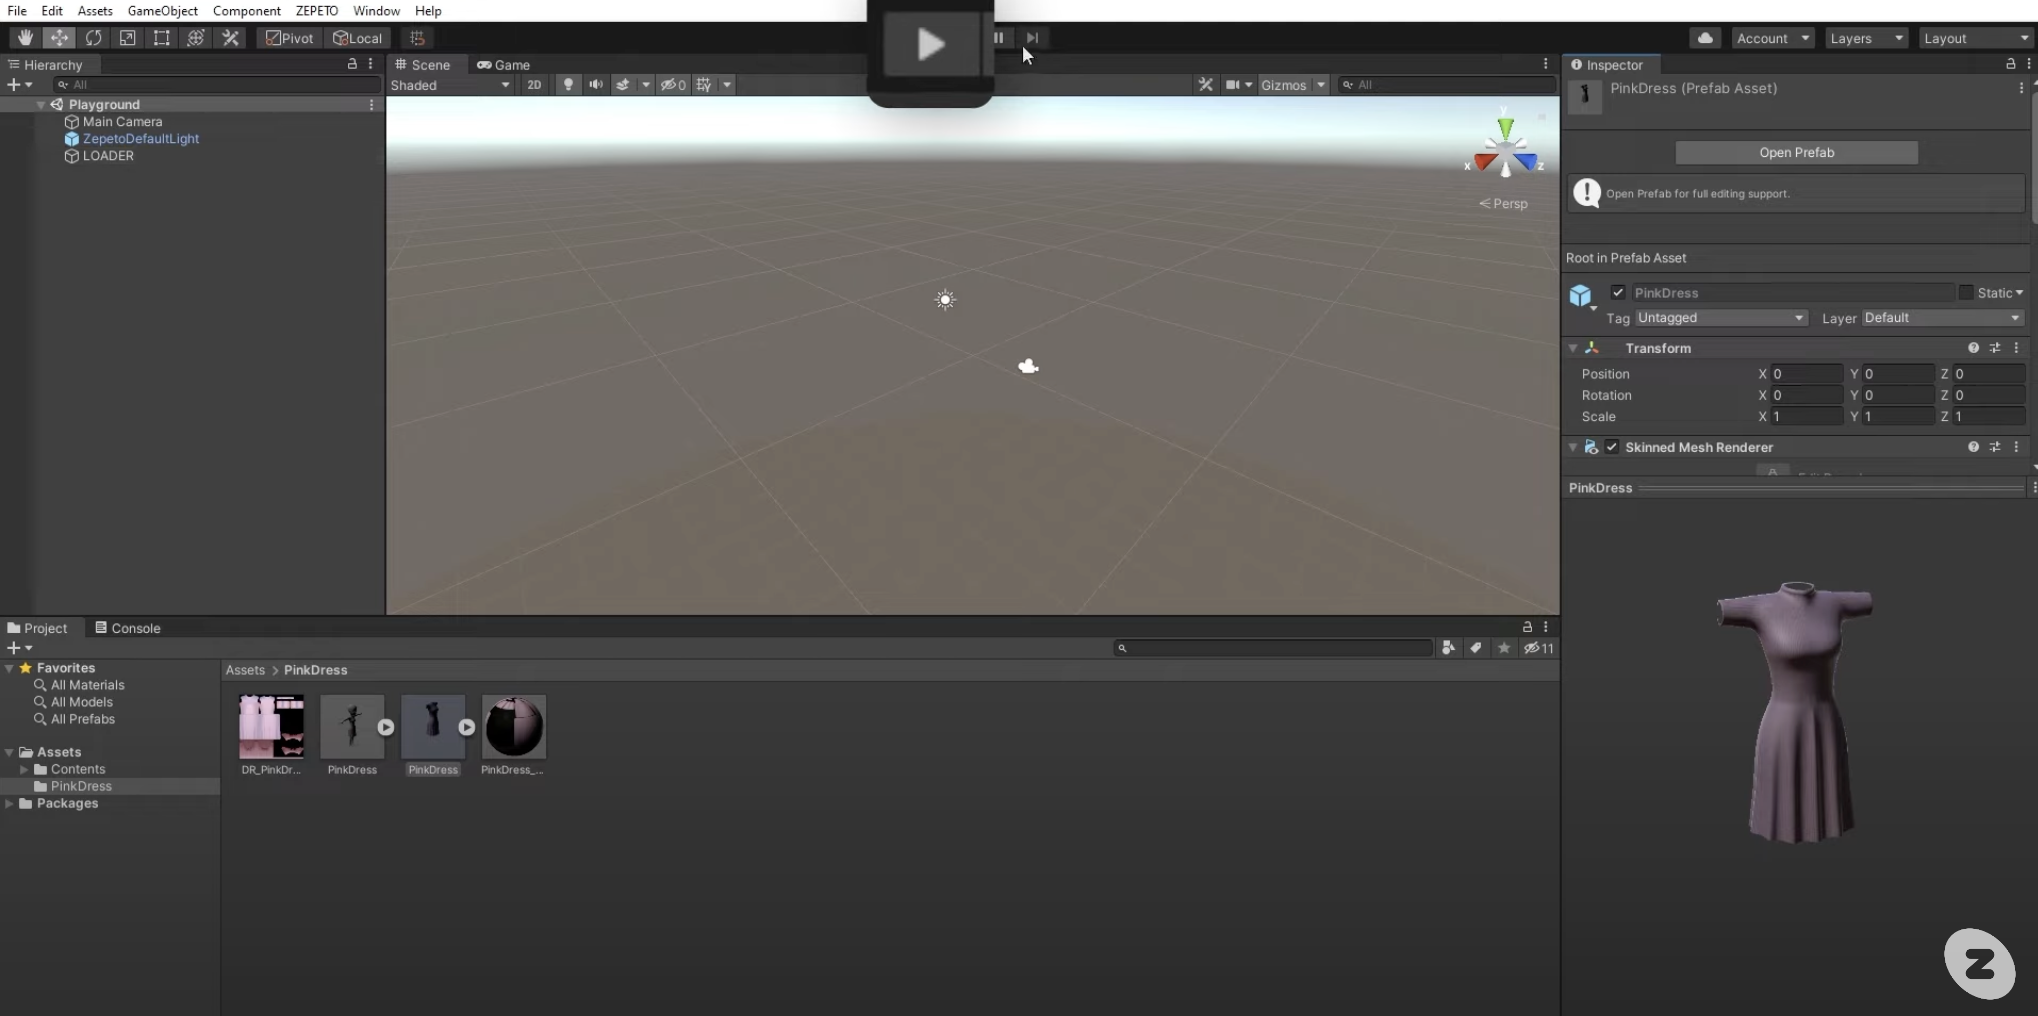
- The screen will switch and you will see ZEPETO's avatar in the center. Select Loader from the Hierarchy panel on the right, and in the Inspector panel, you'll see a list of the different item categories provided by ZEPETO. Select the category of the item you created and check it.
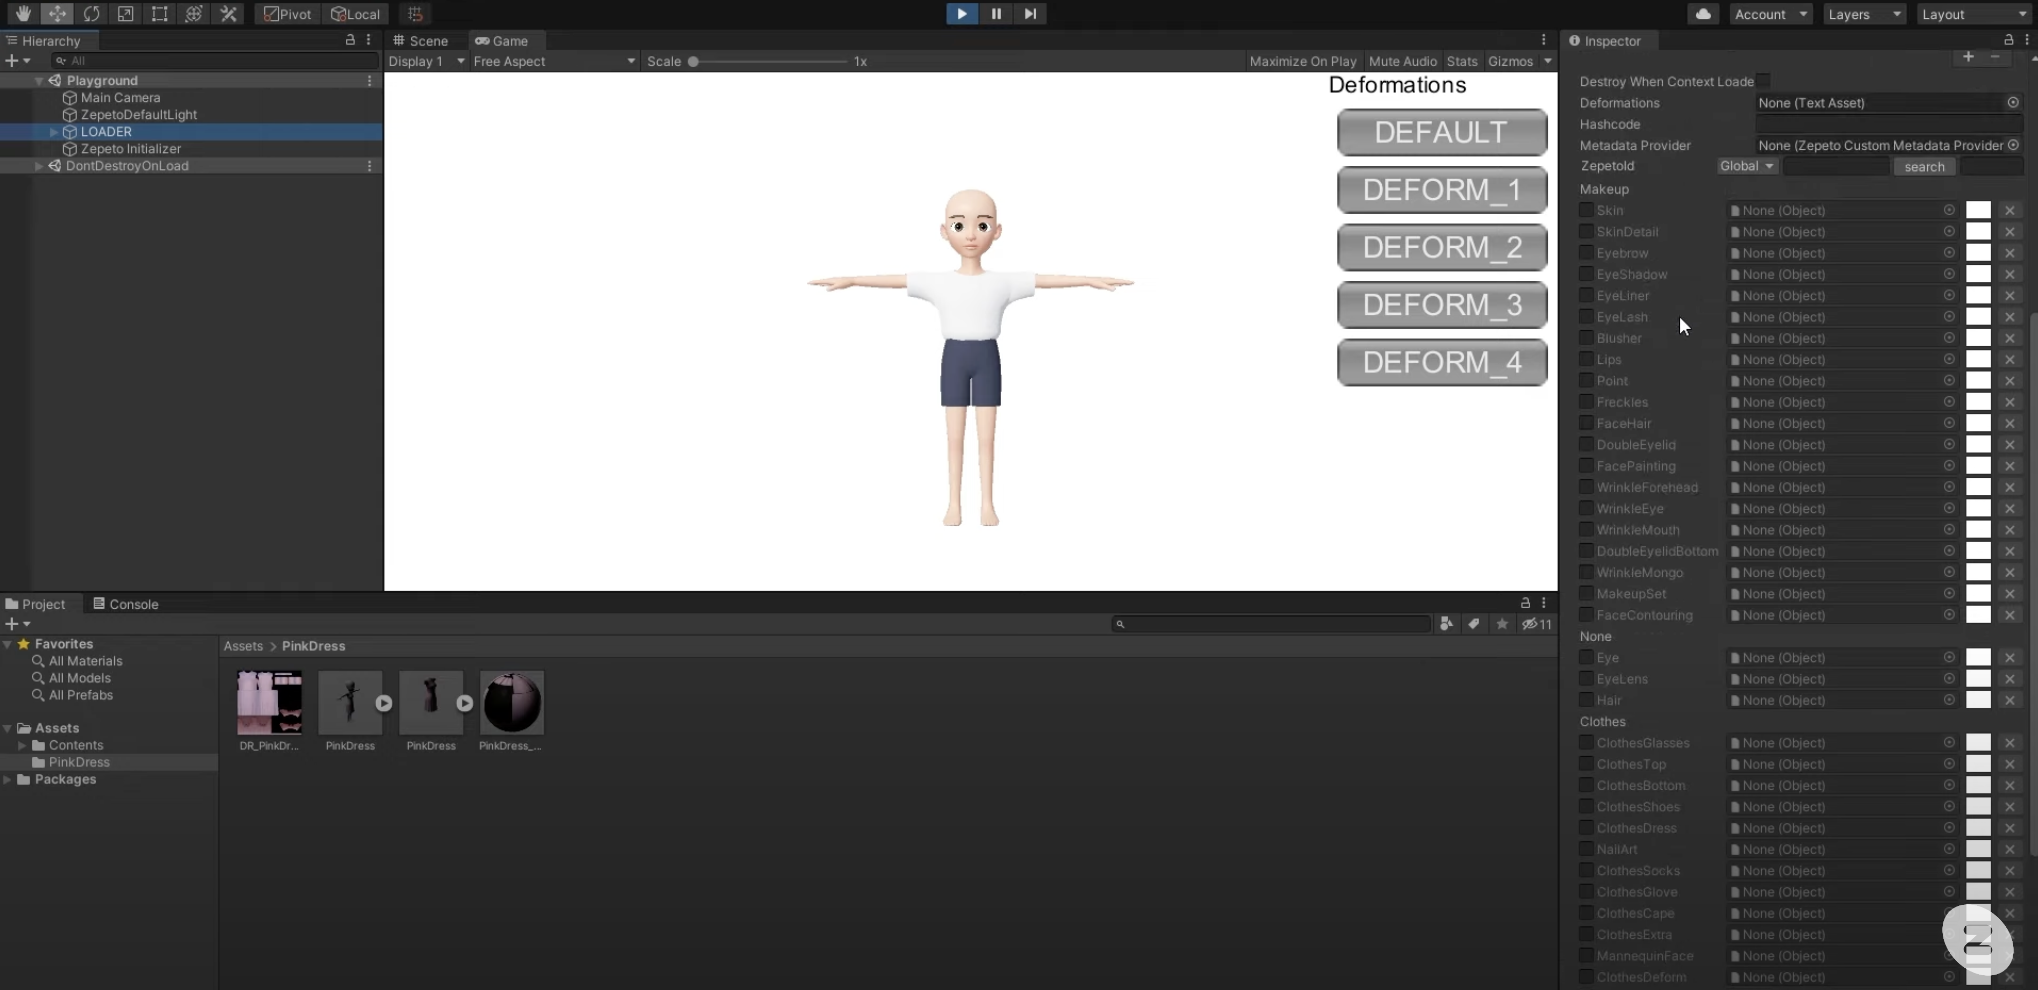
- Drag a prefab from the bottom Project panel and drop it into the box next to the category in the Inspector panel.
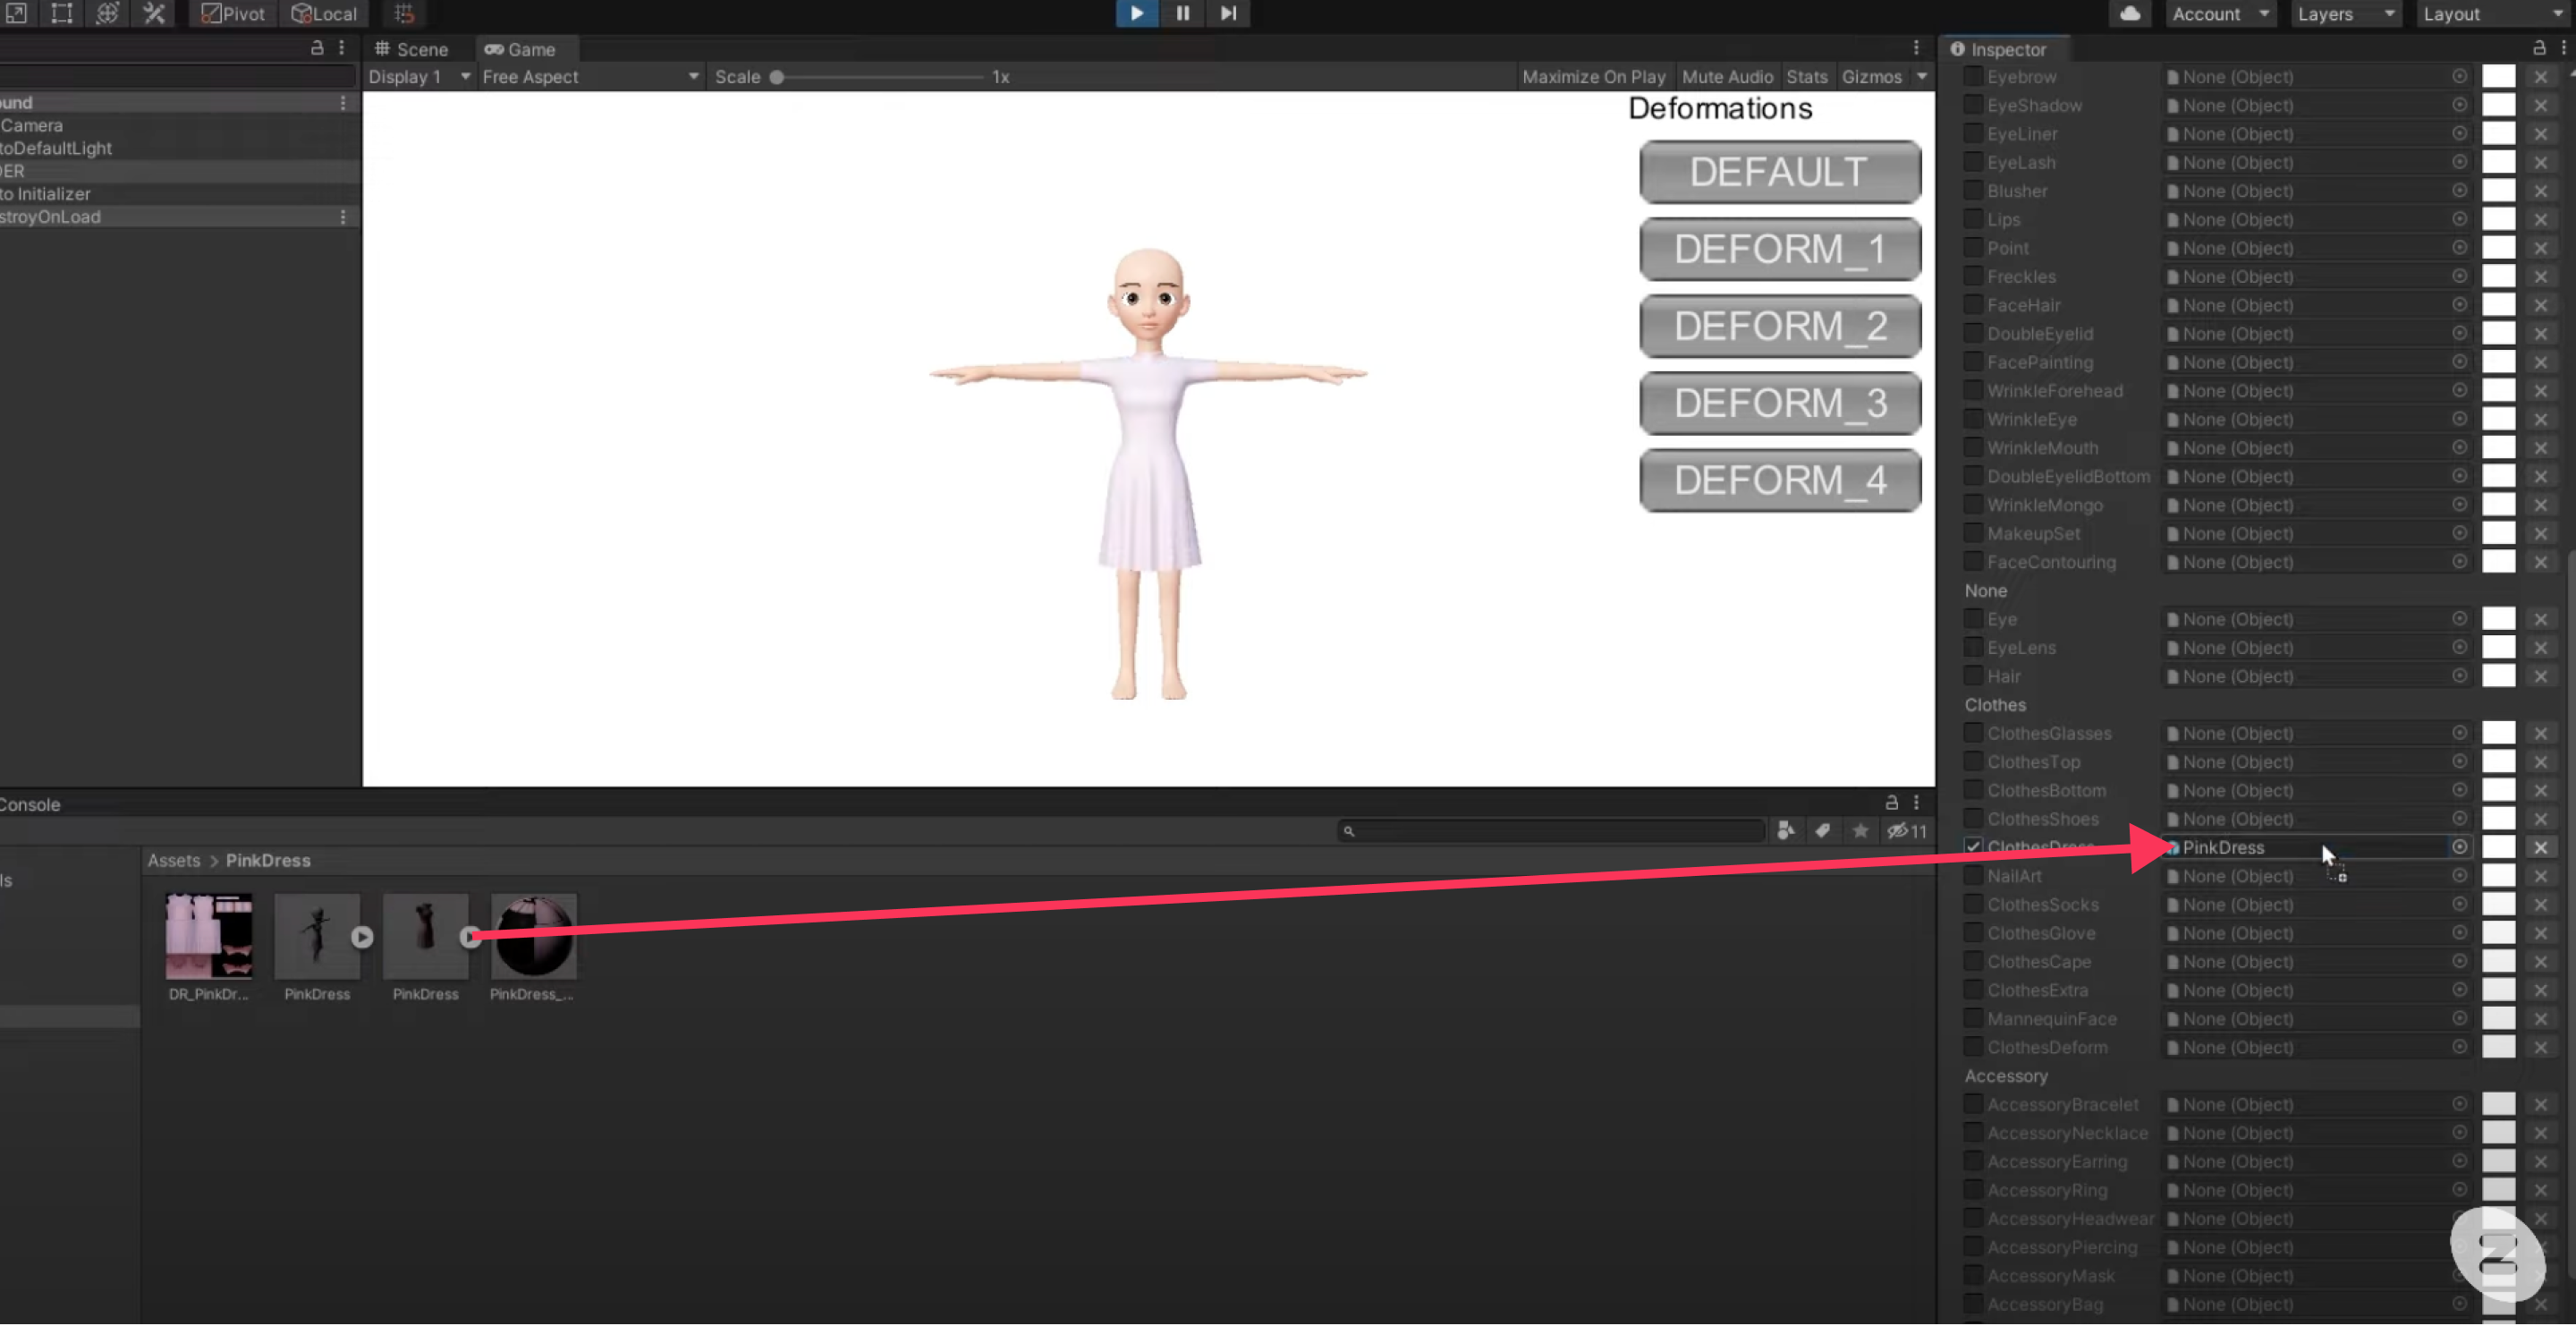
- Utilize the Deform button to test your item in different poses.
Caution
If you notice anything wrong with your item during this process, you'll need to go back into Blender and fix it.
STEP 11 : Export to a .zepeto file
Once you have finished testing your item, you will need to export it to a .zepeto file.
- First, the export process does not work in play mode, so exit play mode by pressing the play button at the top.

- Select your item's prefab, right-click, and select Zepeto Studio > Export as .zepeto.
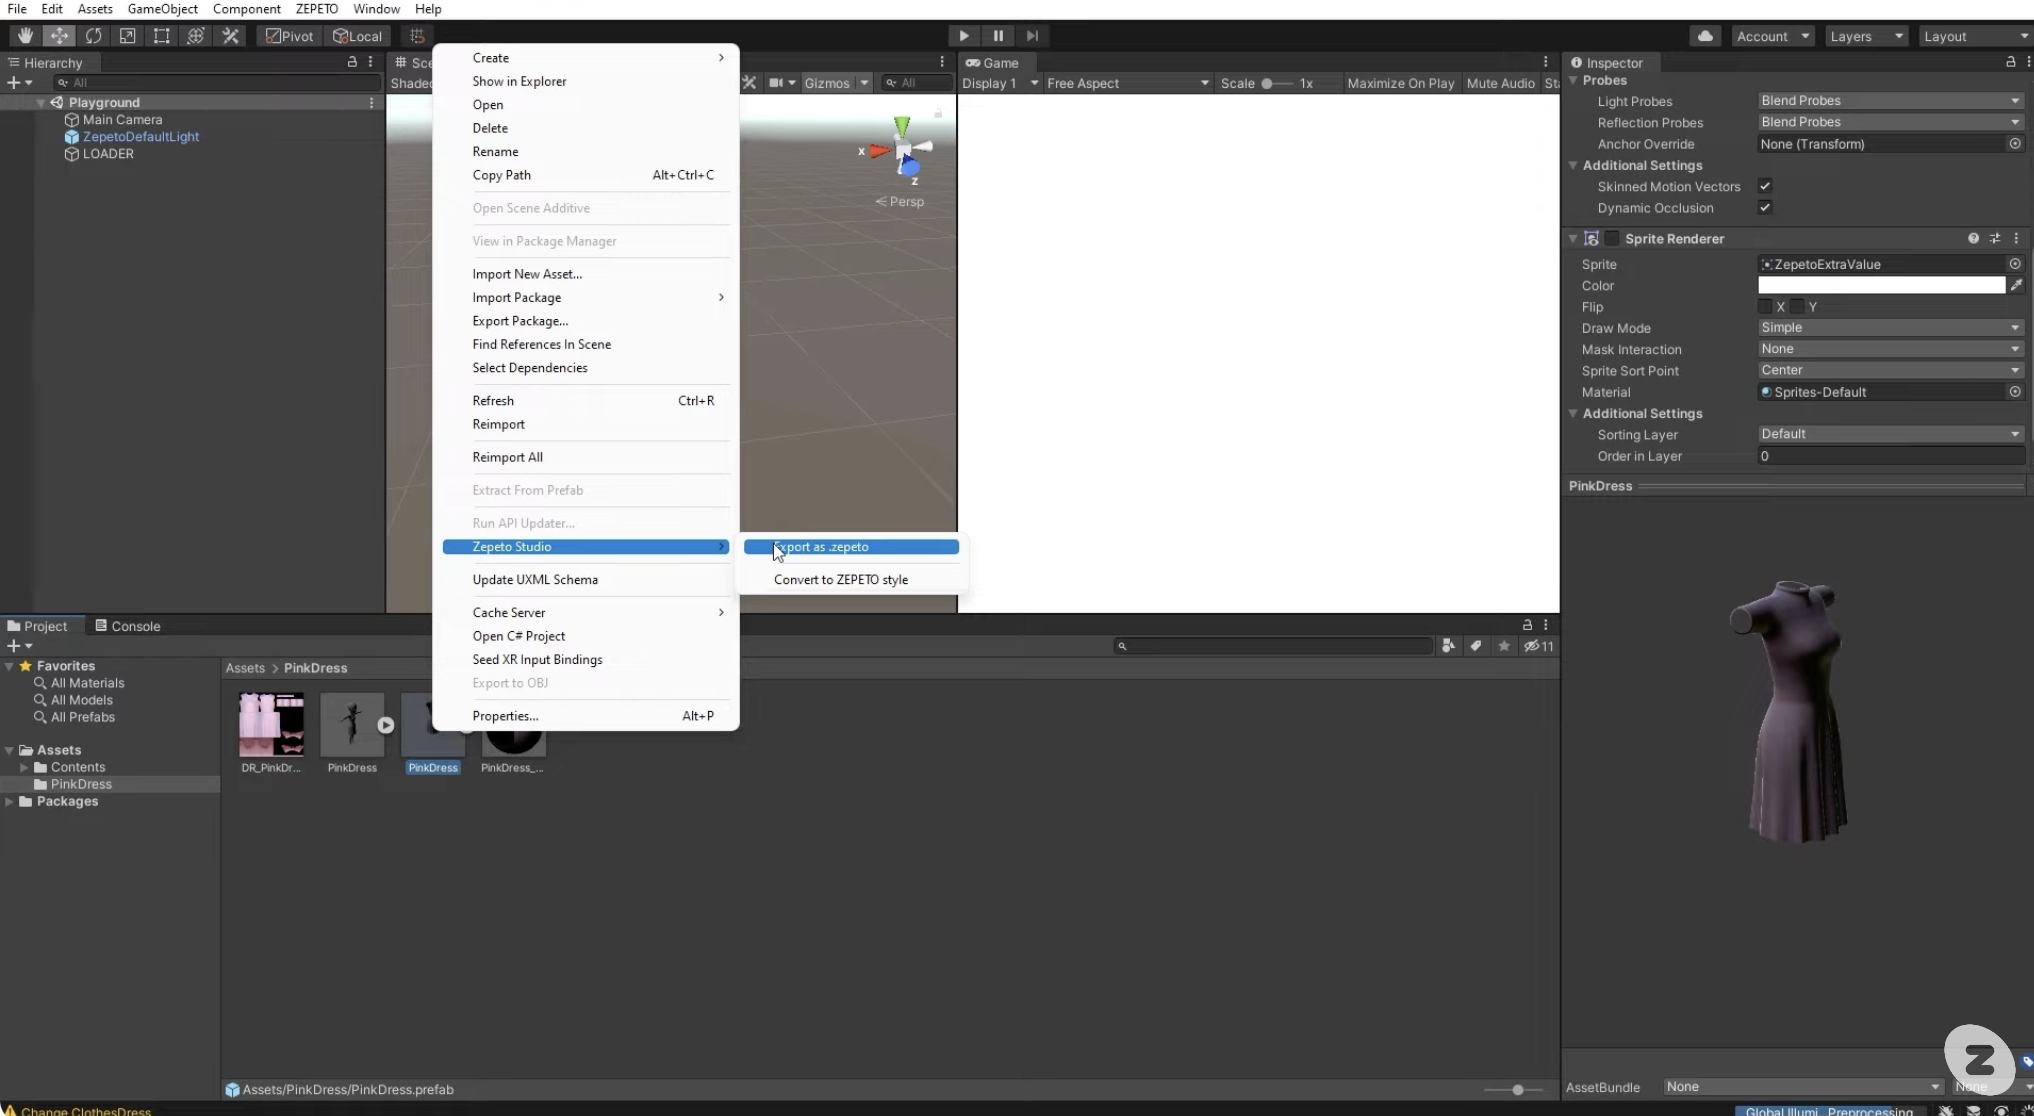
Congratulations, you now have a .zepeto file that you can upload to ZEPETO Studio.
Please refer to the following guide. [Enter details]
Updated 4 months ago
