3Dアイテムの作成 - 3D MAYA
その他
まつげ
6min
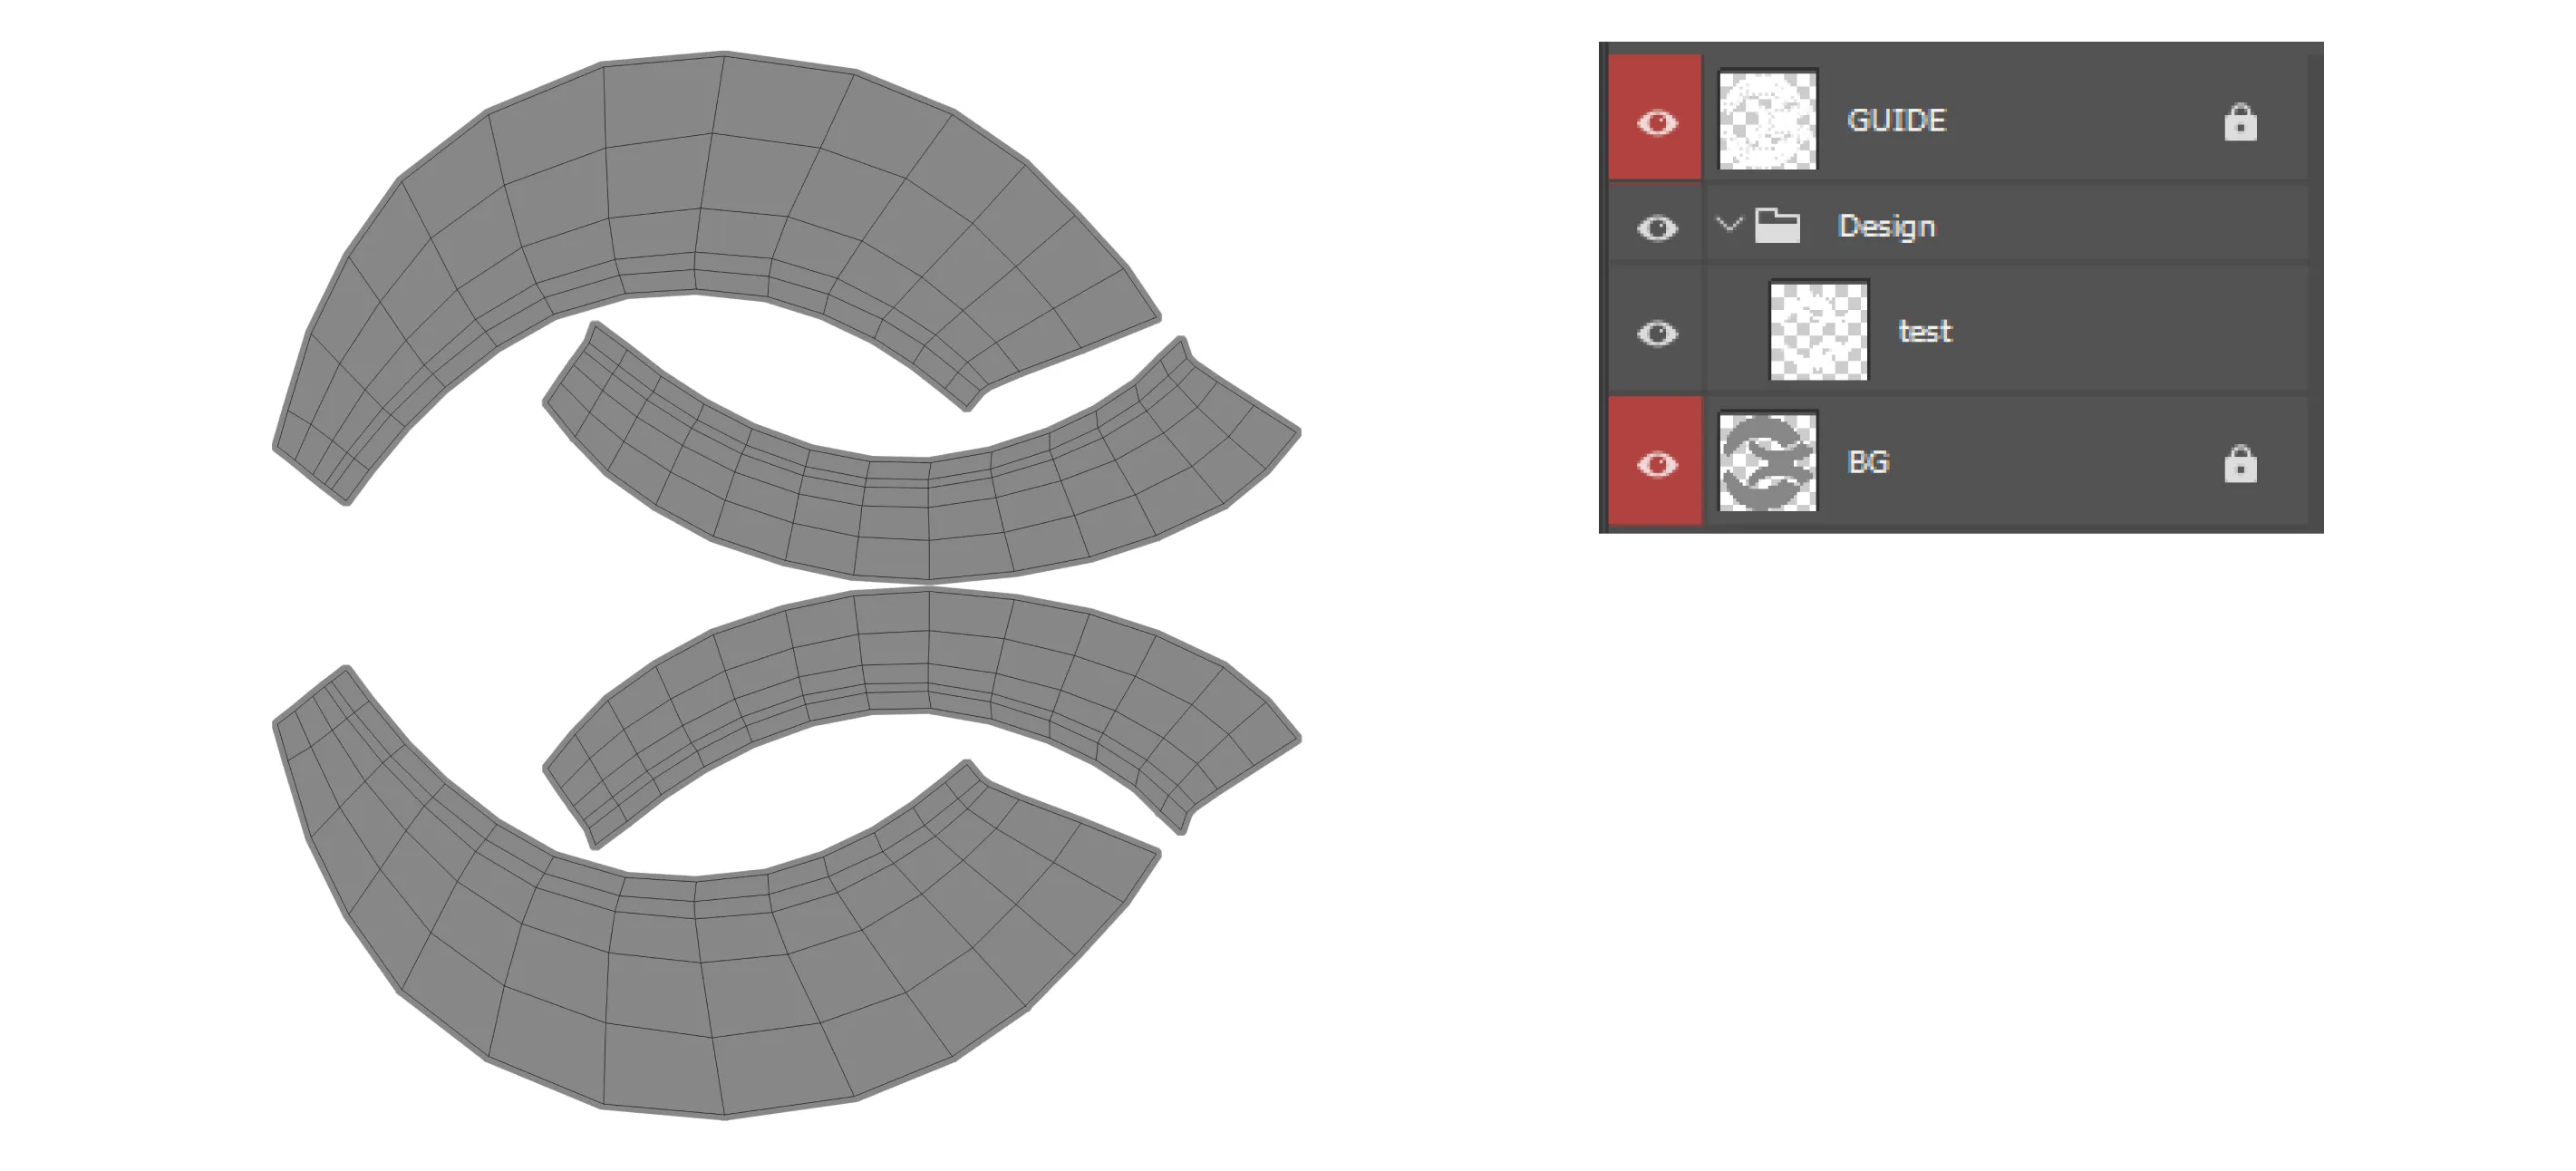
Eyelashes Guideをダウンロードしてください (EYELASHES_GUIDE.psd ) ZEPETO Studioからファイルをダウンロードしてください。
ダウンロードしたファイルをPhotoshopで開きます。
- ガイドファイルにはまつげエリアのテクスチャが含まれています。
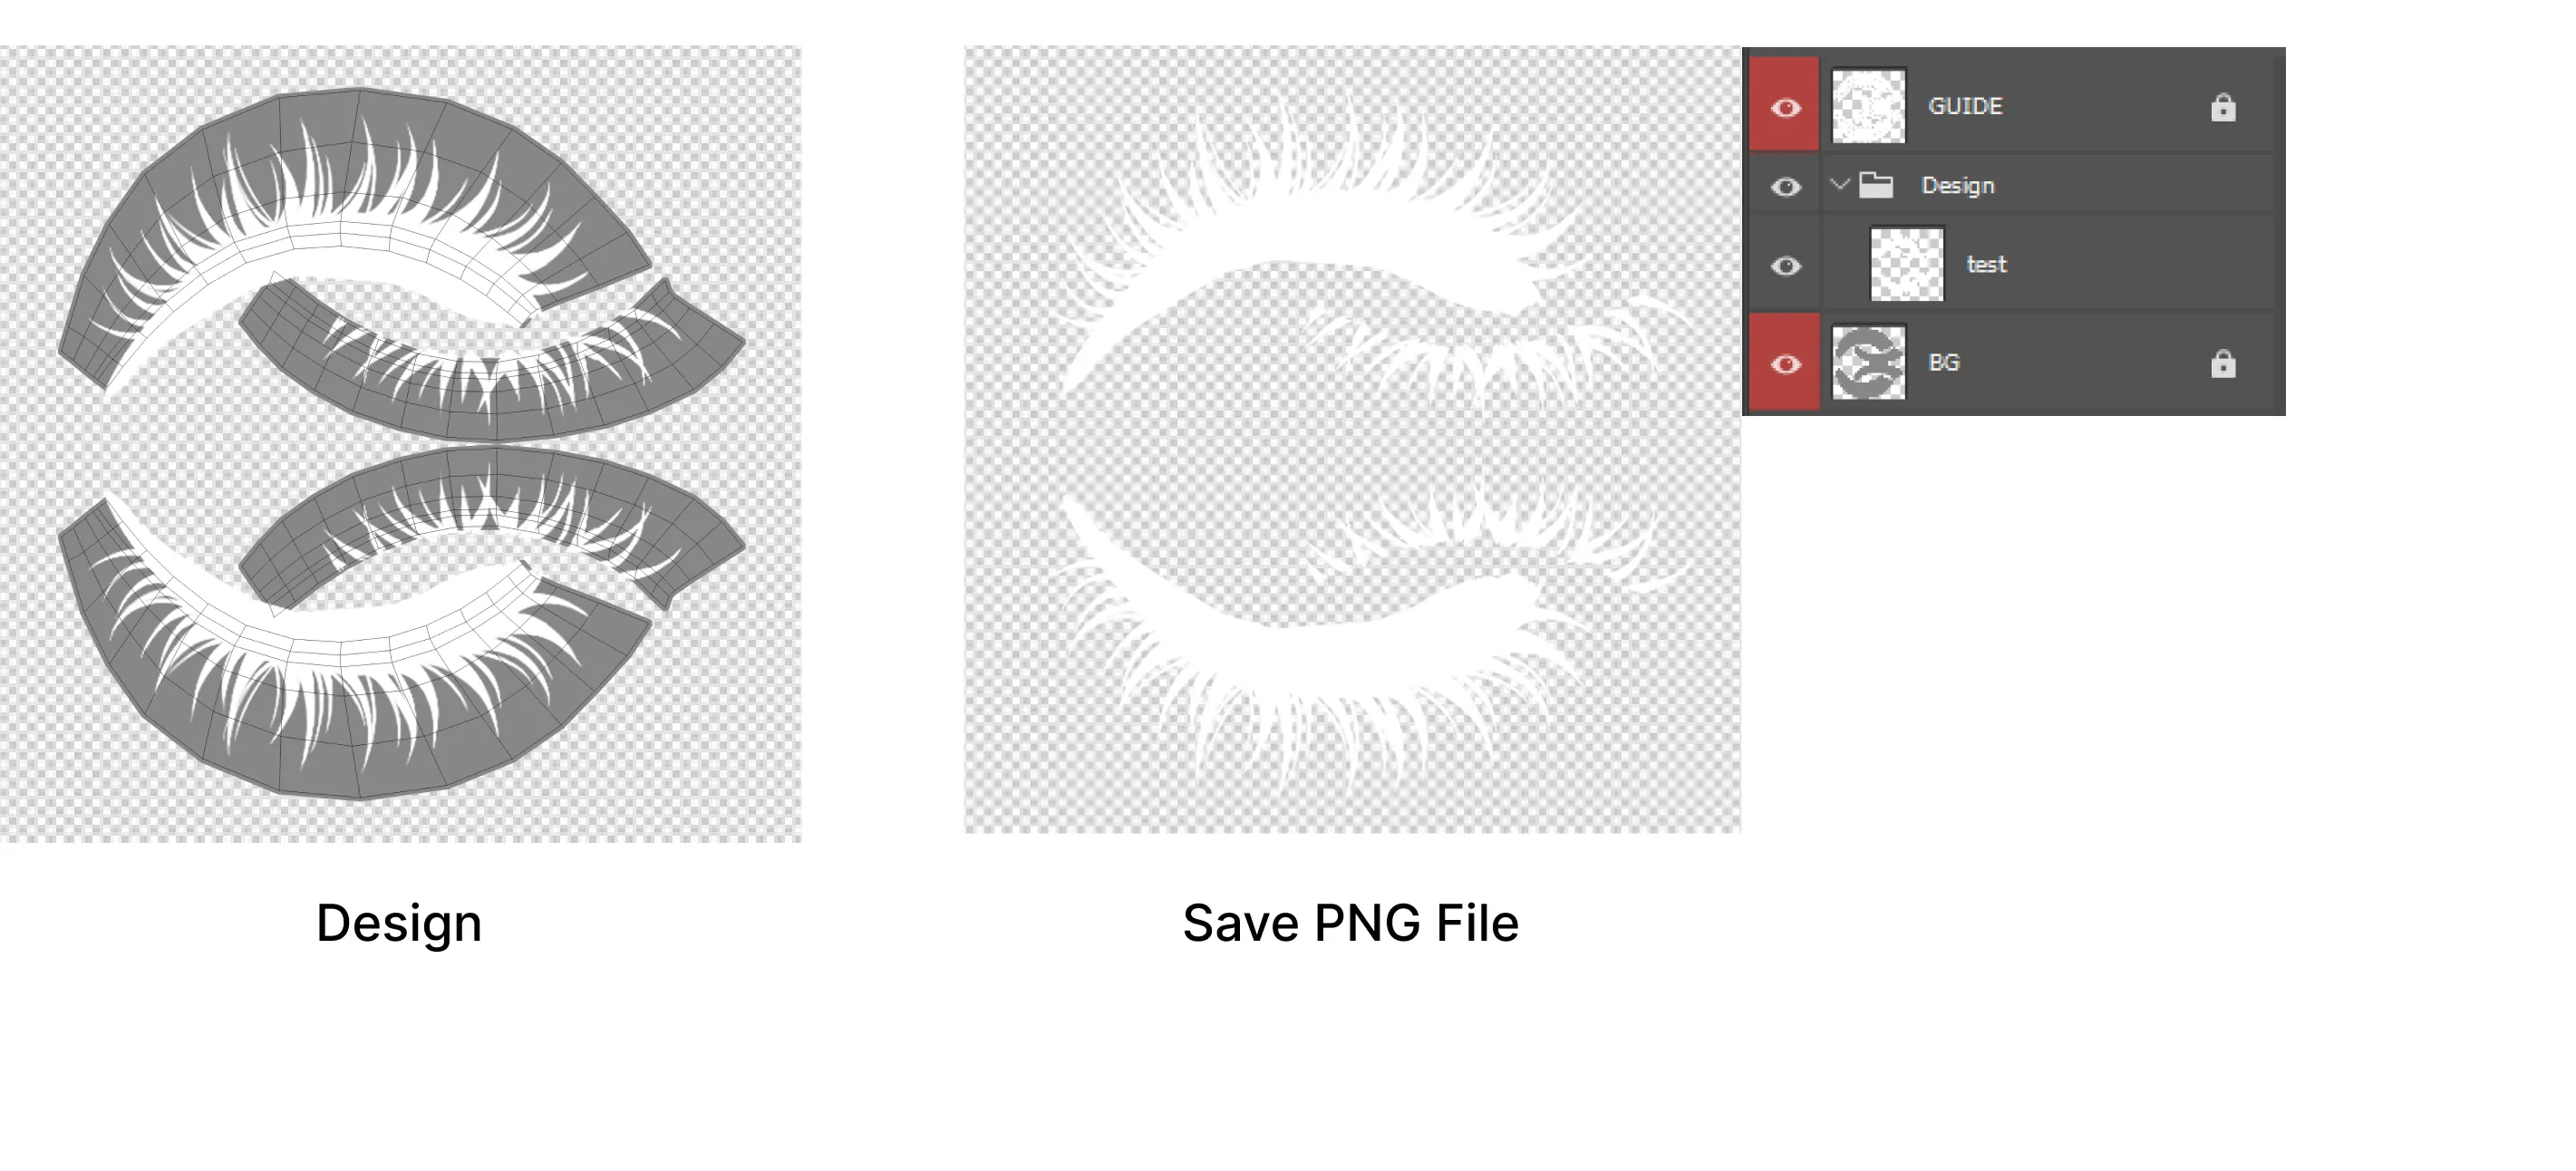
まつげエリアにデザインを作成し、まつげレイヤー(背景)を表示せずに、アルファ付きの.PNGファイルとして画像を保存します。
- まつげエリアの外側には描かないでください。
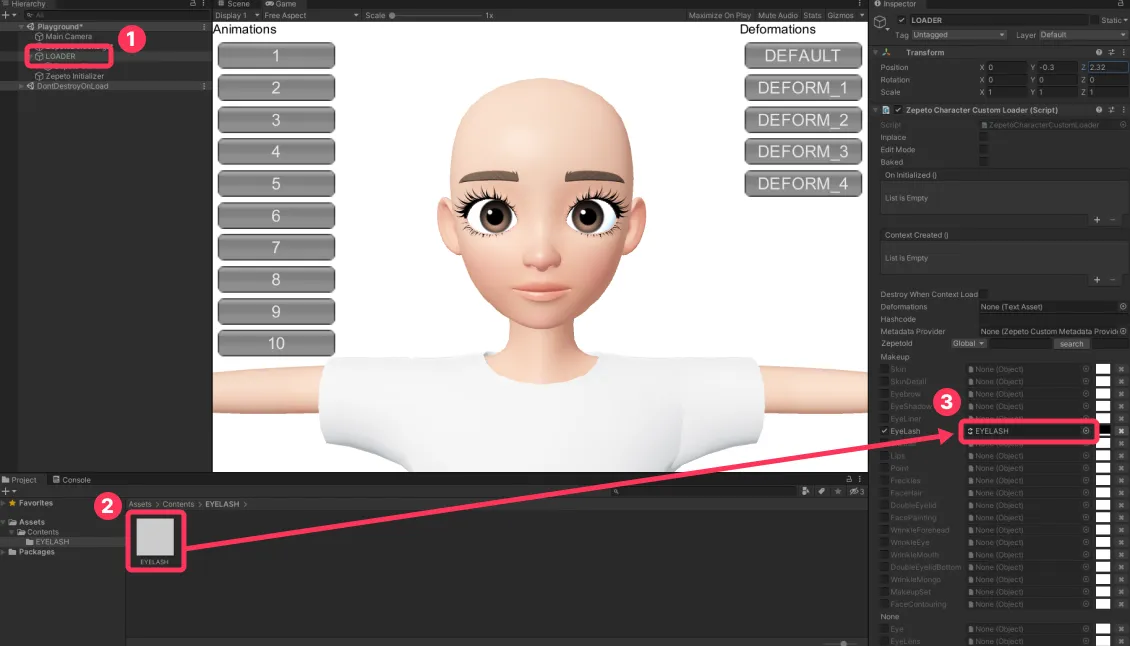
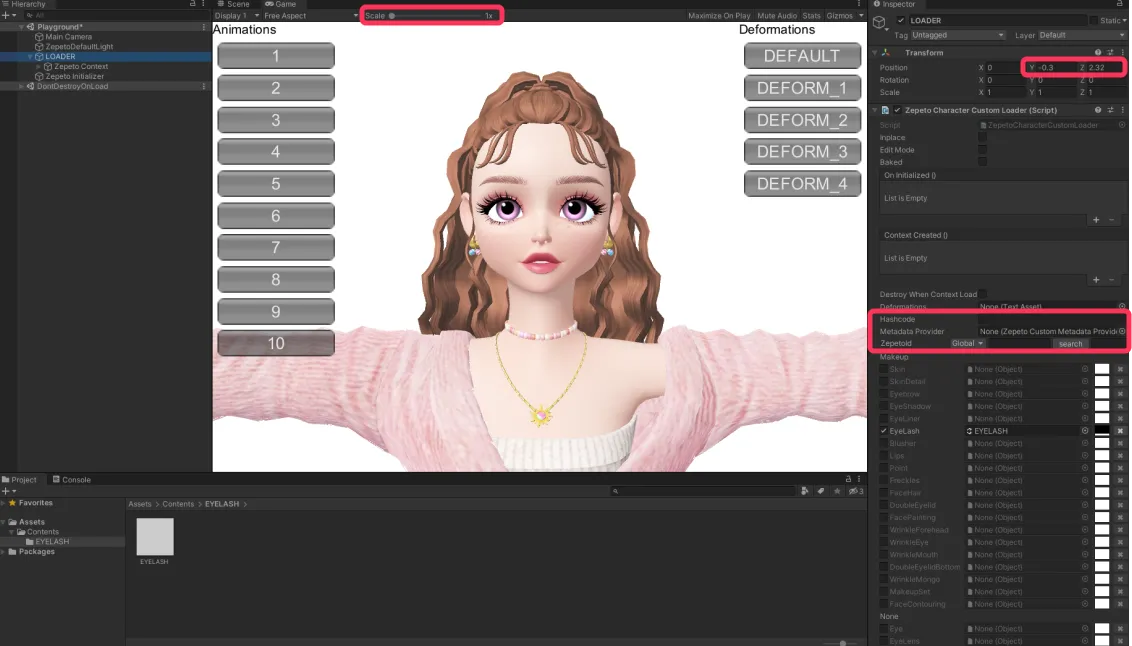
Unityを開き、保存した.PNGファイルをまつげエリアに適用してテストします。
- 2番を3番にドラッグして適用します。
- 3番の色値は#fffffです。
- 画面4で適用されたテクスチャを確認します。
👍 アバターを拡大するには、上部のScaleまたはPosition Y/Z値を調整します。
ZEPETOコードを入力して、アバターに直接適用してテストします。
- より詳細で自然な見た目のアイテムを作成するために、さまざまなアバターの顔でテストします。
最終画像ファイルを512 x 512ピクセルの正方形のサイズにフォーマットして保存します。
❗️ 注意 Studioにアップロードできるのは、横と縦が512ピクセルのファイルのみです。
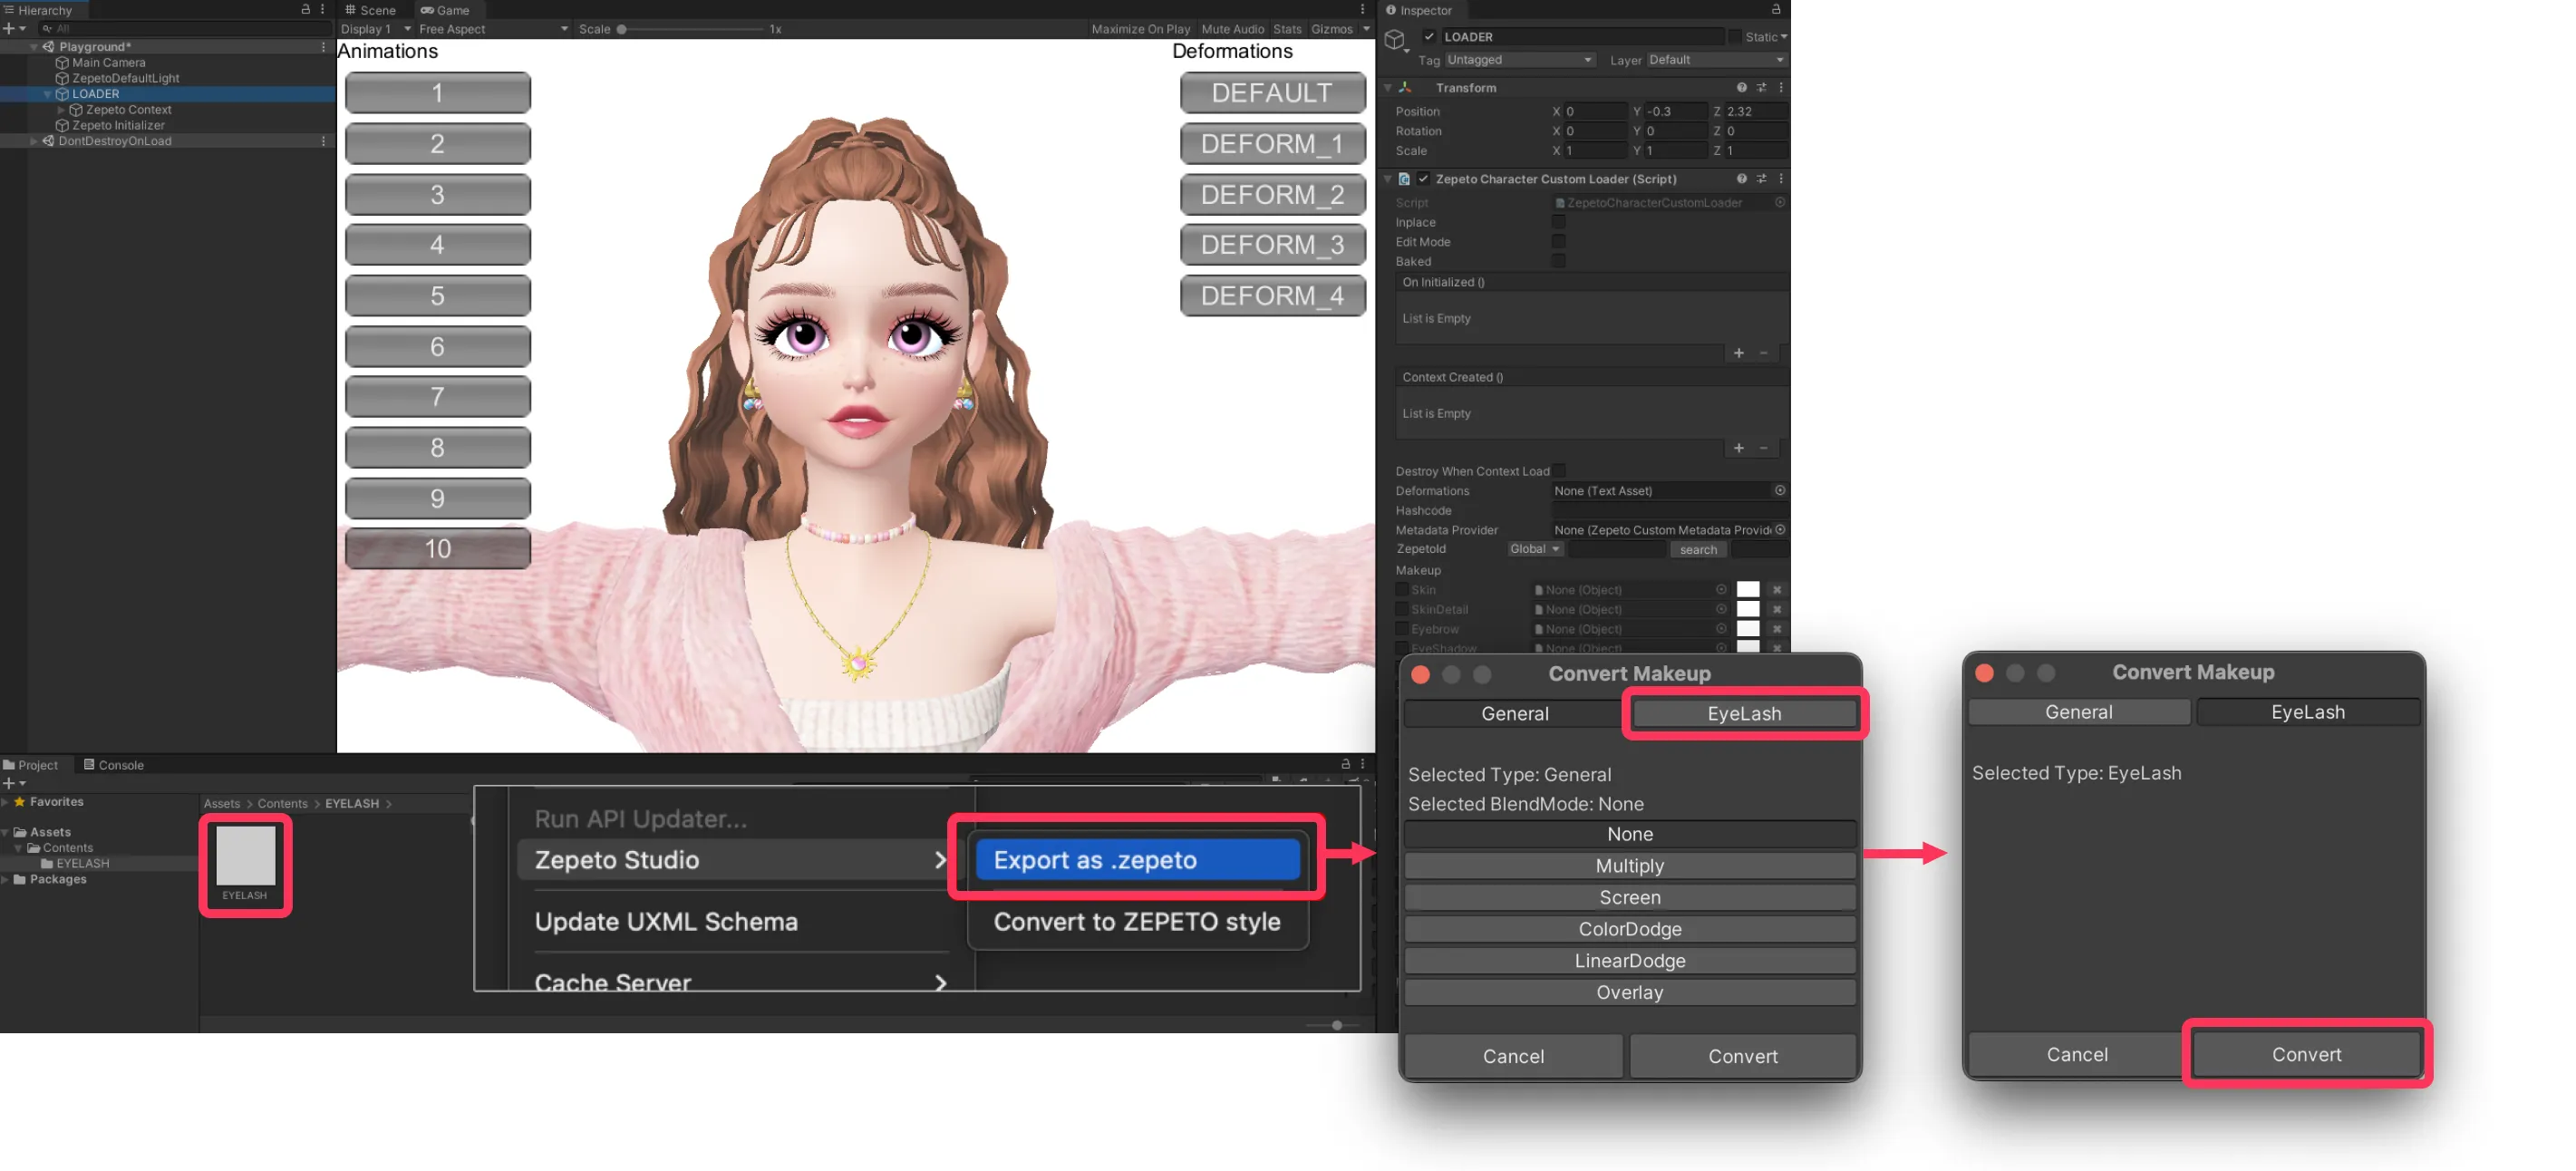
保存したPNGファイルを右クリックし、ZEPETO Studio > .zepetoとしてエクスポートを選択します。次に、まつげタブをクリックし、ブレンドモードでファイルを変換して、zepetoファイル拡張子のファイルを作成します。
- この段階では、まつげエリアにあるテクスチャ以外のすべてのテクスチャが変換前に削除されます。
