Create Items Easily Using the Template Editor (2D)
Hello. 👋
Welcome to the 'Template Editor', where any ZEPETO user can create items!
It looks complicated, but it isn't. With a few simple clicks and image editing, anyone can easily create items.
STEP 1 : Choosing a template
If you have decided on the item you wish to make, select a template that most closely matches your idea. Choosing a template first and trying a suitable design is also a good idea!
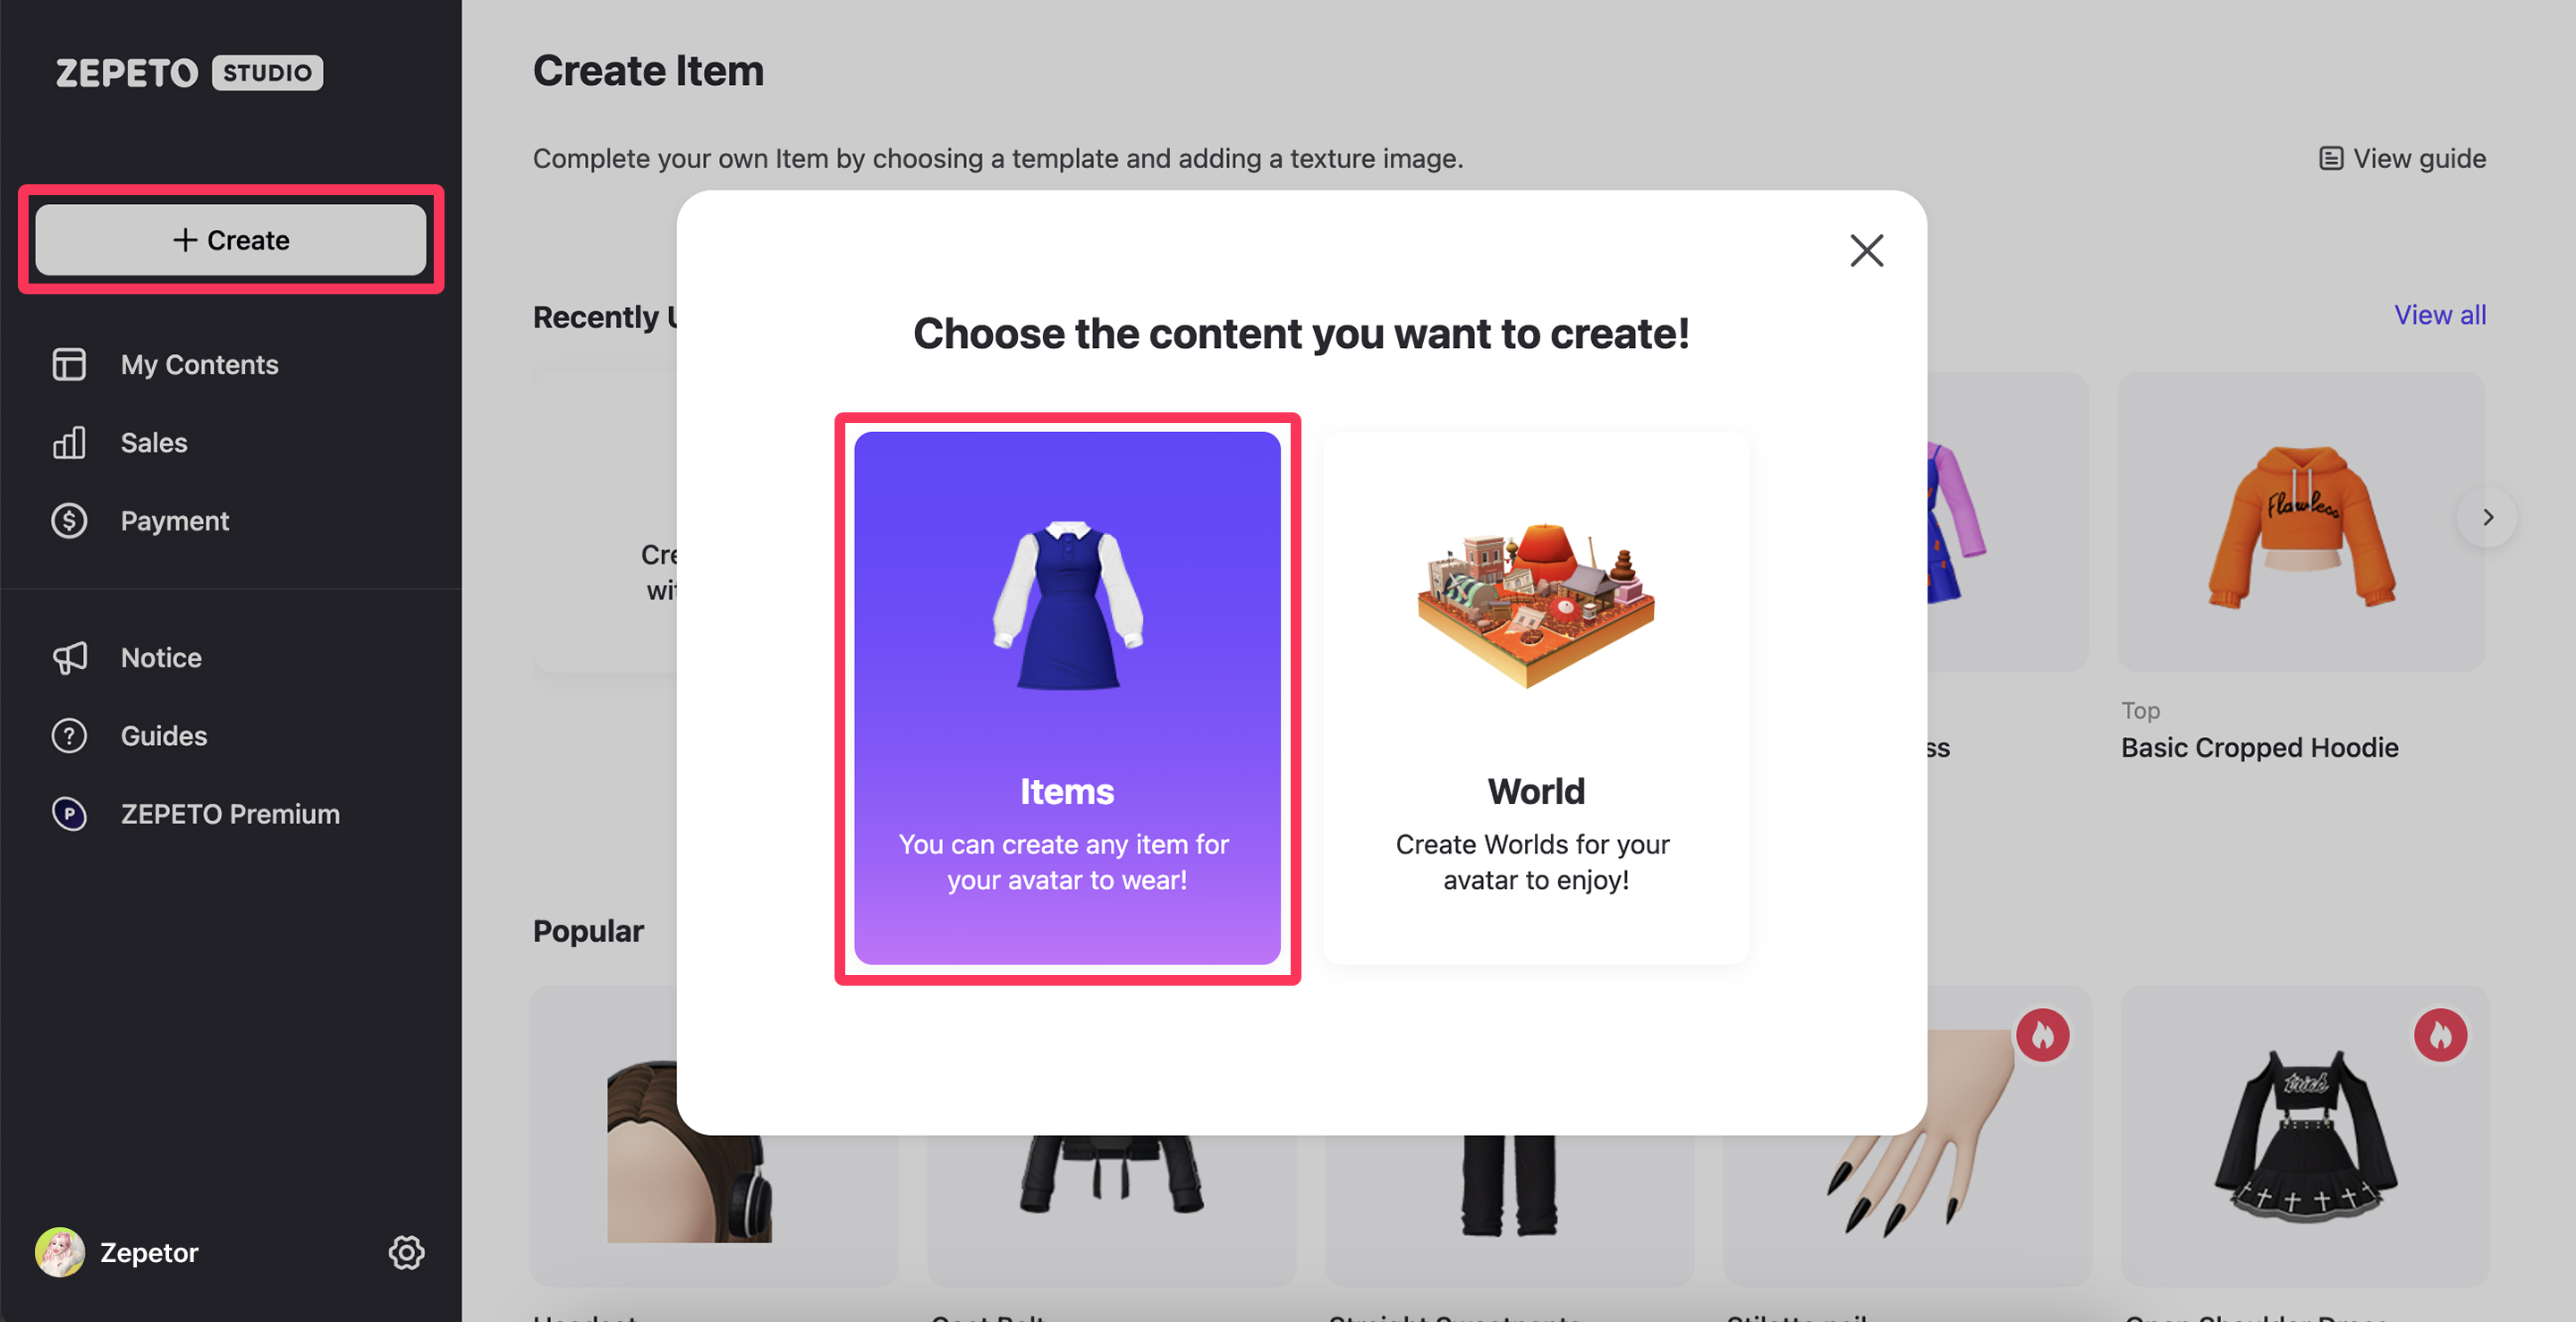
You can access the Template Editor from Manage Contents > Create Item > Item on the right side of the ZEPETO Studio.

Some paid templates require purchase before using them to create items.
STEP 2 : Using the Template Editor
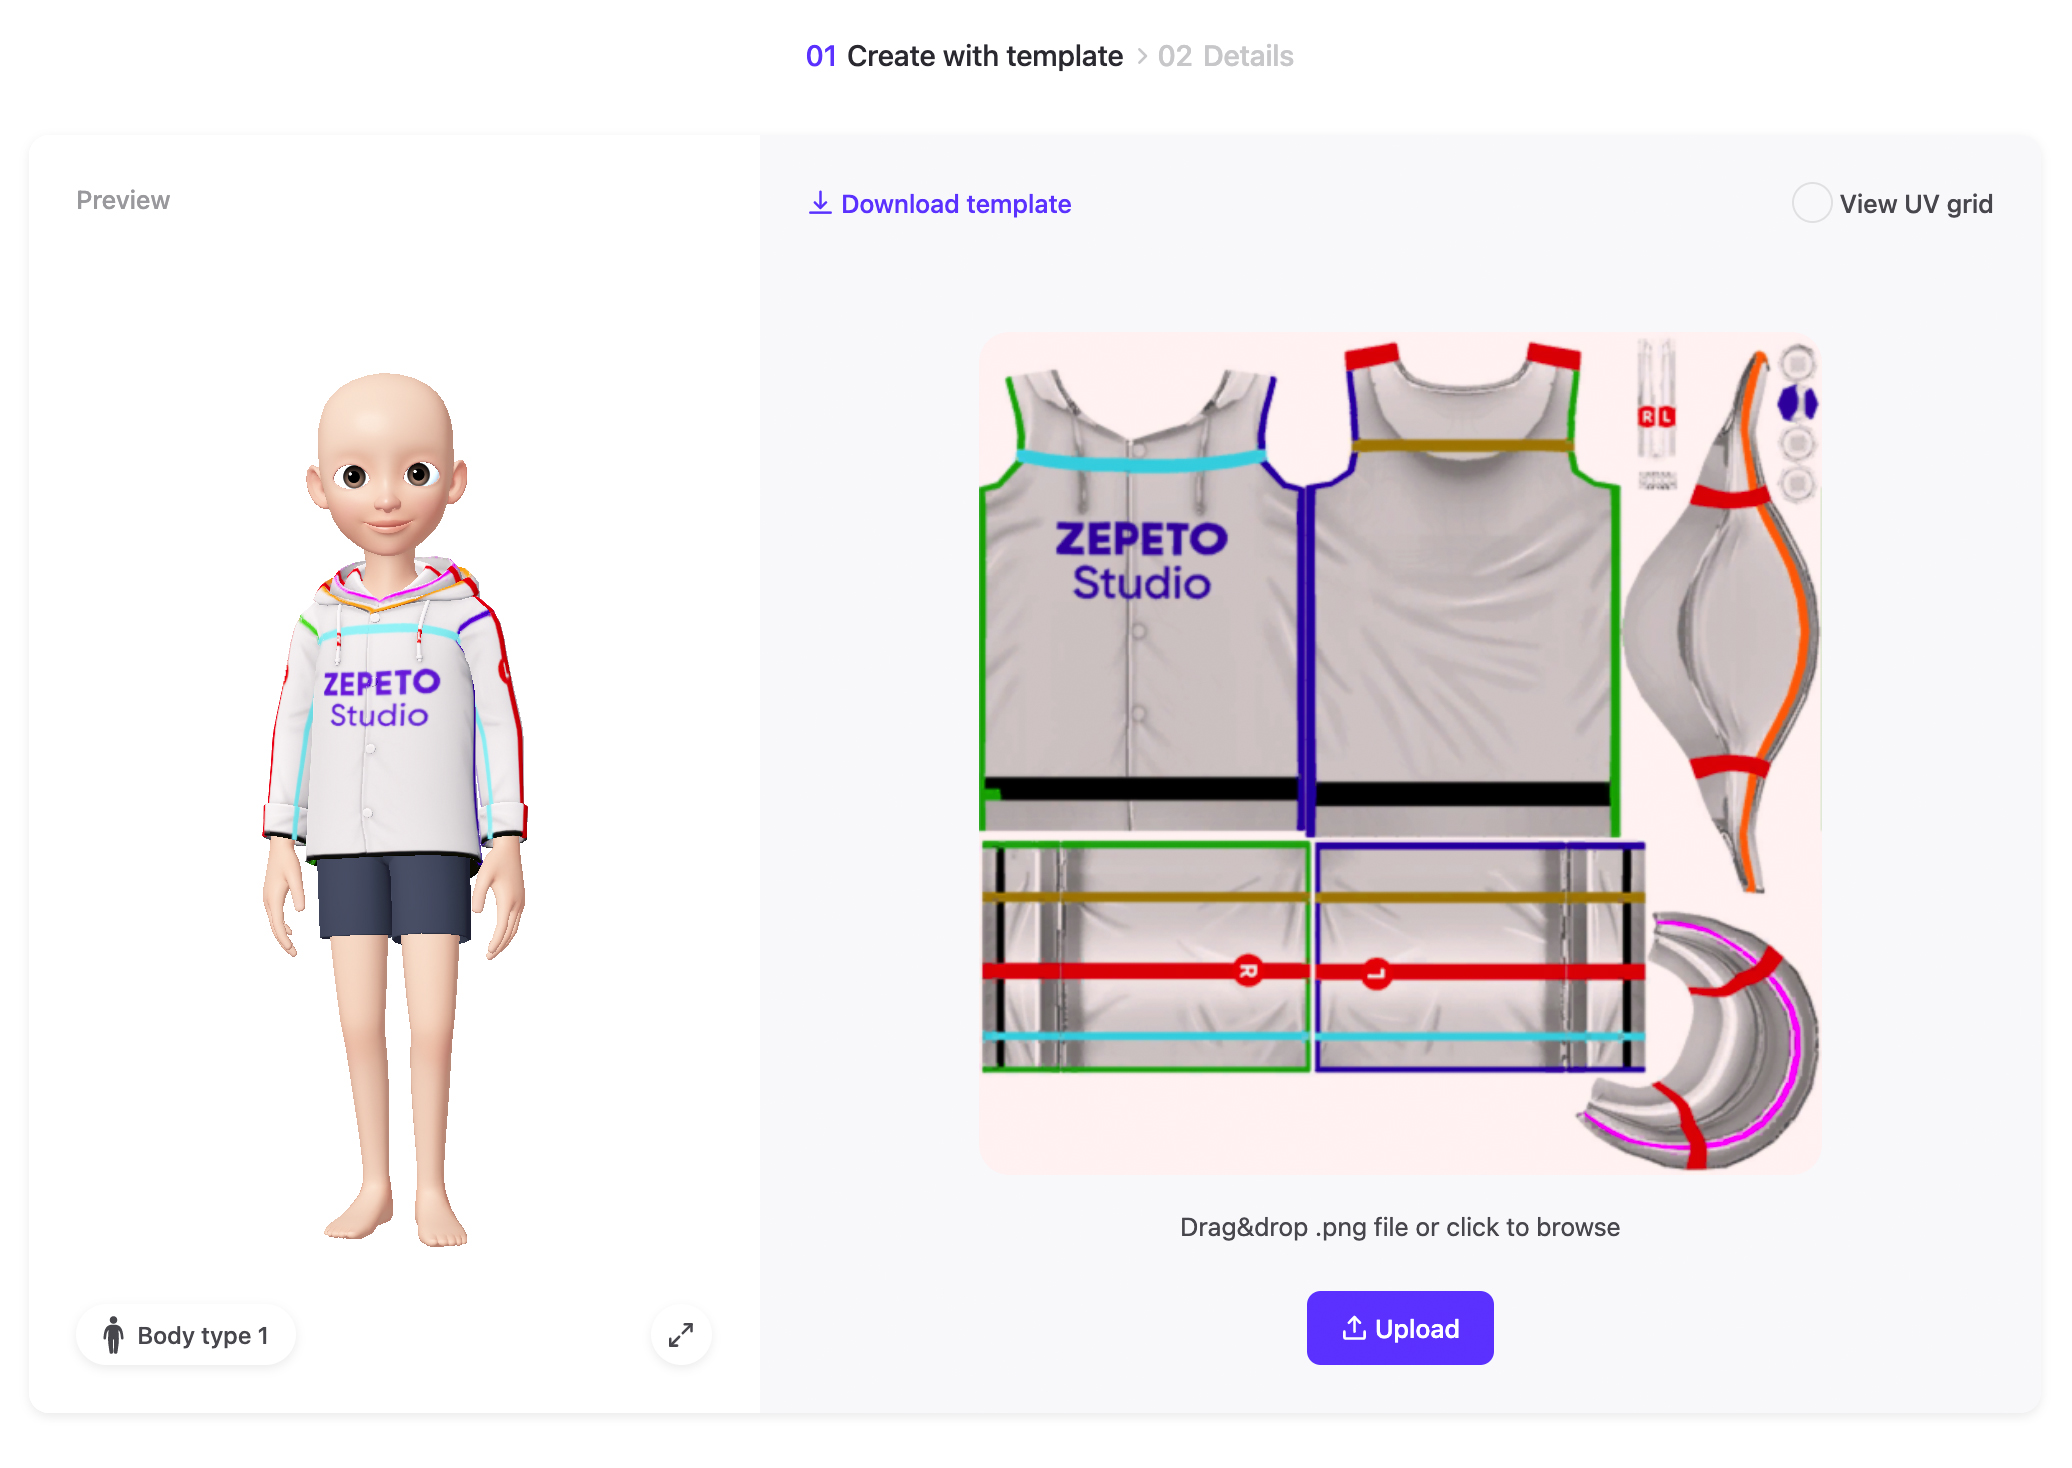
The Template Editor screen consists of character preview and texture preview screens.
- Character Preview: When you upload a texture you have created, you can preview characters wearing your item.
- Texture View: When you upload a texture you have created, you can view the uploaded texture image here.

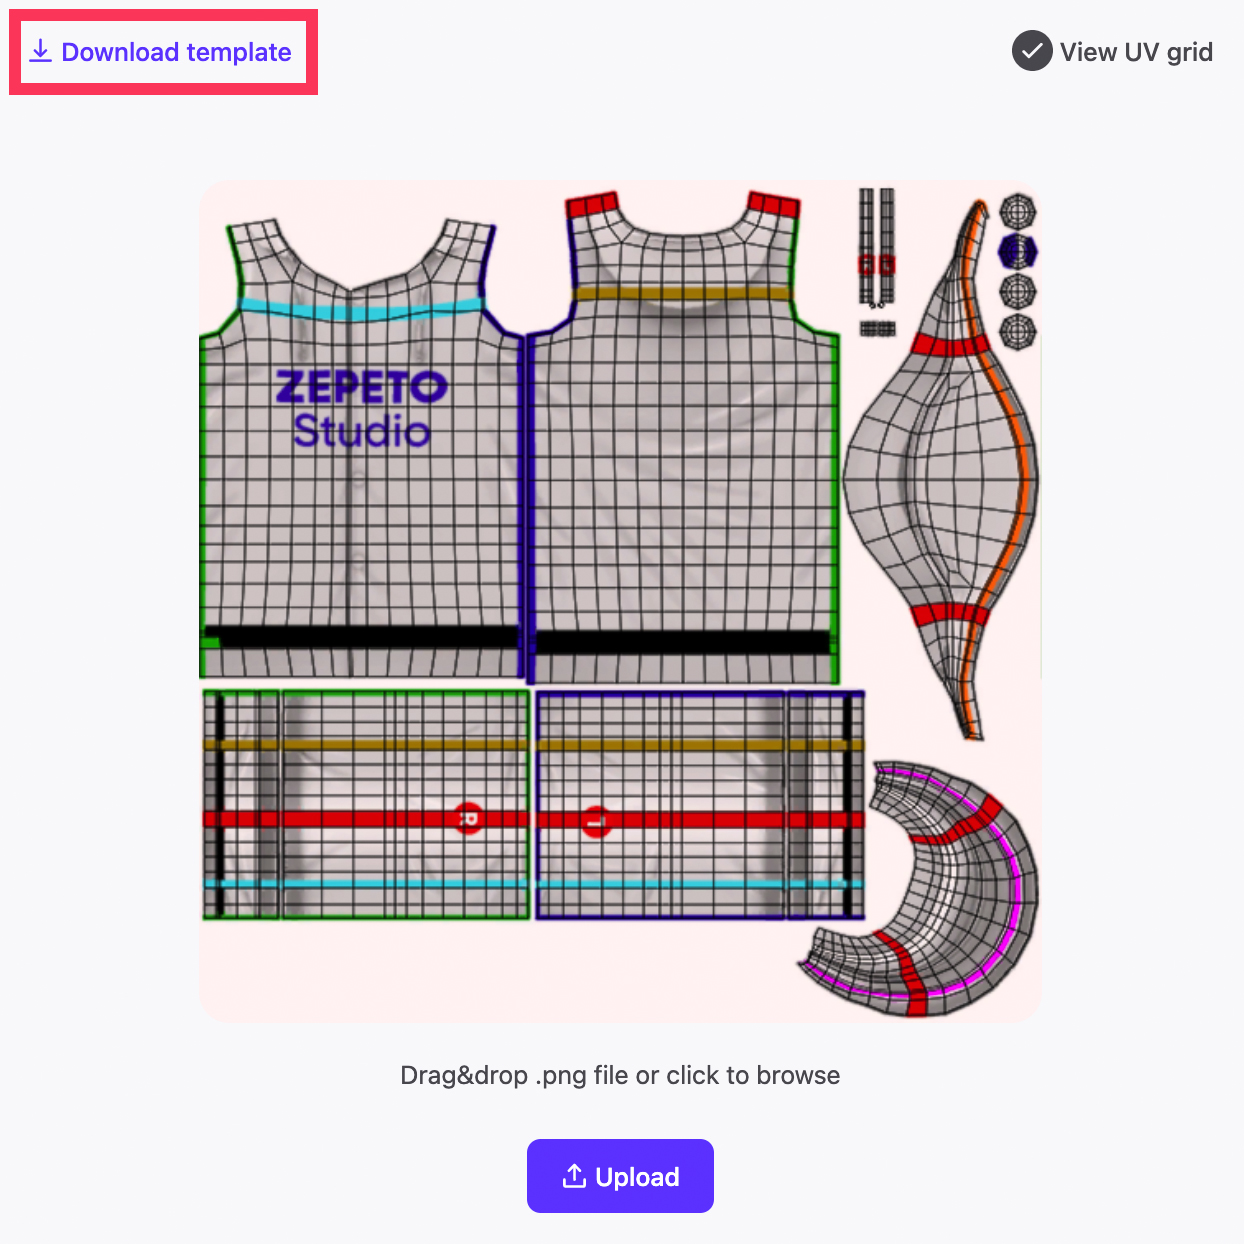
Turn on View UV Grid on the top right of the Texture View screen to see the structure of the texture.

STEP 3 : Applying the texture
Click the Download Templates button on the screen to download the template.
Open the PSD file in Adobe Photoshop and add layers to draw your design.
When your design is complete, save it as a .PNG file.

caution
The recommended image size is 256 x 256 pixels and the maximum size is 512 x 512 pixels.
STEP 4 : Uploading your item
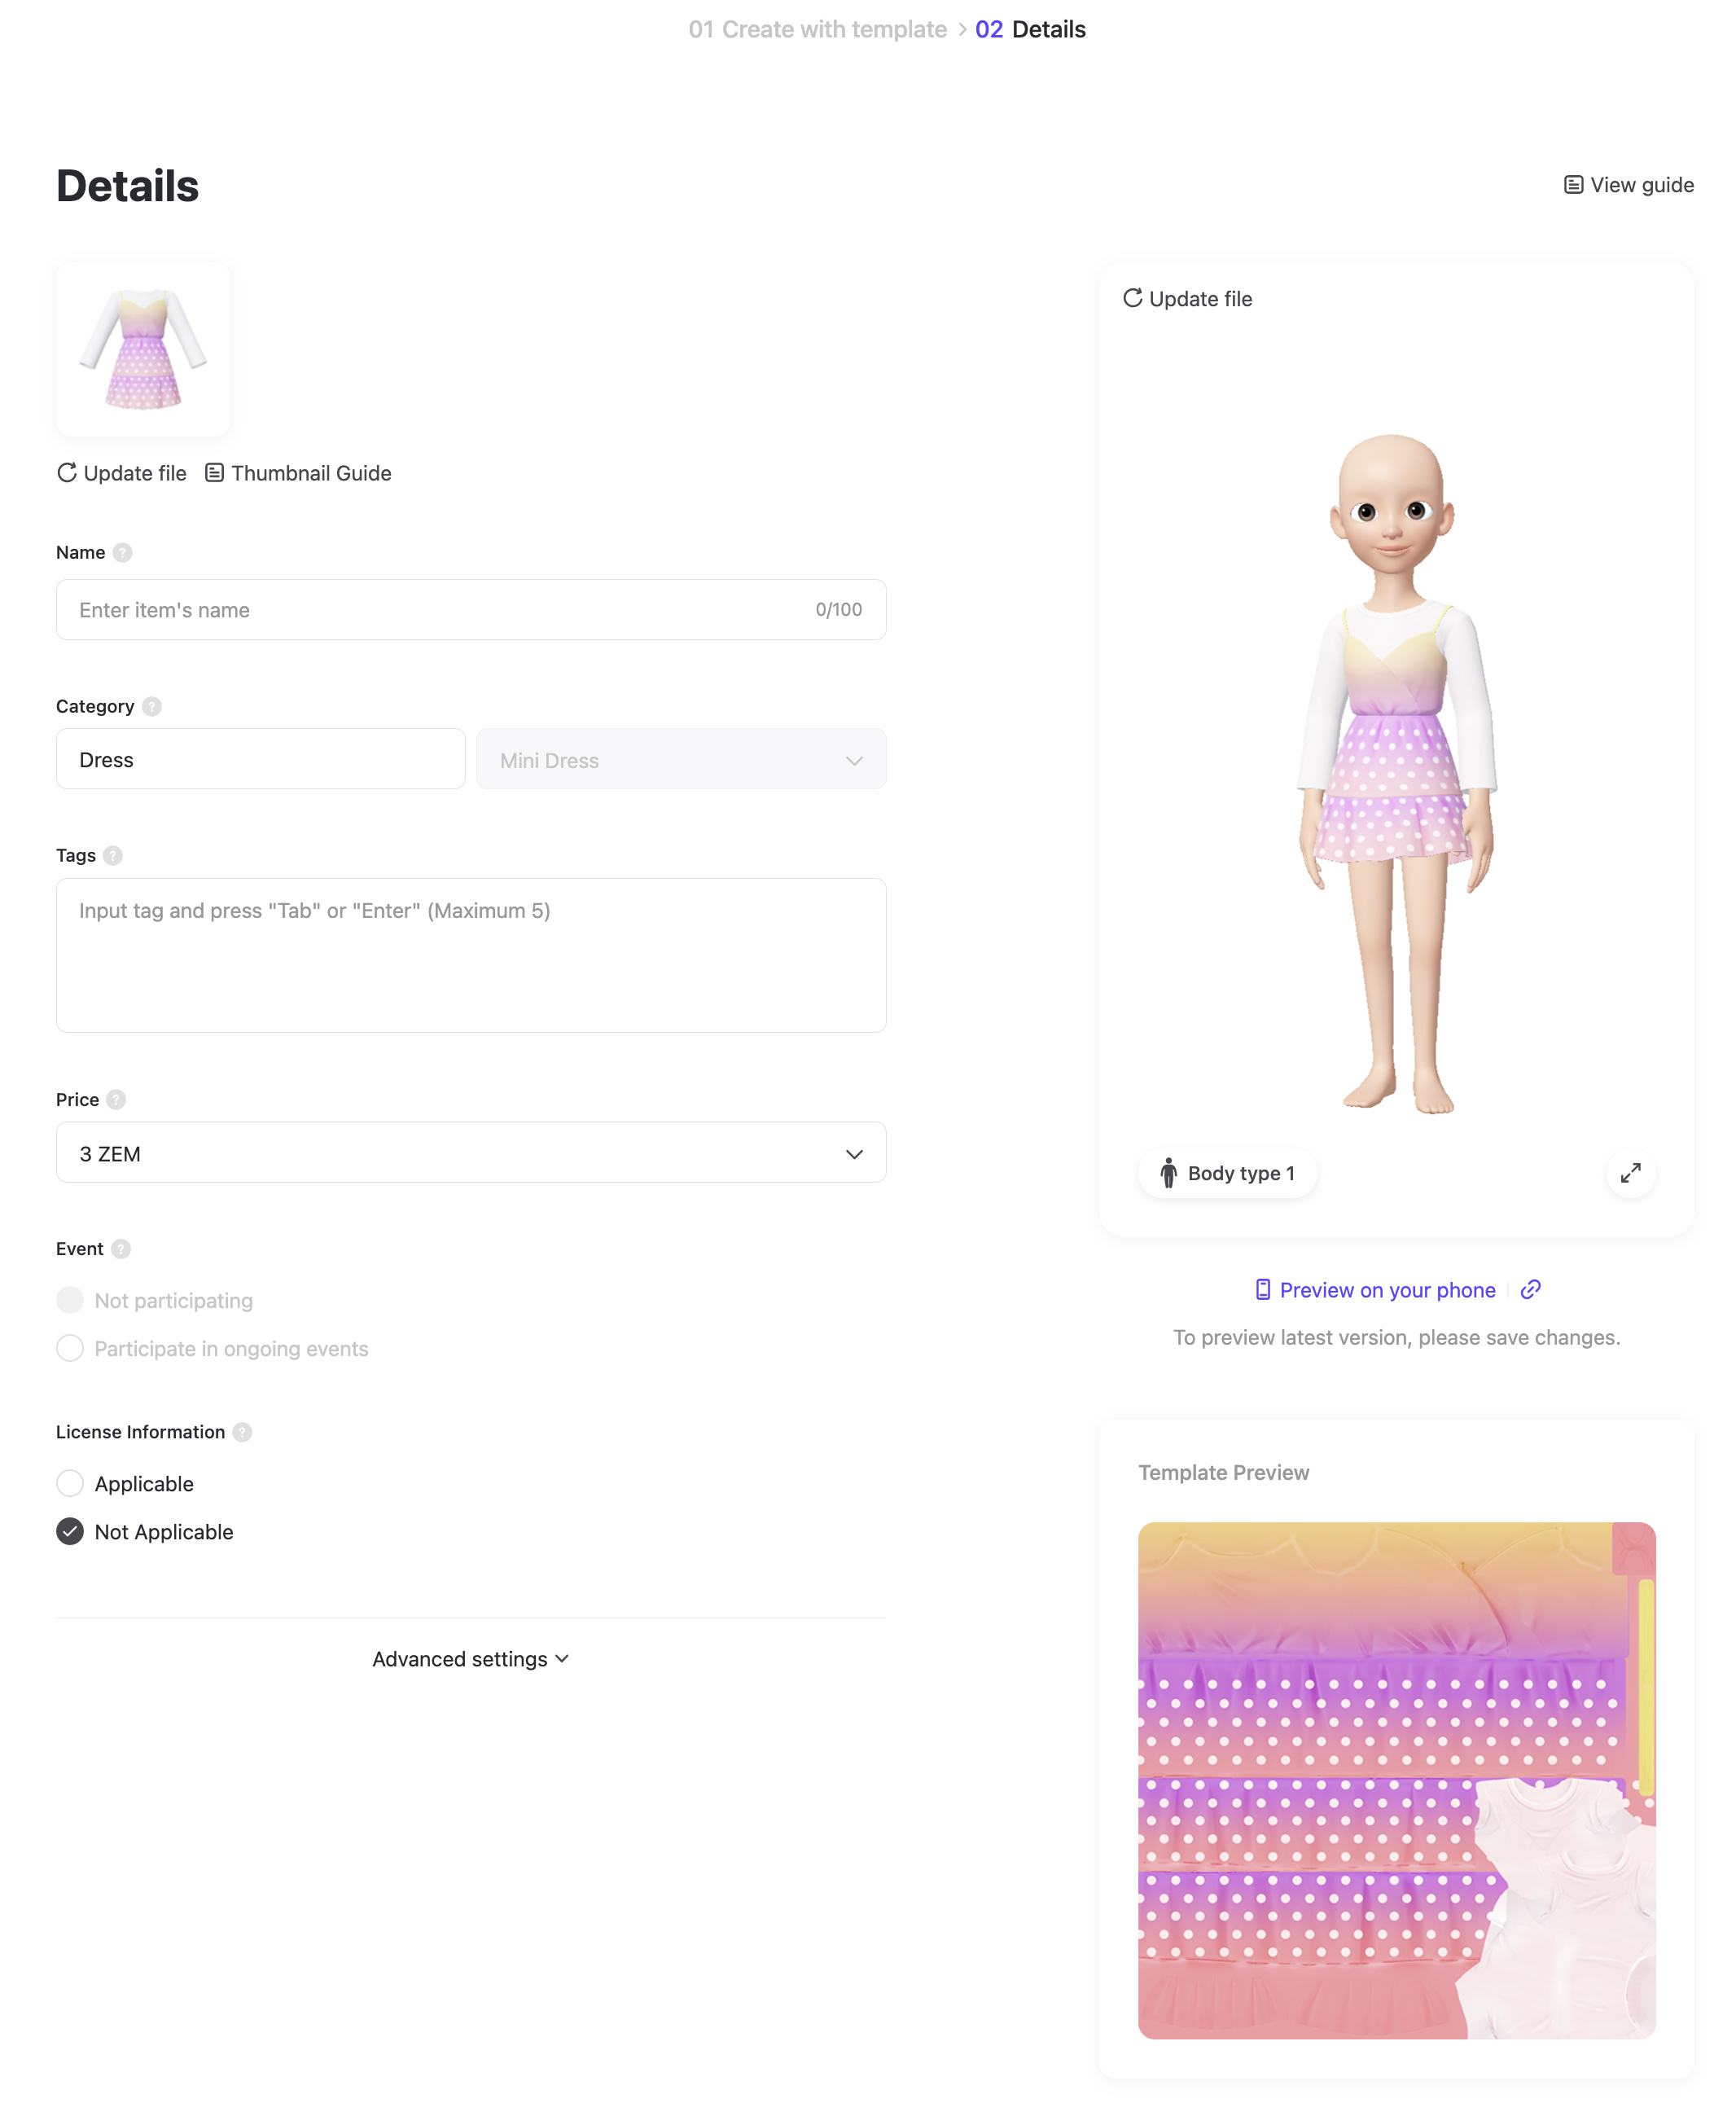
Upload your saved PNG file and check that there are no errors in the ZEPETO preview screen.

Click OK on the top right to enter item details.
Updated about 2 months ago
