STEP 1 : Check Build Settings
In the Unity project, open the Settings window by going to Menu → File → Build Settings.
Register all scenes needed for the actions in your World in [Scenes in Build].
Scenes must be in chronological order(start screen first)
Caution
If you do not register the scene, it may not appear correctly when QR tested or published.
STEP 2 : Check Project Settings > Quality
Check the following settings in Unity > Project Settings > Quality
Please set PC, iOS, and Android to the desired quality.
The following are the default settings used by ZEPETO.
Quality set-up tips
- The higher the quality, more likely that heat generation issues may occur.
- The setting values below are options that cannot be arbitrarily modified.
- Skin Weight : 4 Bones
- Vsync count : Don’t sync
- In the case of shadow, the value set by the creator is applied as it is, so it will increase.
- If the shadow is not visible, look at the following setting values.
- Make sure that iOS, Android quality settings have the same Level.
- Make sure Disable Shadow is the default for the Shadows type and this part is turned on.
- Check the shadow setting in Light setting and object mesh renderer at content level.
- The default value for the shadow distance value is 0.0001. Please adjust this part to an appropriate value.
Setting Anti-aliasing
You can make character and object outlines appear smoother by enabling anti-aliasing.
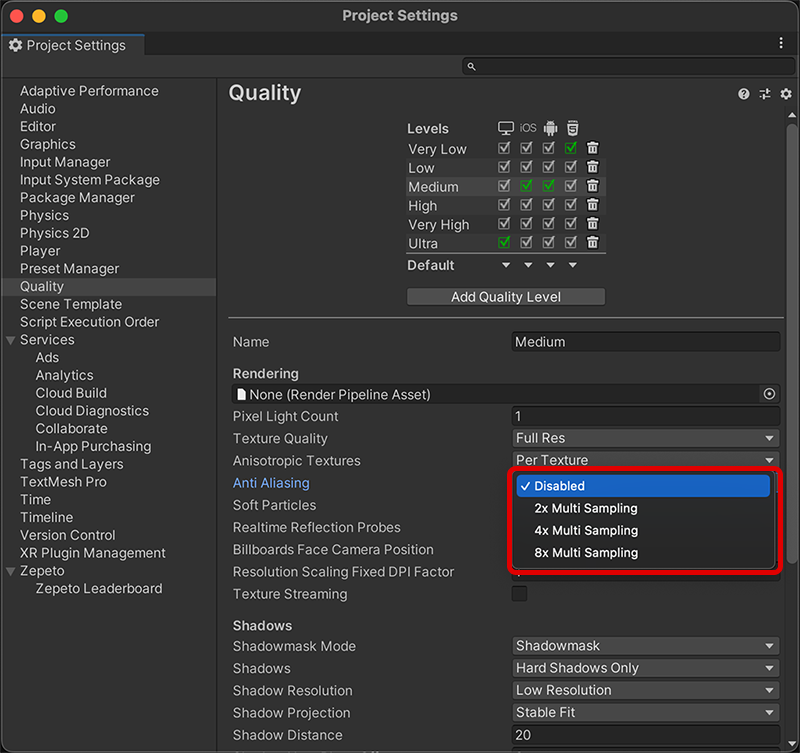
The graphic changes according to each setting value are as follows.

Caution
When using post-processing anti-aliasing, set Anti-aliasing in Quality Settings to Disable.
Unity Anti-aliasing Document
https://docs.unity3d.com/2018.4/Documentation/Manual/PostProcessing-Antialiasing.html
STEP 3 : Check Project Settings > Player
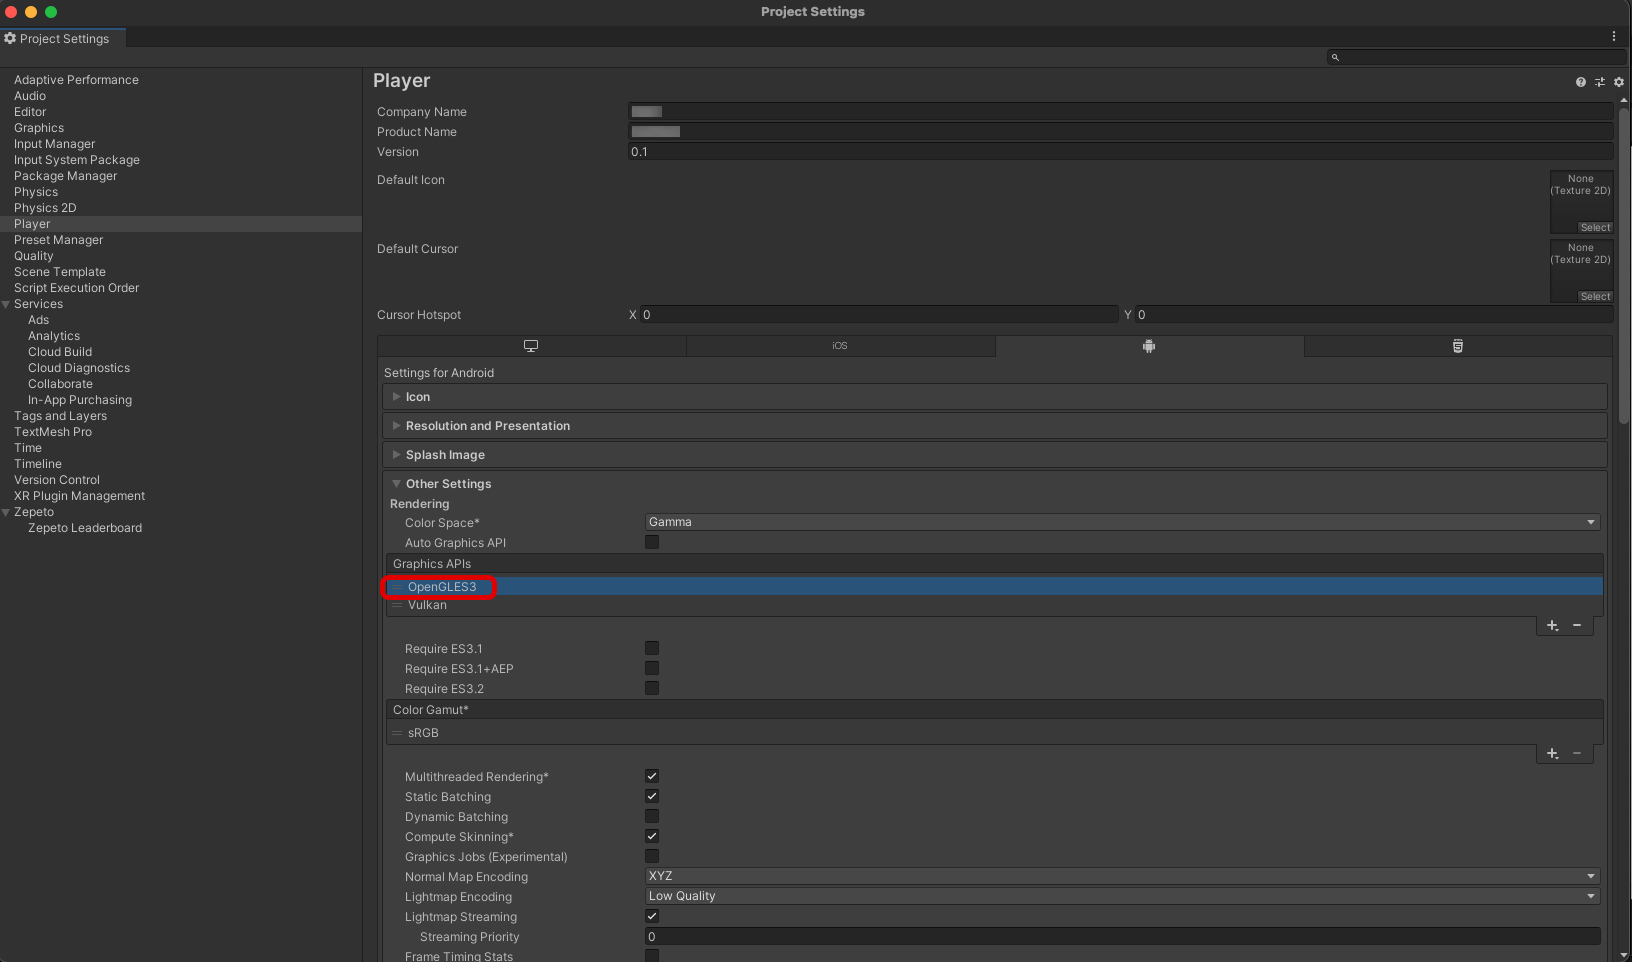
Please set the Graphics API for each device in Unity > Project Settings > Player.
Caution
If the Graphics API settings are not set correctly, the shader will not appear normally.
PC
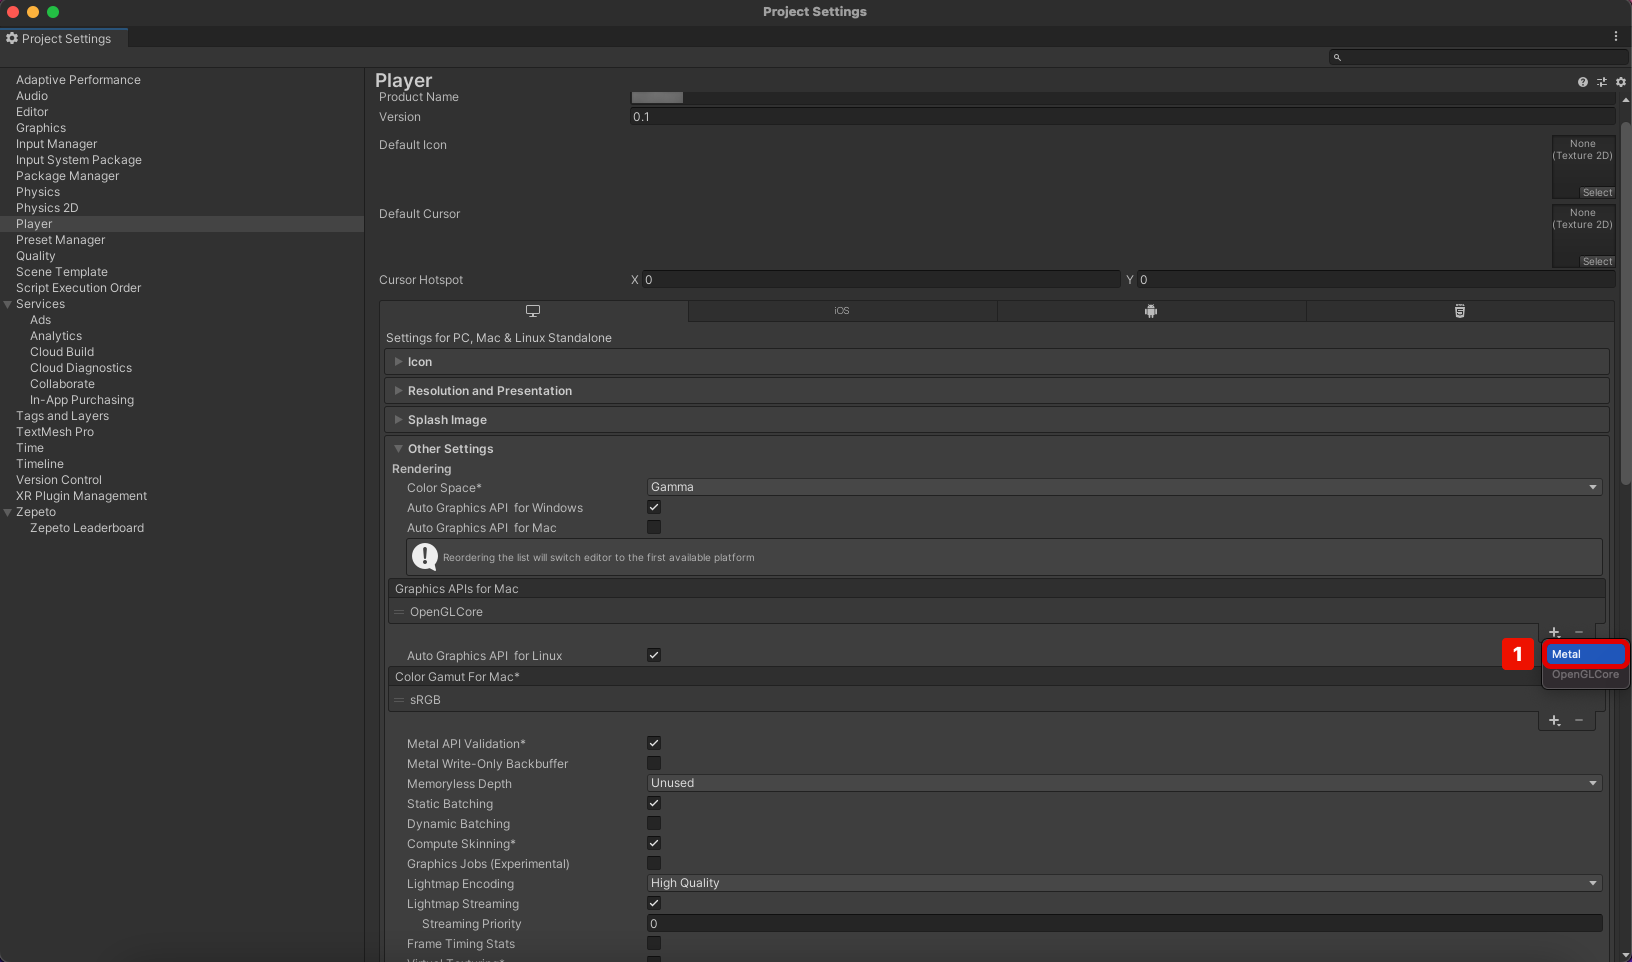
① Select Unity > Project Settings > Player > Settings for PC, Mac & Linux Standalone tab, then Add Metal to Graphics APIs for MAC.
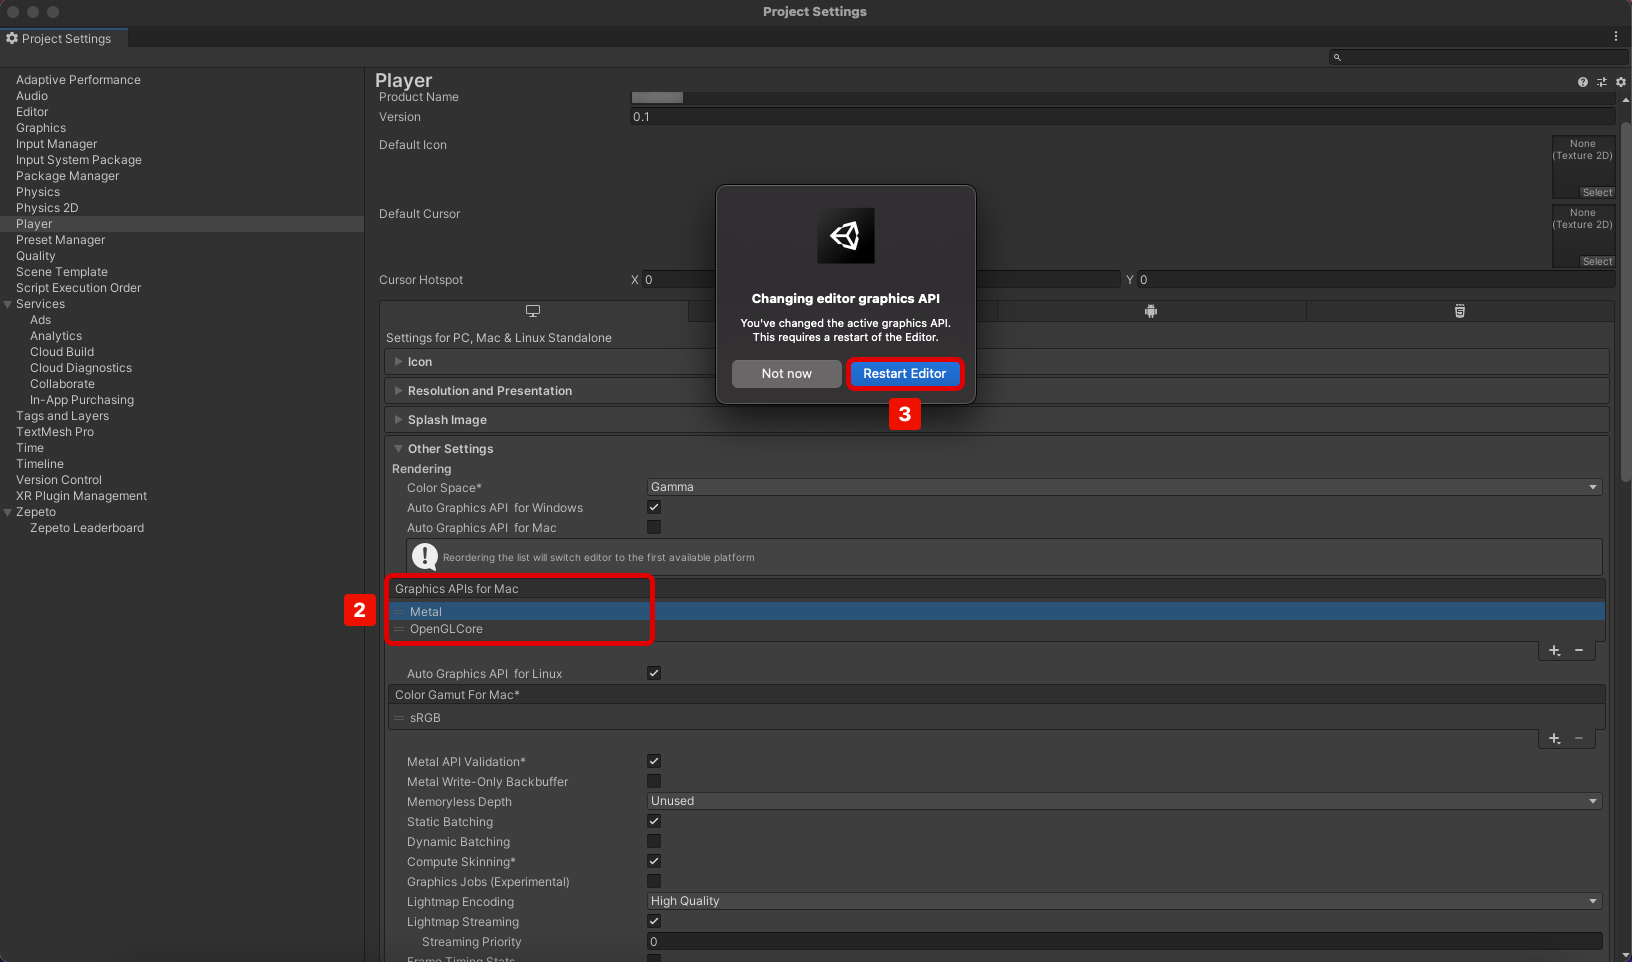
② Drag the Metal to the top.
③ Select Restart Editor when the pop-up window appears asking if you want to restart the editor due to changes in the settings.
iOS
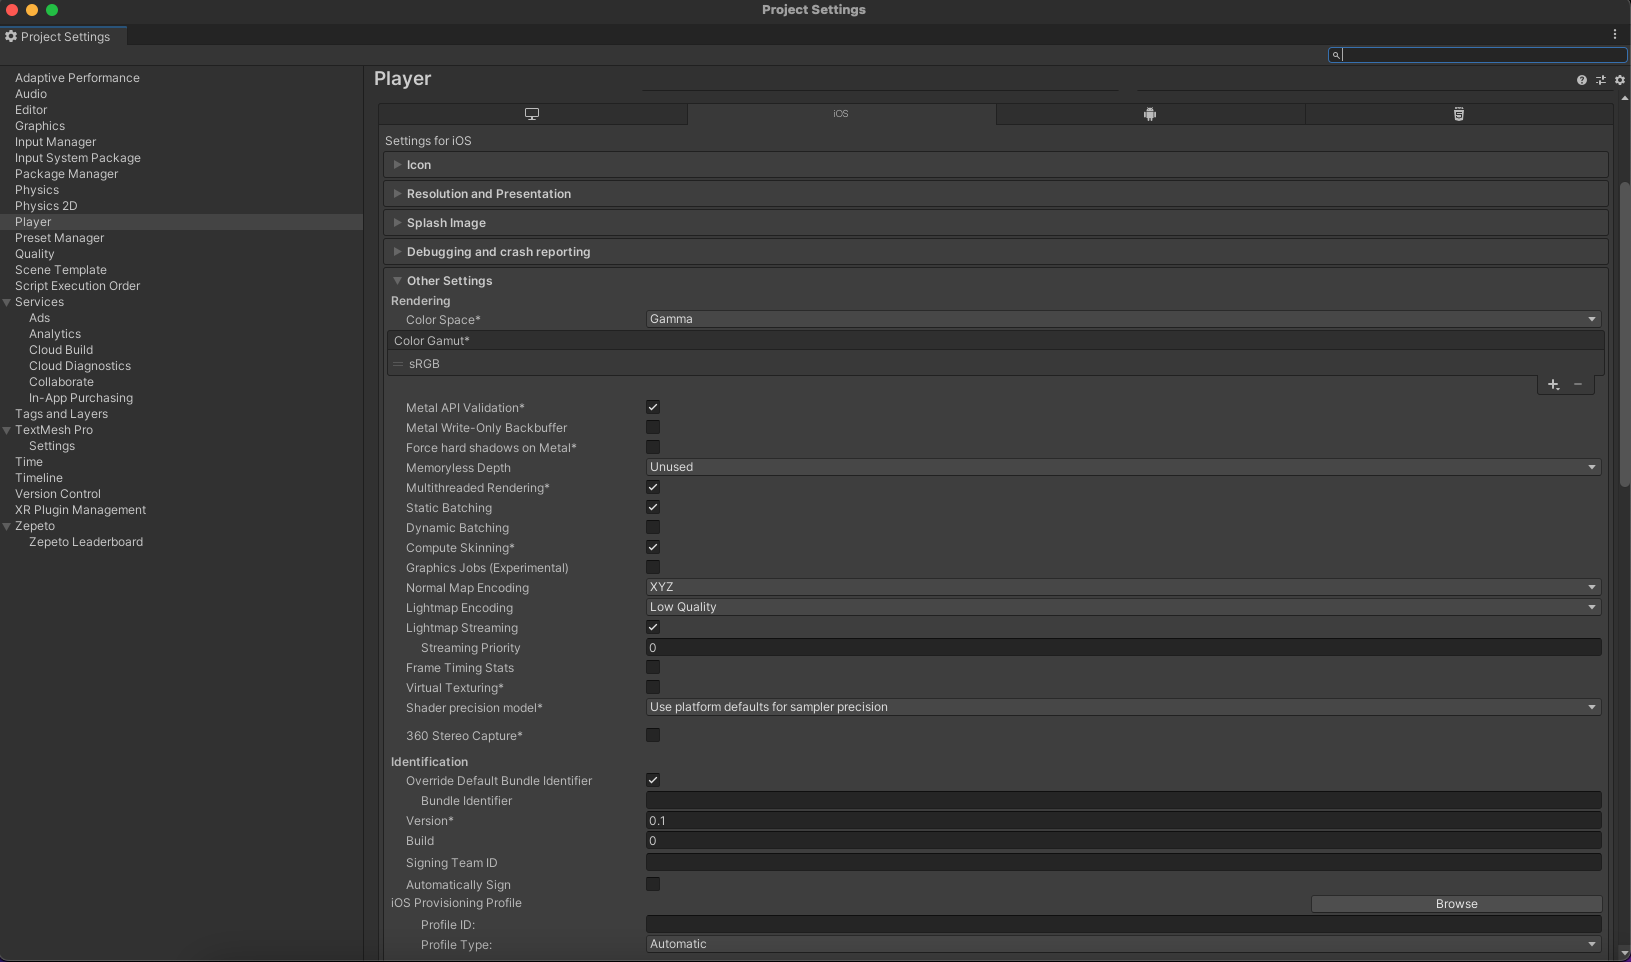
Select Unity > Project Settings > Player > iOS tab and drag Graphics APIs' Metal to the top.
Select Restart Editor when the pop-up window appears asking if you want to restart the editor due to changes in the settings.
If the setting is already completed with Metal, it will look like this.
Android
Select the Unity > Project Settings > Player > Android tab and drag Graphics APIs' OpenGLES3 to the top.
Select Restart Editor when the pop-up window appears asking if you want to restart the editor due to changes in the settings.
STEP 4 : Click the Publish button
Click the [▼] button in the center menu of the Unity project screen.
Click the [Open World Settings] button in the pop-up menu that appears.
Please check Platforms > All.
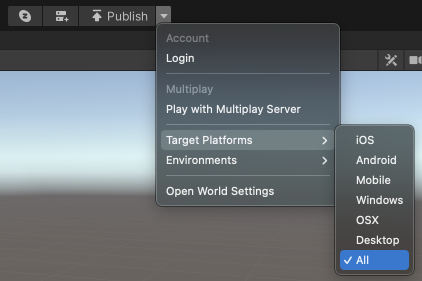
To create a World file for submission, click on the [Publish] button at the center of the screen.

Caution
- Only accounts that own the World ID can Publish
- If the World is not linked in ZEPETO Service, the upload will fail
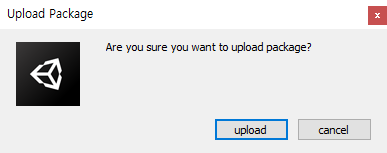
- Select [Upload] in the next pop-up window to automatically register the generated .zepetopackage file in the World console.
- Select [Cancel] to drag and drop, and manually register the generated .zepetopackage file.
STEP 5 : Register the world file in ZEPETO Studio
Please refer to the following guide. [Registering a World File]
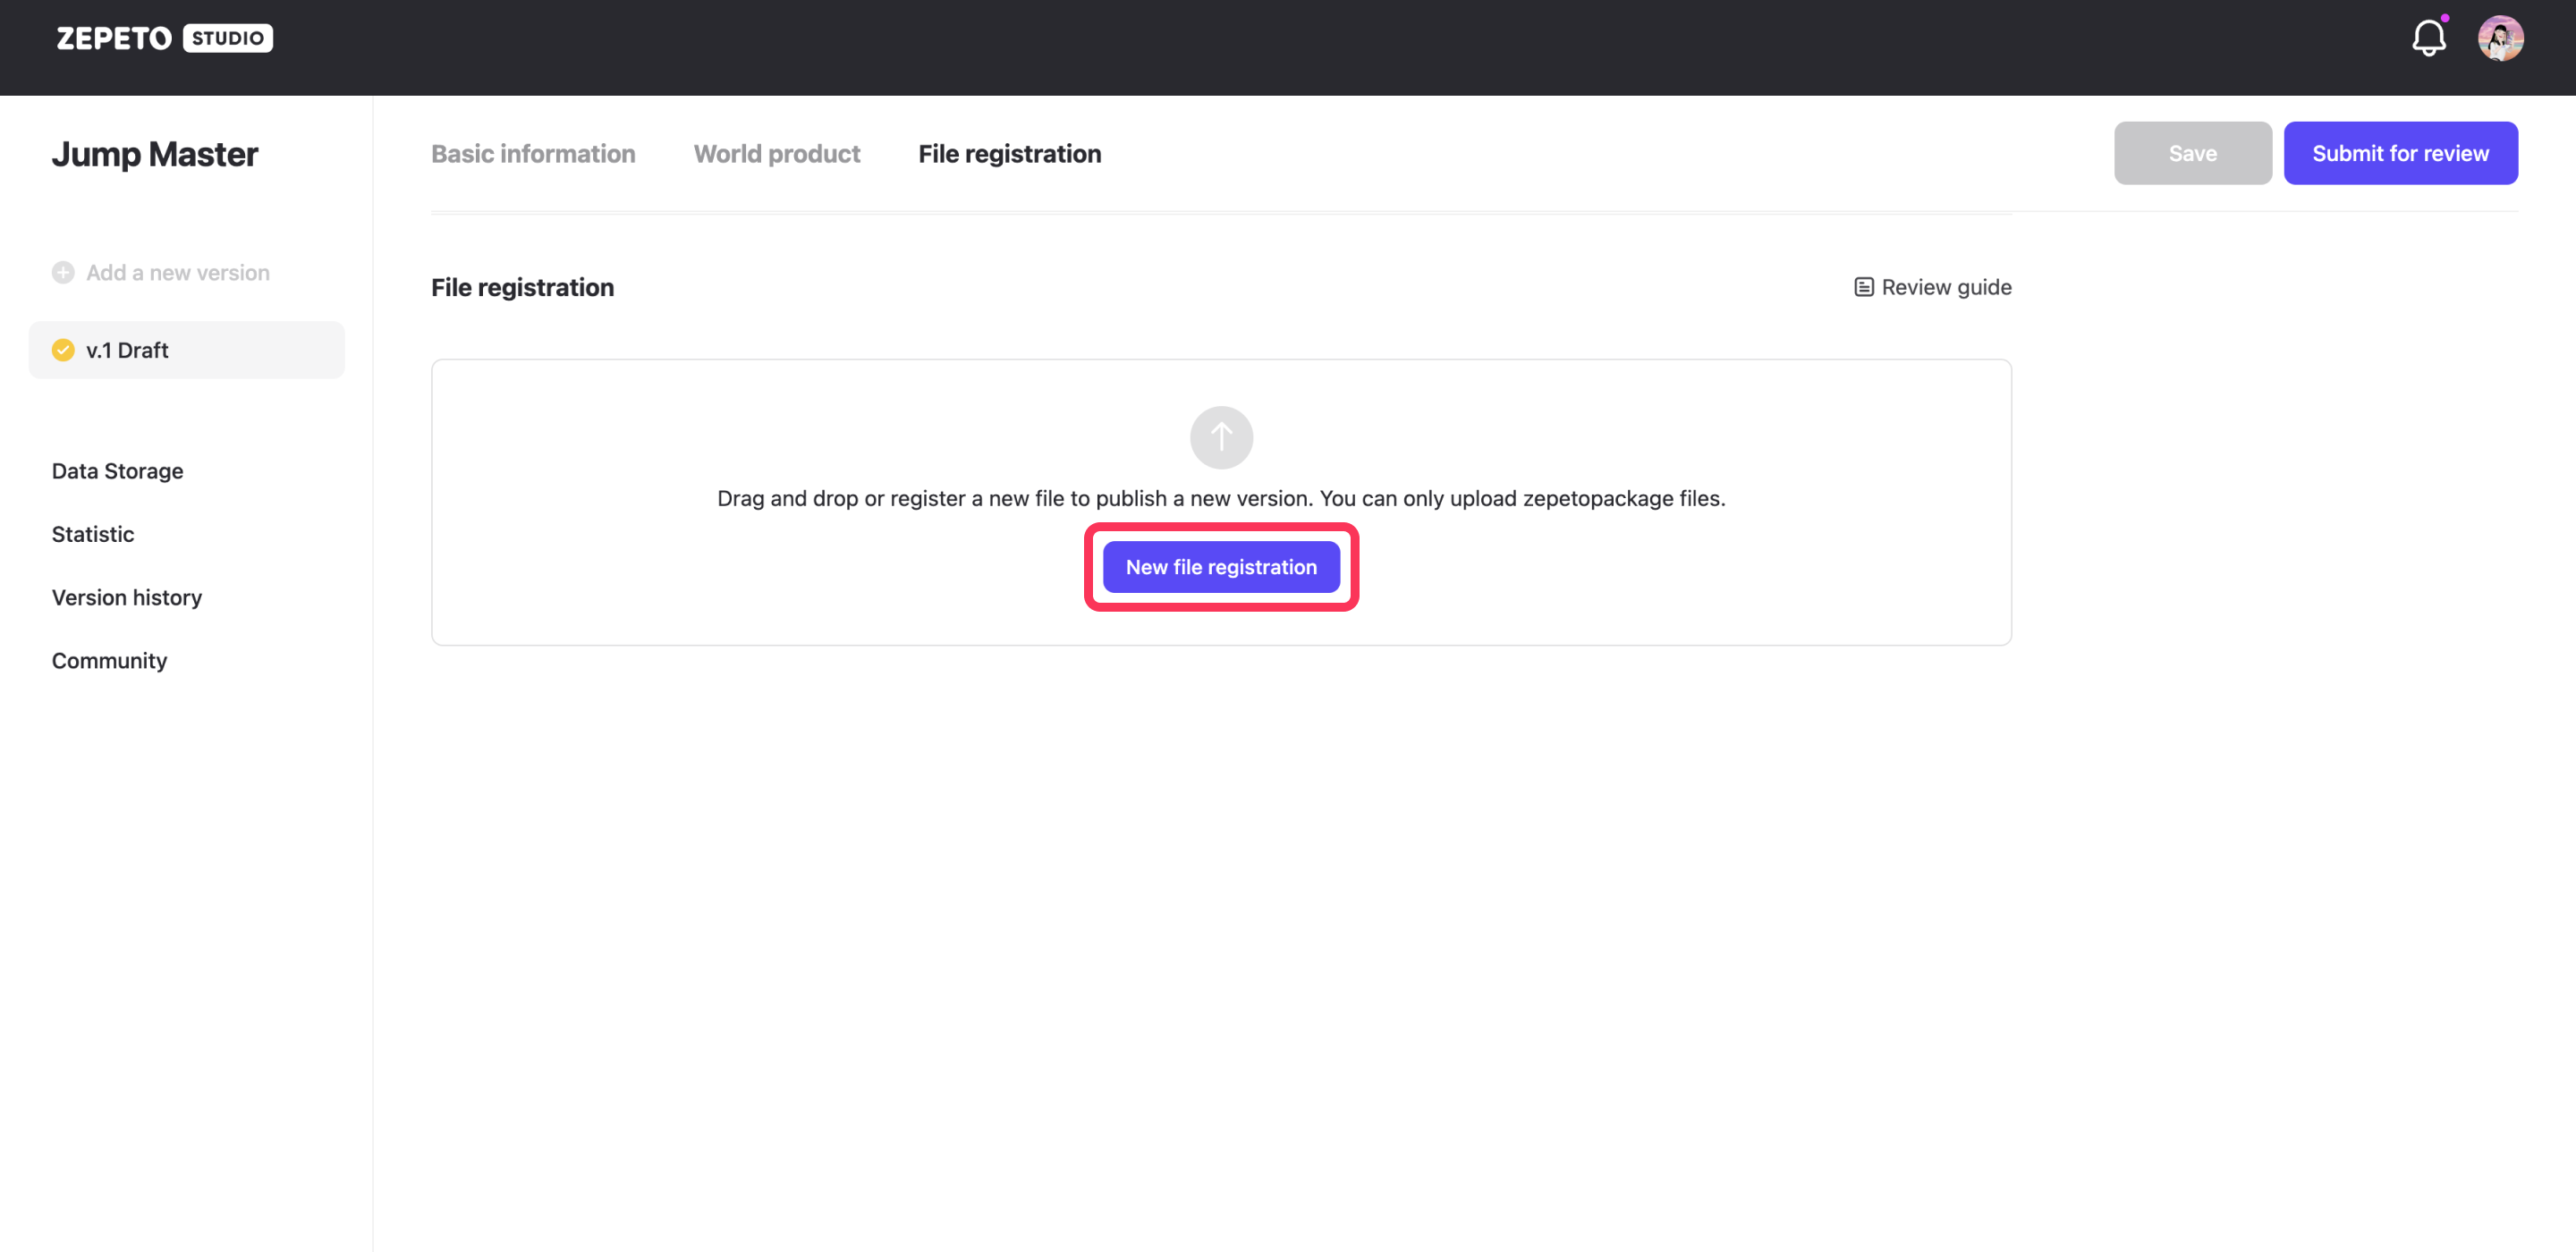
Please refer to the following guide. [Submitting for Review]
