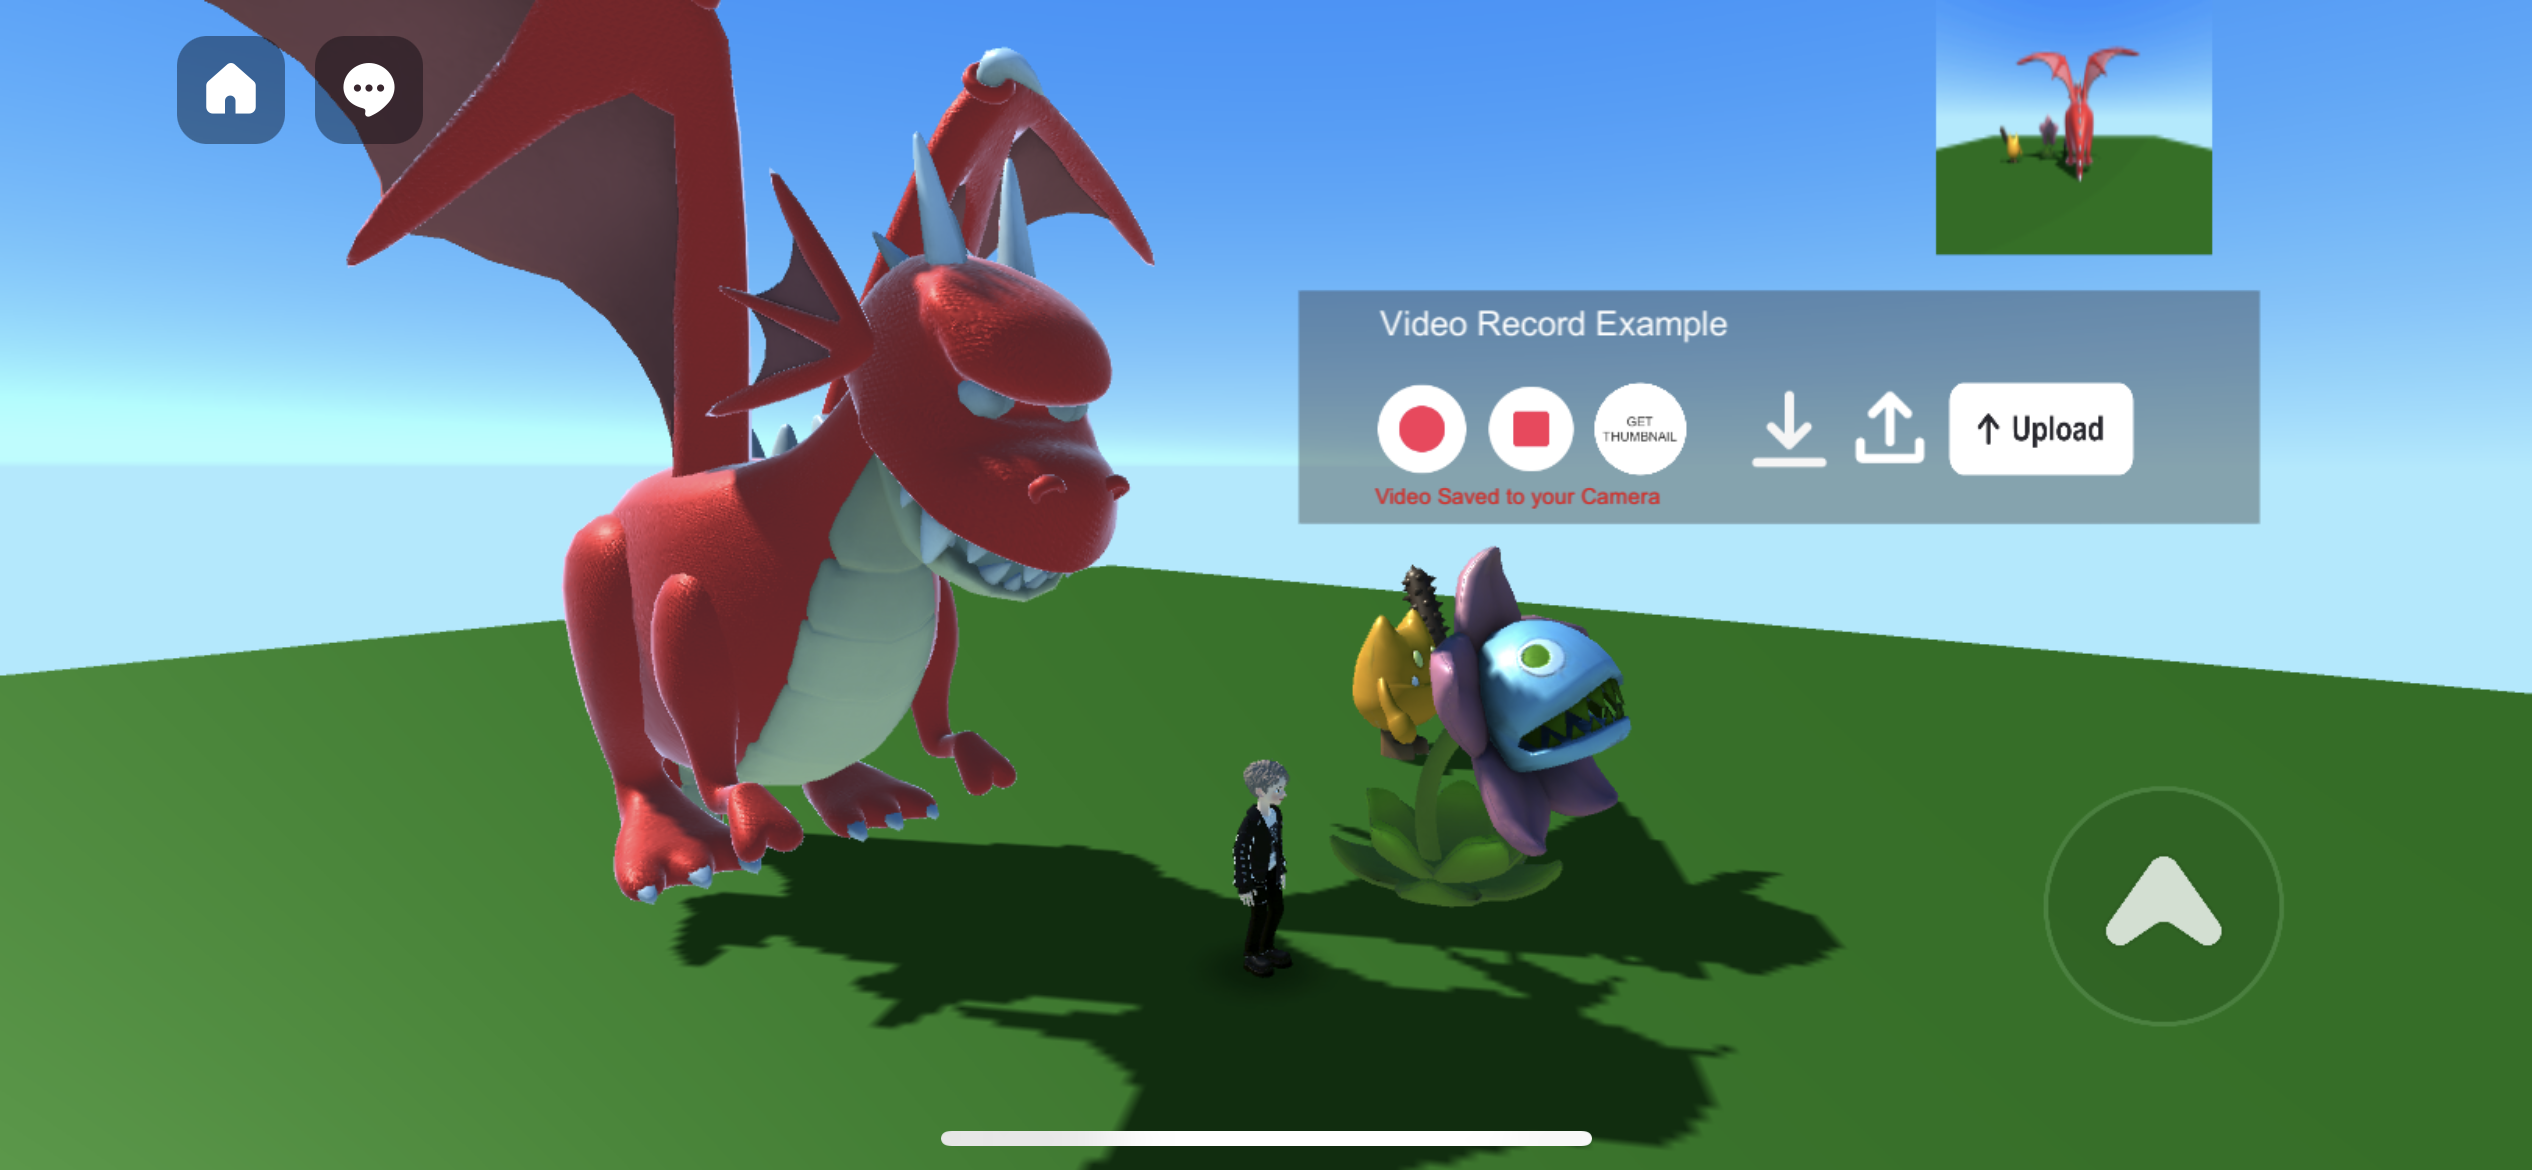
You can save or share videos within the World using video-related functions in the WorldVideoRecorder API, and create feeds using videos.
In order to use the video recording and save/share/feed post functions, you must create an import statement as follows.
import { WorldVideoRecorder } from 'ZEPETO.World';
WorldVideoRecorder API provides the following video-related functions.
| API | Description |
|---|---|
| WorldVideoRecorder.StartRecording(camera: UnityEngine.Camera, resolutions: VideoResolutions, durationSecond: number):boolean | Start recording the video. You can set the recording camera, video resolution, and recording time as parameters. The return result indicates whether or not the recording start was successful. - enum VideoResolutions { W1280xH720 = 0, W720xH1280 = 1, W1920xH1080 = 2, W1080xH1920 = 3 } - durationSecond : The maximum value is 60, so please enter it as less than 60 if possible. |
| WorldVideoRecorder.StopRecording() | Stop recording the video in progress. |
| WorldVideoRecorder.IsRecording():boolean | Returns on whether to proceed with recording the video. |
| WorldVideoRecorder.SaveToCameraRoll(callback: System.Action$1) | Save the video to the photo library. |
| WorldVideoRecorder.Share(callback: System.Action$1) | Share the video with an external app. |
| WorldVideoRecorder.CreateFeed(contents: string, $callback: System.Action$1) | Upload the video to the feed. The first factor, contents, allows you to designate the content of a post. |
| WorldVideoRecorder.AddVideoPlayerComponent(playerObject: UnityEngine.GameObject, renderTexture: UnityEngine.RenderTexture):UnityEngine_Video.VideoPlayer | Add video player components to the GameObject where you want to play the video, and connect the recorded video files. This returns the added video player and lets you designate the width, height, or RenderTexture to play the video, depending on the parameters. |
| WorldVideoRecorder.GetThumbnail():UnityEngine.Texture2D; | Returns the thumbnail of the recorded video. |
Next is an example of calling up functions of the Save/Share/Feed post my videos features within the World Video Recorder.
Caution
- It is unavailable to check it in the Unity editor environment, but available to check it when playing through the app.
- The resolution is recorded at the specified value when it is saved as a file, but the resolution may change when it's uploaded to ZEPETO Feed.
- If you enter a value greater than 60 for durationSecond, recording will not work properly.
WorldVideoRecorder.SaveToCameraRoll(result => {console.log(`${result}`)});

WorldVideoRecorder.Share(result => {console.log(`${result}`)});

WorldVideoRecorder.CreateFeed("[contents]", result => {console.log(`${result}`)});
The following is an entire example code that uses functions of my video recording functions within the WorldVideoRecorder using RenderTexture.
import { Camera, GameObject, RenderTexture } from 'UnityEngine';
import { Button, RawImage } from 'UnityEngine.UI';
import { ZepetoScriptBehaviour } from 'ZEPETO.Script';
import { VideoResolutions, WorldVideoRecorder } from 'ZEPETO.World';

export default class WorldVideoRecorderExample extends ZepetoScriptBehaviour {

    // WorldVideoRecorder Video UI
    public startRecordingButton: Button;
    public stopRecordingButton: Button;
    public saveVideoButton: Button;
    public shareVideoButton: Button;
    public createFeedButton: Button;
    public getThumbnailButton: Button;
    public thumbnailImage: RawImage;

    // Recorder Camera
    public recorderCamera: Camera;

    // Target Texture
    public targetTexture: RenderTexture;

    // VideoPlayer Object
    private videoPlayerObject: GameObject;

    Awake() {
        this.videoPlayerObject = new GameObject();
    }

    Start() {
        this.startRecordingButton.onClick.AddListener(() => {
            if (false == WorldVideoRecorder.StartRecording(this.recorderCamera, VideoResolutions.W1280xH720, 15)) {
                return;
            }

            this.StartCoroutine(this.CheckRecording());
        });

        this.stopRecordingButton.onClick.AddListener(() => {
            if (false == WorldVideoRecorder.IsRecording()) {
                return;
            }

            WorldVideoRecorder.StopRecording();
        });

        this.saveVideoButton.onClick.AddListener(() => {
            if (false == WorldVideoRecorder.IsRecording()) {
                WorldVideoRecorder.SaveToCameraRoll(result => { console.log(`${result}`) });
            }
        });

        this.shareVideoButton.onClick.AddListener(() => {
            if (false == WorldVideoRecorder.IsRecording()) {
                WorldVideoRecorder.Share(result => { console.log(`${result}`) });
            }
        });

        this.createFeedButton.onClick.AddListener(() => {
            if (false == WorldVideoRecorder.IsRecording()) {
                WorldVideoRecorder.CreateFeed("[contents]", result => { console.log(`${result}`) });
            }
        });

        this.getThumbnailButton.onClick.AddListener(() => {
            if (false == WorldVideoRecorder.IsRecording()) {
                this.thumbnailImage.texture = WorldVideoRecorder.GetThumbnail();
            }
        });
    }

    *CheckRecording() {
        while (WorldVideoRecorder.IsRecording()) {
            yield null;
        }

        let videoPlayer = WorldVideoRecorder.AddVideoPlayerComponent(this.videoPlayerObject, this.targetTexture);

        if (videoPlayer == null) {
            return;
        }

        videoPlayer.Play();
    }
}
After writing the script, create the necessary buttons and raw images on the canvas.
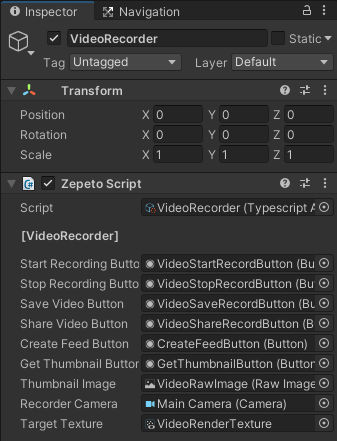
After that, assign each component in the inspector.
- For the camera, you can use a normal camera component.
- For target textures, Create > Please create it as a Render Texture.

Tip
- If you use the same render texture as the screenshot, it may not render correctly, so please create a new render texture just for recording and use it.
You can test the video recording function by running it through the QR mobile build.

