
When creating ZEPETO World, you can use the Gyro Sensor to implement various world play ideas depending on the tilt of the device. This guide will show you how to utilize Input.gyro within ZEPETOScript.
Gyroscope
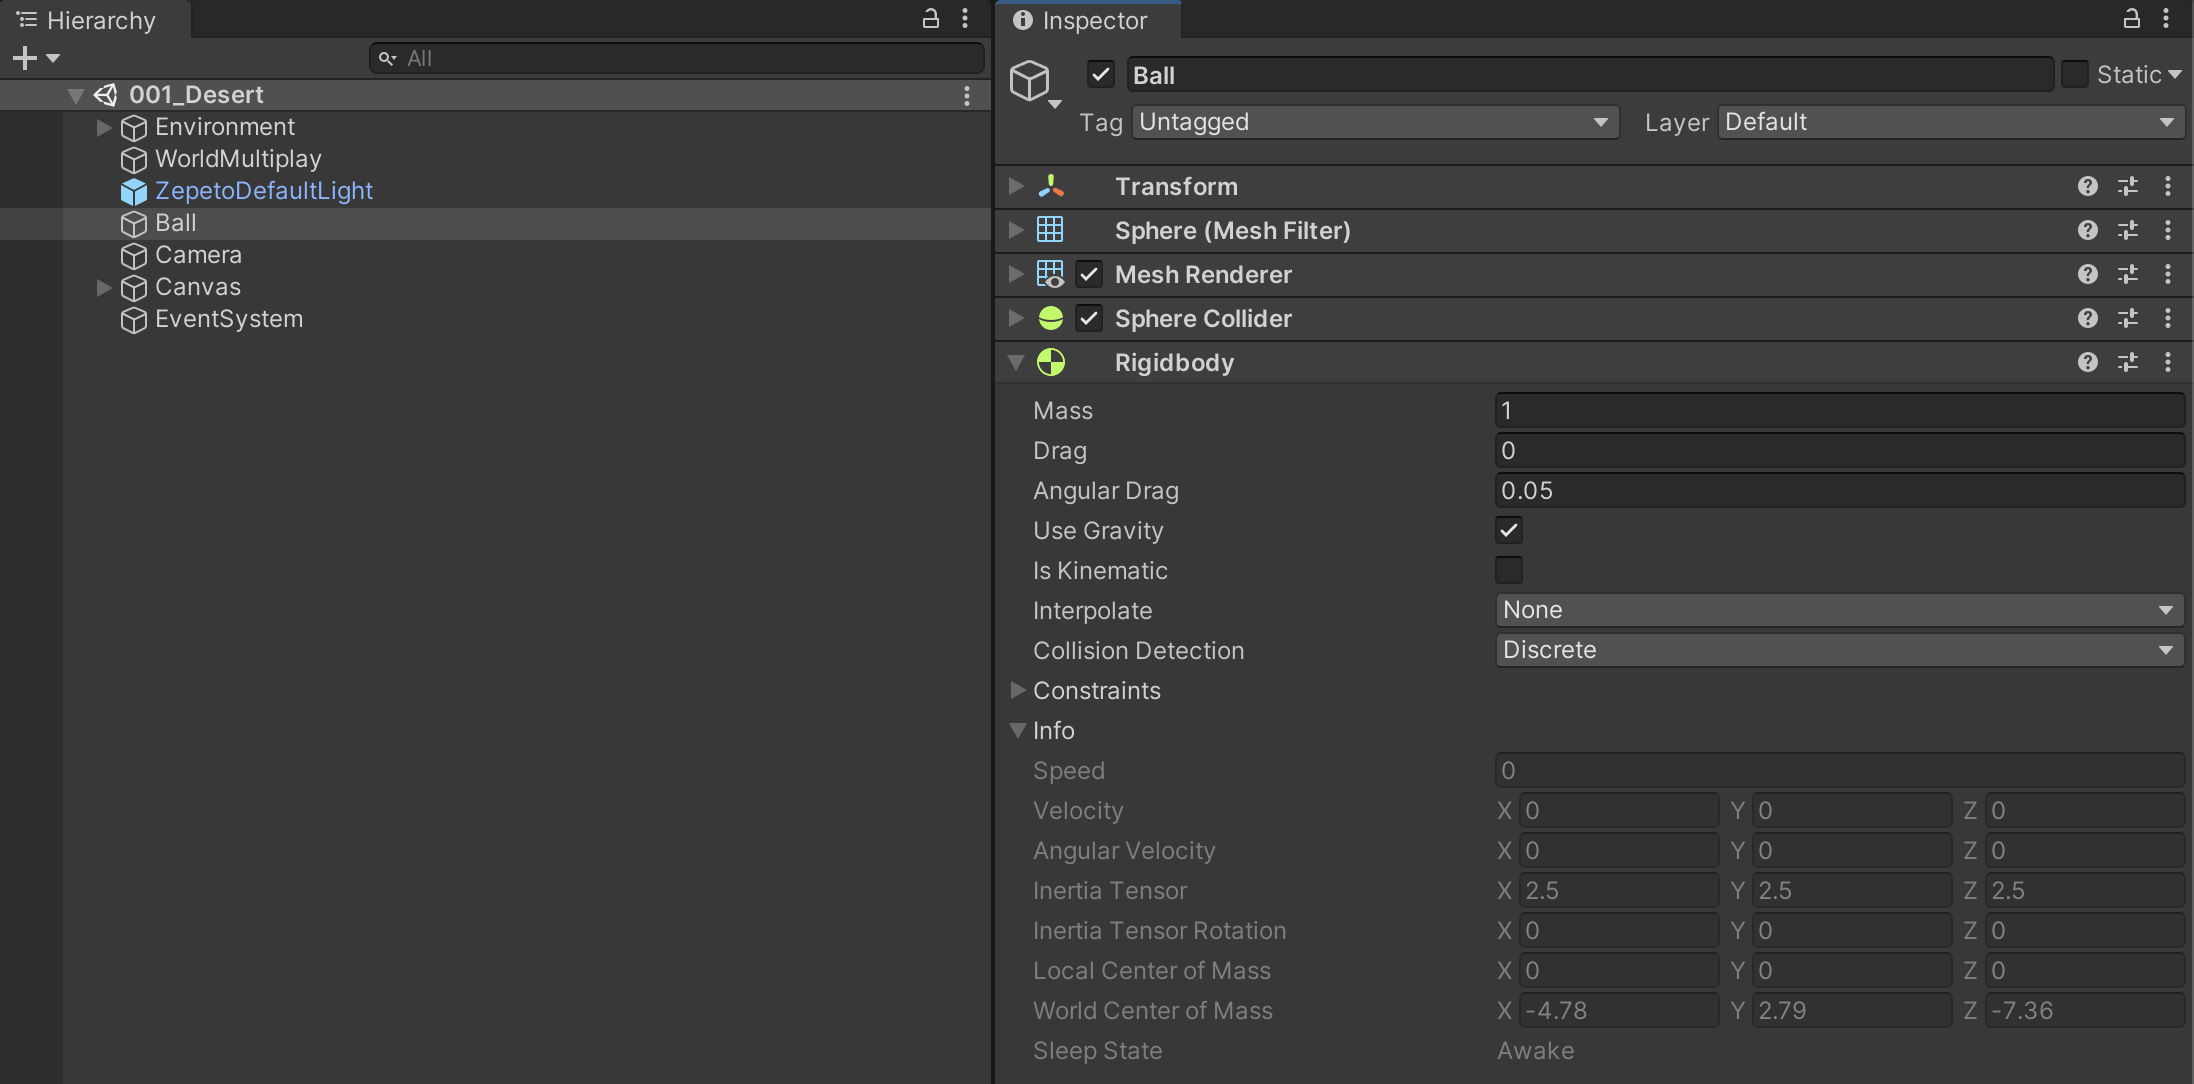
Setting up object
- Add Hierarchy > [+] > 3D Object > Sphere object to the Scene.
- Change the object's name to Ball and add a Rigidbody component.
Writing a script
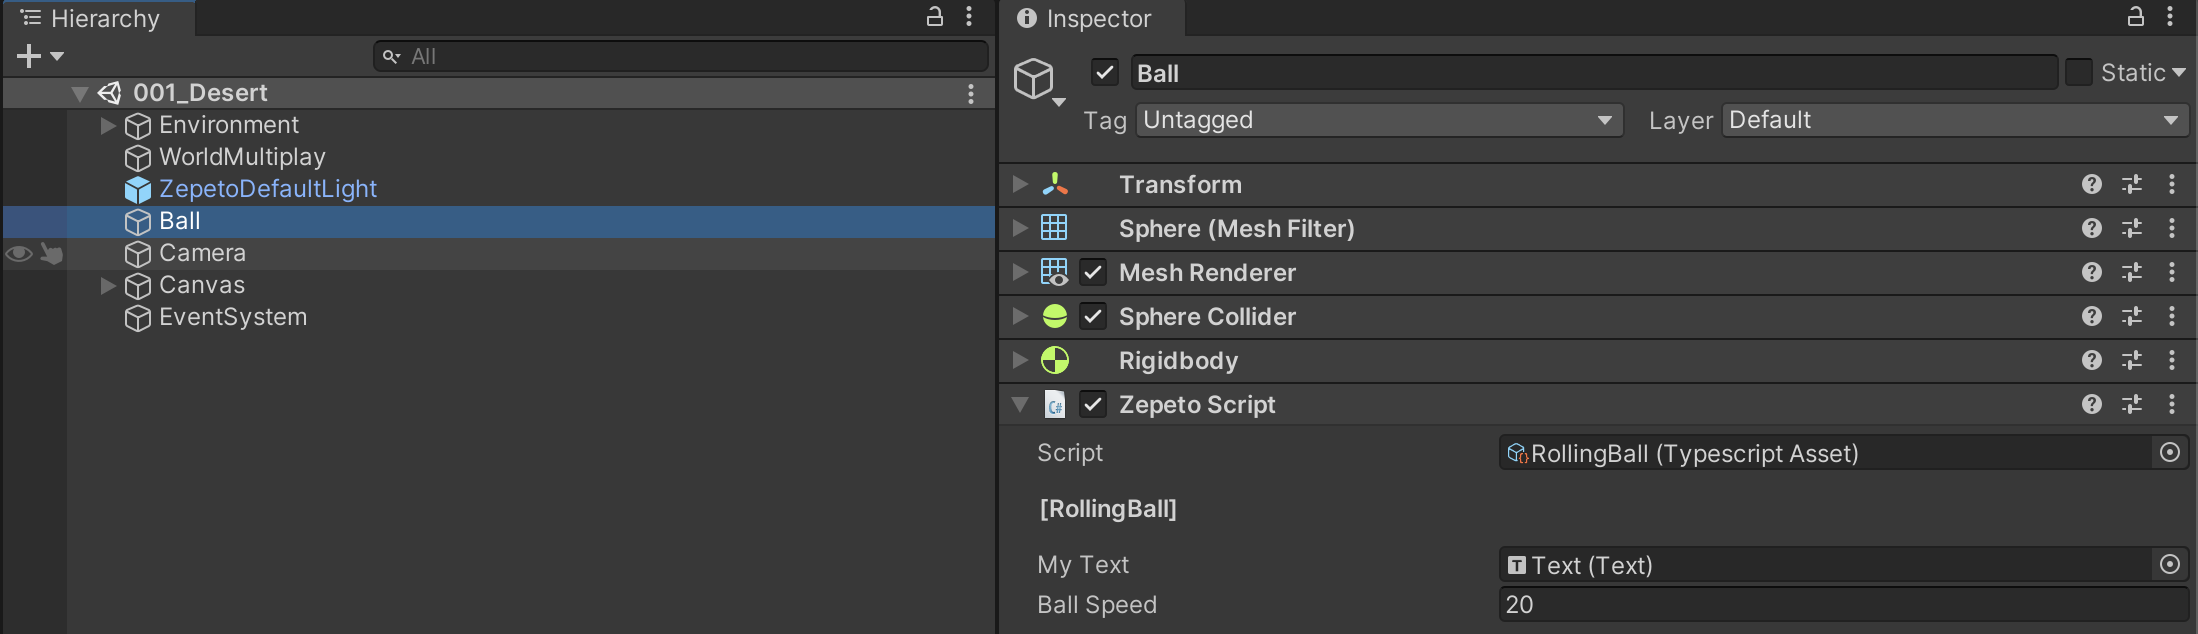
- Add TypeScript and rename the script to RollingBall.
Write a sample script as shown below.
import { ZepetoScriptBehaviour } from 'ZEPETO.Script';
import { Input, SystemInfo, Vector3, Rigidbody } from 'UnityEngine';
import { Text } from 'UnityEngine.UI';

export default class RollingBall extends ZepetoScriptBehaviour {

    public debugText: Text;
    public velocityMultiplier: number = 100;

    private _rollingBall: Rigidbody;


    Start() {

        // Get the Rigidbody component attached to the same GameObject as this script
        this._rollingBall = this.GetComponent<Rigidbody>();

        // Check if the device supports gyroscope
        if (SystemInfo.supportsGyroscope) {
            // Enable the gyroscope
            Input.gyro.enabled = true;
        } else {
            // Disable the script if gyroscope is not supported
            console.log("Gyroscope not supported on this device.");
            Input.gyro.enabled = false;
        }
    }

    Update() {
        // Check if the gyroscope of the input device is enabled
        if (Input.gyro.enabled) {

            // Read gyro values along the x and z axes
            // Round to one decimal place for stable movement of the Ball object
            let gyroValueX = Math.round(Input.gyro.gravity.x * 10) / 10;
            let gyroValueZ = Math.round(Input.gyro.gravity.y * 10) / 10;

            // Set the Ball's velocity with the gyroValueX and gyroValueZ
            this._rollingBall.velocity = new Vector3(gyroValueX * this.velocityMultiplier, 0, gyroValueZ * this.velocityMultiplier);

            // Display the current gyro values on the screen
            this.debugText.text = "Input.gyro.gravity : " + Input.gyro.gravity.ToString();
        }
    }
}
Script Description
- Gets the Rigidbody component attached to the Ball object.
- Round the
Input.gyro.gravity.xandInput.gyro.gravity.zvalues to get gyroValueX, gyroValueZ values. - Give speed to the Ball object by substituting the gyroValueX and gyroValueZ values multiplied by velocityMultiplier into
velocity. - The
Input.gyro.gravityvalue is displayed on the screen through Text UI.
Gyroscope.gravity
https://docs.unity3d.com/ScriptReference/Gyroscope-gravity.html
- Add the RollingBall ZEPETOScript you wrote to the Ball object.
In the Hierarchy window, connect the Text UI to the Property displayed in the ZEPETOScript Inspector window by dragging and dropping.
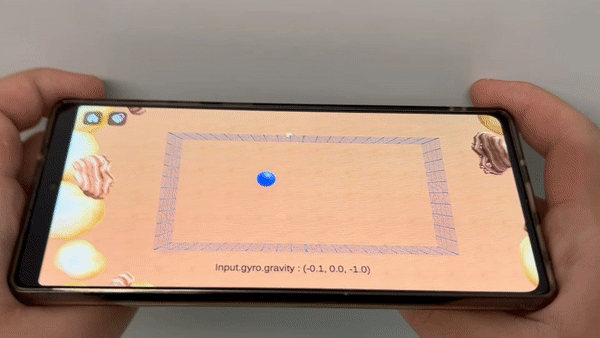
Testing on mobile
- Run the example world with QR mobile test.
- The Ball object moves according to the device tilt.
Caution
Please note that
Input.gyroonly works in mobile environments.
Applying the example
You can move the ZEPETO character within ZEPETO World by applying Input.gyro.
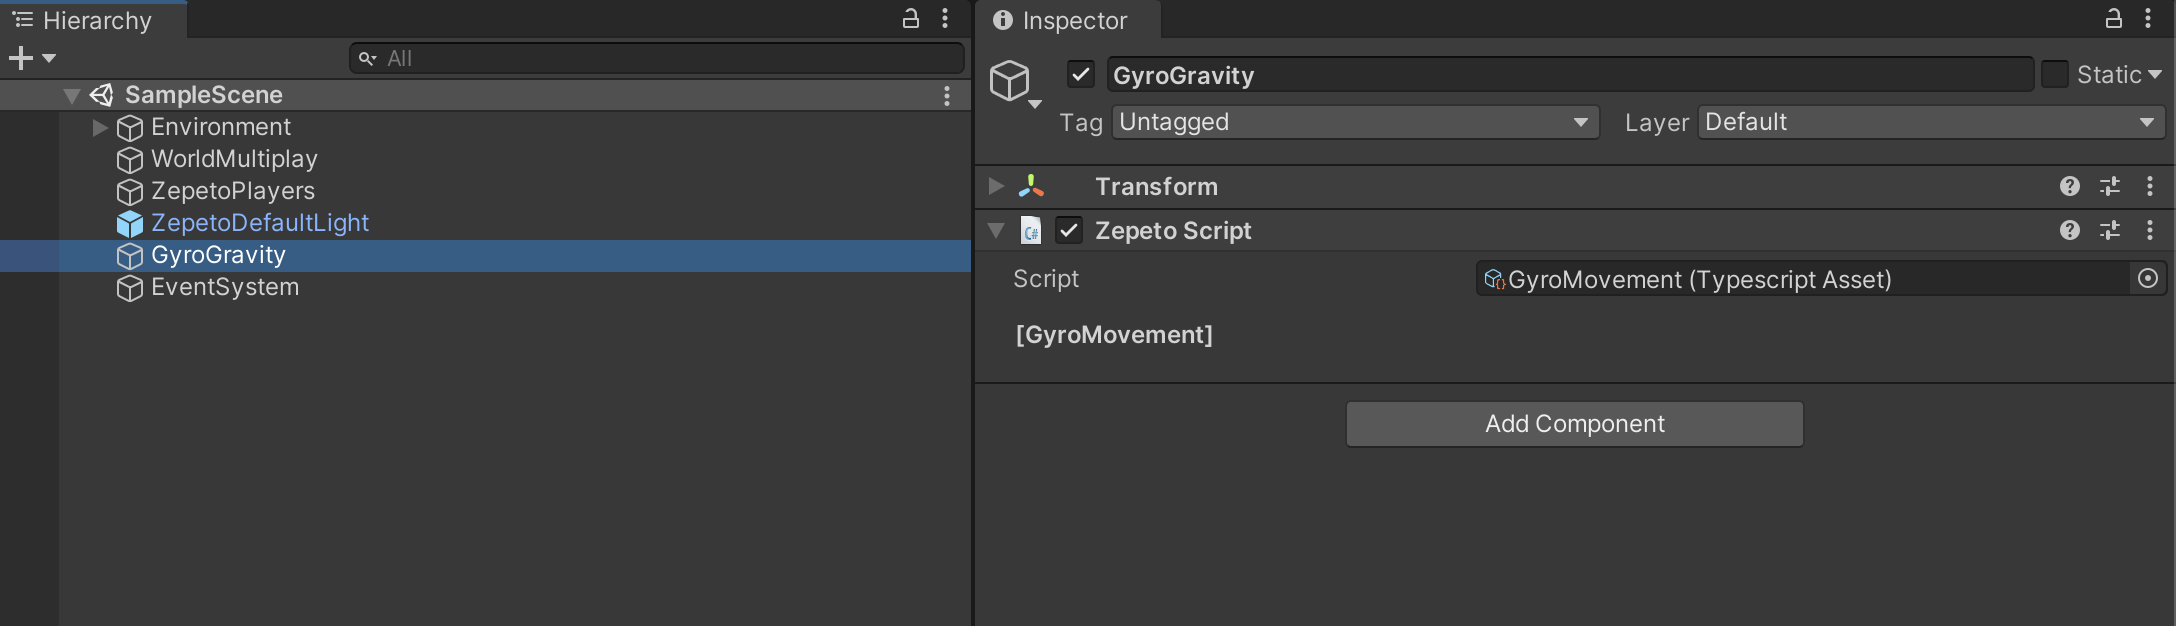
- Add TypeScript and rename the script to GyroMovement.
Write a sample script as shown below.
import { ZepetoScriptBehaviour } from 'ZEPETO.Script';
import { Input, SystemInfo, Vector3 } from 'UnityEngine';
import { ZepetoCharacter, ZepetoPlayers, LocalPlayer } from 'ZEPETO.Character.Controller';

export default class GyroMovement extends ZepetoScriptBehaviour {

    private _localCharacter: ZepetoCharacter;

    Start() {

        // Add a listener for when a local player is added
        ZepetoPlayers.instance.OnAddedLocalPlayer.AddListener(() => {
            this._localCharacter = ZepetoPlayers.instance.LocalPlayer.zepetoPlayer.character;
        });

        // Check if the device supports gyroscope
        if (SystemInfo.supportsGyroscope) {
            // Enable the gyroscope
            Input.gyro.enabled = true;
        }
        else {
            // Disable the script if gyroscope is not supported
            console.log("Gyroscope not supported on this device.");
            Input.gyro.enabled = false;
        }
    }

    Update() {
        if (Input.gyro.enabled) {
            // Get the x-axis value of the gyroscope gravity\
            // Round to one decimal place for stable movement of the character
            const gyroValue = Math.round(Input.gyro.gravity.x * 10) / 10;

            const direction = new Vector3(0, 0, -gyroValue);

            // Move Local character
            this._localCharacter.Move(direction);
        }
    }
}
Script Description
- When a local player is added to the Scene, receive a ZEPETO character instance.
- Round the
Input.gyro.gravity.xvalue to get the gyroValue value. - Move the ZEPETO character in the Z-axis direction by assigning
directionas a parameter to theMove()function.
- Add a GameObject to the Scene and rename it GyroGravity. Add the GyroMovement ZEPETOScript you created.
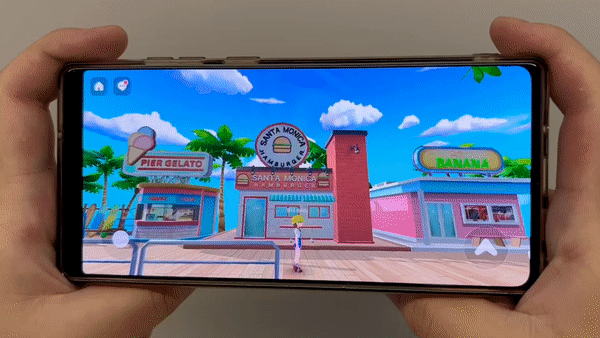
- When running the example world as a QR mobile test, the ZEPETO character moves according to the tilt of the device.
Tips
- In addition to
Input.gyro.gravityused in this example, you can use variousInput.gyrofunctions.- You can apply this to various ideas. Try releasing a fun world on ZEPETO!